How to Light and Adjust an Oxyacetylene Torch Safely
Lighting an oxyacetylene torch looks simple, but small mistakes can create fire, flashback, or gas leak risks. You need a safe setup, the right lighting order, and a steady neutral flame before you start welding or cutting. This guide shows you how to check the equipment, light the torch, adjust the flame, fix common problems, and shut the torch down safely.
Quick Answer
To light and adjust an oxyacetylene torch, put on your PPE, check for gas leaks, and confirm both torch valves stay closed. Open the acetylene cylinder valve about half a turn, light the acetylene with a spark lighter, then slowly add oxygen until you get a clean neutral flame. Keep the flame stable while you work, and shut the torch down in the correct order when finished.
Key Takeaways
- Check hoses, fittings, valves, and regulators before you open any gas cylinder.
- Use a spark lighter, not matches or a standard lighter, to ignite the torch.
- Keep acetylene pressure within safe limits and avoid unstable flame settings.
- Adjust oxygen and acetylene slowly until the flame shows a clear neutral cone.
- Shut down the torch in a controlled sequence and release pressure after use.
Essential Safety Checks for Oxyacetylene Use
Before you use an oxyacetylene torch, complete a full safety check. This step helps you lower the risk of burns, leaks, fire, and flashback.
First, wear proper personal protective equipment (PPE). Use welding gloves, safety goggles or welding eye protection, flame-resistant clothing, and sturdy footwear.
Inspect hoses and connections for cracks, cuts, loose fittings, or worn threads. Damaged equipment can leak gas and create a serious fire risk.
Keep your work area well ventilated. Good airflow helps prevent flammable gas buildup and reduces exposure to fumes during welding or cutting.
Before you pressurize the system, confirm all torch valves stay closed. Open cylinder valves slowly so the system does not get a sudden pressure surge.
Test all connections for leaks with a soap solution. If bubbles form, close the cylinder valves, release pressure safely, and fix the leak before you continue. Also, use proper ventilation to mitigate toxic fumes, because poor airflow can create serious health risks.
Warning: Never use a flame to check for gas leaks, because leaking acetylene or oxygen can ignite fast.
What You’ll Need Before Lighting the Torch
Gather your safety gear and torch parts before you start. A prepared setup helps you avoid rushed changes after gas starts flowing.
- Oxyacetylene torch handle and correct tip
- Oxygen and acetylene cylinders secured upright
- Regulators, hoses, and check valves in good condition
- Spark lighter or striker
- Soap solution for leak testing
- Welding gloves, eye protection, and flame-resistant clothing
- Clean work area with good ventilation
- Fire extinguisher rated for workshop use
Estimated total time: Plan for about 5 to 10 minutes to inspect, leak test, light, and adjust the torch before work begins.
Products Worth Considering

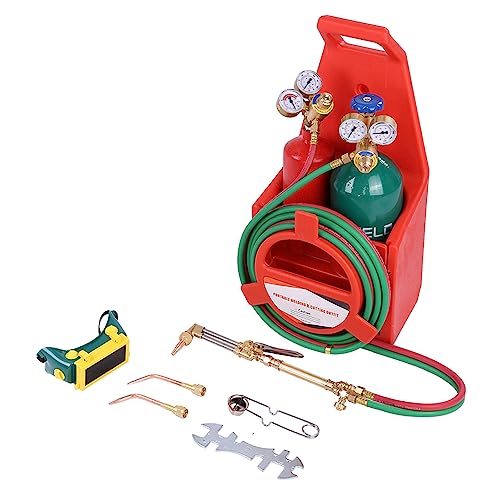
HOW TO USE - Experience simplified operation with our unique ignition system. A quick 12V battery spark is all it takes to start the process; from there, the torch relies solely on oxygen to deliver high-intensity cutting power.

Oxy-Acetylene Torch Kit: The RX WELD Easy Medium Torch Kit is for the amateur metalworker/experienced professional. These gas torch kits are all easy to use and allow you to cut, weld, braze and solder with precision and efficiency

High-Purity Brass Construction for Durability & Precision:Crafted with premium high-purity brass, our oxy-acetylene torch kit boasts exceptional hardness, rust & corrosion resistance, and long-lasting performance—ideal for heavy-duty use. The clear dual-gauge design displays real-time pressure data, ensuring stable flame output to prevent pressure imbalance that ruins weld/cut quality. Achieve accurate, consistent results every time.
Step-by-Step Guide to Lighting the Torch
Lighting an oxyacetylene torch requires a careful order. Follow these steps slowly and keep your body to the side of the regulators and torch.
- Confirm both torch valves are closed. Check the oxygen and acetylene valves on the torch handle before you open any cylinder.
- Open the acetylene cylinder valve slowly. Open it about half a turn so you can close it quickly if a problem occurs.
- Set the regulator pressure for your tip and task. Keep acetylene pressure within safe working limits and follow the torch tip chart when available.
- Crack the acetylene torch valve slightly. Let a small amount of acetylene flow from the tip.
- Ignite the acetylene with a spark lighter. Stand to the side and never use matches, cigarettes, or a pocket lighter.
- Adjust the acetylene flame. Increase or reduce acetylene until the flame burns steady and does not leave heavy black smoke.
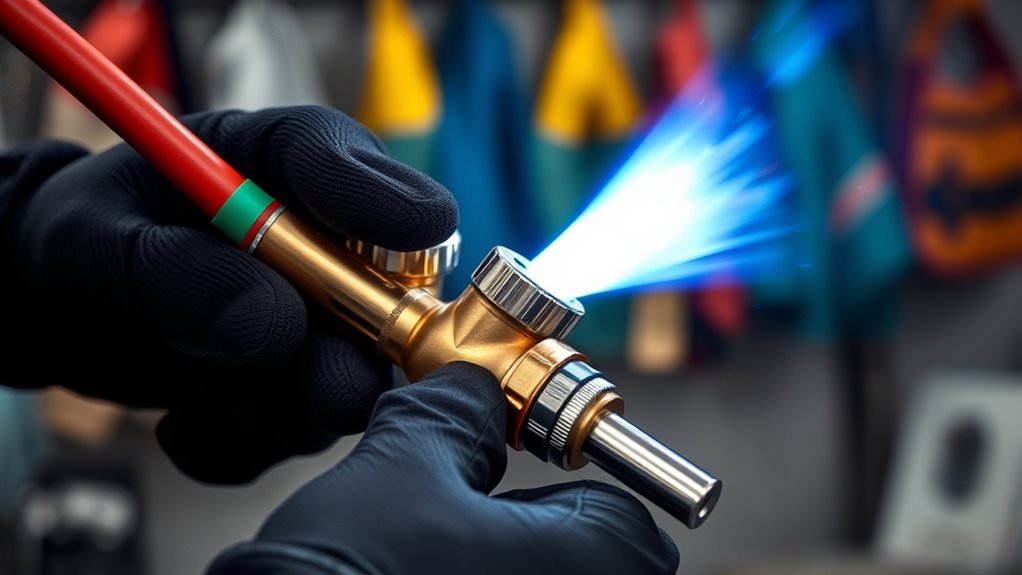
- Open the oxygen valve gradually. Add oxygen slowly until the flame forms a clean, well-defined inner cone.
- Set a neutral flame. Aim for a light blue inner cone with a stable outer envelope for most welding tasks.
As you work, monitor the flame’s stability and make small changes when needed. A balanced flame can improve bead appearance and penetration.
Products Worth Considering

Powerful Flame Temperature Heat up to 5252°F (2900°C)
Since it is designed with high purity brass structure, the welding and cutting torch kit ensures rust and corrosion resistance for excellent durability.
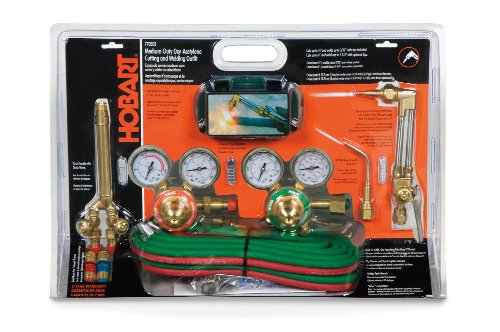
Versatile Medium-Duty Performance – The Hobart 770502 Kit offers a reliable, cost-effective solution for farming, automotive work, light fabrication, and more—ideal for both professionals and DIYers.
Common Problems and Solutions for Oxyacetylene Torches
Even with careful lighting, your oxyacetylene torch can develop flame or cutting problems. Start with the simplest cause before you adjust several settings at once.
- Flame blows out: Increase gas flow slightly and check that the tip size matches the job.
- Smoky flame: Add oxygen slowly or reduce acetylene until the flame burns cleaner.
- Slag does not clear: Reheat the metal or increase cutting oxygen flow to improve cutting efficiency.
- Wide cut: Move the torch at a steadier pace and avoid overheating the cut line.
- Frequent backfire: Check tip cleanliness, pressure settings, connections, and leaks before you continue.
Troubleshooting these problems helps you improve torch performance and reduce rework. Always remember that oxygen adjustment plays a major role in keeping a balanced flame.
Also, keep strong ventilation in confined spaces to reduce the chance of inhaling toxic fumes.
Pro tip: Clean the torch tip before blaming the regulators, because a blocked tip often causes popping, poor flow, and unstable flames.
Adjust Your Flame for Best Performance

To get the best performance from an oxyacetylene torch, balance the oxygen and acetylene valves with small adjustments. For most welding tasks, you want a neutral flame because it gives steady heat and limits oxidation.
Watch the flame closely. If it shifts toward an oxidizing flame with too much oxygen or a carburizing flame with too much acetylene, adjust the valves until the flame returns to neutral.
Monitor your flame carefully and adjust the oxygen valve to avoid oxidizing or carburizing flame conditions.
Choose the right flame size for your workpiece. Larger flames suit thicker materials, while smaller flames work better on thin metal.
Proper fillet weld sizing also helps support weld quality and joint strength.
Check the flame’s color and shape during the job. A stable neutral flame has a light blue inner cone and a clear outer envelope.
Adjust the flame during operation if gas pressure, torch angle, or material temperature changes. Small changes help you keep consistent heat and cleaner results.
How to Safely Shut Down Your Torch
Shut down your oxyacetylene torch in a controlled sequence. Start by closing the oxygen valve on the torch handle.
Next, close the acetylene valve and let the flame go out completely. After that, close the cylinder valves and release pressure from the hoses according to your torch setup.
Back out the regulator pressure adjustment screws after you release line pressure. This helps protect the regulator and lowers the chance of gas leakage.
Confirm all torch valves stay closed and check that the pressure gauges read zero. Wear proper protective clothing during setup, use, and shutdown.
Store the equipment securely and inspect all parts before the next use. Regular maintenance of the torch, hoses, regulators, and fittings supports safer future operation.
When to Stop and Get Professional Help
Stop using the torch if you hear repeated popping, smell gas, see damaged hoses, or cannot keep a stable flame. Close the cylinder valves, release pressure safely, and move away from ignition sources.
Ask a trained welding professional or equipment technician to inspect the setup before you use it again. Do not keep adjusting a torch that may have a leak, damaged regulator, or flashback risk.
Frequently Asked Questions
How do you properly adjust an oxy-acetylene torch?
Adjust an oxy-acetylene torch by opening acetylene first, lighting it with a spark lighter, then adding oxygen slowly. Balance both gases until you get a steady neutral flame with a clear inner cone.
What is the correct way to light an oxy-acetylene torch?
The correct way starts with PPE, a leak check, and closed torch valves. Open the acetylene cylinder valve slowly, light acetylene with a spark lighter, then add oxygen until the flame turns neutral.
What is the 1/7 rule for acetylene?
The 1/7 rule limits how fast acetylene should leave the cylinder. As a practical safety rule, you should also keep acetylene pressure within safe limits and avoid settings above 15 psi.
How do you adjust the flame on a torch?
Adjust the flame by changing the acetylene and oxygen valves in small steps. Use more oxygen to clean up a smoky flame, but avoid adding so much that the flame turns oxidizing.
Why does my oxyacetylene torch pop or backfire?
A torch can pop or backfire because of a dirty tip, wrong pressure, poor gas flow, or a loose connection. Stop and check the equipment if popping happens often.
Safety Disclaimer: This article is for informational purposes only and does not replace hands-on training from a qualified welding instructor or safety professional. Follow your equipment manual, workplace rules, and local safety requirements before using an oxyacetylene torch.
Conclusion
A safe oxyacetylene setup starts with inspection, leak testing, and the right lighting order. Focus on a stable neutral flame before you weld or cut, and stop work if the torch acts unsafe.
Use the same care during shutdown as you use during lighting. With steady practice and safe habits, you’ll improve your torch control and reduce risk on each project.


