How to Use an Oxyacetylene Torch for Automotive Brazing
Automotive brazing can turn weak, dirty joints into strong repairs, but only when you control heat, flame, filler rod, and safety. To use an oxyacetylene torch for automotive brazing, clean the metal first, set a neutral flame, heat the joint evenly, and feed the brazing rod into the hot joint. Wear proper personal protective equipment (PPE), ventilate the workspace, and shut down the torch in the right order after the job. This guide shows you how to prepare, braze, fix common problems, and maintain your torch.
What’s in This Article
- Introduction to Oxyacetylene Torch and Its Applications
- Before You Begin
- Key Safety Tips for Brazing
- Preparing Metal Surfaces for Brazing
- How to Get the Perfect Flame for Brazing
- Selecting the Right Brazing Rod for Your Application
- How to Control Heat During the Brazing Process
- Identifying and Fixing Common Brazing Problems
- Shutdown Procedures After Brazing
- Maintenance Tips for Your Oxyacetylene Torch
- Frequently Asked Questions
- Conclusion
Quick Answer
Use an oxyacetylene torch for automotive brazing by cleaning the joint, setting a neutral flame, heating the base metal evenly, and touching the brazing rod to the hot joint. Keep acetylene pressure low, use oxygen to fine-tune the flame, and choose a rod that fits the metals you need to join. Shut the torch down safely and inspect your setup after each use.
Key Takeaways
- Clean metal gives the brazing filler a better surface to bond to.
- A neutral flame gives you steady heat without adding too much oxygen or carbon.
- The right brazing rod must melt before the base metal does.
- Heat the base metal, not the rod, so the filler flows into the joint.
- Safe shutdown and regular inspection help prevent leaks, flashback, and equipment damage.
Introduction to Oxyacetylene Torch and Its Applications
An oxyacetylene torch uses oxygen and acetylene to create a very hot flame for welding, heating, cutting, and brazing. In automotive repair, you can use it for small brackets, thin steel parts, copper lines, brass fittings, and some repair joints where brazing makes sense.
Brazing differs from welding because the base metal does not melt. Instead, the filler rod melts and flows into the joint by capillary action. That makes clean surfaces and steady heat very important.
A neutral flame gives you the best starting point for most automotive brazing work. It balances oxygen and acetylene, which helps you heat the joint without heavy oxidation.
Common starting pressure settings are about 5 psi for acetylene and 5 to 10 psi for oxygen. Your torch size, tip size, hose length, and manufacturer instructions can change the correct settings, so always follow your equipment manual.
Choose a brazing rod that matches the base metals and the job. Copper, brass, steel, and aluminum each need the right rod and flux combination. Understanding cut quality variations when using different gases can also help you understand how gas choice affects heat and finish in metalwork.
Before You Begin
Estimated total time: A small automotive brazing repair often takes 20 to 45 minutes, not counting cooling time. A more complex joint can take longer if you need extra cleaning, fitting, or test work.
Gather the right tools and materials before you light the torch. A rushed setup increases the chance of poor joints and unsafe handling.
- Oxyacetylene torch, hoses, regulators, and cylinders
- Correct torch tip for the metal thickness
- Brazing rod that matches the base metals
- Flux, if your filler rod or base metal requires it
- Wire brush, grinder, or clean abrasive pad
- Clamps or a vise to hold the work steady
- Safety goggles, gloves, and flame-resistant clothing
- Fire extinguisher rated for your work area
Warning: Never use damaged hoses, leaking fittings, oily regulators, or loose cylinder connections with oxyacetylene equipment.
Key Safety Tips for Brazing
When you work with an oxyacetylene torch, safety must come before speed. Heat, sparks, gas pressure, and fumes can all create serious risk.
- Wear PPE: Use safety goggles or a proper welding face shield, gloves, and flame-resistant clothing to protect your skin and eyes.
- Inspect equipment: Check hoses, regulators, fittings, and the torch for cracks, leaks, burns, or loose parts before each use.
- Control fire risk: Clear flammable items from the work area, keep a fire extinguisher nearby, and work on a safe surface.
- Ventilate the area: Keep fresh air moving so fumes and gases do not build up around you.
- Protect your body: Make sure your protective clothing meets the heat and spark risk of the job.
Learn your emergency shutdown steps before you start. You should know how to close cylinder valves, stop gas flow, and respond if the flame pops back or the torch acts strangely.
Preparing Metal Surfaces for Brazing
Clean metal helps the filler rod flow and bond. Oil, paint, rust, zinc coating, scale, and moisture can weaken the joint or cause porosity.
Use a wire brush, grinder, or clean abrasive pad to remove surface contamination. For larger areas, a knotted wire wheel on a grinder works well if you control pressure and avoid gouging the metal.
Avoid sand cloth on refrigeration tubing because loose particles can stay in the joint area. After cleaning, use a mild detergent rinse when needed, then dry the surface fully before heating.
Check the fit before you light the torch. The parts should touch closely enough for the filler metal to flow through the joint. Clean base metal also supports better weld quality in other processes, and the same clean-surface rule matters in brazing.
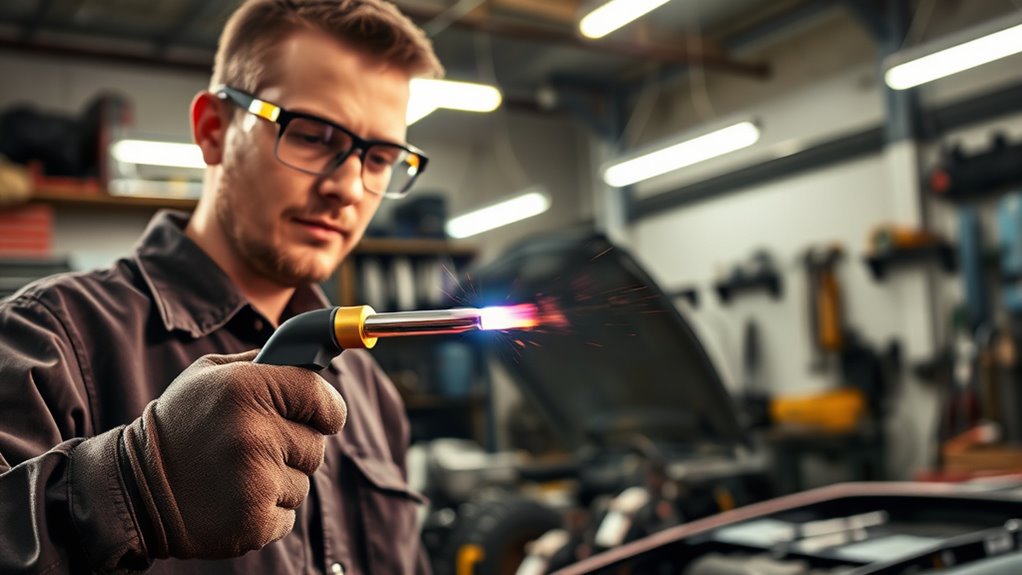
How to Get the Perfect Flame for Brazing
A good brazing flame starts with safe pressure settings and careful valve control. A neutral flame gives steady heat and helps you avoid excess oxidation.
- Set the regulators: Set acetylene around 5 psi and oxygen around 5 to 10 psi, unless your torch manual calls for different settings.
- Open the acetylene valve slightly: Light the acetylene with a spark lighter, not a match or cigarette lighter.
- Add oxygen slowly: Open the oxygen valve until the flame turns bright blue and forms a clear inner cone.
- Check the flame type: Use a neutral flame for most automotive brazing tasks.
- Hold the tip steady: Keep the torch tip about 1 to 2 inches from the workpiece for broad heating, then adjust as needed.
Clean the torch tip often so the flame stays even. Also, use proper PPE usage whenever you work around high heat, sparks, and metal fumes.
Pro tip: Heat the joint area first, then let the hot base metal melt the brazing rod.
Products Worth Considering
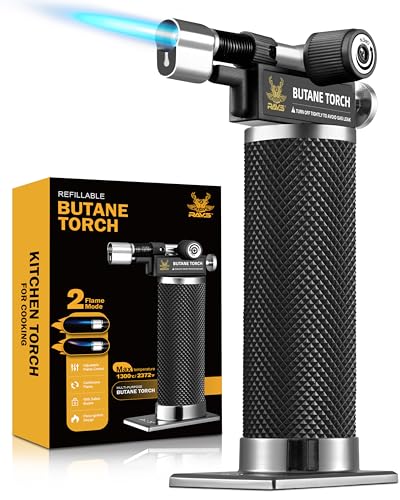
[Portable Torch Lighter Gun] ravs cooking torch baking tools are made of quality metal material, which is more sturdy than plastic butane torches on the market. With an ergonomic design handle, the micro torch offers a great grip and and comfort. (Note: Pls use quality and pure refillable butane for torch refill)


Well-made and Safety: Industrial style, sturdy metal body design. Long-angled nozzle keeps your hand safely away from the flame. The wide metal base provides excellent support and anti-tipping to the butane torch lighter body. The ergonomic anti-slip handle offers a great grip and stays cool.
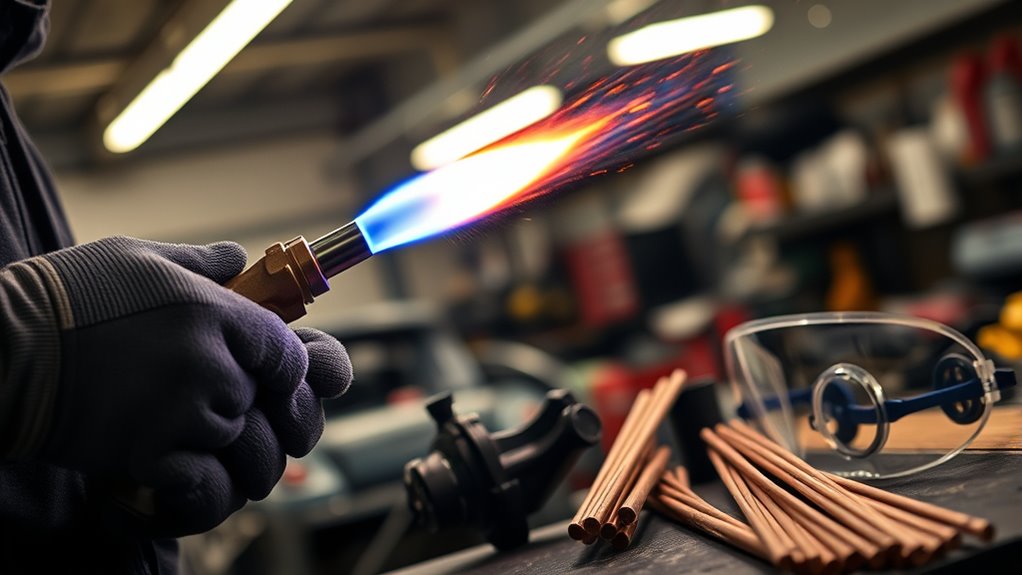
Selecting the Right Brazing Rod for Your Application
Selecting the right brazing rod helps you make strong, durable joints. Match the rod to the base metals you want to join.
For copper-to-brass connections, a copper-phosphorus or brass-compatible rod may fit the job. Aluminum needs an aluminum brazing rod and suitable flux, if the rod does not already include it.
Choose a rod with a lower melting point than the base metals. This helps you avoid overheating the parts and damaging the joint area.
For many automotive tasks, a rod diameter from 1/16 inch to 1/8 inch works well. Small joints need smaller rods, while wider joints may need more filler.
Always check the rod maker’s instructions for base-metal compatibility, flux needs, and temperature range. Using the right filler can improve results, much like Blue Demon 309LFC-O helps match filler material to the welding job.
Products Worth Considering

【Easy To Use】Brazing temperature range: 1310-1508°F. And the welds have no leakage, no deformation and falling off, no cracking and flying slag, and obtain a good weld. Easy to use and perfect for both beginners and professionals.

Harris Products 45F318MPOP Safety-Silv 45FC Flux Coated Brazing Alloy Wire; BAg-5, 1/16 Inch x 18 Inch, 3 Stick Tube, 30% Copper, 25% Zinc, 45% Silver Alloy Harris Products Safety-Silv 45FC General
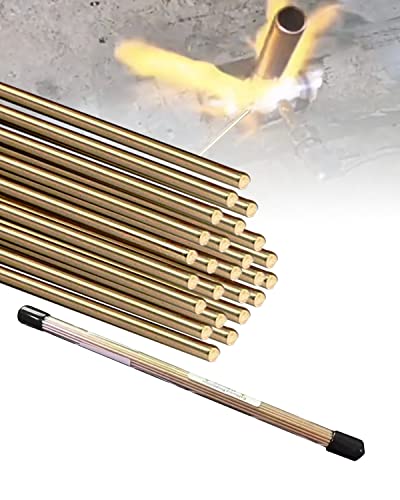
【APPLICATION】 Versatile and can be used for a variety of welding applications as well as DIY projects such as making whirligigs. Brass brazing rods is used for welding copper alloy, carbon steel and alloy steel. It can also be used as an inlaid carbide tool or DIY decorate. Note: Copper-zinc alloys are not suitable for argon arc welding.
How to Control Heat During the Brazing Process
Heat control decides whether the filler flows smoothly or the joint fails. Start with a neutral flame, then adjust torch motion and distance based on metal thickness.
Thicker sections need more heat and slower torch movement. Thin sheet metal needs faster movement, a smaller tip, and close attention so the panel does not warp.
Watch the metal and the filler rod. The joint should get hot enough for the filler to flow, but the base metal should not melt. Maintaining proper pressure settings also helps keep the flame stable during brazing.
Flame Adjustment Techniques
Good flame adjustment gives you better control over heat. Start low, increase oxygen slowly, and watch the shape of the inner cone.
- Open the acetylene valve slightly and light the torch with a striker.
- Add oxygen until the flame shows a clear, bright inner cone.
- Reduce oxygen if the flame sounds harsh, pops often, or shows signs of excess oxygen.
- Keep the torch moving so heat spreads across the joint area.
Some tasks need a small change in distance or angle. Move closer for focused heat and farther back for broader heat, but avoid overheating one small spot.
Material Thickness Considerations
Material thickness changes how you control the torch. Thick metal needs more time to reach brazing temperature, while thin metal can overheat fast.
For thicker metals, use a larger torch tip when the job calls for it. Focus heat near the joint, but keep the flame moving enough to warm both sides evenly.
For thinner materials, use a smaller tip and quicker passes. This helps limit warping and protects nearby areas from heat damage.
Identifying and Fixing Common Brazing Problems
Brazing problems often come from dirty metal, low heat, too much heat, poor fit-up, or the wrong filler rod. Fix the cause before you add more filler.
- Fix poor filler flow: Clean the joint again, add proper flux if needed, and heat the base metal evenly before touching the rod to the joint.
- Stop weak joints: Use enough heat for the filler to flow through the joint, not just sit on the surface.
- Prevent leaks: Make sure the parts fit closely and allow the filler to flow into the full joint area.
- Remove oxide layers: Brush, grind, or clean the metal until the filler can bond to bare metal.
- Avoid contamination: Remove paint, oil, zinc residue, and moisture before heating the part.
Inspect your torch and valves if flame quality changes during the job. An oxidizing flame can contaminate the joint, so correct the flame before you keep brazing.
If the part has galvanized coating, remove the coating in the work area and control fumes carefully. Any zinc residues left on the workpiece can contaminate the brazed joint.
Warning: Heating coated metal can release harmful fumes, so remove coatings safely and work with strong ventilation.
Shutdown Procedures After Brazing

Safe shutdown protects you, your hoses, and your torch. Follow the shutdown order from your torch manufacturer, and use the same process every time.
- Close the torch acetylene valve: Extinguish the flame at the torch.
- Close the torch oxygen valve: Stop oxygen flow through the torch.
- Close both cylinder valves: Shut the gas supply at the cylinders.
- Bleed the lines one at a time: Open each torch valve briefly to release hose pressure, then close it.
- Back out the regulator screws: Release pressure on the regulator diaphragms.
- Let the torch cool: Store it only after the tip and handle cool fully.
Good ventilation practices also matter while the part cools, especially if the metal had coatings, oil, or residue.
Inspect the torch, hoses, and fittings after each use. Replace worn parts before your next brazing project.
Maintenance Tips for Your Oxyacetylene Torch
Maintaining your oxyacetylene torch helps keep it safe and efficient. Regular upkeep also gives you a cleaner flame and more stable brazing results.
Follow these maintenance habits after use and before storage:
- Inspect hoses: Check hoses, regulators, and connections for wear, burns, cracks, loose fittings, or leaks.
- Clean torch tips: Use the correct tip cleaner to remove buildup without enlarging the tip opening.
- Replace damaged hoses: Do not tape or patch damaged gas hoses.
- Store cylinders upright: Secure cylinders so they cannot fall or roll.
- Keep oil away: Never use oil or grease on oxygen equipment.
Store your oxyacetylene equipment in a dry, secure place to reduce corrosion and damage. Good proper cylinder storage practices help protect both safety and equipment life.
Follow the maintenance schedule in your torch manual. A clean, leak-free setup gives you better control and safer results.
Frequently Asked Questions
How do you light an oxy-acetylene torch for brazing?
Check your PPE, workspace, hoses, and fittings first. Open the acetylene valve slightly, light the torch with a striker, then add oxygen slowly until you get a neutral flame.
Can you use an acetylene torch for brazing?
You can use an oxyacetylene torch for brazing when the metals and filler rod match the repair. You need oxygen with acetylene to create a controlled flame that works for most brazing jobs.
What psi should oxygen and acetylene be set for brazing?
A common starting point is about 5 psi for acetylene and 5 to 10 psi for oxygen. Your torch tip size and manufacturer instructions should guide the final setting.
What is the 1/7 rule for acetylene?
The 1/7 rule refers to limiting acetylene withdrawal from a cylinder to help prevent unsafe gas draw. Check your cylinder and regulator guidance because modern equipment and cylinder sizes can vary.
Why does my brazing rod ball up instead of flowing?
The joint may be too cold, dirty, or missing the right flux. Heat the base metal evenly, clean the surface again, and let the hot joint melt the rod instead of melting the rod directly in the flame.
What flame should you use for automotive brazing?
Use a neutral flame for most automotive brazing work. It gives steady heat and helps limit oxidation while the filler flows into the joint.
Can you braze thin auto body metal?
You can braze some thin automotive metal, but you must control heat carefully. Use a smaller tip, move the flame quickly, and avoid heating one spot long enough to warp the panel.
Safety Disclaimer
Safety Disclaimer: This article is for informational purposes only and does not replace hands-on training, your torch manual, or professional safety guidance. Work with a qualified instructor or experienced professional if you are new to oxyacetylene equipment.
Conclusion
Good oxyacetylene brazing depends on clean metal, a neutral flame, the right filler rod, and steady heat control. Start with a safe setup, test your flame, and practice on scrap metal before you repair an automotive part.
Pay close attention to shutdown, hose inspection, and cylinder storage after each job. The more carefully you build your routine, the more consistent and safe your brazing results will become.


