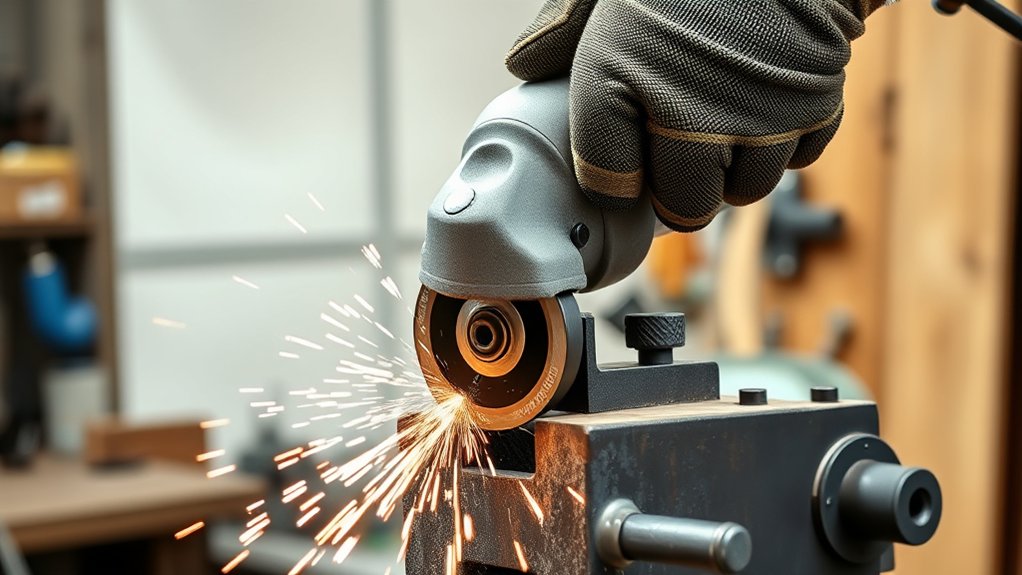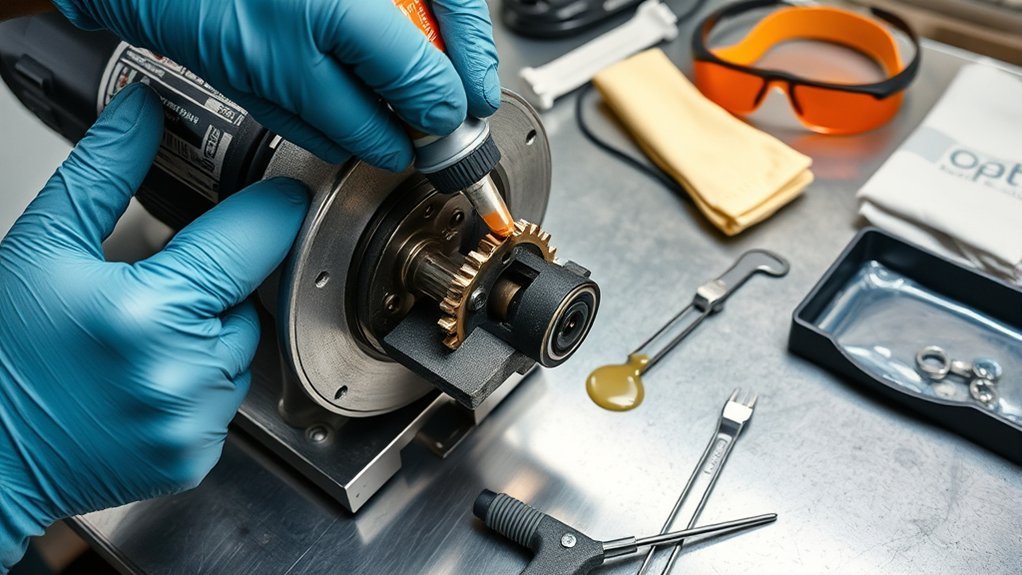
Lubricating an angle grinder gearbox can reduce gear wear and help the tool run smoothly, but the correct grease, quantity, and service method depend on the exact model. Before opening the gearcase, find the grinder’s model number and check its official manual or service documentation. Some grinders permit model-specific gearcase service, while others should be handled by qualified repair personnel.
Quick Answer
Disconnect the grinder, confirm that its manual permits gearbox service, and open only the gearcase as directed. Remove the specified amount of old grease, inspect the gears and seals, and apply the exact approved grease in the stated quantity. Reassemble to the listed torque and complete a controlled no-load test.
Key Takeaways
- Unplug a corded grinder or remove the battery from a cordless model before servicing it.
- Do not assume that every angle grinder has a user-serviceable gearbox.
- Use the exact grease type, quantity, and application points listed for your model.
- Inspect the gears, bearings, spindle, seals, and old grease before adding new lubricant.
- Stop and arrange qualified service if you find chipped teeth, metal particles, rough bearings, damaged wiring, or excessive spindle play.
At a Glance
| Time Required | About 30–60 minutes when the model has a documented service procedure |
| Difficulty | Intermediate; professional service is safer when internal specifications are unavailable |
| Tools Needed | Model manual, correct drivers, lint-free cloths, plastic scraper, soft brush, measured grease applicator or scale, gloves, and eye protection |
| Cost | Varies by the specified grease, replacement seal or gasket, and whether professional service is required |
Warning: Do not open the gearcase unless official documentation for your exact model provides the required grease and service information. Unplug the tool or remove its battery first. If the gearcase is sealed, wiring or electronic modules must be disturbed, or internal damage is visible, use a qualified repair technician.
Before Opening the Angle Grinder Gearbox
Start by locating the model and type number on the grinder’s nameplate. Search the manufacturer’s official support site for the owner’s manual, parts diagram, or service bulletin that matches that complete number. A document for a similar-looking grinder may specify a different grease, quantity, seal, screw, or gearcase design.
General safety guidance from OSHA says to disconnect power tools before servicing or cleaning them. For a corded grinder, unplug the cord and place the plug where you can see it. For a cordless grinder, turn the switch off and remove the battery pack.
Do not open a new grinder merely to check whether the factory grease is evenly distributed. If a new tool produces abnormal heat, noise, leakage, vibration, or rough spindle movement, stop using it and contact the manufacturer or service provider.
Note: Some owner manuals provide only cleaning and basic maintenance instructions. Internal gearbox specifications may appear in separate service literature intended for trained technicians. Bosch, for example, states that its spare parts should be fitted by specialist personnel.
What Tools Do You Need for Angle Grinder Lubrication?
Prepare everything before opening the gearcase so exposed components remain uncovered for as little time as possible. You may need:
- The official manual, parts diagram, or service bulletin for the exact model
- The specified screwdriver, Torx, hex, or socket bits
- The exact approved gear grease or an explicitly approved equivalent
- A gram scale, measured syringe, or applicator when the quantity is specified by weight
- Lint-free cloths and a plastic or wooden scraper
- A soft parts brush
- A parts tray or magnetic mat for screws
- A marker or phone camera for recording gearcase orientation
- A replacement O-ring, gasket, or seal when required
- Safety glasses and grease-resistant gloves
Avoid metal scrapers that can score sealing surfaces. Do not use gasoline, brake cleaner, or another strong solvent inside the tool unless the manufacturer specifically permits it. Solvents can damage plastic, insulation, seals, paint, or bearing lubrication.
Products Worth Considering

▸Outstanding Heat Protection: Ensure your equipment's longevity in the most extreme heat environments with our angle grinder grease's unique high-temperature formula that provides remarkable lubrication, maintaining optimal performance at all times.
✅High-temperature lubrication: Enjoy smooth efficient operatiion while maximizing equipment lifespan with our angle grinder grease. Engineered with a special high-temperature formula, this grease provides unparalleled resistance to extreme heat and maintains excellent performance in any environment.

For High Speed, High Temp Angle Heads(Green) Grease #67, Size - 4OZ
Step-by-Step Guide to Safely Lubricating Your Angle Grinder
-
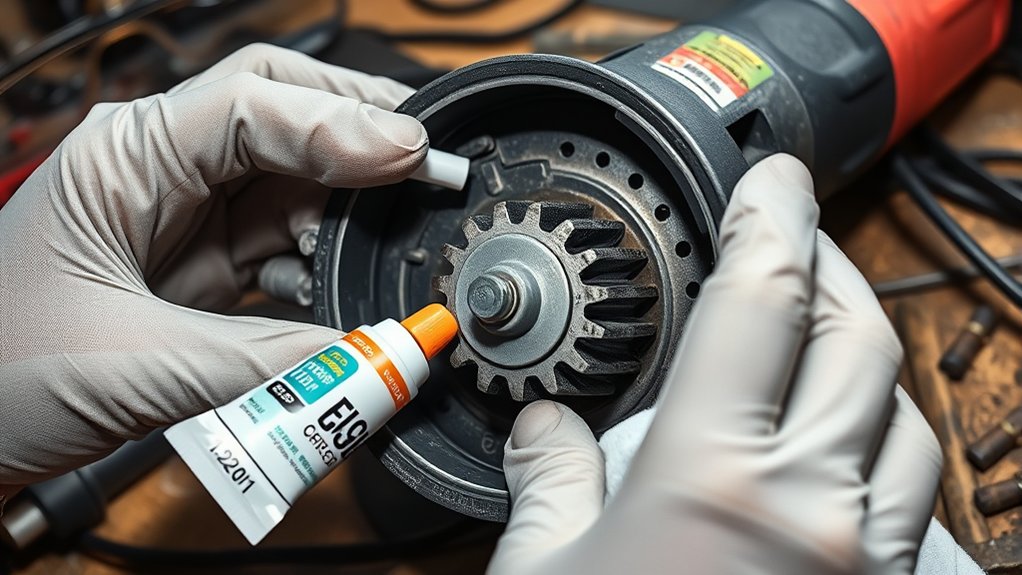
Confirm that you have the correct procedure. Match the complete model and type number to official documentation. Identify the specified grease, quantity, application points, replacement seals, and screw torque before disassembly.
-
Disconnect all power. Unplug a corded grinder or remove the battery from a cordless model. Confirm that the switch is off and wait until the tool and gear head are cool.
-
Remove the accessory safely. Remove the grinding wheel, cutting disc, backing pad, flange, side handle, and guard only as directed by the manual. Store each part in installation order.
-
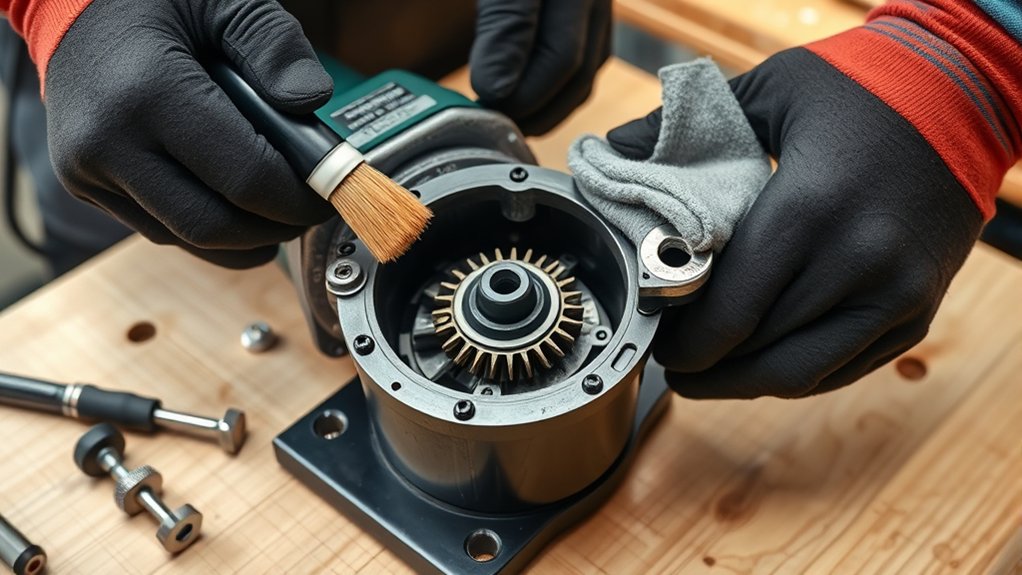
Clean the outside of the gear head. Brush or wipe away grinding dust before removing any cover. This helps prevent abrasive debris from falling into the gearbox.
-
Record the gearcase orientation. Photograph the housing, screw positions, spacers, seals, and wire routing. Add alignment marks only where they will not damage a sealing surface.
-
Open only the documented gearcase section. Use the correct bit and keep downward pressure on the fastener to prevent stripping. Do not pull on wires, separate motor components, or force a housing that remains attached.
-
Inspect before cleaning. Look for chipped or pitted gear teeth, metal flakes, water, hardened grease, damaged O-rings, loose bearings, rough spindle rotation, or excessive side-to-side play. Stop if you find damage that requires parts replacement.
-
Remove the specified amount of old grease. Use a plastic scraper, brush, and lint-free cloth. Do not assume that every trace must be removed. For example, some official Milwaukee service bulletins instruct technicians to remove 90–95% of the old grease before adding new grease.
-
Apply the exact grease and quantity. Weigh or measure the lubricant when the documentation provides a quantity. Coat only the gears, bearing bores, seals, and cavities identified in the service procedure. Keep grease away from motor windings, switches, air passages, friction surfaces, and electronics.
-
Reassemble and test. Install the correct gasket or O-ring, align the housing, and tighten the screws in the specified sequence and to the published torque. Rotate the spindle by hand before reconnecting power. Reinstall every required guard, flange, handle, and accessory before completing the manufacturer’s no-load test.
Grease quantity is model-specific. An official Milwaukee 6140-30 service bulletin specifies 9–12 grams, while the Milwaukee 2880-20 bulletin specifies approximately 16 grams. Guessing can leave a gearbox under-lubricated or overfilled.
Pro Tip: Place each screw on a sketch or magnetic mat that matches its location. Similar-looking screws may have different lengths, and installing a long screw in the wrong hole can damage the housing or internal components.
How to Choose the Right Angle Grinder Gear Grease
The correct lubricant is the product identified by the manufacturer for the exact grinder model. Look for a grease name, service part number, quantity, and placement diagram. Do not choose grease only because it is labeled high-temperature, heavy-duty, automotive, multipurpose, or suitable for gears.
Different formulations may use different base oils, thickeners, additives, and viscosities. They may also behave differently around seals, plastics, bearings, and high-speed bevel gears. Avoid mixing old and new grease unless the manufacturer confirms compatibility. When compatibility is unknown, follow the documented cleaning procedure before applying the specified product.
A third-party grease may be acceptable when its manufacturer provides an explicit cross-reference to the original specification and the grinder manufacturer permits an equivalent. A vague claim that a grease is “similar” is not enough.
Why Lubrication Is Important for Your Angle Grinder
The angle grinder’s bevel gears transfer power from the motor to the spindle while changing the direction of rotation. The specified grease creates a lubricating film between loaded gear teeth, limits friction and wear, helps control heat, and protects designated surfaces from contamination.
Too little grease can leave gear teeth inadequately protected. Too much can create drag, churn the grease, increase heat, or push lubricant past a seal. Incorrect placement can also send grease into parts that should remain dry. That is why the correct quantity matters as much as the grease type.
Lubrication cannot repair a chipped gear, worn bearing, bent spindle, damaged seal, failing motor, or loose accessory. Adding more grease to a mechanically damaged grinder can hide a symptom briefly without correcting the cause.
When Should You Change Your Lubricant?
There is no universal rule that every angle grinder must be regreased every six or twelve months. Use the interval in the official manual or service schedule when one is provided. If no interval is published, do not open a normally operating gearbox solely because a calendar date has arrived.
Arrange inspection or service when you notice:
- New grinding, clicking, rattling, or high-pitched gear noise
- Unusual heat concentrated around the gear head
- Grease leaking from the housing or spindle area
- Rough or tight spindle rotation with the tool disconnected
- Excessive spindle play
- Water, abrasive dust, or other contamination inside the gearcase
- A damaged seal, gasket, gear, bearing, or housing
- A manufacturer-prescribed service interval
- Gearcase disassembly for another repair
Heavy commercial use may justify more frequent inspection, but the inspection schedule should come from the manufacturer, an authorized service provider, or a documented maintenance program rather than a universal six-month rule.
Signs the Grinder Needs Repair Instead of More Grease
Stop using the grinder and arrange qualified service if you find any of the following:
- Chipped, cracked, blue-discolored, or badly pitted gear teeth
- Visible metal flakes or large magnetic particles in the old grease
- A bearing that feels rough, loose, seized, or noisy
- A bent spindle or excessive radial movement
- Burned insulation, pinched wires, damaged connectors, or melted plastic
- A cracked gearcase or stripped screw hole
- Smoke, an electrical smell, arcing, or repeated switch problems
- Severe vibration that remains after the wheel and flanges are inspected
Noise and heat do not prove that grease is the only problem. An unbalanced accessory, damaged flange, failing bearing, worn gear, blocked air vent, overloaded motor, or incorrect wheel can produce similar symptoms.
Angle Grinder Lubrication: Tips for Gearbox Maintenance
| Step | Correct Practice |
|---|---|
| Check the documentation | Use the manual or service bulletin for the complete model and type number. |
| Clean old lubricant | Remove the amount stated by the manufacturer without contaminating bearings, wiring, or electronics. |
| Choose the lubricant | Match the specified product, part number, or explicitly approved equivalent. |
| Inspect components | Check gear teeth, bearings, spindle movement, O-rings, gaskets, and old grease for damage or contamination. |
| Apply new grease | Measure the specified quantity and apply it only to the documented locations. |
| Reassemble | Replace damaged seals and tighten fasteners in the required sequence and to the listed torque. |
| Conduct a functionality test | Check spindle movement by hand, reinstall all safety parts, and perform the manufacturer’s controlled no-load test. |
Common Mistakes to Avoid When Lubricating Your Angle Grinder
Using a calendar instead of the manual. A six- or twelve-month interval should not be applied to every grinder. Follow the model’s documentation and actual service condition.
Using generic grease. General-purpose or automotive grease is not automatically suitable for a high-speed angle-grinder gearbox.
Mixing unknown grease types. Greases that appear similar may not be compatible. Use the specified product and follow the documented cleaning procedure.
Packing the housing full. More grease does not mean more protection. Excess grease can increase drag, heat, and leakage.
Removing grease without inspecting it. Metal particles, water, hardened deposits, or a burned smell can reveal damage or contamination that requires more than lubrication.
Using harsh solvents. A cleaner that is safe for bare metal may damage seals, insulation, plastics, paint, or remaining bearing grease.
Reusing a damaged O-ring or gasket. A flattened, torn, hardened, or swollen seal can allow grease to escape and abrasive dust to enter.
Guessing screw torque. Loose fasteners can allow leakage or misalignment, while excessive torque can strip threads or distort a housing.
Testing before full reassembly. Reinstall every required cover, guard, handle, flange, and accessory before operating the tool. OSHA’s Hand and Power Tools guidance emphasizes following manufacturer instructions during lubrication and maintenance.
How to Test the Grinder After Lubrication
- Keep the grinder unplugged or the battery removed and rotate the spindle by hand.
- Check for binding, scraping, excessive resistance, or abnormal side play.
- Confirm that the spindle lock releases and returns correctly.
- Check that the gearcase sits flush and no seal is pinched.
- Reinstall the guard, side handle, flanges, and a sound, correctly rated accessory.
- Remove every wrench and loose item from the work area.
- Stand to the side of the accessory’s plane and keep bystanders away.
- Reconnect power and follow the model’s specified no-load test.
- Stop immediately if you hear grinding or clicking, feel strong vibration, smell overheating, or see grease leakage.
- Disconnect power again and inspect the gearcase before returning the grinder to work.
The official DEWALT DCG407/DCG408 manual, for example, instructs users to stand away from the plane of a newly installed accessory and run the tool at maximum no-load speed for one minute. Follow the procedure written for your own grinder rather than assuming every model uses the same test.
Frequently Asked Questions
How to Lubricate a Gearbox?
Disconnect the power, obtain the service instructions for the exact grinder, open only the documented gearcase section, inspect the components, remove the specified amount of old grease, and apply the approved grease in the listed quantity. Replace required seals, tighten screws to specification, rotate the spindle by hand, and complete the prescribed no-load test.
What Grease to Use on Angle Grinder Gears?
Use the grease identified in the manual, parts diagram, or service bulletin for the exact model. Match the grease name or part number, quantity, and application points. Do not assume that grease sold for another grinder, another brand, automotive joints, wheel bearings, or general machinery is compatible.
How Often Should Angle Grinder Gearbox Grease Be Changed?
There is no universal six- or twelve-month interval. Follow the schedule published for your model. If no interval is listed, arrange inspection when there is leakage, abnormal gear noise, concentrated gear-head heat, contamination, rough spindle movement, or another repair that requires opening the gearcase.
What Are 10 Safety Precautions Before Using a Grinding Machine?
- Inspect the grinder, cord, battery, switch, guard, handle, spindle, and flanges.
- Use only an undamaged accessory designed for the grinder and task.
- Confirm that the accessory’s rated speed meets or exceeds the grinder’s maximum speed.
- Install the correct guard and position it between you and the accessory.
- Tighten the side handle and hold the grinder with both hands.
- Wear safety glasses or a face shield, hearing protection, and task-appropriate respiratory protection.
- Remove flammable materials and keep bystanders outside the hazard area.
- Secure the workpiece and maintain stable footing.
- Remove the adjustment wrench and confirm that the switch is off before connecting power.
- Stand out of the accessory’s plane during the no-load test and stop if vibration or noise is abnormal.
What Can I Use to Lubricate My Grinder?
Use the manufacturer-specified gear grease or an equivalent that has an explicit compatibility cross-reference for the exact specification. Do not substitute oil, penetrating lubricant, spray grease, chassis grease, or an unidentified multipurpose product.
Can Automotive Grease Be Used in an Angle Grinder?
Only when the grinder’s official documentation explicitly permits that exact formulation or specification. Automotive grease may have the wrong viscosity, thickener, additives, or seal compatibility for a compact high-speed gearbox.
Why Is My Grinder Still Noisy After Regreasing?
Disconnect it immediately. The cause may be a damaged gear, rough bearing, bent spindle, incorrect grease quantity, misaligned housing, pinched seal, loose fastener, damaged flange, or unbalanced accessory. Do not keep running the tool to distribute the grease if the sound is severe or new.
Conclusion
Safe angle grinder lubrication is not a one-grease or one-schedule job. The correct approach starts with the exact model documentation. Disconnect the power, inspect the components, remove and replace grease as specified, preserve the seals, and follow the listed assembly and testing procedure.
Do not try to solve chipped gears, rough bearings, excessive spindle play, damaged wiring, or severe vibration by adding more lubricant. When the service information is unavailable or the gearcase contains damaged parts or sensitive electronics, qualified repair is the safer choice.
Sources
- OSHA: Safe Use of Portable and Hand-Held Power Tools — supports disconnecting grinders before servicing and general grinder safety.
- OSHA: Hand and Power Tools — supports following manufacturer lubrication instructions and maintaining power tools safely.
- Milwaukee 2880-20 Service Parts List — specifies Type J grease, removal of 90–95% of old grease, and an approximately 16-gram quantity.
- Milwaukee 6140-30 Service Parts List — specifies Type Y grease, component-specific application, and a 9–12-gram quantity.
- DEWALT DCG407/DCG408 Instruction Manual — supports battery removal, maintenance controls, cleaning guidance, service requirements, and controlled no-load testing.
- Bosch Professional Online Spare Parts Service — states that spare parts should be fitted by specialist personnel.