
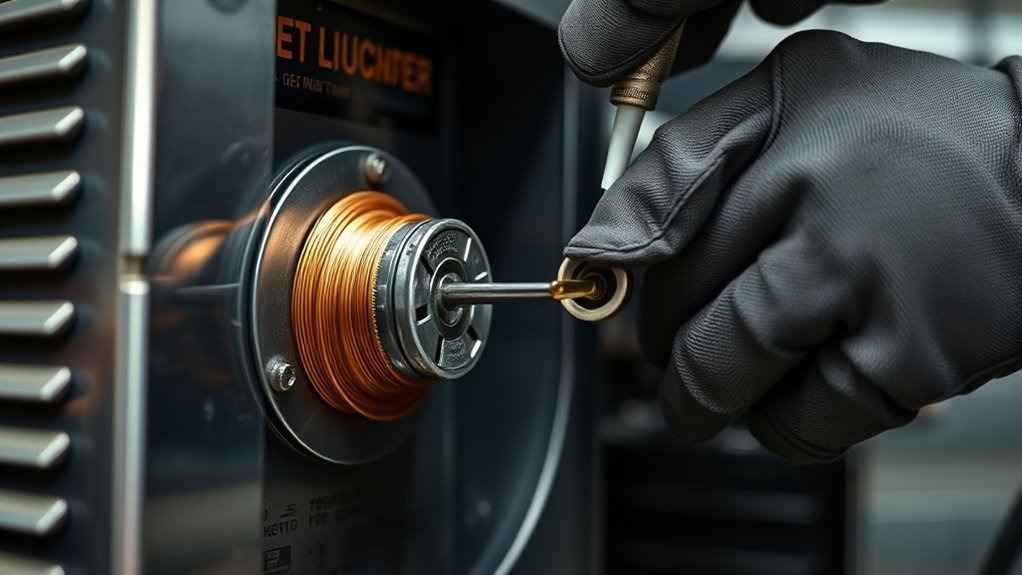
A rough MIG wire feed can turn a simple weld into a cycle of slipping wire, burnback, bird-nesting, and damaged contact tips. In many setups, you do not need to add lubricant at all. Start by inspecting the spool, drive rolls, liner, gun cable, and contact tip. Use a purpose-built cleaner pad and approved lubricant only when the equipment and product manufacturers allow it.
Quick Answer
Do not spray oil or grease onto MIG wire. First, check the liner, contact tip, drive rolls, spool brake, and gun cable. If your equipment and lubricant manufacturers approve a wire-cleaning system, clip its felt pad before the drive rolls and add only the specified amount. The pad should wipe the wire, not leave it visibly wet.
Key Takeaways
- Most MIG wire-feed problems are mechanical and should be diagnosed before you add lubricant.
- Use only a cleaner pad and lubricant approved for your wire, gun, feeder, and welding process.
- Install the pad before the drive rolls so it removes dust before the wire enters the liner.
- A properly treated pad is lightly damp, never dripping, and should not leave the wire visibly oily.
- Replace rusty wire, damaged liners, worn contact tips, and incorrect drive rolls instead of trying to fix them with more lubricant.
At a Glance
| Time Required | About 15–30 minutes for inspection, pad installation, and a test feed |
| Difficulty | Beginner to intermediate |
| Tools Needed | Welder manual, purpose-built cleaner pad, approved lubricant if permitted, lint-free cloth, welding pliers, safety glasses, and filtered compressed air if the gun manual allows it |
| Cost | Low for a cleaner pad and optional approved lubricant; replacement tips, liners, or drive rolls cost extra |
Decide Whether Your MIG Wire Needs Lubricant
A cleaner pad and a lubricant pad do related but different jobs. A dry cleaner pad wipes dust and loose residue from the wire. A lubricated pad also transfers a controlled film from an approved product onto the wire. Many home and shop MIG welders feed clean wire correctly without any added lubricant.
Before adding anything, read the manuals for your power source, wire feeder, and MIG gun. Also check the instructions and safety data for the cleaner or lubricant. Do not choose a product only because its label mentions PTFE, Teflon, oil, or low friction. Compatibility with your equipment and electrode wire matters more than the lubricant chemistry.
Look for these common mechanical causes first:
- A gun cable that is sharply bent, kinked, or tightly coiled
- Too much or too little spool-brake tension
- Drive rolls that do not match the wire size or type
- Drive-roll pressure that crushes the wire or allows it to slip
- A dirty, worn, kinked, incorrectly trimmed, or incorrectly sized liner
- A restricted or worn contact tip
- Misaligned inlet and outlet guides
- Rusty, dirty, damaged, or poorly wound electrode wire
Miller’s wire-feeding guidance recommends matching the drive-roll size and type to the wire, setting only enough pressure to prevent slipping, cleaning or replacing blocked liners, and avoiding excessive pressure that deforms the electrode.
Note: Lubricant cannot repair rusty wire, a kinked liner, a damaged contact tip, or the wrong drive rolls. Replace the defective part rather than masking the resistance with more lubricant.
Choose a MIG Wire Cleaner
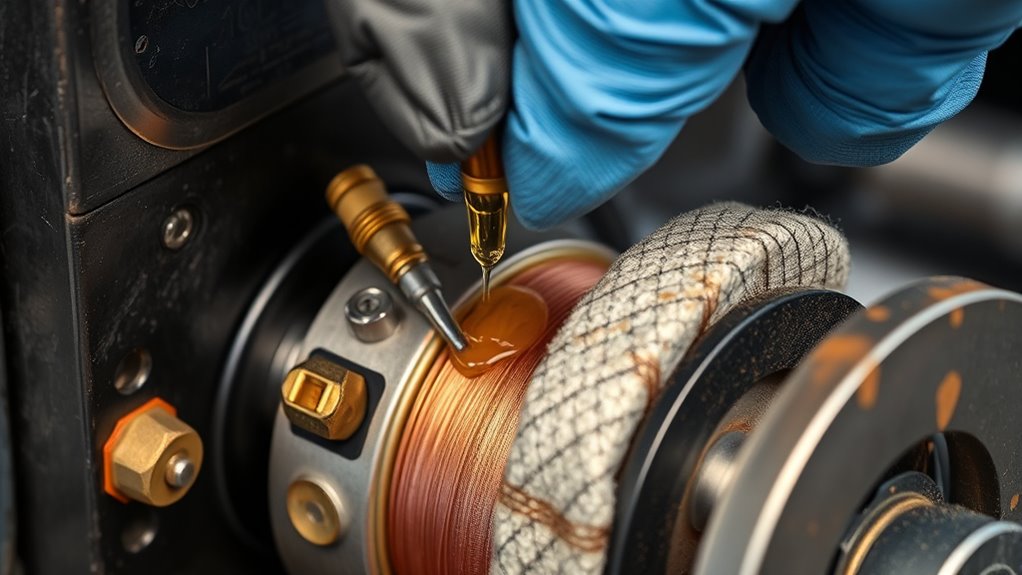
Choose a purpose-built MIG wire cleaner that fits around the electrode without bending, flattening, or tightly gripping it. The normal installation point is between the wire spool and the feeder’s inlet guide, before the wire reaches the drive rolls. This position lets the pad catch dust and loose residue before those contaminants enter the rolls and liner.
Install the cleaner close enough to the inlet guide that it stays aligned with the wire path. It should not pull the wire sideways or create visible resistance. The wire must enter the guide straight and remain centered in the drive-roll groove.
Commercial systems such as CRC Weld-Aid’s cleaner and lubricant pads are designed specifically for welding wire. Follow the product label for pad selection, lubricant compatibility, installation, and replacement.
Check the pad before each longer welding session. Replace it when it becomes hard, torn, misshapen, saturated with grit, or dark with contamination. A dirty pad can become an abrasive source rather than a cleaner.
A MIG wire cleaner should remove contamination without bending the electrode, adding noticeable drag, or leaving the wire visibly wet.
Keep the spool covered when possible and separate the feeder from grinding dust. If you also use a plasma cutter in the same work area, keep its cutting debris away from the MIG feeder and consult the separate plasma cutter amperage and thickness chart for cutting setup guidance.
Products Worth Considering

Steady Material: crafted from felt and metal, our welding wire cleaner pads promise steadiness; Specifically designed for rigorous environments like welding workshops, these pads withstand heavy usage and maintain their shape and efficiency over time; This product cleans wires and reduces scorching by 50%, ensuring smooth feeding of poorly cast, spiral, rusted, or excessively long wire feed bushings
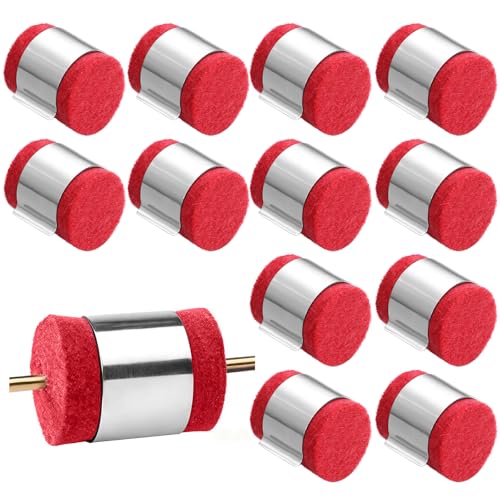
Steady Material: crafted from felt and metal, our welding wire cleaner pads promise steadiness; Specifically designed for rigorous environments like welding workshops, these pads withstand heavy usage and maintain their shape and efficiency over time; This product cleans wires and reduces scorching by 50%, ensuring smooth feeding of poorly cast, spiral, rusted, or excessively long wire feed bushings
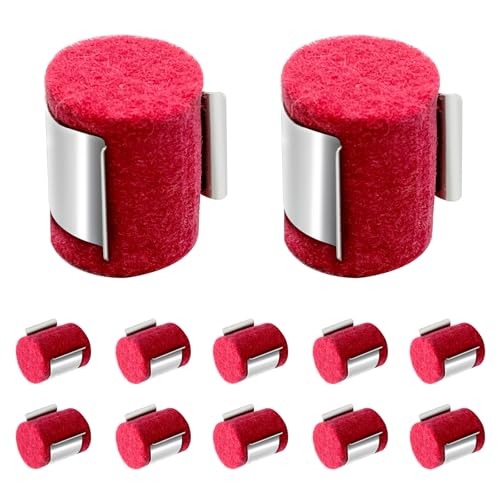
【Keep Your Welding Smooth】 These 12-piece MIG welding wire cleaner pads are designed to remove dust, rust, and debris from the welding wire surface. By ensuring a clean wire enters the feeder, they significantly reduce friction and prevent erratic wire feeding for a more stable arc.
Pick Felt or Foam Pads
Purpose-built felt pads are the safest general choice because they are made to clip around welding wire and wipe its surface before it reaches the drive rolls. Some products are supplied as dry cleaner pads, while others are designed to hold a compatible lubricant.
Select a pad intended for your wire diameter and application. A pad that is too loose may do little cleaning. A pad that is compressed too tightly can increase drag and contribute to unstable feeding.
A clean foam earplug is sometimes used as a low-cost improvised wire wiper, but it is not a reliable replacement for a purpose-built cleaner. Foam can shed, compress unevenly, trap abrasive grit, or move out of position. Use a commercial pad when consistent feeding and weld quality matter.
Replace the pad based on its condition and the product instructions rather than waiting for a fixed number of hours. Dusty fabrication areas, exposed spools, and frequent grinding may contaminate a pad much faster than a clean enclosed shop.
A clean wire path helps prevent MIG wire-feed problems, reduces debris entering the liner, and gives you steadier arc starts. However, a pad cannot compensate for damaged feed components.
Products Worth Considering
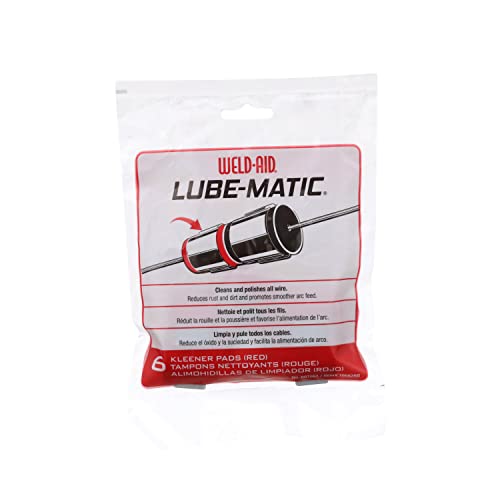
Pads are for all wires all the time

Comprehensive Package: This package includes 15 piece wire cleaner pads.You will have ample reserves to handle multiple project tasks without the need for frequent restocking.Affordable pricing provides a reliable and long-lasting supply of consumables for your busy workshop or home garage.

Cleans wire and reduce burn back 50 percent
Use Lube Only on the Pad
Use lubricant only when the wire-feeder, gun, electrode, and lubricant manufacturers permit it. Apply the product to the approved pad rather than spraying or pouring it onto the spool, drive rolls, inlet guide, liner, contact tip, or welding gun.
1. Shut Down the Welder
Turn off and unplug the welding power source before opening the feeder or servicing the wire path. Close the shielding-gas cylinder valve if the work will disturb the gun or gas connections. Secure the loose wire end so the spool cannot unravel when you release the drive-roll pressure.
Warning: Keep your fingers away from the drive rolls and wire guide whenever the feeder is powered. The wire, reel, drive housing, and related metal parts may be electrically live when the machine is on.
2. Inspect the Wire and Feed Path
Check the exposed wire for rust, oil, deep drive-roll marks, copper flaking, crushed areas, or embedded grinding dust. Inspect the drive-roll groove, inlet guide, spool brake, gun cable, liner, and contact tip. Correct mechanical problems before installing a lubricated pad.
3. Install a Clean Pad
Clip the pad around the wire between the spool and inlet guide. Make sure it stays clear of rotating parts and does not pull the wire out of alignment. The wire should slide through with light wiping contact.
4. Add Only the Approved Amount
Apply the amount stated on the lubricant label. There is no universal number of drops or “small squirt” that works for every pad and product. The pad should feel lightly damp but should not drip, leak, or leave beads of liquid on the wire.
If the manufacturer does not provide application instructions for your setup, use the pad dry or contact the product manufacturer instead of guessing.
5. Reset the Feeder
Close the drive-roll assembly and restore only enough pressure to feed the wire without slipping. Set the spool brake so the spool stops when feeding stops but does not create unnecessary drag. Confirm that the wire, drive-roll groove, liner, and contact tip sizes match.
6. Run a Test Feed and Test Weld
Reassemble the gun, restore power, and feed several feet of wire while keeping the gun cable as straight as practical. Watch the spool and drive rolls for hesitation, slipping, wire shaving, or side-to-side movement. Then make a test weld on clean scrap using the machine’s recommended settings.
- The wire should move at a steady speed.
- The pad should remain in position.
- The wire should not look wet or oily after the pad.
- The drive rolls should not accumulate paste-like residue.
- The arc should start and run without new instability, smoke, or visible contamination.
Regular care of the MIG wire-feed system can prevent many feeding failures, but lubricant should remain an optional aid rather than the first repair.
Signs You Have Used Too Much Lubricant
Stop feeding wire and inspect the system if you notice any of these signs:
- The pad drips or feels saturated.
- The wire looks wet, greasy, or heavily polished after the pad.
- Liquid appears on the inlet guide or drive rolls.
- Dust forms a dark paste around the pad or feeder.
- The rolls begin slipping after lubricant was added.
- You notice an unusual odor, smoke, unstable arc, or possible contamination during the test weld.
Turn off and unplug the machine. Remove the saturated pad and wipe accessible feeder surfaces with a clean, dry, lint-free cloth. Do not wash the liner with solvent unless the gun manufacturer specifically permits that cleaner and procedure.
If lubricant has entered the liner and feeding remains rough, follow the gun manual for cleaning or replace the liner. Also replace any contact tip that has become restricted. Install a fresh dry pad, correct the mechanical feed settings, and make another test weld on scrap before returning to the job.
Pro Tip: Start with a dry cleaner pad. Add an approved lubricant only when the manual or product instructions call for it and a clean mechanical setup still benefits from the pad-based system.
Clean the Liner and Gun
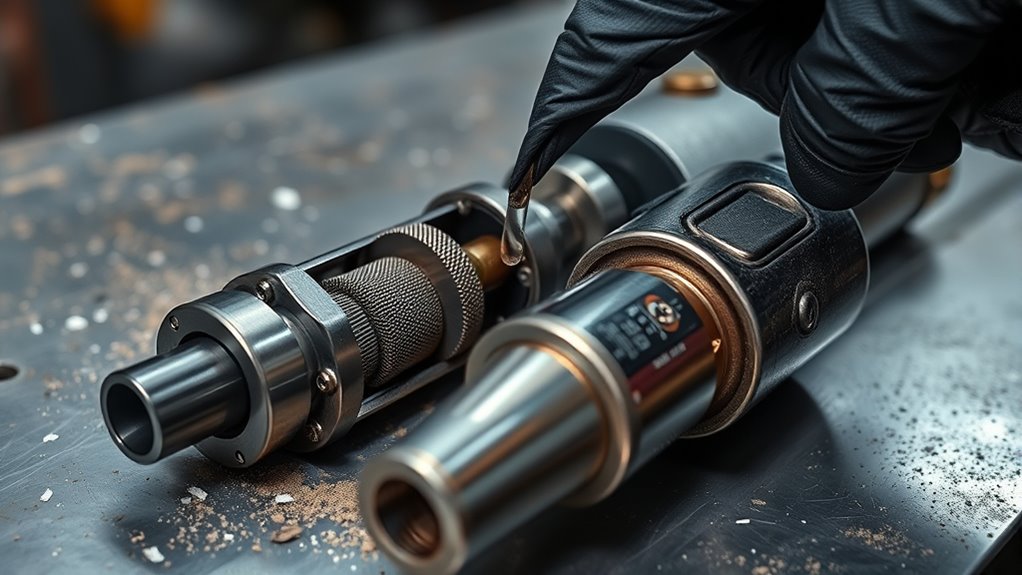
Disconnect input power before cleaning or removing the liner. Secure the wire spool, release drive-roll pressure, and remove the contact tip before blowing debris through the gun. Follow the gun manufacturer’s specified cleaning direction because some manuals direct air from the feeder end while others allow cleaning from either end.
Use clean, dry, filtered compressed air only when the gun or liner manufacturer permits it. Tregaskiss liner guidance calls for removing the contact tip, blowing from the back of the gun, and wearing safety goggles to prevent eye injuries from ejected debris.
For workplace cleaning in the United States, OSHA’s compressed-air guidance requires pressure below 30 psi at the cleaning nozzle under static conditions, effective chip guarding, and appropriate personal protective equipment. Keep the outlet pointed away from yourself and other people.
Warning: Never use compressed air to clean your skin or clothing. Wear safety glasses with side protection and control the path of any debris leaving the liner.
Inspect the liner for kinks, flattened coils, rust, metal flakes, heavy dust, incorrect length, and worn areas. Replace it when cleaning does not restore smooth movement or when the liner is damaged, incorrectly sized, or trimmed too short. Miller’s consumables guidance notes that liner size should match the electrode range and that an improperly installed, kinked, or worn liner can cause burnback, bird-nesting, and erratic feeding.
After cleaning, inspect the contact tip, gas diffuser, nozzle, neck, gun connection, and seals. Tight connections and sound seals help maintain electrical transfer and shielding-gas delivery. Replace a contact tip if its opening is restricted, worn into an oval shape, or does not match the wire.
Regular liner and gun maintenance supports more consistent welding quality with both solid and tubular wire. Treat the gun as a precision feed path rather than a storage place for dirt, oil, and grinding dust.
Fix Wire Feed Problems Without Over-Lubing
If the wire still feeds poorly, use a systematic test rather than adding more lubricant. Begin with the easiest components to inspect and work toward the liner and gun.
| Symptom | Likely Causes | What to Check |
|---|---|---|
| Drive rolls slip | Insufficient roll pressure, excessive spool-brake tension, dirty rolls, or a downstream restriction | Clean the rolls, reduce spool drag, straighten the cable, and inspect the liner and tip before increasing pressure |
| Deep marks or flattened wire | Excessive drive-roll pressure or the wrong roll type | Reduce pressure and install rolls that match the wire size and construction |
| Bird-nesting near the feeder | Blocked tip, restricted liner, sharp cable bend, incorrect liner, or excessive pressure | Remove the tip and test the feed, straighten the cable, and inspect or replace the liner |
| Wire feeds with the contact tip removed | Restricted, worn, overheated, or incorrectly sized contact tip | Install a new tip of the correct type and size |
| Wire burns back to the tip | Feed restriction, incorrect wire-feed speed, worn tip, or incorrect contact-tip-to-work distance | Clear restrictions, confirm the machine settings, replace the tip, and correct gun position |
| Spool overruns after feeding stops | Spool brake is too loose | Increase brake tension only until the spool stops without creating excess drag |
| Intermittent or pulsing feed | Kinked liner, cable coil, worn rolls, loose gun connection, contaminated wire, or misaligned guides | Straighten the gun, inspect connections, align the guides, and replace worn components |
Test the Contact Tip First
With the machine safely prepared according to its manual, remove the contact tip and test the feed. If the wire becomes smooth with the tip removed, the tip is likely restricted, worn, overheated, or incorrectly sized. Replace it rather than enlarging the opening with an improvised tool.
Check Drive-Roll Size, Type, and Pressure
Use a smooth V-groove roll for common solid steel wire when specified by the feeder manufacturer. Tubular wire commonly requires the correct knurled roll, but excessive pressure can crush or open the wire seam. Match the roll markings to the electrode diameter.
If the wire has deep roller marks, metal shavings, or a flattened profile, lower the pressure. Too much pressure can force damaged wire into the liner and create a blockage farther downstream.
Check Spool Drag and Alignment
The spool should rotate smoothly and stop when feeding stops. Too much brake tension makes the drive rolls fight the spool. Too little tension allows the spool to overrun and tangle. Also confirm that the wire leaves the spool in the correct direction and enters the inlet guide without rubbing an edge.
Match the Feed System to the Wire
Solid steel, flux-cored, stainless, and aluminum wires do not always use the same drive rolls, liners, contact tips, or feeder arrangements. Aluminum is soft and commonly feeds best through a spool gun or push-pull system. Miller’s aluminum MIG guide recommends matching the contact tip, drive rolls, and liner to the wire and checking roll pressure carefully.
Do not automatically add lubricant when switching wire types. Confirm that the cleaner pad and lubricant are approved for the exact electrode and feed system.
Regular inspection can prevent the wire-feed problems that stop a welder from feeding wire. Correct the physical restriction first, then consider a compatible cleaner or lubricant pad if the manufacturer recommends one.
Pro Tip: If the wire shows deep roll marks, reduce drive-roll pressure before blaming the liner or adding lubricant. The wire should be gripped firmly enough to feed without being crushed or shaved.
Prevent Future Wire-Feed Problems
Store electrode wire in a cool, dry location and protect open spools from humidity, dust, and grinding debris. Do not leave a partially used spool exposed in a damp feeder for long periods. Rusted or heavily contaminated wire should be replaced.
Keep the gun cable in broad, loose loops when stored. Tight coils can kink the liner and increase drag. Miller’s maintenance checklist recommends loose cable loops, periodic liner cleaning with filtered compressed air, clean drive rolls, and dry filler-metal storage.
- Cover the welder when it is not in use.
- Keep grinding and cutting dust away from the open feeder.
- Inspect the pad before long welding sessions.
- Clean drive rolls with the machine shut down.
- Check contact tips and nozzles for buildup.
- Replace worn liners instead of repeatedly increasing roll pressure.
- Use the shortest practical gun length for difficult-to-feed wire.
- Keep the gun cable as straight as practical while welding.
Frequently Asked Questions
Can You Lubricate MIG Wire?
You can use a purpose-built wire cleaner and lubricant system when the welder, gun, wire, and lubricant manufacturers approve it. Apply the product to its pad according to the label. Do not spray generic lubricant directly onto the spool, drive rolls, liner, contact tip, or gun.
How Much MIG Wire Lubricant Should You Use?
Use the amount stated by the lubricant manufacturer. There is no universal drop count because pad sizes and product formulas differ. The pad should be lightly damp, not dripping, and the wire should not look wet after passing through it.
Can You Use WD-40, Motor Oil, or Grease on MIG Wire?
Do not use WD-40, motor oil, grease, penetrating oil, silicone spray, or another general shop chemical unless the welding-equipment and consumable manufacturers specifically approve it. These products can hold dirt, leave residue in the liner, and contaminate the feed path or weld.
Why Does My MIG Wire Keep Sticking to the Contact Tip?
The wire may burn back or stick because the tip is restricted or worn, the tip size is wrong, wire-feed speed is incorrect, the gun is too close to the work, or a liner or roll problem is slowing the wire. Remove the tip and test the feed. If feeding improves, install a new correct-size tip.
Can Too Much Wire Lubricant Cause Porosity?
Excess or incompatible residue can contribute to contamination and unstable welding conditions. Correctly used manufacturer-approved products should leave only a controlled film. Stop and inspect the system if the wire looks wet, residue reaches the drive rolls, or weld quality changes after application.
How Often Should You Replace MIG Wire Cleaner Pads?
Replace the pad when it becomes dirty, hard, torn, misshapen, or packed with dust. Follow the product instructions if they specify an interval. Pads used near grinding or cutting work may need replacement much sooner than pads in a clean enclosed shop.
Can You Use a Cleaner Pad With Flux-Cored Wire?
Use a cleaner or lubricant pad only when its manufacturer approves it for that flux-cored electrode. Also use the correct drive roll and avoid excessive roll pressure, which can crush tubular wire or damage its seam.
Why Is My MIG Wire Still Not Feeding Smoothly?
Check the gun cable, spool brake, drive-roll size and pressure, inlet-guide alignment, liner size and condition, contact tip, and wire quality. If the wire feeds normally with the contact tip removed, replace the tip. If resistance remains, clean or replace the liner before adding more lubricant.
Safety Disclaimer: This article is for informational purposes only and does not replace hands-on training, your welder and MIG gun manuals, product safety data, workplace rules, or guidance from a qualified welding professional. Disconnect input power before service work, control compressed-air hazards, and use proper welding protective equipment.
Conclusion
The safest way to improve MIG wire feeding is to remove the cause of the drag before adding lubricant. Check the spool brake, drive rolls, guides, liner, contact tip, gun cable, and wire condition first. Install a purpose-built cleaner pad before the drive rolls, and add lubricant only when the equipment and product manufacturers approve it.
Keep the pad lightly damp rather than soaked, watch for residue on the wire or rolls, and test the feed before welding an important part. Replace rusty wire, damaged liners, worn tips, and incorrect feed components instead of trying to overcome them with extra lubricant. A clean, correctly adjusted system should feed smoothly without leaving the wire visibly oily.
Sources
- Miller: Tips to Improve and Track Welding Productivity — drive-roll selection, pressure adjustment, and liner troubleshooting
- Miller: How to Choose MIG Welding Consumables — liner cleaning, liner sizing, and contact-tip selection
- Miller: Welder Maintenance Checklists — filler-wire storage, cable care, drive-roll cleaning, and filtered compressed air
- Tregaskiss TOUGH GUN Manual — liner contamination, drive-roll pressure, compressed-air direction, and eye protection
- CRC Weld-Aid — purpose-built welding-wire cleaner and lubricant pad systems
- OSHA Compressed-Air Cleaning Guidance — pressure reduction, guarding, and personal protective equipment




