
To prevent weld failure in auto body repairs, start with the vehicle maker’s repair procedure, clean bare metal, correct weld settings, controlled heat, and a careful inspection before and after welding. A strong weld is not just a nice-looking bead. It must match the approved weld type, location, size, and corrosion-protection steps for that exact vehicle.
Quick Answer
Prevent weld failure in auto body repair by following the OEM repair procedure, cleaning all weld areas to bright metal, making test welds first, using the correct MIG, resistance spot, or plug weld method, controlling heat with short welds, and inspecting for porosity, cracks, burn-through, and incomplete fusion before refinishing.
Key Takeaways
- Always verify the OEM repair procedure before welding any structural or safety-related panel.
- Most weld failures start with poor cleaning, wrong settings, poor fit-up, too much heat, or skipped inspection.
- Test weld coupons help confirm penetration and settings before you weld on the vehicle.
- Control heat with tack welds, stitch welds, skip welding, and cooling pauses to reduce warping and weak joints.
- After welding, restore corrosion protection, seam sealer, cavity wax, and coatings as required by the repair procedure.
At a Glance
| Time Required | 30 minutes to several hours, depending on prep, test welds, panel type, and inspection needs |
| Difficulty | Intermediate to advanced; structural repairs should be handled by qualified technicians |
| Tools Needed | OEM repair information, welder, matching wire or electrodes, shielding gas, clamps, grinder, wire brush, PPE, fire extinguisher, test coupons, inspection light, and corrosion protection products |
| Cost | Low for practice coupons and prep supplies; higher if OEM repair access, specialty welders, scans, or corrosion materials are needed |
Warning: Do not guess on structural auto body welding. Check the OEM repair procedure for the exact year, make, model, body location, steel type, weld method, sectioning point, corrosion-protection step, and scan requirement. If the procedure says a part is non-repairable or must not be welded, replace it as instructed.
Why Weld Quality Is Crucial to Prevent Failure
Weld quality matters because welded panels help carry loads through the body structure. A poor weld can crack, tear loose, rust early, or fail when the vehicle is stressed again. That risk grows when the repair involves rails, pillars, rocker panels, aprons, quarter panels, or any part tied to crash energy management.
A reliable weld starts before the arc. You need clean metal, tight fit-up, correct weld settings, and the right process for the panel. You also need the right repair information. Many late-model vehicles use high-strength steel, ultra-high-strength steel, aluminum, adhesives, squeeze-type resistance spot welds, and corrosion coatings. The wrong repair method can weaken the part even if the bead looks smooth.
Follow the manufacturer’s procedure first, then use sound welding practice. That means test welds, good joint preparation, heat control, inspection, and documentation. If you are working around coated steel, also review the challenges of welding galvanized steel, since zinc coatings can affect weld quality and fume exposure.
Before You Weld: Check the Repair Plan
Most weld failures happen because one early step was skipped. Before striking an arc, confirm the repair plan and prepare the vehicle safely.
- Find the OEM repair procedure: Confirm whether the panel can be repaired, where it can be sectioned, and which weld type is allowed.
- Identify the material: Do not treat mild steel, high-strength steel, ultra-high-strength steel, boron steel, and aluminum the same way.
- Disconnect and protect components: Follow the service procedure for the battery, modules, airbags, sensors, fuel lines, glass, trim, and wiring near the weld zone.
- Plan fire protection: Remove or shield flammable materials, keep a suitable extinguisher nearby, and watch hidden cavities after welding.
- Make test welds: Use scrap or coupons that match the vehicle panel thickness and stack-up. Confirm settings before welding the vehicle.
- Prepare corrosion protection: Know which weld-through primer, seam sealer, epoxy primer, cavity wax, or coating must be restored after welding.
Note: A weld can look acceptable on the surface and still be weak underneath. Test coupons and proper inspection are your best protection before the repair becomes permanent.
Common Weld Defects to Watch For
When you inspect an auto body weld, look for both visible defects and clues that the weld settings were wrong. Small defects can spread under vibration, road shock, and body flex.
| Defect | Common Cause | How to Prevent It |
|---|---|---|
| Porosity | Contamination, moisture, poor gas coverage, long stick-out, or drafts | Clean to bright metal, check gas flow, block drafts, and maintain proper gun angle and stick-out |
| Incomplete fusion | Low heat, poor fit-up, dirt, wrong travel speed, or poor torch angle | Set the welder with test coupons, tighten gaps, and angle the arc into both panels |
| Burn-through | Too much heat, slow travel, thin metal, or large gaps | Use short welds, reduce heat, close gaps, and allow cooling time between welds |
| Cracking | Wrong material repair method, excessive heat, hard zones, stress, or contamination | Follow OEM limits, avoid overheating advanced steels, and inspect before refinishing |
| Undercut | Excessive heat, fast travel, or poor torch control | Tune settings, steady the torch, and avoid washing away the panel edge |
Porosity Issues
Porosity is a group of tiny holes caused by trapped gas in the weld. It can weaken the joint and leave a path for moisture. Common causes include oil, paint, rust, seam sealer, zinc coating, moisture, low shielding gas, blocked nozzles, wind, and too much contact-tip-to-work distance.
To reduce porosity, clean the weld zone and the surrounding area before welding. Use a grinder, abrasive disc, or wire brush to remove coatings where the weld will be made. Check the nozzle for spatter, confirm shielding gas flow, and keep the gun close enough for the gas to protect the weld pool. Understanding surface contamination is critical because even a small amount of oil or coating can create gas pockets.
Incomplete Welds Risks
Incomplete welds include poor fusion, shallow penetration, missed plug welds, and welds that do not bond both panels. These defects are dangerous because the joint may pass a quick visual check but fail under load.
Prevent incomplete welds by setting the welder on test coupons first. Match the coupon thickness to the actual panel stack. Check the back side or perform a destructive peel test when appropriate. If the weld button is too small, too cold, or pulls apart too easily, adjust the settings before welding the vehicle.
Step-by-Step Process to Prevent Weld Failure
Use this process when welding sheet metal or body panels. For structural parts, the OEM procedure controls the final method.
- Confirm the approved repair: Check sectioning locations, weld count, weld spacing, weld size, adhesives, and corrosion-protection steps.
- Clean the joint: Remove paint, rust, sealer, undercoat, adhesive residue, and galvanizing where the procedure requires bare metal.
- Fit and clamp the panels: Keep gaps small. Poor fit-up forces the weld to bridge space instead of joining metal.
- Prepare plug weld holes if required: Drill or punch the correct hole size and deburr the edges so the weld can tie into the lower panel.
- Set the welder on coupons: Use the same material thickness, wire, gas, and joint stack as the repair.
- Make controlled welds: Use tacks, stitch welds, skip welding, or plug welds as required. Avoid long beads on thin panels unless the procedure allows it.
- Inspect before grinding: Look for pinholes, cracks, undercut, missed edges, and poor tie-in.
- Finish carefully: Grind only as much as needed. Do not thin the panel or remove too much weld strength.
- Restore protection: Apply primer, seam sealer, cavity wax, and coatings according to the repair procedure.
- Document the repair: Record procedures used, weld settings, test weld results, scans, and final inspection notes.
Pro Tip: Keep one labeled test coupon with the repair file when possible. It shows the settings, panel stack, and weld quality used before the actual repair.
Top Welding Techniques for Stronger Joints
Stronger joints come from matching the welding method to the panel and repair procedure. Do not choose a process only because it is convenient.
Products Worth Considering

【Designed For Automotive Repair Work】Spot weld panel chisel Designed for automotive body repair work, precisely removes auto body spot welds and easily separates metal panels. It is suitable for a wide range of bodywork, include accident repairs, vehicle dismantling, door and fender replacement, and the separation of welds on frames and chassis, ensuring efficient performance to meet your needs.

Highly Durable Design: The shell of stud welder kit is made of high-quality ABS body, has good stability under high temperature conditions, withstand temperature of 93-118℃, and the movement is pure copper electrode. This welder stud kit is wear-resistant, strong and sturdy.

Professional Dent Removal: VEVOR Stud Welder Dent Puller offers a fast and efficient solution for removing dents from steel car body panels, all while providing precise dent pulling and controlled force for a professional-grade dent repair every time.
MIG Plug Welding
MIG plug welding is common in auto body repair when the OEM procedure allows it as a replacement for certain factory spot welds. The goal is to fill the hole and fuse the top panel to the lower panel. A good plug weld usually has full fill, clean edges, and strong fusion into the backing panel.
To improve plug weld strength, hold the gun steady, start in the center of the hole, build heat into the lower panel, then spiral outward to fill the hole. If the weld sits only on the top panel, it is not strong enough.
Squeeze-Type Resistance Spot Welding
Squeeze-type resistance spot welding is often preferred on late-model vehicles when access and equipment allow it. It can duplicate many factory-style spot welds with less open arc heat than MIG welding. The machine, tips, pressure, and settings must match the material stack and OEM guidance.
Stitch and Skip Welding
Stitch welding uses short welds instead of one long bead. Skip welding spreads those short welds across the panel so heat does not build in one area. These methods help control distortion on thin body panels, especially when patching, butt welding, or closing small gaps.
Flux Core and TIG Considerations
Flux core welding can work for some repairs, but it creates more smoke and slag than solid-wire MIG and may be harder to control on thin panels. If you use it, review flux core welding techniques and practice on scrap first. TIG can create precise welds on thin metal, but it takes more skill and time. Use TIG only where it fits the material and repair plan.
Proper Joint Preparation
Joint preparation has a direct effect on weld strength. Cleaned surfaces, tight alignment, correct overlap, and proper plug weld holes all help the weld fuse instead of sitting on top of the panel.
| Joint Preparation Step | Why It Matters |
|---|---|
| Clean to bright metal | Reduces porosity, inclusions, and weak fusion |
| Clamp panels tightly | Improves heat transfer and reduces burn-through |
| Deburr plug weld holes | Helps the weld flow into the lower panel |
| Match OEM weld spacing | Maintains the intended load path and repair strength |
Effective Heat Management Strategies
Heat control is one of the most important parts of auto body welding. Too little heat causes weak fusion. Too much heat causes burn-through, warping, brittle zones, and coating damage.
Use small tacks to hold the panel before welding. Then weld in short sections and move around the repair area so heat does not concentrate in one spot. Let the metal cool between passes. Copper backing bars or heat-absorbing paste can help in some non-structural sheet-metal work, but use them only when they do not block proper penetration or conflict with the repair procedure.
Before welding, maintain a clean surface and remove coatings that can contaminate the weld. After welding, avoid heavy grinding that thins the panel. A smooth repair is good, but not if it removes the strength you just created.
Warning: Never use water-soaked rags or compressed air in a way that shocks hot metal, hides a fire, or traps moisture in a seam. Cooling pauses are useful, but the metal still needs to cool in a controlled, dry, inspectable way.
Pre- and Post-Repair Inspection Guidelines
A weld inspection should happen before welding, during welding, and after welding. Do not wait until the repair is painted to look for weld problems.
Pre-Repair Inspection
- Check the damage path: Look beyond the visible dent or tear. Measure structure if the repair involves rails, pillars, rockers, aprons, or suspension mounting areas.
- Scan when required: Follow OEM guidance for pre-repair and post-repair scans, especially near ADAS, airbag, restraint, and electrical systems.
- Check corrosion and old repairs: Rust, old filler, or previous bad welds can change the repair plan.
- Confirm access: Make sure you can weld and protect both sides of the repair area when required.
During-Repair Checks
- Inspect each test weld: Check penetration, nugget size, burn-through, and fusion before welding the vehicle.
- Watch the arc and puddle: A sputtering arc, soot, pinholes, or poor wet-out can signal contamination or gas problems.
- Pause for heat control: If the panel is too hot to touch near the weld zone, allow more cooling time before continuing.
Post-Repair Inspection
- Check every weld: Look for cracks, pinholes, missed welds, undercut, poor fill, and incomplete plug welds.
- Confirm weld count and spacing: Match the repair procedure, not guesswork.
- Verify corrosion protection: Restore seam sealer, primer, coatings, and cavity wax before final assembly when required.
- Complete final scans and calibrations: If the repair affects electronics, sensors, or ADAS, finish the scan and calibration steps before delivery.
- Document everything: Save procedure references, test weld notes, photos, scans, and inspection records.
Essential Safety Tips for Welders
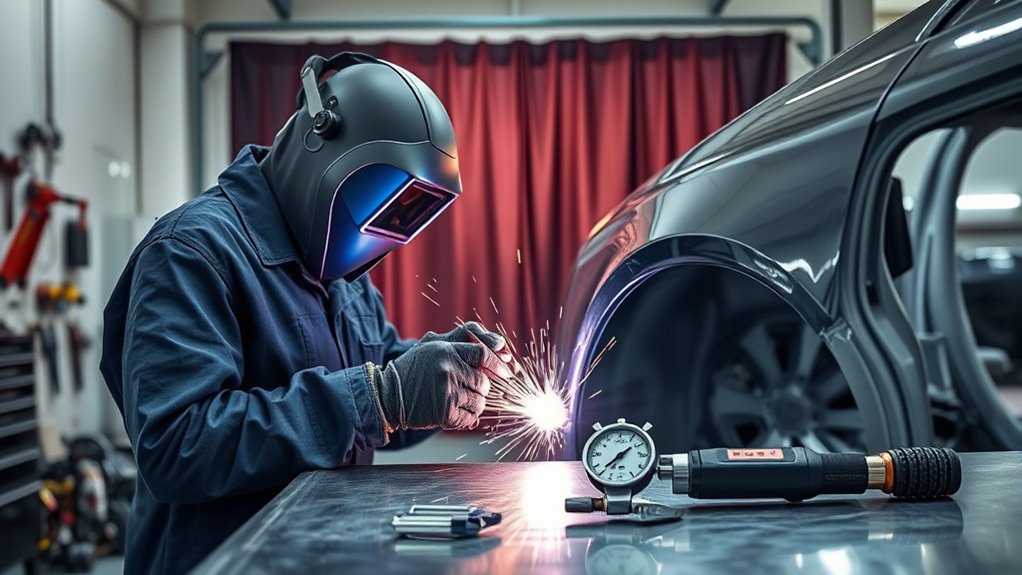
Safe welding protects both the technician and the repair. Always wear the right personal protective equipment, including an auto-darkening welding helmet, safety glasses, welding gloves, flame-resistant clothing, hearing protection when needed, and sturdy boots. Nearby workers also need protection from arc flash, sparks, and grinding debris.
Use personal protective equipment and keep the work area clean. Remove paper, rags, trim, foam, fuel vapors, and other flammable materials from the weld zone. Use welding curtains to shield others from UV light and sparks. Keep a fire extinguisher ready, and check hidden cavities after welding because sparks can smolder behind panels.
Ventilation is also part of weld quality and safety. Welding fumes can contain metal particles, and coated steels can increase exposure risks. Avoid welding in confined spaces unless you have proper ventilation and respiratory protection. Follow essential safety guidelines for sparks, hot work, and shop fire prevention.
A good weld is not only strong at the joint. It is also made with safe prep, controlled heat, clean air, fire protection, and restored corrosion protection.
How to Pick the Best Welding Gear?
The best welding gear depends on the material, repair procedure, access, and weld type. For many auto body repairs, a quality MIG welder with solid wire and shielding gas is common. For many late-model panels, squeeze-type resistance spot welding may be required or preferred. For aluminum, stainless, or precision work, TIG may be used when the procedure allows it.
- Choose the correct welder: Match the welder to MIG, TIG, resistance spot, or approved plug weld work. Make sure it has enough adjustment range for thin sheet metal.
- Use the right wire or electrodes: Match the filler material and diameter to the base metal and procedure.
- Check shielding gas: Use the gas type and flow rate recommended for your process. Keep the nozzle clean.
- Invest in PPE: Use an auto-darkening helmet, gloves, safety glasses, respirator when required, boots, and flame-resistant clothing.
- Keep inspection tools nearby: Use a bright inspection light, mirror, pick, weld gauge, and test coupons.
Do not rely on factory presets alone. Presets can help you get close, but test coupons confirm whether the actual panel stack is welding correctly. For MIG welding, maintaining proper stick-out length also helps keep the arc stable and the weld cleaner.
Products Worth Considering
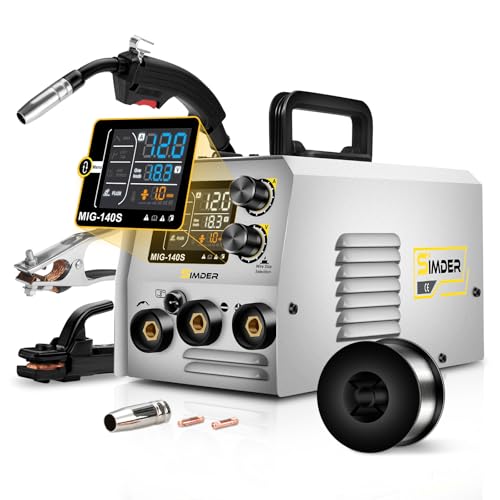
THREE-PROCESS WELDING STATION BUILT FOR FIRST-TIME USERS - Flux Core MIG, Lift TIG and Stick in one machine, so you can find the process that fits your projects without buying three separate welders. Runs on a standard 110V household outlet or 220V for heavier work - no electrician, no special wiring. Welds carbon steel, low-alloy steel, stainless steel, titanium, copper and cast iron

【LOW SPATTER & EASY CLEANUP】Minimal Spatter, Flawless Beads: Experience exceptionally low spatter and minimal post-weld cleanup. This ER70S-6 solid wire allows you to achieve smooth, visually appealing beads with ease, saving both time and grinding effort on your metal fabrication.

Wires diameter :0.6-1.0mm(0.023‘’-0.04‘’)
When Not to Weld
Sometimes the best way to prevent weld failure is to avoid welding entirely. Stop and recheck the repair plan if any of these apply:
- The OEM procedure says the part is not repairable.
- The steel type is unknown or marked as boron, martensitic, press-hardened, or ultra-high-strength steel with welding limits.
- The required weld method or equipment is not available.
- You cannot access the back side for cleaning, corrosion protection, or inspection when required.
- The panel has severe rust, old collision damage, or previous poor repairs in the weld zone.
- The weld area is too close to fuel vapors, wiring, airbags, modules, or trim that cannot be protected.
Note: Adhesive bonding, rivet bonding, panel replacement, or a different sectioning location may be required on some vehicles. The approved repair method is the one in the OEM procedure.
Continuous Learning: Sharpening Your Welding Skills
Welding skill improves with practice and feedback. Use scrap panels that match real repair thickness. Practice plug welds, butt welds, lap welds, stitch welds, and heat-control techniques before doing them on a vehicle. Cut apart or peel test practice welds so you can see whether the weld fused correctly.
Keep learning from updated OEM procedures, welding standards, equipment manuals, and experienced technicians. Modern auto body repair changes as vehicles use new steel grades, aluminum panels, adhesives, sensors, and joining methods. A technique that worked on an older mild-steel panel may be wrong for a newer structural part.
Document past projects, including welder settings, material thickness, problems found, and final results. Over time, those notes help you spot patterns, reduce repeat defects, and produce more reliable repairs.
Frequently Asked Questions
How do you prevent weld defects in auto body repair?
Prevent weld defects by following the OEM repair procedure, cleaning the weld area to bright metal, using correct fit-up and clamps, setting the welder on test coupons, controlling heat, blocking drafts, and inspecting each weld before grinding or refinishing.
What is the golden rule in welding?
The golden rule is to weld clean, correctly prepared metal with the right procedure. Clean metal, correct settings, proper fit-up, and controlled heat do more for weld strength than trying to hide problems with a larger bead.
What is the best type of welder for auto body repair?
For many steel auto body repairs, a quality MIG welder with solid wire and shielding gas is common. However, the best welder is the one approved by the OEM repair procedure. Some panels require squeeze-type resistance spot welding, while aluminum or specialty repairs may need different equipment.
Why do welds fail after auto body repair?
Welds usually fail because of contamination, low penetration, poor fusion, excessive heat, wrong weld spacing, poor panel fit-up, corrosion, or using a repair method that is not approved for the vehicle. Skipped test welds and weak inspection also raise the risk.
Are welding fumes dangerous?
Yes. Welding fumes can contain metal particles and gases, and some coatings can increase exposure risks. Use ventilation, avoid breathing fumes, wear proper PPE, and follow OSHA, NIOSH, and shop safety requirements. Seek medical advice if you develop breathing problems, fever-like symptoms, chest pain, or neurological symptoms after welding exposure.
Conclusion
Preventing weld failure in auto body repair comes down to discipline. Follow the OEM repair procedure, prepare clean metal, make test welds, control heat, inspect every joint, and restore corrosion protection before final assembly. A weld that looks good is not enough. The repair must be approved, clean, fused, protected, documented, and safe.
Sources
- OSHA 1910.252 — Welding, Cutting, and Brazing General Requirements — supports fire prevention, PPE, ventilation, and hot-work safety guidance.
- CDC/NIOSH Welding Fumes and Manganese — supports welding fume, manganese exposure, and confined-space exposure cautions.
- American Welding Society Standards & Publications — supports welding standards, quality, and procedure-based repair context.
- OEM1Stop — supports the need to locate manufacturer repair information before collision repairs.




