You remove oxidation from automotive welds by matching the cleanup method to the metal, the type of oxide, and the final finish you need. Start with a clean, dry surface, identify whether you are dealing with mild steel rust, stainless heat tint, aluminum oxide, mill scale, or coating residue, then use the least aggressive method that fully restores the weld area. Light surface oxidation may only need degreasing and a dedicated brush, while stainless heat tint may need electrochemical cleaning or pickling, and aluminum oxide may need a stainless wire brush, approved abrasive, laser cleaning, or a qualified chemical process.
Quick Answer
To remove oxidation from automotive welds, degrease the area first, then choose the correct method: abrasive cleaning for light rust or scale, electrochemical cleaning for stainless heat tint, laser cleaning for precise work, and pickling only for stubborn oxides when you can control acids, rinsing, and PPE. Rinse, dry, inspect, and coat the weld afterward.
Key Takeaways
- Always clean oil, dust, paint, and loose scale before you attack the oxide layer.
- Use electrochemical weld cleaning mainly for stainless heat tint and passivation, not as a blanket fix for every metal.
- Aluminum oxide reforms quickly, so clean it shortly before welding, bonding, or coating.
- Pickling can remove stubborn stainless oxides, but it requires strict chemical handling, neutralizing, rinsing, and disposal control.
- Cleaning is not a repair for cracks, porosity, deep pitting, or a structurally weak weld.
At a Glance
| Time Required | 10 to 45 minutes for light oxidation; longer for pickling, coating prep, or multiple welds |
| Difficulty | Easy for brushing and degreasing; moderate to advanced for chemical, laser, or stainless passivation work |
| Tools Needed | Degreaser, clean rags, dedicated stainless or carbon-steel wire brush, Scotch-Brite-style pad, respirator when needed, gloves, eye protection, coating or primer |
| Cost | Low for manual cleaning; higher for electrochemical, pickling, or laser systems |
Warning: Weld cleaning can expose you to metal dust, acid residue, solvent vapor, and welding fume hazards. OSHA notes that welding fumes can contain harmful metal fumes and gases, and chromium-containing stainless work can involve hexavalent chromium exposure. Work with ventilation, eye protection, chemical-resistant gloves, and respiratory protection when the task or product label requires it. Do not use acids, pickling paste, or solvent cleaners near open flame, fresh weld heat, or poor ventilation.
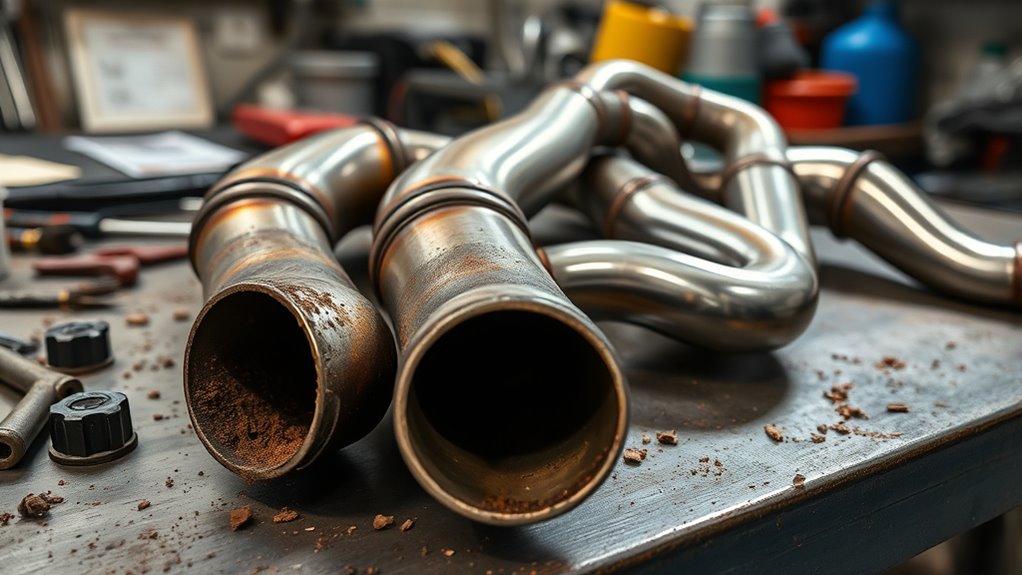
Why Automotive Welds Oxidize
Automotive welds oxidize because welding heat changes the surface of the metal and makes the weld zone react with oxygen, moisture, coatings, and shop contaminants. The result can look different depending on the metal.
- Mild steel: red-orange rust, black scale, or brown staining.
- Stainless steel: straw, blue, purple, gray, or black heat tint near the weld.
- Aluminum: dull white or gray aluminum oxide that can reform quickly after cleaning.
- Galvanized or coated steel: zinc residue, burnt coating, paint ash, and hazardous fume risk.
You create an oxide layer when heat strips protective chemistry from the weld zone. On carbon steel, that oxide can hold moisture and lead to rust. On stainless steel, heavy heat tint can reduce corrosion resistance because the chromium-rich protective surface has been disturbed. On aluminum, oxide forms fast because aluminum naturally reacts with oxygen.
You can often read the weld by its color and texture: a light straw tint on stainless is easier to clean than a dark gray or black oxide; light surface rust is easier to remove than pitting; and powdery aluminum oxide needs a different approach than greasy residue.
Practical weld cleaning helps you interrupt corrosion before it spreads. If you are also working around galvanized parts, remove unsafe coating contamination before hot work because zinc coating can affect weld quality and fume safety.
Clean Automotive Welds Before You Start
Before you strip oxidation, start with a clean weld area so you are not grinding grease, dust, undercoat, wax, or paint residue into the metal. Cleaning first also helps you see whether the problem is only surface oxidation or a deeper weld defect.
Detach rings, clips, trim, rubber seals, and nearby accessories so nothing blocks access or traps residue. Wash the area with a mild alkaline cleaner or an automotive-safe degreaser, then wipe it dry with a clean lint-free rag. Keep your bench and tools clean so fresh contamination does not settle back on the part.
Clean first, remove oxide second, then protect the bare metal. Skipping the final coating step is what lets flash rust return.
- Inspect the weld and base metal.
- Identify the metal: mild steel, stainless steel, aluminum, or coated steel.
- Remove attached accessories that trap residue.
- Degrease before brushing, sanding, pickling, or coating.
- Test any chemical or abrasive method on a hidden spot first.
- Use separate brushes for carbon steel, stainless steel, and aluminum to avoid cross-contamination.
If you plan to use abrasion or an acidic cleaner later, test it on a small, inconspicuous area first. That quick check helps you verify the finish and avoid damage while you prepare to remove oxidation cleanly. For aluminum work, thorough prep is especially important because contamination can contribute to porosity; this also matters when learning how cleaning aluminum affects weld results.
Choose the Right Weld Oxidation Removal Method
The best method depends on the metal, the oxide depth, the final finish, and how much access you have around the joint. Use the least aggressive method that removes the oxide without thinning the metal or gouging the bead.
| Method | Best For | Main Caution |
| Degreasing and hand brushing | Light surface rust, dust, and loose oxide | Use the right brush for the metal and keep oil away from weld prep |
| Abrasive pad, flap disc, or wire wheel | Mild steel rust, mill scale, rough oxidation, accessible seams | Do not overgrind thin body panels or remove too much weld metal |
| Electrochemical weld cleaner or TIG brush | Stainless steel heat tint and passivation work | Use only the approved fluid and verify stainless passivation requirements |
| Laser cleaning | Precise oxide removal near intricate joints, brackets, and production parts | Requires trained operators, laser-rated safety controls, and correct settings |
| Pickling or acid-based cleaner | Stubborn stainless oxide or heat tint when mechanical cleaning is not enough | Chemical burns, fumes, neutralizing, rinsing, and waste disposal |
Note: If the weld has cracks, porosity, undercut, deep pitting, or poor penetration, cleaning will only improve the surface. It will not restore structural strength. Have structural automotive welds inspected or repaired before you coat them.
Remove Weld Oxidation Step by Step
- Let the weld cool fully. Do not apply solvent, water, or chemical cleaner to a hot weld unless the product instructions specifically allow it.
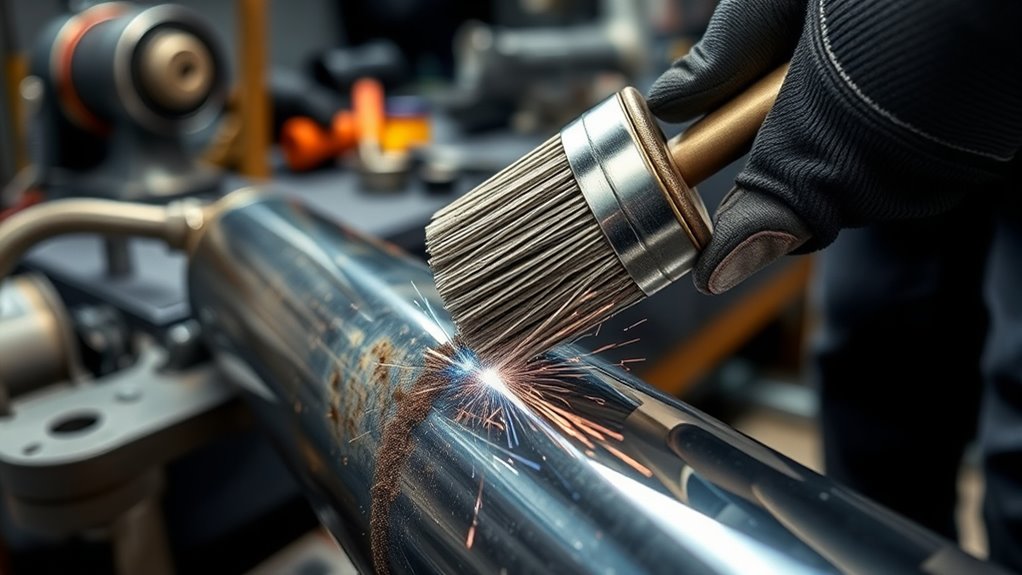
- Degrease the area. Use a compatible cleaner and wipe in one direction with clean rags until the rag stops picking up residue.
- Brush away loose oxide. Use a dedicated brush for the metal. Do not use a carbon-steel brush on stainless or aluminum.
- Choose the removal method. Use abrasion, electrochemical cleaning, laser cleaning, or pickling based on the metal and severity.
- Rinse or wipe away residue. Remove cleaner, dust, acid residue, and abrasive particles.
- Neutralize if acids were used. Follow the product label and never guess with strong chemicals.
- Dry immediately. Use clean compressed air, lint-free cloth, or gentle heat so moisture does not restart corrosion.
- Inspect the weld. Look for remaining dark oxide, pits, cracks, undercut, or contamination.
- Protect the surface. Apply primer, paint, passivation, coating, cavity wax, or dry storage based on the part and metal.
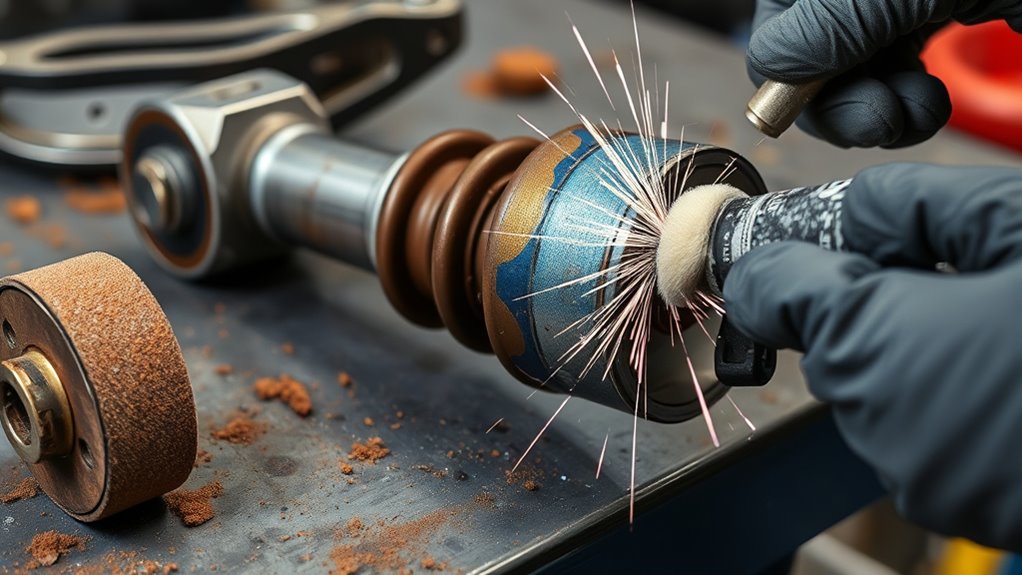
Remove Weld Oxidation With a TIG Brush
Use a TIG brush or electrochemical weld cleaner mainly on stainless steel welds where heat tint needs to be removed without grinding the finish. The process uses current, a conductive brush, and a compatible cleaning fluid to lift heat tint and contamination from the stainless surface.
Do not treat it as a universal cleaner for every automotive metal. For aluminum welds, use aluminum-safe mechanical cleaning, approved chemistry, or controlled laser cleaning. For mild steel rust, abrasion and coating prep are usually more practical.
Cleaning also cannot correct a bad joint design. If the weld was too large, too cold, or poorly shaped, surface cleaning will not fix the underlying joint. That is why weld sizing fundamentals, including the maximum fillet weld size, still matter before the cleanup stage.
TIG Brush Cleaning Steps
To remove oxidation from a stainless weld with a TIG brush, saturate the brush with the proper weld cleaning fluid before making contact with the affected area.
- Confirm the machine, fluid, and brush are approved for stainless weld cleaning.
- Wear chemical-resistant gloves, eye protection, and ventilation as the product label requires.
- Touch the oxidized seam directly.
- Move in tight circular strokes and keep the brush wet.
- Use steady pressure without lingering in one spot.
- Rinse or neutralize residue according to the fluid instructions.
- Dry the zone fully before inspection or coating.
This motion drives the electrochemical cleaning action and lifts contamination without grinding away the base metal. After you clean the weld, flush the surface to clear residue and reveal the restored finish.
Passivation After Cleaning
Once the heat tint is removed from stainless steel, passivation helps restore a stable chromium-rich surface so the weld area resists corrosion better. Some electrochemical weld cleaners combine cleaning and passivation, but the final result still depends on the metal grade, chemistry, process control, and job requirements.
If a customer, inspection plan, or regulated job calls for stainless passivation, verify the process against the required specification, such as ASTM A967/A967M. Do not assume a cleaned surface automatically meets a formal passivation standard.
Pro Tip: Use separate, labeled brushes for stainless, aluminum, and carbon steel. A brush that touched carbon steel can transfer iron to stainless or aluminum and cause new staining later.
Clean Mild Steel, Stainless, and Aluminum Welds
Mild Steel Welds
For mild steel automotive welds, remove grease first, then use a wire brush, abrasive pad, flap disc, or media designed for the finish you need. Keep the tool flat and controlled on thin sheet metal so you do not create low spots or thin the panel.
If rust has started, remove it until you reach solid metal. Light rust can often be cleaned mechanically. Deeper rust or pitting needs closer inspection before coating. After cleaning, apply epoxy primer, weld-through primer where appropriate before welding, paint, undercoat, or cavity protection so bare steel does not flash rust.
Stainless Steel Welds
For stainless steel, focus on removing heat tint without contaminating the surface. A dedicated stainless brush, non-iron abrasive, electrochemical weld cleaner, or controlled pickling process can work. Avoid carbon-steel brushes and dirty abrasives because they can embed iron and cause rust spots.
When stainless contains chromium, hot work and grinding dust deserve extra care. OSHA explains that chromium can be converted to hexavalent chromium during welding and that Cr(VI) fumes are highly toxic. Use ventilation and respiratory protection when work practices and exposure levels require it.
Aluminum Welds
For aluminum, remove oil first, then remove oxide with a clean stainless wire brush or aluminum-safe abrasive shortly before the next welding, bonding, or coating step. Aluminum oxide can form again quickly, so avoid cleaning days ahead of the work.
Do not use a carbon-steel brush on aluminum. Do not leave oily products on the surface before welding, adhesive bonding, primer, or paint. If the aluminum part is critical, follow the welding procedure, coating maker, or repair manual instead of guessing.
When Laser Cleaning Works Best
Laser cleaning works best when you need controlled oxide removal near intricate joints, brackets, seams, or production parts where heavy abrasion would be too rough. It can target the oxide layer with high precision and reduce dust compared with grinding.
Laser cleaning can remove oxide from tight weld areas with less mechanical contact, but it still requires trained operators and laser-safe controls.
You can use laser cleaning when you are preparing parts for welding, adhesive bonding, sealing, or coating and you need a clean, repeatable surface. It is also useful in high-volume production, where repeatability and low contact wear matter.
- Precise oxide removal
- Lower mechanical wear on thin or finished parts
- Clean, targeted surface prep
- Less abrasive dust
- Repeatable results when settings are validated
Laser cleaning is not the same as plasma cutting. Cutting quality depends on arc behavior and factors such as standoff distance, while laser cleaning depends on beam settings, surface response, and operator controls.
Pickling vs. Abrasive Cleaning
When you use pickling, you can remove oxides and impurities uniformly, even on complex stainless weld shapes. The tradeoff is chemical risk. You need compatible product selection, chemical-resistant PPE, ventilation, controlled dwell time, neutralizing, rinsing, and responsible waste handling.
Abrasive cleaning gives you immediate mechanical removal with tools like wire brushes, pads, or sandpaper. It works well for mild steel, accessible welds, and light oxide, but it can leave scratches, create dust, or miss tightly bonded oxides.
Your choice comes down to the metal and the finish: choose pickling or electrochemical cleaning when stainless corrosion resistance and uniform heat tint removal matter; choose abrasion when you need fast removal on carbon steel or a surface that will be primed and painted. In either case, wear the correct protective clothing and follow the cleaner label.
Pickling Benefits and Risks
Pickling removes weld oxidation by applying acidic solutions that dissolve oxides and contaminants. It can leave a uniform surface and support corrosion resistance on stainless steel when the process is done correctly.
- Apply the acid only where the product instructions allow.
- Use full PPE listed on the safety data sheet.
- Control dwell time so the acid does not over-attack the surface.
- Neutralize residues if the product requires it.
- Rinse thoroughly to stop chemical action.
- Dry immediately after rinsing.
- Inspect for a uniform metal appearance.
Pickling is slower than quick mechanical cleaning and can be dangerous if handled casually. For small automotive jobs, an electrochemical stainless cleaner or carefully controlled mechanical cleaning may be safer and more practical.
Abrasive Cleaning Tradeoffs
If you need a less chemical-heavy approach, abrasive cleaning gives you a simpler way to remove weld oxidation. You use mechanical action to strip oxide layers, so it works best on light contamination and accessible welds.
For tightly bonded oxides, pickling or electrochemical cleaning may remove residue more completely. With abrasive cleaning, you avoid acid handling and reduce chemical waste, but you create dust, debris, and possible airborne metal particles.
You also risk scratches and uneven finish if you use too much pressure. On thin body panels, aggressive discs can gouge the metal and make the repair harder to finish. Use light pressure, let the abrasive do the work, and stop as soon as the oxide is gone.
Rinse, Dry, and Inspect After Cleaning
After oxidation removal, your work is not finished. Residue left behind can cause flash rust, coating failure, stainless staining, or poor adhesive bonding.
- After brushing or sanding: vacuum or wipe dust, then degrease if coating instructions require it.
- After electrochemical cleaning: rinse or neutralize according to the cleaner instructions.
- After pickling: neutralize if required, rinse thoroughly, and keep runoff controlled.
- After aluminum cleaning: dry quickly and move to the next welding, bonding, or coating step soon.
Inspect the weld under bright light. Look for remaining dark oxide, orange rust, white powder, pits, cracks, undercut, or pinholes. If the part is structural, inspection matters more than appearance. Do not hide a questionable weld under primer.
Troubleshooting Common Weld Cleaning Problems
- Flash rust appears within minutes: the steel stayed wet too long or humidity is high. Dry faster and apply primer or corrosion protection sooner.
- Black residue remains on stainless: the heat tint may be heavy. Use a stainless-safe electrochemical cleaner or controlled pickling process.
- White oxide returns on aluminum: clean closer to the welding, bonding, or coating step and avoid touching the surface with bare hands.
- Primer or paint lifts later: oil, acid residue, dust, or moisture may have remained. Strip the failed area and repeat cleaning with better rinsing and drying.
- Rust spots appear on stainless: carbon-steel contamination may have been transferred by a brush, grinder, clamp, or dirty bench.
- The weld still looks rough after cleaning: oxidation was not the only issue. Inspect for porosity, undercut, lack of fusion, or excessive grinding marks.
How to Prevent Weld Oxidation
To prevent weld oxidation, limit heat exposure, contamination, and moisture as early as possible. Treat the weld zone like a controlled system, not an afterthought.
- Weld in a clean, dry, well-ventilated area.
- Use the correct shielding gas and flow rate for the process.
- Wipe joints free of oil, dust, paint, and scale.
- Use TIG where precision and lower spatter matter.
- Let stainless cool without overheating the heat-affected zone.
- Clean aluminum oxide shortly before welding or coating.
- Store cleaned parts in a dry space.
- Apply primer, coating, passivation, or cavity protection after cleaning.
These steps reduce the conditions that trigger scale and discoloration. You are not waiting for damage to spread; you are stopping it at the source.
Keep humidity low, limit temperature swings, and handle clean parts with gloves. Also use effective ventilation when cutting, welding, grinding, or cleaning around coatings and fumes.
Frequently Asked Questions
Does WD-40 Remove Oxidation?
WD-40 can loosen light grime, displace moisture, and help with minor surface rust on non-critical parts, but it is not a primary weld-prep cleaner. It leaves an oily film that can interfere with welding, primer, paint, coating, and adhesive bonding. If you use it for temporary cleanup, degrease the surface completely before any repair or finishing step.
What Is the Best Homemade Oxidation Remover?
For non-critical light rust, vinegar or a baking-soda paste may help, but homemade cleaners are not the best choice for automotive weld prep. They can leave residue, add moisture, or affect coating adhesion if not rinsed and dried correctly. For welds, use a metal-safe degreaser, dedicated brush, approved abrasive, or a cleaner made for the metal.
How Do You Reduce Oxidation in Welding?
Reduce oxidation by cleaning the joint before welding, using the correct shielding gas, controlling heat input, avoiding drafts around shielded processes, and keeping oil, paint, moisture, and coating residue away from the weld zone. After welding, remove heat tint or rust early, dry the area, and protect it with passivation, primer, paint, or corrosion coating.
What Dissolves Oxidation?
Acids can dissolve some oxides, but the right chemistry depends on the metal. Stainless pickling products can remove heat tint, while mild acids may help with light rust on steel. Aluminum requires special care because the oxide layer reforms quickly and the wrong chemical can damage the part. Always follow the cleaner label and wear proper PPE.
Can You Paint Over Weld Oxidation?
You should not paint over oxidation. Paint can trap moisture, dust, and oxide under the coating, which leads to poor adhesion and rust creeping under the finish. Clean the weld to sound metal, remove residue, dry it fully, then apply the primer or coating system recommended for that metal.
When Should a Weld Be Repaired Instead of Cleaned?
Repair the weld instead of only cleaning it if you see cracks, deep pitting, undercut, porosity, lack of fusion, loose slag, or corrosion that has reduced metal thickness. On frame, suspension, seat belt, or crash-related parts, treat the weld as structural and get qualified inspection before coating it.
Conclusion
You can keep automotive welds clean by acting early and using the right method for the metal and the oxidation type. Brush or abrade light rust on mild steel, use stainless-safe electrochemical cleaning or controlled pickling for heat tint, choose laser cleaning when precision and repeatability matter, and treat aluminum oxide with aluminum-safe tools and timing. Then rinse, dry, inspect, and protect the weld with the right coating or passivation step. When you prevent oxidation at the source, you preserve strength, improve finish quality, and reduce corrosion problems later.
Sources
- OSHA: Controlling Hazardous Fume and Gases during Welding — welding fume hazards, ventilation, respiratory protection, and Cr(VI) exposure basics
- OSHA: Hexavalent Chromium — chromium exposure risk during stainless and chromium-containing hot work
- ASTM A967/A967M — stainless steel chemical passivation standard reference
- WD-40 Safety Data Sheets — product safety reference for residue, handling, and flammability review before shop use


