To form sheet metal into a smooth curve for rust repair, start by exposing the full damaged area and confirming that the surrounding steel is solid. Make a template, cut the patch slightly oversized, and copy the original panel profile before shaping. Form straight flanges in a brake, then build the curve with a slip roller, rounded form, hammer and dolly, or a shrinker/stretcher suited to the shape.
Work in small steps and test-fit the patch often. A good patch should follow the surrounding contour without heavy hand pressure, rocking, large edge gaps, sharp steps, or visible waves. Final trimming should come only after the curve, flange angle, crown, and body lines are close to their finished positions.
Quick Answer
Measure the rust repair area, make a template, and cut matching sheet metal slightly oversized. Form straight flanges with a brake, then create the curve with a roller, rounded form, hammer and dolly, or shrinker/stretcher. Test-fit after every few passes and trim only when the patch follows the original panel without force.
Key Takeaways
- Cut back to solid steel and copy the panel’s original shape before making the patch.
- Match the original metal thickness instead of choosing a gauge only because it is easy to shape.
- Use a brake for straight folds, a roller or rounded form for simple curves, and localized shrinking or stretching for curved flanges.
- Make light, even passes because aggressive hammering or stretching can thin, mark, or warp the metal.
- Test-fit repeatedly and correct one high, low, tight, or loose area at a time.
- Do not treat a cosmetic patch-panel method as an approved structural repair for a frame, crash structure, suspension mount, seat-belt anchor, or jacking point.
At a Glance
| Time Required | About 1 to 3 hours to shape a small, simple patch after the rust is exposed; compound curves, hidden corrosion, and repeated templates can take much longer |
| Difficulty | Moderate for a simple curve; advanced for compound curves, sharp body lines, or safety-critical structures |
| Tools Needed | Tape measure, straight edge, marker or scribe, cardboard, clamps, shears or cut-off wheel, file, brake or angle-iron bending setup, vise, body hammer, dolly, and a rounded form |
| Optional Tools | Contour gauge, profile strip, slip roller, shrinker/stretcher, shot bag, planishing hammer, or English wheel |
| Best Sheet Metal | Clean automotive mild steel that closely matches the original panel thickness; 18 to 22 gauge is a common range, but direct measurement is more reliable |
| Cost | Low with basic hand tools and scrap for practice; moderate or higher if you need a brake, slip roller, shrinker/stretcher, or English wheel |
Warning: Stop before cutting if the corrosion affects a frame rail, suspension or steering mount, seat-belt anchor, jacking point, subframe attachment, battery enclosure, reinforced rocker, or another crash-related structure. Use the vehicle maker’s repair procedure or have a qualified collision-repair professional inspect the damage.
Inspect the Repair Before Cutting
Remove enough paint, filler, undercoating, and seam sealer to see the true boundary of the corrosion. Rust often extends farther than the visible bubble or hole, so do not design the patch around paint that is already lifting from weak metal.
Inspect both sides of the panel whenever access allows. Look behind it for wiring, sound insulation, carpet, trim, fuel or brake lines, electronic modules, adhesive, foam, and factory reinforcement. These parts can affect where you cut, clamp, grind, or later weld.
Decide whether a handmade patch is the right repair. A replacement panel may be faster and more accurate when the damaged area includes a complex stamping, long body line, folded hem, reinforcement, mounting point, or large section of thin corroded steel.
Note: Complete the shaping work before exposing nearby flammable materials to sparks or welding heat. Vehicle cavities can hide seam sealer, insulation, wax, leaves, and old repairs that may ignite.
Measure the Rust Repair Area
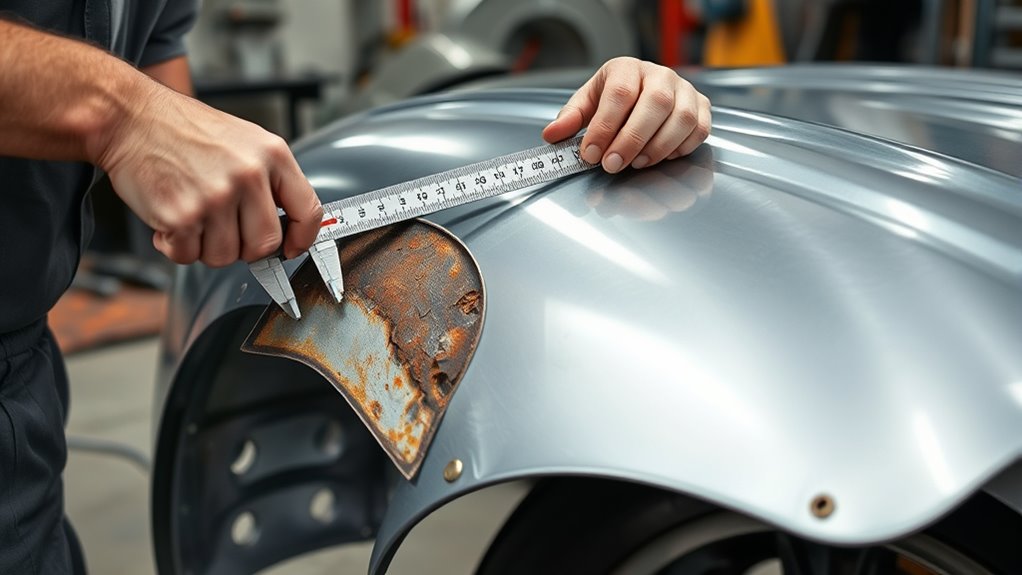
Start by measuring the rusted area from several directions. Corrosion rarely leaves straight, reliable edges, so first identify the clean steel that will remain after cutting. Record the opening’s height and width, plus its distance from nearby body lines, seams, holes, trim edges, and panel gaps.
Do not measure only the visible hole. Probe the surrounding area gently and mark metal that flexes, flakes, perforates, or separates from an adjoining layer. The finished patch needs to meet sound steel rather than cover a weak rusted border.
Use a straight edge, ruler, tape measure, and marker or scribe to record the basic shape. If the panel has a flange, crown, flare, step, or body line, mark where that feature begins and ends. Take reference measurements before removing the damaged section because cutting it out may remove useful landmarks.
A contour gauge, flexible profile strip, or narrow piece of soft metal can help copy the panel’s cross-section. Check the profile at several points and label each one so you know where it belongs. When possible, compare the damaged side with the matching undamaged panel on the other side of the vehicle.
Clean the measurement and weld area so rust flakes, grease, paint, undercoating, and loose scale do not hide the true surface. For additional preparation guidance, see how to clean mild steel for welding.
Note: If the repair is close to a door gap, wheel arch, rocker edge, body line, trim hole, or mounting point, take several reference measurements before cutting. These landmarks help you position the patch correctly later.
Choose the Right Sheet Metal Gauge
For many automotive outer-panel repairs, mild steel in the broad 18 to 22 gauge range is workable. However, the best choice is metal that closely matches the original panel’s actual thickness, strength, and coating.
Measure a clean edge with a micrometer or suitable caliper if possible. Paint, rust, zinc, and folded seams can distort the reading, so measure bare single-layer metal rather than a coated or doubled edge. Remember that gauge numbers do not represent the same thickness across every material system, so do not use a steel gauge assumption for aluminum.
A patch that is much thinner than the original may distort or burn through more easily during welding. A patch that is much thicker can be difficult to form and may sit proud of the surrounding panel.
Test a scrap from the same sheet before cutting the final blank. Bend it, hammer it over the intended form, and make practice weld tacks if the repair will be welded. Scrap testing reveals springback, tool marks, cracking, burn-through risk, and the amount of force needed.
Make a Template Before Cutting
A template reduces wasted sheet metal and records the orientation of the repair. Cardboard, poster board, cereal-box card, masking tape, or stiff paper can work for a basic patch.
Hold the template against the repair area and trim it until it follows the planned opening and nearby features. Mark the top, front, outside face, bend lines, flange direction, body lines, and reference holes. If the panel has a simple curve, allow the template to follow that curve instead of flattening it on the bench.
For a compound curve, make small relief cuts in the paper so it can lie against the panel. The overlaps and openings show where a flat sheet will need localized shrinking, stretching, or crown forming. A masking-tape shape pattern can also capture a more complex surface.
Once the template fits, transfer it to the sheet metal and trace around it. Add a small trimming allowance outside the final line. The exact allowance depends on the patch size and forming method, but leaving a little extra is safer than cutting the blank to its finished size before the edges move during shaping.
Pro Tip: Write “outside,” “inside,” “top,” and “front” on the template and the metal blank before flipping either one. This simple step helps prevent a mirrored patch.
Choose the Right Forming Method
“Rolling sheet metal” can describe several different operations. Pick the method that matches the shape instead of forcing one tool to do every part of the patch.
| Shape Needed | Useful Method | Main Limitation |
| Straight flange or crisp fold | Sheet metal brake or clamped angle iron | Does not create a smooth crown by itself |
| Long, even cylindrical curve | Slip roller or gradual bending over a pipe | Does not create most compound curves |
| Curved flange around an opening | Brake followed by a shrinker or stretcher | Works mainly on the flange held in the jaws |
| Shallow crown or compound surface | Shot bag and hammer, dolly, or English wheel | Requires practice and frequent profile checks |
| Small local correction | Body hammer and suitable dolly or rounded form | Heavy blows can create dents, creases, and stretched spots |
Cut the Sheet Metal to Size
Transfer the template and reference marks to the sheet metal, then check the orientation one more time. If a small repair blank happens to measure 5.5 inches in one direction, treat that as a project-specific measurement rather than a standard dimension.
Clamp the sheet securely and cut outside the final line with aviation snips, electric shears, a nibbler, or an angle grinder with a suitable cut-off wheel. Leave enough excess material for the edges to move during bending, rolling, shrinking, or stretching.
Wear safety glasses and appropriate face protection for flying-particle hazards. Keep the grinder guard installed, confirm that the wheel is undamaged and rated for the tool speed, direct sparks away from people and flammable materials, and position the work so the cut cannot close and pinch the wheel. OSHA addresses eye and face protection and abrasive-wheel guarding in its eye and face protection and abrasive-wheel standards.
Uncoated mild steel is usually the simplest patch material to prepare for welding. If the sheet is galvanized, remove the coating from the weld zone using a controlled method and manage the resulting dust and fumes. See this guide to removing zinc coating from galvanized steel.
Warning: Welding or heating zinc-bearing metal can generate zinc oxide fumes. Use effective ventilation or local exhaust suitable for the work, follow applicable respiratory-protection requirements, and avoid placing your head in the fume plume. A basic nuisance-dust mask is not a substitute for controlling welding fumes.
Measure the Required Length
Use the template and panel references to mark the required blank length. A dimension such as 5.5 inches may be correct for one repair, but the finished blank must follow the actual opening, bend allowance, flange width, and trimming allowance for your panel.
- Verify the opening and reference dimensions on the vehicle.
- Position the template on the sheet in the correct orientation.
- Mark the cut line, bend lines, and final-edge reference separately.
- Check the measurements before cutting.
After cutting, remove burrs and sharp corners with a file, deburring tool, or light abrasive pass. Test the flat blank against the opening before forming so a layout error does not become harder to correct later.
Mark Accurate Cut Lines
Use a fine marker or scribe and a straight edge for crisp lines. Label the final edge and rough-cut edge differently so you do not accidentally cut away the trimming allowance.
For curved boundaries, transfer the template carefully or mark several measured points and connect them with a flexible ruler. Confirm that both ends of each bend or body-line mark land at the correct reference points.
Angle iron can serve as a guide for a straight layout or a simple bending setup, but do not let a guide interfere with the grinder guard or place your hand in the cutting path.
Cut With Safety Gear
Before cutting, inspect the tool, cord or battery, guard, wheel, and work clamp. Wear safety glasses under a face shield when the task creates flying fragments, plus hearing protection and clothing that covers exposed skin.
- Mark the rough-cut line clearly.
- Secure the sheet so it cannot vibrate or shift.
- Keep your body out of the wheel’s plane.
- Use light, controlled pressure and let the wheel cut.
- Allow the wheel to stop before setting the tool down.
Handle the new edge carefully. Sheet metal can remain sharp even when it does not have an obvious burr.
Clean and Deburr the Patch
Deburr every edge before shaping. Burrs can cut gloves, scratch forms, catch in shrinker/stretcher jaws, and prevent the patch from sitting flat against a brake or template.
Use a file, deburring tool, or light flap-disc pass. Avoid holding the grinder in one spot because concentrated heat can distort thin metal. Round only dangerous corners and sharp burrs; do not remove the trimming allowance or alter an edge that serves as a measurement reference.
Remove oil, loose marker residue, paint, primer, zinc, rust, seam sealer, and undercoating from areas that will later be welded. Clean both sides of the patch and the adjoining vehicle panel. Let any approved cleaner evaporate fully before sparks, heat, or welding are introduced.
Bend the Metal in a Brake
Use a brake when the patch needs a straight flange, return, step, or crisp body line. Mark the bend line on both sides and align it with the brake’s clamping edge. A 3/4-inch flange may suit a small repair, but flange width must come from the original panel and the tool’s capacity.
Check which side of the line becomes the inside of the bend. Material thickness and the brake’s nose radius affect where the finished flange lands, so test the setup on scrap when alignment is critical.
Clamp the panel evenly and raise the leaf in a smooth motion. Thin sheet metal springs back slightly after release, so the brake may need to move a little past the target angle. Approach the final angle gradually instead of making a severe correction after the bend is complete.
Mark the Bend Line
Measure the flange on the original panel or template and mark the bend line with a ruler and fine scribe or marker. Add short witness marks at both ends so you can see whether the blank remains square in the brake.
- Confirm which face will be outside the finished patch.
- Mark the bend direction and target angle.
- Align the witness marks with the brake edge.
- Check that the remaining panel will clear the brake during movement.
Practice on material of the same thickness when the flange must meet a body line, hem, or adjoining panel precisely.
Set Brake Clamps
Tighten the brake clamps evenly so the sheet cannot creep during the bend. Use enough pressure to hold the work without deeply marking or crushing it.
Check the setup from both ends. A line that is aligned at one end but offset at the other produces a tapered flange and can twist the patch during later shaping.
If you are using angle iron and a vise instead of a brake, clamp the full bend line firmly and use a wood block or suitable hammer to fold the exposed flange in stages. Keep the clamping faces clean so trapped debris does not dent the patch.
Form a Clean Bend
Move the brake handle steadily and watch both ends of the bend. Stop if the sheet slips, twists, or begins folding outside the intended line.
- Begin the bend with even pressure.
- Check that the bend develops along the full line.
- Approach the target angle in stages.
- Release the panel and measure springback.
- Make a small correction only if needed.
After bending, inspect the flange for cracks, clamp marks, waviness, and a changing angle. Correct minor problems before using the flange in a shrinker or stretcher.
Use a Slip Roller for Long, Even Curves
A slip roller is useful when the patch needs a smooth curve in one direction, similar to part of a cylinder. It works well for long, even sections but does not automatically create the compound crown found on many quarter panels and wheel arches.
Set a light initial pressure and feed the sheet squarely through the rolls. Make several passes, increasing pressure in small amounts. Alternate the feed direction when the machine and workpiece allow so the curve develops evenly from end to end.
Leave extra length at the leading and trailing edges because many small rollers cannot curve the first and last portion as tightly as the center. Trim those flatter ends only after the target radius is close.
If the panel needs a flange that follows the new curve, form and adjust that flange according to the tool sequence that best preserves access. On some patches it is easier to create the main roll first; on others, a flange must be bent and then shrunk or stretched.
Use a Hammer and Vise to Form Curves
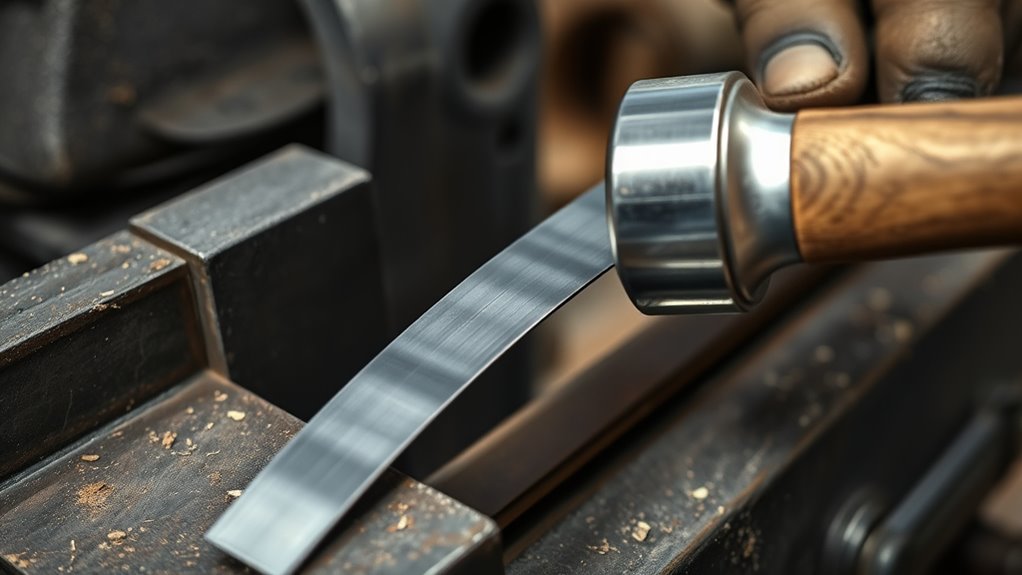
For a small patch or a simple edge curve, secure the sheet in a vise and move it a short distance after each series of light blows. Use soft jaws, clean angle iron, wood, or another suitable backing surface when you need to avoid deep vise marks.
Start with gentle, overlapping strikes instead of trying to form the full radius at one point. Move the panel repeatedly so the bend develops over a broad area. A body hammer gives better control than a heavy general-purpose hammer.
A smooth curve usually comes from many light, overlapping adjustments, not one hard bend.
Use a dolly or rounded backing form that is close to the desired profile. The backing shape controls where the metal can move and helps prevent a sharp crease.
If the curve tightens near one edge, identify whether the flange needs shortening, lengthening, or whether the panel face needs a small amount of crown. Do not keep striking an edge simply because the patch has not moved enough. Recheck the profile and choose the correction that matches the error.
Keep your hands away from pinch points between the work, vise, hammer, and dolly. Use eye protection and hearing protection, and handle the sharp edges carefully. Clean metal before final fit-up and welding; additional process guidance is available in these flux-core welding tips for beginners.
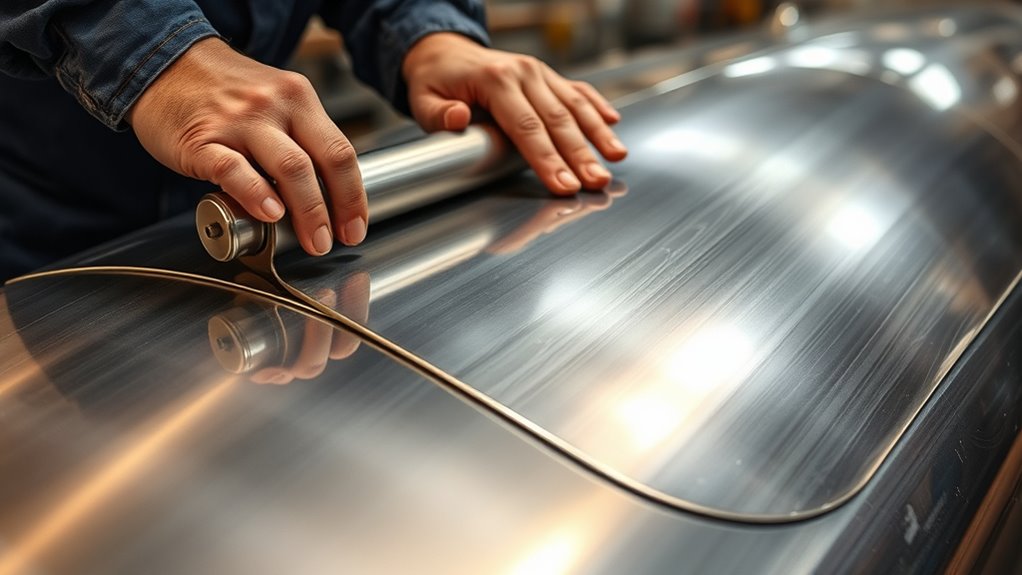
Use a Rounded Form for Smoother Curves
A pipe, dolly, wooden buck, shot bag, trailer-hitch ball, or other strong rounded object can help produce a smoother curve than bending against a sharp vise jaw. Choose a form with a radius close to the finished panel, allowing for springback.
Place the sheet over the form and work from one side toward the other with light hand pressure or controlled hammer blows. Overlap each pass so the shape changes gradually rather than developing a series of flats.
Use a larger-radius form for a shallow curve and a smaller form for a tighter local transition. Check the panel against your contour gauge or profile strip after each pass.
If the metal ripples along an edge, the edge may be too long for the curve. If the center becomes loose and pops in and out, the patch may have uneven stretch or an unsupported low-crown area. Stop forming and diagnose the cause before adding more force.
Pro Tip: Approach the final curve slowly. Ten light passes are easier to correct than one heavy pass that leaves a crease or a deeply stretched spot.
Form Compound Curves and Panel Crown
A simple curve bends in one main direction. A compound curve bends in two directions, such as a wheel arch that also crowns outward across the body. A slip roller can create the first type, but it cannot complete most compound shapes by itself.
For a shallow crown, support the patch on a shot bag or shaped wooden block and use light, evenly spaced hammer blows in the area that needs stretching. Smooth the marks with a dolly, planishing hammer, or English wheel when available.
Work from a marked pattern rather than randomly hammering the surface. Keep the blows light near final shape because stretching is easier to add than remove. Check the panel from several directions and compare it with the original profile frequently.
Do not confuse a low spot with metal that needs more stretching. The patch may simply be held at the wrong angle, have an incorrect flange, or be touching at a high spot elsewhere.
Stretch and Shrink the Metal to Add Radius
A common hand-operated shrinker/stretcher works on the flange or edge placed between its jaws. The shrinker shortens that worked area, while the stretcher lengthens it. This changes the arc of the flange and pulls the connected panel with it.
Many curved-and-angled patches begin with a straight flange formed in a brake. The flange is then stretched or shrunk in small steps to match the opening. Manufacturer guidance for curved patch panels uses this brake-first sequence, although the exact order can vary with the part and tool access.
Insert a consistent depth of flange into the jaws and make light strokes. Move the work a small distance after each stroke so the forming marks overlap rather than concentrating in one spot.
- Mark the areas that need more or less arc.
- Confirm whether that flange section must become longer or shorter.
- Make one or two light strokes.
- Move the panel and repeat over a wider area.
- Test-fit before making a stronger correction.
Inspect both faces for jaw marks, cracks, edge waviness, and local thinning. Stay within the tool manufacturer’s material and flange-capacity limits. For additional cutting and preparation options, see this overview of metal cutting methods.
When to Stretch the Metal
Stretch the flange when it is too short to follow the required outside arc. Lengthening that flange opens the curve and can help a wheel-arch or lower-quarter patch follow a wider radius.
Work over a broad area and use light strokes. Excessive stretching in one location can create a wavy edge, thin the flange, leave deep jaw marks, or pull the main panel out of shape.
After every few strokes, hold the patch against the vehicle and check the center and both ends. Stop when the flange follows the reference curve without being forced.
When to Shrink the Metal
Shrink the flange when it is too long for the required inside curve and begins to ripple or stand away from the form. Shortening the flange tightens the arc around a rocker end, wheel opening, trunk corner, or similar return.
A shrinker gives repeatable control, while careful tuck shrinking with a hammer and dolly can work on small sections. Keep individual tucks or jaw strokes small and distribute them across the affected zone.
If the flange becomes lumpy, stop and planish it lightly against an appropriate dolly before making more shrink passes. Do not grind deep forming marks out of already thin metal.
Account for Springback
Sheet metal tends to relax slightly after it leaves a brake, roller, vise, or form. This springback can make a bend open up or a curve flatten after pressure is released.
Test the material on scrap to learn how much correction it needs. Increase the bend or roller pressure in small amounts rather than sharply overforming the finished patch.
Springback varies with material, thickness, temper, bend radius, and forming method. A setting that works on mild steel may not produce the same result on aluminum or high-strength automotive steel.
Test-Fit the Patch on the Car
Position the curved patch against the rust repair area of the BMW E30, or the corresponding panel on another vehicle, and secure it temporarily with suitable clamps or magnets. Do not use magnetic holding near sensitive areas without considering the welding process and access needs.
Check the patch in a consistent order:
- Confirm the top, front, and outside orientation.
- Align body lines, holes, seams, and panel edges.
- Check whether the center or ends touch first.
- Look for rocking, twisting, high corners, and unsupported low areas.
- Inspect the edge gap around the full opening.
- View reflected light across the panel to reveal waves.
If the patch fits in the center but stands away at both ends, it may need more overall curvature. If the ends fit but the center stands high, it may have too much curve. If one corner rises while the opposite corner drops, the patch may be twisted or the flange angle may vary.
Make one small correction at a time and mark what changed. If plasma cutting is used for a larger blank, select settings appropriate for the material and control heat input; this plasma cutting speed chart provides additional process guidance.
Trim the Patch for a Tight Gap
Trim the patch only after the main curve, crown, flange, and body lines are close. Remove a narrow amount, deburr the edge, and test-fit again. A series of controlled trims is safer than trying to create the finished edge in one cut.
For a butt-welded patch, aim for an even joint suited to the metal thickness and chosen welding process. Do not copy a universal gap number without testing it on scrap and confirming the welder setup. Large or changing gaps increase the risk of burn-through and uneven distortion.
For an overlap, flange, plug-weld, or adhesive repair, follow the vehicle maker’s or product manufacturer’s joint-design requirements. An overlap that is not sealed and protected correctly can trap moisture.
Mark high-contact areas with a fine marker. Trim or reshape only the area that touches first. Protect the sections that already fit so the patch does not become too small.
Fine-Tune the Curve for Weld-In Fit
Fine-tune the patch by comparing its length, cross-section, flange angle, crown, and edge gap with the surrounding panel. If a flange is required, use the original measurement rather than treating a 3/4-inch flange as a universal standard.
Correct the largest shape error first. Trimming an edge will not fix a patch with the wrong crown, and more stretching will not fix a bend line placed in the wrong location.
- Verify the patch position against fixed vehicle references.
- Mark high spots, low spots, and sections with the wrong arc.
- Choose the smallest forming area that can correct the error.
- Make a light adjustment.
- Deburr if needed and test-fit again.
Use the vise and hammer for controlled local bends, a rounded form for a smooth simple curve, and the shrinker/stretcher only where a flange needs to become shorter or longer. Watch for tool marks and thinning as the shape approaches completion.
When the patch sits correctly, clean the weld zone and prepare the welding equipment on matching scrap. A steady sequence of spaced tacks and controlled heat helps reduce warping on thin body panels. See this guide to welding body panels with flux core for process-specific considerations.
Troubleshoot Sheet Metal Fit Problems
| Problem | Likely Cause | Correction |
| Patch rocks on the opening | One high area, uneven crown, or twist | Mark the contact point and correct that area before trimming elsewhere |
| Flange edge is wavy | Too much length, uneven stretching, or concentrated jaw strokes | Planish lightly and apply small distributed shrink corrections if the geometry requires them |
| Patch fits at center but not ends | Not enough overall curve | Add a small amount of curve over a broad area |
| Ends fit but center stands high | Too much curve or crown | Relax the curve gradually over a larger form; do not flatten one small point |
| Panel oil-cans | Uneven stretch, insufficient crown, or unsupported geometry | Recheck the profile and flange before adding localized stretch or shrink |
| Bend lands in the wrong place | Incorrect layout, bend radius, or brake alignment | Remake the blank when correction would badly thin, crease, or distort the panel |
Common Sheet Metal Curving Mistakes
Trying to force the entire curve at once is one of the most common mistakes. Heavy blows, excessive roller pressure, or strong shrinker/stretcher strokes can create creases, deep marks, thin spots, and local distortion.
Skipping test-fits is another problem. A patch may look correct on the bench but miss the vehicle’s body line, flange angle, or compound crown. Check it against the vehicle before every major correction.
Do not trim the patch to final size while it is still flat. Bending, shrinking, and stretching can move the edges and alter the developed length.
Avoid grinding away a high area before confirming whether the problem is excess material or incorrect shape. Removing thickness may hide the symptom while weakening the patch.
Do not overheat thin metal while grinding or welding. Use light abrasive pressure, move around the panel, and let the metal cool when heat begins affecting the shape.
Finally, do not keep repairing a failed blank indefinitely. Starting again is often safer and faster when the bend line is misplaced, the metal has cracked, the flange is heavily thinned, or the patch has multiple conflicting distortions.
How to Know the Patch Is Ready to Weld
The patch is ready for final weld preparation when it sits in its intended position without heavy hand pressure. The surrounding contour should flow through the repair, and any body line, edge, flange, or hole should align with its reference.
Check the following before welding:
- The patch reaches clean, solid steel around the full repair.
- The curve and crown match when viewed from several angles.
- The patch does not rock, twist, or spring away from the panel.
- The joint gap is even and suitable for the chosen welding process.
- The flange angle and depth match the original construction.
- Both sides of the weld zone are free from rust, paint, oil, zinc, seam sealer, and undercoating.
- Wiring, trim, insulation, fuel lines, brake lines, modules, and flammable materials are protected or removed.
- The vehicle maker’s battery, electronics, and welding procedures have been followed.
- A fire extinguisher and post-weld fire watch are available.
Run a gloved hand gently across the transition and inspect reflected light along the panel. A sharp step, raised corner, sudden reflection break, or loose section needs correction before welding.
For thin automotive steel, clean base material and distributed tack or stitch welding help limit contamination and heat buildup. Miller’s automotive MIG repair guidance emphasizes clean material and controlling heat on body panels.
Frequently Asked Questions
What gauge sheet metal works best for automotive curves?
Many automotive patch panels fall within the general 18 to 22 gauge mild-steel range, but you should measure and match the original panel whenever possible. A patch that is much thinner can distort or burn through more easily, while thicker metal can be harder to shape and finish flush.
Which safety gear is essential when forming sheet metal?
Wear safety glasses, suitable hand protection for sharp sheet, hearing protection, and a face shield when cutting or grinding creates flying particles. Keep abrasive-wheel guards installed, clamp the work securely, and avoid loose clothing or jewelry around powered equipment.
Can aluminum sheet metal be rolled the same way?
Aluminum can be rolled and formed, but its alloy and temper strongly affect springback, cracking, and work hardening. Use clean tools, gentler passes, suitable bend radii, and scrap tests. Do not assume a steel gauge number or steel forming setup applies directly to aluminum.
How do you avoid warping during curve forming?
Use light, overlapping passes and support the sheet with a form that matches the intended profile. Move the work frequently, avoid concentrating force or grinding heat in one spot, and compare the patch with a template or contour gauge after each adjustment.
What tools help create repeatable curved sections?
A slip roller helps with long cylindrical curves, a brake creates repeatable flanges, and a shrinker/stretcher changes the length of a worked flange. Contour gauges, profile strips, dollies, rounded forms, wooden bucks, and an English wheel help reproduce and check more complex shapes.
Can you curve sheet metal without a roller?
Yes. Small patches can be curved over a pipe, dolly, wooden buck, shot bag, or other rounded form. A vise and body hammer can make controlled local bends, while a shrinker/stretcher can adjust a curved flange. Work in light passes and check the profile frequently.
Should the patch be cut to exact size before shaping?
No. Leave a small trimming allowance because bending, rolling, shrinking, and stretching can move the edges. Form the main curve and flange first, then trim the perimeter in small steps while repeatedly checking the fit.
Do I need a slip roller for a small rust patch?
Not always. A slip roller is convenient for a long, even curve in one direction. A small patch can often be shaped over a pipe or rounded form. Compound curves usually require additional crown forming, shrinking, stretching, or hammer-and-dolly work.
How tight should the gap be around a weld-in patch?
The gap should be even and appropriate for the metal thickness, joint design, welding process, wire or filler size, and operator technique. Avoid large changing gaps. Test the intended fit and welder settings on matching scrap before welding the vehicle panel.
Conclusion
To roll or form sheet metal for a rust repair, begin with a complete inspection, accurate references, matching material, and a slightly oversized template. Use a brake for straight flanges, a slip roller or rounded form for a simple curve, and controlled shrinking, stretching, or crown forming for more complex contours.
Make small adjustments and test-fit after each stage. The patch is ready only when it follows the surrounding panel without force, aligns with its reference points, and has a clean, consistent joint. Careful shaping before welding reduces gap filling, grinding, heat distortion, and unnecessary body filler.
Sources
- OSHA 1910.133: Eye and Face Protection — supports protection from flying-particle and eye hazards.
- OSHA 1910.215: Abrasive Wheel Machinery — supports abrasive-wheel guarding and safe equipment requirements.
- OSHA 1910.252: Welding, Cutting, and Brazing — supports ventilation requirements for welding and cutting zinc-bearing materials.
- NIOSH Pocket Guide: Zinc Oxide — supports the health warning for zinc oxide fumes.
- Miller: MIG Basics for Automotive Welding Repair — supports clean base metal and heat-control guidance for thin automotive panels.
- Eastwood: How to Make a Curved and Angled Patch Panel — demonstrates brake forming followed by controlled flange shrinking or stretching.


