
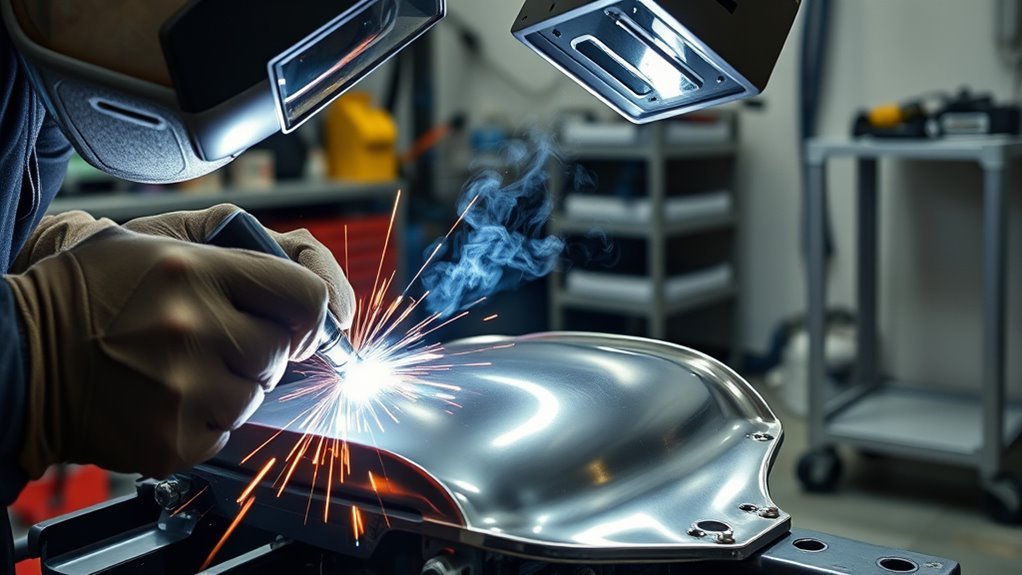
To TIG weld automotive parts, start by identifying the metal, cleaning it to bare material, choosing the right tungsten and filler rod, and setting your machine for controlled heat. TIG welding gives you clean, precise welds on thin panels, brackets, stainless parts, and aluminum components, but it also demands good fit-up, steady torch control, safe ventilation, and patience.
Quick Answer
To TIG weld automotive parts, clean the metal to bare material, clamp it tightly, use DCEN for steel or stainless and AC for most aluminum, set argon flow around 15-20 CFH, hold a short arc, add matching filler, and use short welds or pulse to control heat and warping.
Key Takeaways
- Use an AC/DC TIG welder if you plan to weld both steel and aluminum automotive parts.
- Cleanliness matters more with TIG than with most welding processes. Remove paint, oil, rust, zinc coating, oxide, and solvent residue before welding.
- For most modern TIG setups, 2% lanthanated or ceriated tungsten is a safer general-purpose starting point than thoriated tungsten.
- Thin panels need short tacks, skip-welding, pulse control, and cooling pauses to prevent warping.
- Do not TIG weld near fuel, airbags, batteries, high-voltage EV parts, or structural crash components unless you are following the correct OEM repair procedure.
At a Glance
| Time Required | 30 minutes to 2 hours for small parts after cleaning and setup; longer for panels or aluminum parts |
| Difficulty | Intermediate to advanced, especially on thin sheet metal and aluminum |
| Tools Needed | AC/DC TIG welder, argon cylinder, regulator/flowmeter, torch, tungsten, filler rods, clamps, stainless brush, acetone, helmet, gloves, jacket, fire extinguisher, and ventilation |
| Cost | Low if you already own TIG equipment; higher if you need argon, filler rods, tungsten, PPE, and cleaning supplies |
Warning: Automotive welding can start fires, damage electronics, release toxic fumes, and weaken safety-critical parts if done incorrectly. Remove the part from the vehicle when possible, keep combustibles away, protect wiring and trim, and follow the vehicle maker’s repair procedure for structural, fuel-system, airbag, hybrid, or EV components.
Selecting the Right Equipment for TIG Welding Automotive Parts
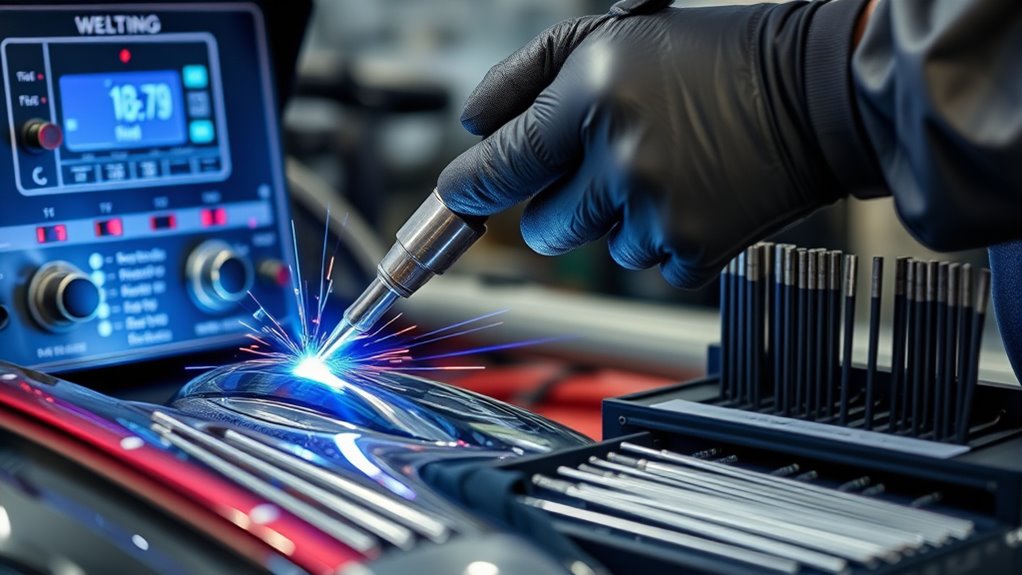
For automotive work, choose a TIG welder based on the metals you expect to weld. A DC TIG machine can handle mild steel, stainless steel, and many chromoly parts. An AC/DC TIG welder is the better choice if you also plan to weld aluminum parts such as brackets, intake parts, intercooler piping, or small fabrication pieces.
Use a constant-current TIG power source, a foot pedal or fingertip amperage control, a flowmeter, and a clean argon supply. Pure argon is the standard shielding gas for most automotive TIG welding. A typical starting flow is 15-20 CFH, but cup size, gas lens use, drafts, and joint shape can change what works best.
Your helmet and PPE matter just as much as the welder. For TIG welding, use a welding helmet that meets ANSI Z87.1 protection requirements and choose a shade that matches amperage. OSHA lists minimum protective shades for gas tungsten arc welding as shade 8 under 150 amps and shade 10 from 150-500 amps in its eye and face protection table.
Note: An auto-darkening helmet still needs the right shade range. Start darker, then lighten only enough to see the puddle clearly without going below the recommended protection level.
Products Worth Considering

POWERFUL 7-IN-1 TIG WELDER AC/DC: The Welder is capable of welding with DC TIG / DC Pulse TIG / AC TIG / AC Pulse TIG / AC Pulse TIG Square / AC Pulse TIG Triangular / STICK /SPOT TIG Methods. AC TIG is used in finesse welding various aluminum alloys, magnesium alloys, and other non-ferrous metals. DC TIG provides low-temperature control. You need precise welding for various types of steel: stainless steel, carbon steel, copper.

【Born for Aluminum Welding】AC TIG mode is perfect for dealing with Aluminum and Aluminium alloy.
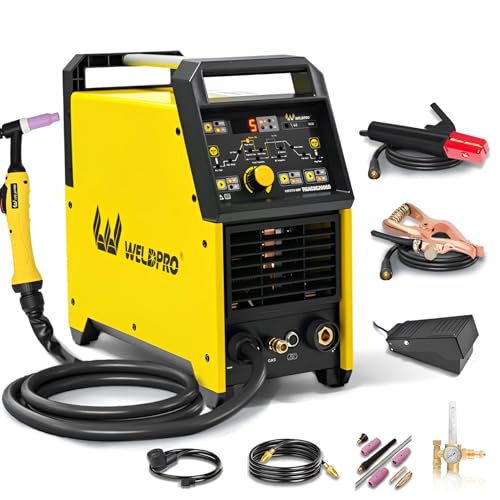
200A AC/DC TIG WELDER & 5 IN 1 MULTIPROCESS WELDING MACHINE: This versatile high frequency welder combines 5 welding modes in one portable design: High-Frequency AC TIG, DC TIG, AC Pulse TIG, DC Pulse TIG, and Stick MMA welding. Perfect for welders of all skill levels, from hobbyists doing home DIY projects to professional fabricators, this ac dc tig stick welder handles all your welding needs with consistent, reliable performance
Safety Check Before You Weld on a Vehicle
Before you strike an arc, treat TIG welding as hot work. Move the part to a welding bench whenever you can. If the part must stay on the vehicle, inspect both sides of the weld area and remove or shield anything that can burn, melt, or carry heat.
- Remove flammables: Keep fuel, brake cleaner, upholstery, insulation, paper, rags, plastic trim, and sound deadener away from the arc and sparks.
- Protect nearby parts: Use welding blankets, copper backing, or steel shields around wiring, glass, painted surfaces, hoses, and rubber parts.
- Control fumes: Use local exhaust or strong ventilation, especially around stainless, coated, painted, or galvanized metal.
- Watch for hidden hazards: Check the back side of panels, boxed sections, rocker areas, floor pans, and brackets before welding.
- Follow OEM procedures: Do not weld structural crash parts, airbag-adjacent areas, fuel tanks, battery trays, hybrid systems, or EV high-voltage parts without the correct repair instructions.
- Keep fire equipment ready: Have a suitable extinguisher nearby and keep watching the area after welding because trim, seam sealer, and sound deadener can smolder.
Be extra careful with stainless steel and chromium-containing alloys. Welding or grinding these materials can create hazardous fumes, including hexavalent chromium. Coated or galvanized steel can also release harmful fumes, so remove the coating well beyond the weld zone and use ventilation and respiratory protection when the exposure cannot be controlled otherwise.
Choose the Right Tungsten, Filler, and Gas
For most modern automotive TIG work, 2% lanthanated tungsten is a reliable all-around choice. It works well on DC steel and stainless and can also work on many inverter AC aluminum setups. Ceriated tungsten is another good choice for lower-amperage thin work. Zirconiated tungsten is useful for AC aluminum when you want a stable rounded tip.
Thoriated tungsten can weld steel well, but it contains thorium. The main concern is dust from grinding the electrode, so it should not be treated as the casual default for a home or small shop. If you use thoriated tungsten, grind it with dust control, avoid breathing dust, and follow local disposal rules.
Filler rod should match the base metal and the job:
- Mild steel: ER70S-2 or ER70S-6 is common for clean automotive steel fabrication.
- Stainless steel: Match the stainless grade when possible, such as ER308L for many 304 stainless parts.
- Aluminum: ER4043 is easy to run on many cast and 6xxx-series aluminum parts; ER5356 is stronger in some applications but is not right for every alloy or high-heat service.
- Chromoly: Use the filler and preheat guidance required by the part, tube spec, or sanctioning body. Do not guess on cages, suspension links, or structural racing parts.
Pro Tip: Keep separate stainless brushes for steel, stainless, and aluminum. A brush used on steel can contaminate aluminum or stainless and make TIG welds dirty.
Products Worth Considering
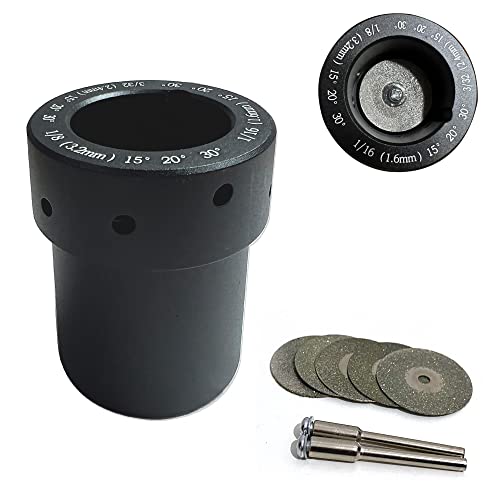
【ANGLE OFFSET DESIGN】: Heavy-duty Sharpener Multi-Angle Off is made of aluminum, anti-corrosion,anti-rust, the surface is treated with black matte, smooth and durable. The size of each hole with angular offset compensation to ensure that the grinding surface of the tungsten needle is in contact with the diamond grinding wheel, and the tool tip is at the grinding center point, so that the ground tip is as straight as possible. Make sure you can buy with confidence and use it.
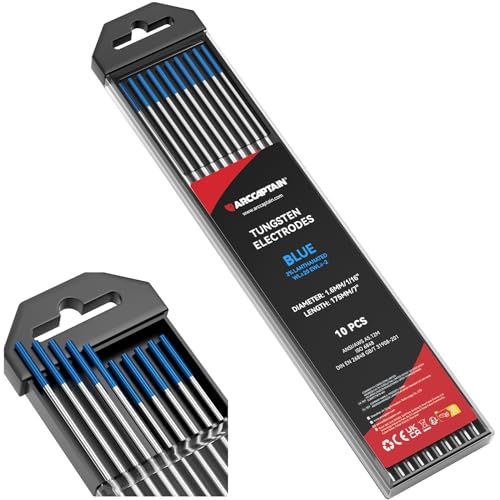
TOP QUALITY: This 10-pack of 2% Lanthanated tig tungsten electrodes 1/16"x7"(Blue, WL20/EWLa-2) adhere to Standard AWS A5.12M/A5.12:2009 and DIN EN 26848 GB/T 31908-201. All our tungsten has 100% traceability.

Premium Material: Crafted from high-grade stainless steel, ER308L rods ensure superior strength & durability for professional welding work
Automotive TIG Settings by Material
| Material | Polarity | Good Starting Setup | Key Caution |
| Mild steel sheet or brackets | DCEN | 2% lanthanated tungsten, ER70S-2 filler, argon at 15-20 CFH | Thin panels warp fast. Use short tacks and cooling pauses. |
| Stainless exhaust or trim parts | DCEN | 2% lanthanated tungsten, matching stainless filler, clean argon shielding | Overheating causes heavy discoloration and can reduce corrosion resistance. |
| Aluminum brackets or piping | AC | 2% lanthanated or zirconiated tungsten, ER4043 or ER5356 filler, argon shielding | Remove oxide with a clean stainless brush right before welding. |
| Chromoly tube or performance parts | DCEN | Use the filler and procedure required for the part or rulebook | Do not guess on roll cages, suspension, steering, or safety parts. |
| Galvanized or coated steel | DCEN after coating removal | Bare clean steel only, with ventilation and correct PPE | Never weld through zinc, paint, undercoating, or unknown coatings. |
Prepare Your Materials: Cleaning and Setup
Proper preparation is the difference between a clean TIG weld and a porous, contaminated mess. TIG does not tolerate dirt well, so clean farther than the weld bead itself. On automotive parts, the hidden problem is often old paint, undercoating, seam sealer, oil, rust, aluminum oxide, or brake cleaner residue.
- Strip the weld zone: Remove paint, primer, powder coat, plating, rust, and undercoating from the weld area and the back side if heat will reach it.
- Degrease the metal: Wipe with acetone on a clean rag, then let the solvent fully evaporate before welding.
- Clean aluminum oxide: Brush aluminum with a dedicated stainless steel brush after degreasing, not before.
- Fit the joint tightly: TIG works best with clean fit-up. Large gaps make you add more filler and heat, which increases distortion.
- Clamp the part: Use clamps, fixtures, magnets kept away from the arc, or copper backing to hold alignment.
- Prepare the tungsten: Grind DC tungsten lengthwise to a clean point. For AC aluminum, use the tip shape recommended for your machine and tungsten type.
- Set gas flow and post-flow: Start around 15-20 CFH with argon, shield the weld from drafts, and use enough post-flow to protect the hot tungsten and weld puddle as they cool.
Warning: Do not clean welding areas with chlorinated brake cleaner or other chlorinated solvents. Heat and UV from welding can create extremely dangerous gases. Use a suitable cleaner, wipe the area dry, and allow all solvent to evaporate before welding.
Essential Techniques for Successful TIG Welding
Start with a test coupon of the same metal and thickness before welding the actual automotive part. This lets you confirm amperage, filler size, tungsten shape, and travel speed without risking the final piece.
- Set the amperage range: The 1 amp per 0.001 inch rule is a rough starting point for steel, but thin panels, heat sinks, aluminum, and joint design can change the setting.
- Hold a short arc: Keep the tungsten about 1/16 to 1/8 inch from the work. A long arc spreads heat and weakens gas coverage.
- Use the right torch angle: Hold the torch about 10-15 degrees from vertical and push the puddle slightly in the direction of travel.
- Add filler at the leading edge: Dip the filler into the front of the puddle, then pull it back into the gas shield. Do not let the filler ball up outside the shield.
- Keep the cup close: A gas lens can help smooth gas flow and improve coverage, especially when you need more tungsten stickout.
- Control the puddle size: On automotive sheet metal, a small puddle is safer than a wide hot puddle. If the metal starts to sag, stop and let it cool.
If the tungsten touches the puddle or filler rod, stop and regrind it. Continuing with contaminated tungsten can make the arc wander, add inclusions, and make the weld look dirty.
How to Control Heat and Prevent Warping
Thin automotive sheet metal moves quickly when it gets hot. A long continuous TIG bead on a door skin, patch panel, or floor pan can shrink the panel and leave waves that are hard to fix. Use a slower, cooler method instead.
- Tack first: Place small tacks every 1-2 inches, then check alignment before adding more.
- Skip around: Weld short sections in different areas instead of running one long bead.
- Let the panel cool: Use air cooling time between welds. Do not quench hot steel unless the repair procedure specifically allows it.
- Use copper backing: Copper can support the puddle and help absorb heat on holes or edges.
- Use pulse if available: Pulse TIG can reduce average heat input while keeping the puddle moving.
- Plan the sequence: Balance welds around brackets, tabs, and seams so heat does not pull the part out of shape.
With thin automotive panels, the goal is not one beautiful long bead. The goal is clean fusion with the least heat needed to keep the part straight.
Troubleshooting Common TIG Welding Challenges
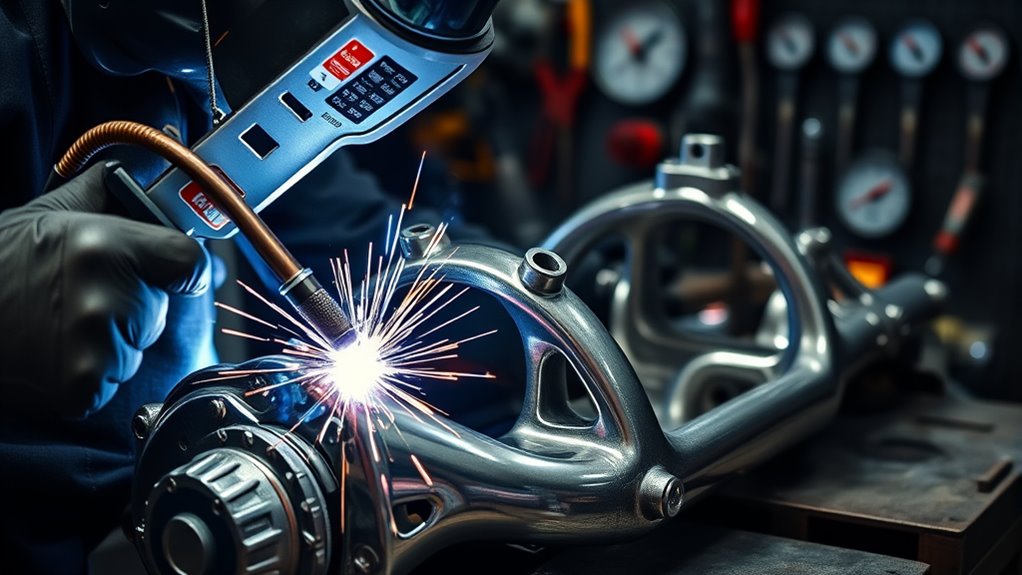
Even with good setup, TIG welding problems can show up fast. Use the weld appearance to trace the cause before you keep welding.
| Problem | Likely Cause | Fix |
| Porosity or pinholes | Dirty metal, moisture, bad gas coverage, draft, or too much torch distance | Reclean, check argon flow, block drafts, shorten arc length, and inspect hoses for leaks. |
| Wandering arc | Contaminated tungsten, wrong grind, magnetic arc blow, or too long of an arc | Regrind tungsten lengthwise, reduce arc length, move ground clamp, and check polarity. |
| Burn-through | Too much amperage, slow travel, wide gap, or no backing support | Lower heat, use copper backing, tighten fit-up, and make shorter welds. |
| Gray or sugary stainless weld | Overheating or poor shielding | Reduce heat, improve gas coverage, use post-flow, and consider back purging when needed. |
| Black soot on aluminum | Oxide, contamination, wrong AC balance, or poor gas coverage | Degrease, brush oxide with a dedicated stainless brush, adjust AC cleaning, and check gas flow. |
How to Inspect Your Welds for Quality
Inspect your TIG weld before you grind, paint, or reinstall the part. Start with the simplest check: look at the bead in good light. A sound weld should be consistent, tied in at both edges, and free from cracks, holes, heavy undercut, and obvious contamination.
Check these items:
- Bead shape: The bead should be even, not ropey, piled up, or sunken.
- Fusion at the toes: Both edges should blend into the base metal without cold lap.
- Porosity: Small pinholes mean gas, moisture, or contamination entered the puddle.
- Cracks: Any crack is a stop sign. Grind-out and repair only if the part and procedure allow it.
- Distortion: Make sure brackets, tabs, panels, and mating surfaces still line up.
- Back side: If accessible, check for burn-through, lack of penetration, or heat damage to nearby parts.
For practice pieces, make a sample weld on the same material and bend or cut that coupon to see penetration and fusion. For finished automotive parts, avoid destructive tests unless you are testing a separate coupon. If surface cracks are a concern on a non-porous metal part, dye penetrant testing can help reveal flaws that are hard to see with the naked eye.
When Not to TIG Weld an Automotive Part
TIG is precise, but it is not the right answer for every repair. Do not weld a part just because the crack or hole looks small. Some parts are heat-treated, cast from unknown alloys, coated with hazardous materials, or designed to crush in a controlled way during a crash.
Avoid TIG welding or get qualified help when the part involves:
- Fuel tanks, fuel lines, fuel rails, or vapor-contaminated parts
- Airbag mounts, seat belt anchors, or crash structures
- EV battery enclosures, high-voltage cables, or hybrid components
- Steering, brake, or suspension parts without an approved repair procedure
- Unknown cast aluminum or cast iron parts that may crack again after welding
- Galvanized, plated, painted, or chemically contaminated metal that cannot be cleaned safely
For structural repairs, use the OEM procedure, the correct welding process, and the required qualification. A clean-looking TIG bead does not automatically mean the repair is safe.
Frequently Asked Questions
What safety gear is needed for TIG welding automotive parts?
Use an ANSI-rated welding helmet with the right shade, TIG gloves, flame-resistant clothing, safety glasses, closed leather boots, and hearing protection when grinding or working around noisy tools. Add local exhaust ventilation or respiratory protection when welding stainless, galvanized, coated, painted, or unknown metal. Keep a suitable fire extinguisher nearby.
How do I choose the right tungsten electrode size?
Match tungsten diameter to amperage and material thickness. For thin automotive sheet metal, 1/16 inch tungsten is often easier to control at lower amperage. For thicker brackets or aluminum, 3/32 inch tungsten is a common starting point. Use the amperage range recommended by your tungsten maker and TIG machine manual.
Can I TIG weld dissimilar metals together?
Sometimes, but not all dissimilar metals make a strong or durable weld. Mild steel to stainless can often be welded with the correct stainless filler, but aluminum to steel is not a normal TIG weld. When the part is structural, heat-treated, or safety-related, use an approved procedure instead of guessing.
What is the best shielding gas for automotive TIG welding?
Pure argon is the best default shielding gas for most automotive TIG welding on steel, stainless, and aluminum. Start around 15-20 CFH, then adjust for cup size, gas lens use, drafts, and joint access. Argon-helium mixes are usually reserved for thicker aluminum, copper, or special high-heat applications.
How do I prevent warping during TIG welding?
Use short tacks, skip around the joint, keep the puddle small, and allow cooling time between welds. Tight fit-up and copper backing also help. Avoid long continuous beads on thin panels because they add too much heat and can shrink or wave the metal.
Is TIG welding better than MIG for auto body work?
TIG gives cleaner, more precise welds and better puddle control, but it is slower and harder to learn. MIG is often faster for auto body sheet metal and plug welds. TIG is best when appearance, precision, stainless, aluminum, or small fabrication details matter more than speed.
Can I TIG weld directly on a car with the battery connected?
Follow the vehicle maker’s repair procedure. Many welding jobs require protecting or disconnecting sensitive electronics, and EV or hybrid vehicles need special high-voltage safety steps. When possible, remove the part from the vehicle and weld it on a bench.
Conclusion
TIG welding automotive parts is all about control. Choose the right machine, tungsten, filler rod, gas flow, and polarity for the metal, then slow down and keep everything clean. On thin panels, use short welds and cooling pauses. On aluminum, remove oxide and control AC cleaning. On stainless and coated metals, protect yourself from fumes. Most of all, know when a weld is a simple fabrication job and when it is a safety-critical repair that needs an approved procedure.
Sources
- OSHA 1910.252, Welding, Cutting, and Brazing General Requirements — fire prevention, fire watch, protective clothing, and ventilation requirements.
- OSHA 1910.133, Eye and Face Protection — welding filter shade guidance and ANSI eye/face protection criteria.
- OSHA Hexavalent Chromium Overview — chromium hot-work exposure and health-risk background for stainless and chromium-containing alloys.
- Miller Electric, Selection and Preparation Guide for Tungsten Electrodes — tungsten selection and preparation guidance.
- Diamond Ground Products Tungsten Guidebook — tungsten electrode selection, grinding, and application guidance.




