Practicing MIG welding on scrap metal is a low-risk way to build heat-control, fit-up, and weld-testing skills before you work on an auto body panel. Use clean, identified mild steel close to the thickness you expect to repair, follow your welder’s chart, and learn on nonstructural coupons. Scrap practice does not qualify you to repair structural, aluminum, or high-strength vehicle parts.
Quick Answer
To practice MIG welding for auto body work, use clean 18- to 22-gauge mild steel scrap, confirm its thickness, and set up solid wire with the gas and polarity listed by your welder. Practice short tacks, butt joints, lap joints, plug welds, hole filling, and patch coupons, then destructively test samples before attempting a permitted vehicle repair.
Key Takeaways
- Match the scrap’s material and thickness to the type of nonstructural mild-steel panel you want to practice.
- For light-gauge mild steel, .023- or .024-inch ER70S-6 solid wire with 75% argon/25% CO2 is a common starting combination, but your machine chart comes first.
- Control heat with tight fit-up, brief tacks, skip-around placement, natural cooling pauses, and copper backing where appropriate.
- A backside heat mark is only a clue. Use bend or peel tests on scrap to confirm fusion before moving to a real panel.
- Never use a scrap-metal exercise as a substitute for a model-specific OEM repair procedure on structural, high-strength, aluminum, or safety-related parts.
At a Glance
| Time Required | 30 to 90 minutes per focused practice session |
| Difficulty | Beginner to intermediate |
| Tools Needed | MIG welder, identified mild-steel scrap, helmet, safety glasses, gloves, protective clothing, hearing protection, grinder, wire brush, clamps, copper backing, pliers, measuring tool, marker, and fire extinguisher |
| Cost | Low if you already own the welder and PPE; ongoing costs include wire, shielding gas, abrasives, and scrap |
Choose the Right Scrap for MIG Welding Practice
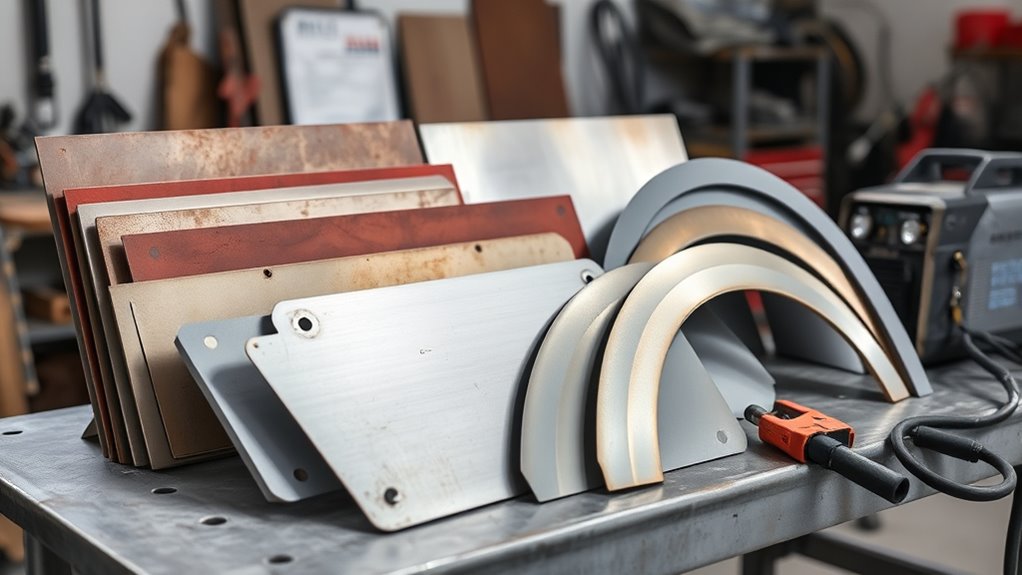
Useful MIG welding practice starts with scrap that behaves like the panel you want to learn on. Clean mild steel in the 18- to 22-gauge range is a practical training range for many sheet-metal exercises. You can keep some 24-gauge pieces for extra burn-through control and thicker pieces for bracket practice, but a bead on 1/4-inch plate does not teach the same heat control as a body-panel coupon.
Do not identify sheet thickness by appearance alone. Measure it with calipers or a sheet-metal gauge, mark the thickness on every coupon, and keep different materials in separate bins. Vehicle panels vary by model, location, and steel grade, so the scrap must be treated as a training sample rather than proof that a particular vehicle panel can be welded the same way.
Remove rust, paint, primer, undercoating, seam sealer, oil, adhesive, and scale from both sides of the weld zone. Clean enough surrounding area that heat cannot draw coating residue into the puddle. Clean metal makes the arc easier to read, improves shielding, and reduces avoidable porosity.
Match the coupon to the job you want to learn: same base metal, similar thickness, clean joint, and repeatable fit-up.
Collect flat strips, old body-panel cutoffs, lap-joint pieces, small patch blanks, and coupons with drilled holes. These let you practice beads, edges, corners, butt joints, lap joints, plug welds, and controlled hole filling. If you cut coupons with a plasma cutter, remove dross and oxide from the edge before welding. This guide to nitrogen plasma cutting explains why plasma gas and edge condition can change the surface you later prepare for welding.
Keep aluminum, stainless steel, galvanized steel, and mixed-material scraps separate. Aluminum requires different wire, shielding gas, feeding equipment, and cleaning. Stainless filler and shielding choices depend on the alloy, and welding stainless can create chromium-containing fumes. Aluminum-to-steel joining is a specialized dissimilar-metal process that can form brittle iron-aluminum intermetallic layers, so it is not a basic mild-steel MIG exercise.
Warning: Do not weld painted, plated, galvanized, oily, or unknown scrap until you have identified the material and coating, removed contamination by an appropriate method, and provided effective ventilation or local exhaust. Never weld a closed container or a part that may have held fuel, solvent, or another flammable substance.
Set Up Your Work Area Before You Weld
Prepare the area before you set the machine. Wear a welding helmet with a filter shade suitable for the process and current, safety glasses under the helmet, leather welding gloves, flame-resistant cotton or leather clothing, and closed-toe boots. Add hearing and face protection when grinding. Avoid synthetic clothing because sparks can melt it.
Work where you can control fumes and sparks. Use local exhaust when available, move combustibles away, inspect the opposite side of walls or benches, and keep suitable fire-extinguishing equipment ready. OSHA’s welding, cutting, and brazing requirements address ventilation, fire prevention, hidden-side ignition, and post-work fire watching. Its eye and face protection standard includes guidance for selecting welding filter shades.
Secure the shielding-gas cylinder upright, protect it from impact, check hoses and fittings, and close the valve when the equipment is not in use. Keep electrical cables dry and away from sharp edges, hot metal, and traffic. Stop using a machine with damaged insulation, loose connections, gas leaks, or an unreliable gun trigger.
Note: A real vehicle is not a practice coupon. Before any permitted vehicle weld, obtain the model-specific repair procedure and inspect for fuel lines, brake lines, wiring, batteries, high-voltage components, restraint systems, glass, trim, foam, seam sealer, adhesives, and hidden combustibles.
Set Up Your MIG Welder and Work Clamp
For mild-steel body-panel practice, .023- or .024-inch ER70S-6 solid wire is a common choice for light-gauge sheet when the machine supports it. A .030-inch wire may work on 18-gauge and thicker material or on a machine that feeds it more reliably. Use the wire diameter, drive rolls, liner, and contact tip specified for your welder.
For solid-wire MIG on mild steel, 75% argon and 25% CO2 is a common shielding-gas blend because it supports a smoother, lower-spatter short-circuit arc than straight CO2. It is not a universal gas for aluminum or stainless steel. Most solid-wire mild-steel setups use electrode-positive polarity, but the wire label and machine manual must decide the final polarity.
Start with the voltage and wire-feed values on the machine chart or manufacturer’s manual for the measured thickness and wire size. Set gas flow according to the manual and actual conditions rather than copying one universal number. Excessive flow can create turbulence, while low flow, leaks, drafts, or a clogged nozzle can expose the puddle to air.
Connect the work clamp, often called a ground clamp in casual shop language, directly to clean bare metal on the coupon or a conductive welding table with a verified return path. The work clamp carries welding current back to the machine; it is not the same as the machine’s protective electrical grounding. OSHA’s arc-welding standard requires firm work-lead connections, equipment checks, and compliance with manufacturer instructions.
Keep approximately 1/4 to 3/8 inch of wire stickout from the contact tip as a practical starting range for short-circuit automotive MIG. Hold a steady contact-tip-to-work distance, use a slight push angle, and keep the wire aimed at the joint. Clean the nozzle, verify gas flow, inspect the contact tip, and check drive-roll tension before each session.
Pro Tip: Mark the material thickness, wire size, voltage, wire-feed speed, gas setting, polarity, and test result on each coupon. Change only one setting at a time so you can tell what improved or harmed the weld.
Prepare Repeatable Practice Coupons
Cut several coupons from the same sheet so each test starts with the same material. Make the pieces large enough to clamp safely and far enough from the bench edge that the gun, work clamp, and your gloved hands have room. Deburr sharp edges, flatten distorted strips, and clean both sides before assembly.
For butt-joint practice, make the edges straight and fit them with the smallest consistent gap your exercise and machine can handle. Thin sheet loses heat-sinking ability quickly when the gap opens. For lap and plug-weld coupons, clamp the layers tightly together so the upper sheet cannot lift away from the backing sheet.
Before every new joint type, run a test tack on an offcut from the same sheet. Check arc stability, bead shape, heat on the backside, and whether the tack can be broken too easily. If the result is poor, correct the setup before making a full coupon.
Practice Tack Welds and Short Beads
Start with flat beads to learn the arc sound, puddle size, and effect of travel speed. Keep the gun steady and run only short beads on light sheet. Adjust voltage and wire feed until the bead wets into the metal without sitting as a cold rope or blowing through the coupon.
Next, tack two pieces together. Start at the ends or corners, confirm alignment, and add spaced tacks only as needed to hold the joint. Do not treat one-inch spacing as a universal rule. Coupon size, metal thickness, joint design, and heat buildup determine how many holding tacks you need.
| Practice Step | Goal | Pass Check |
|---|---|---|
| Straight beads | Learn arc sound, puddle size, and bead profile. | The bead is even, attached at both toes, and free of visible pinholes. |
| Tack welds | Make quick, repeatable tacks without enlarging the gap. | The tack holds alignment and shows fusion without a hole. |
| Butt joints | Join two edges with controlled heat and low distortion. | The joint survives a bend test without the weld separating cleanly. |
| Lap joints | Fuse the upper edge into the lower sheet. | The lower sheet is fused, not merely covered by a bead. |
| Plug welds | Fill a hole in the upper sheet and fuse into the backing sheet. | A peel test pulls a nugget or tears surrounding parent metal. |
| Patch coupons | Fit, tack, cool, join, and finish a small repair area. | The patch stays aligned and the sheet remains acceptably flat. |
For thin sheet, use brief trigger pulls instead of a continuous bead. Place one tack, move to a cooler part of the joint, and let the first area lose heat before returning. Keep connecting cooled tacks until the seam is closed. This skip-around method spreads heat and reduces distortion.
Solid-wire MIG with shielding gas is generally easier to control on cosmetic light-gauge sheet than self-shielded flux-core wire, which usually runs hotter and creates slag and more cleanup. The heat-control lessons in this guide to welding thin metal with flux core are useful, but do not copy its wire, polarity, or settings into a solid-wire MIG setup.
Repair Holes and Install Patch Panels

After you can place repeatable tacks, practice small-hole repair and fitted patch coupons made from the same mild steel. These exercises teach edge control, gap management, clamp placement, and heat distribution.
Fill Small Holes With Copper Backing
Clamp a clean copper backing plate behind an accessible hole. Copper draws heat away and supports the puddle without normally fusing to mild steel. Start on solid metal at the edge, place a quick tack, allow it to cool, and add another tack on the opposite side. Work around the edge until the opening closes. If the hole grows, stop and correct heat, fit-up, stickout, or trigger time.
Fit and Tack a Patch Coupon
A close, even patch fit is more valuable than trying to bridge a wide gap with a long, hot weld.
Cut the patch to sit flush with a tight, consistent gap. Hold it with panel clamps, magnets positioned away from the immediate arc, or a backing tool. Tack opposite corners first, recheck alignment, and then add tacks between earlier tacks. Keep moving around the perimeter rather than welding in one direction.
Practice Plug Welds
Drill a clean hole in the upper coupon, remove burrs, and clamp it tightly against the lower coupon. Direct the arc into the exposed lower sheet, establish fusion there, and fill outward to the edge of the hole. The finished weld should join both layers rather than leave a button attached only to the upper sheet. Hole diameter, weld count, spacing, and acceptance criteria on a real vehicle must come from the OEM procedure.
Check patch alignment after each group of cooled tacks. Light hammer-and-dolly planishing may help level a fully cooled, nonstructural mild-steel practice coupon, but do not hammer glowing weld metal or apply this method to structural or high-strength vehicle parts without an approved procedure. Heat control matters across welding processes, including stainless steel stick welding, but its filler, polarity, and technique are not substitutes for auto-body MIG instructions.
Note: Real panels may require resistance spot welds, MIG/MAG plug welds, MIG brazing, adhesives, rivets, or replacement-only procedures. The vehicle maker decides the permitted joining method, wire, hole size, weld count, location, and testing requirement.
Control Heat and Distortion
Thin sheet can warp even when every individual tack looks acceptable. Watch the whole coupon, not only the puddle. If the panel starts to oil-can, the gap opens, or the next tack blows through more easily, stop and allow the assembly to cool naturally.
- Use tight fit-up: A wide gap removes the metal that would absorb heat and support the puddle.
- Keep trigger time short: Add only enough heat to fuse the tack, then stop.
- Skip around: Move to a distant, cooler area instead of stacking heat beside the last tack.
- Use a chill bar: Copper or aluminum backing can absorb heat where access allows.
- Let the coupon cool: Do not rush the sequence or use water near energized equipment.
- Recheck alignment: Correct movement early, before the seam becomes rigid.
Do not chase a perfectly flat coupon by repeatedly reheating it. Extra heat can stretch mild steel and can damage the properties of high-strength vehicle steel. Scrap practice should teach you when to pause, not how to force a hot panel back into shape.
Grind and Finish Practice Welds Without Thinning the Sheet
Inspect and photograph the weld before grinding because finishing can hide porosity, undercut, and poor tie-in. Use a controlled abrasive and light pressure to reduce only the proud weld metal. Keep the tool moving and stop often to check temperature and panel thickness.
Do not grind until the surrounding sheet becomes thin, blue, or deeply scratched. A flush-looking seam is not successful if the parent metal has been weakened. Practice dressing a weld while leaving the adjacent sheet intact, then inspect both sides again.
Warning: Grinding creates sparks, noise, sharp fragments, and dust. Wear safety glasses, a face shield when appropriate, hearing protection, gloves, and suitable respiratory protection for the material and coating. Keep the grinder guard installed and direct sparks away from cylinders, hoses, vehicles, and combustibles.
Check Your Welds Before Real Body Repairs
Do not judge a practice weld only by appearance, especially after grinding. Before finishing, look for even tie-in, a consistent bead or tack size, no visible pinholes, no soot trails that suggest lost shielding, no cold bead sitting on top, and no excessive distortion.
Flip the coupon over and look for a consistent heat pattern or slight evidence of penetration. This can help you compare settings, but it does not prove adequate fusion by itself. A cold weld may still discolor the backside, and a heavily penetrated weld may still have defects.
Use Destructive Tests on Scrap
Clamp butt or lap coupons in a vise and bend them after they have cooled. For plug welds, peel the upper sheet away from the lower sheet. A useful practice plug weld should form a nugget and resist separation; tearing the surrounding parent metal is stronger evidence of fusion than a cap that pops off cleanly.
Repeat the same joint on several coupons. You are looking for repeatability, not one lucky weld. Move to a nonstructural vehicle repair only when you can prepare, weld, finish, and test comparable scrap consistently and the model-specific procedure permits your process.
Pro Tip: Keep one ungrounded sample from every successful settings group. It gives you a visual reference for bead shape, heat pattern, and destructive-test behavior the next time you use the same material.
Know When Scrap Practice Does Not Transfer to a Vehicle
Modern vehicles can combine mild steel, high-strength steel, ultra-high-strength steel, aluminum, castings, adhesives, rivets, spot welds, MIG/MAG welds, and MIG brazing in one body. Heat and joining limits can change by model year, part location, and tensile strength. A technique that works on loose mild-steel scrap may be prohibited on the actual panel.
Use OEM1Stop or the automaker’s official service-information system to locate current vehicle-specific repair information. Recent Honda/Acura guidance, for example, requires model-specific material identification, approved high-strength welding wire where MAG welding is permitted, and prescribed spot-welding conditions for certain UHSS parts. Other automakers publish different limits, so do not transfer one brand’s procedure to another.
Do not practice on structural rails, pillars, rocker reinforcements, roof rails, intrusion beams, restraint mounting areas, suspension mounting areas, battery structures, or other safety-related components. Do not heat-straighten high-strength steel or assume a damaged part can be sectioned. Refer the job to a trained collision-repair professional when you cannot identify the material, find the procedure, perform the required weld tests, or restore all safety and corrosion-protection systems.
Protect the Vehicle Before an Approved Weld
When an OEM procedure permits welding, follow its steps for battery or high-voltage isolation, electronic-module protection, work-clamp placement, trim removal, fire protection, weld-through primer, adhesives, seam sealer, cavity wax, and post-repair inspections. Place the work clamp as close to the weld as the procedure allows so current does not take an uncontrolled path through vehicle components.
Restore Corrosion Protection
Practice panels can be left bare for inspection, but a completed vehicle repair cannot. After approved welding and finishing, restore primers, seam sealers, topcoats, and internal cavity protection exactly as the repair procedure and product instructions require. A sound-looking weld can still lead to premature corrosion if hidden seams and bare backsides remain unprotected.
Fix Common MIG Welding Problems
When MIG welds become erratic or weak, check setup, preparation, and fit-up before blaming hand technique. Clean the work-clamp contact area, verify the return path, inspect the gun and consumables, confirm polarity, and compare voltage and wire feed with the chart for the actual thickness.
This guide to a MIG welder that is not working correctly covers broader equipment faults. For practice coupons, use the table below to isolate one likely cause at a time.
| Problem | Likely Cause | Fix |
|---|---|---|
| Burn-through | Too much heat, long trigger time, wide gap, slow travel, or thin metal | Shorten tacks, confirm settings, tighten fit-up, move to cooler areas, and use copper backing where appropriate. |
| Porosity | Dirty metal, coating residue, weak gas coverage, leaks, drafts, or a clogged nozzle | Clean both sides, verify gas supply and flow, repair leaks, block drafts, and clean the nozzle. |
| Heavy spatter | Incorrect voltage or wire feed, long stickout, dirty tip, wrong polarity, or poor work connection | Return to the chart, shorten and steady stickout, confirm polarity, replace worn consumables, and clean the clamp area. |
| Cold lap or lack of fusion | Too little heat, excessive travel speed, poor gun aim, scale, or failure to reach the lower sheet | Clean the joint, aim at both members, adjust one setting at a time, and verify the result with a destructive coupon test. |
| Wire stubbing | Wire feed too high for voltage, long or changing gun distance, liner drag, or poor contact-tip fit | Steady the gun, compare settings with the chart, and inspect the tip, liner, drive rolls, and spool tension. |
| Burn-back | Wire feed too low, gun held too close, restricted feeding, or a damaged tip | Restore proper stickout, inspect the feed path, trim the wire, and replace the contact tip if damaged. |
| Birdnesting wire | Excessive drive-roll tension, liner restriction, wrong groove or tip, or a blocked gun | Release the drive, remove the tangled wire safely, inspect the liner, match components to wire size, and reset tension. |
| Warped panel | Too much continuous heat, poor sequence, weak clamping, or repeated grinding in one area | Skip around, pause for natural cooling, improve clamping, and reduce weld and grinding dwell time. |
Scrap gives you room to test these corrections without risking a vehicle. Keep preparation consistent, change one variable at a time, and retest the joint rather than trusting arc sound or bead appearance alone.
Frequently Asked Questions
How do you get scrap metal to practice welding?
Ask local scrap yards, recycling centers, body shops, fabrication shops, vocational programs, and welding clubs. Get permission, identify the alloy and coating, and choose flat mild-steel pieces you can clean safely. Avoid closed containers and unknown, plated, oily, or heavily coated scrap.
Which two metals should a beginner not try to join with a basic mild-steel MIG setup?
Do not treat aluminum and steel as a basic MIG pair. Their different melting behavior and the formation of iron-aluminum intermetallic compounds make the joint a specialized process. Keep mild steel, stainless steel, and aluminum in separate practice groups with the correct wire, gas, feeding system, and procedure for each.
What is the best metal for auto body MIG practice?
Clean, identified mild-steel sheet is the most useful starting material for basic auto body MIG practice. Begin with material in the 18- to 22-gauge range, measure the actual thickness, and use matching coupons for each settings test.
What sheet-metal gauge should you use for body-work practice?
Use sheet close to the thickness you expect to encounter, with 18 to 22 gauge as a practical training range and 20 gauge as a useful middle exercise. Do not assume the same gauge or steel grade applies to every panel or vehicle.
Should you practice long beads or tack welds on auto body scrap?
Practice short beads first to learn the puddle, then spend most of your thin-sheet practice on tacks, short stitches, butt joints, lap joints, plug welds, and patches. Long continuous beads usually add too much heat to light body sheet.
Can you use flux-core wire for auto body practice?
You can practice with flux-core wire if the wire and machine are rated for the material, but self-shielded flux core generally runs hotter and creates slag and more spatter. Solid-wire MIG with shielding gas usually gives a beginner more control on clean, cosmetic light-gauge mild steel.
What gas flow should you use for MIG welding body-panel scrap?
Use the flow range in your welder or regulator instructions and adjust only for actual conditions. There is no single correct number for every gun, nozzle, shop, or regulator. Check for leaks, block drafts, keep the nozzle clean, and avoid excessive flow that can create turbulence.
Should you grind practice welds completely flush?
Grind only enough to practice finishing and to meet the intended repair requirement. Do not thin the surrounding sheet to make the seam disappear. Inspect the weld before grinding, use light pressure, and stop often to check heat and remaining panel thickness.
How do you know when your practice welds are ready for a real repair?
You are ready for a permitted nonstructural repair when you can repeat clean fit-up, stable tacks, acceptable distortion control, and destructive coupon results on matching material. You must also have the model-specific OEM procedure, correct equipment, required weld tests, and a plan to restore corrosion protection. Structural repairs still require trained professional methods.
Conclusion
Scrap metal lets you build useful auto body MIG skills without sacrificing a good panel. Measure and clean mild-steel coupons, set the machine from its chart, use the correct work-clamp connection, and progress from beads to tacks, joints, plug welds, holes, and patch coupons. Inspect before grinding and prove fusion with destructive tests. When the work moves to a vehicle, stop treating it as practice and follow the current model-specific OEM repair procedure.
Sources
- OSHA 1910.252: Welding, Cutting, and Brazing General Requirements — supports ventilation, fire prevention, fire-watch, and hot-work guidance.
- OSHA 1910.133: Eye and Face Protection — supports primary eye protection and welding filter-shade selection.
- OSHA 1910.254: Arc Welding and Cutting — supports work-lead attachment, equipment inspection, grounding distinctions, and manufacturer-instruction guidance.
- Miller Electric: Successfully Welding Sheet Metal With MIG and TIG — supports small solid-wire sizes, ER70S-6, 75/25 shielding gas, skip welding, tight fit-up, and backing bars.
- OEM1Stop — provides access to participating automakers’ current collision-repair information and position statements.
- Honda/Acura: Ultra-High-Strength Steel Repair Guidance, Summer 2026 — supports model-specific material identification, approved welding wire, prescribed spot-welding conditions, and repairability limits for UHSS.


