How to Weld a Nut Over a Stripped Bolt on Your Car
What’s in This Article
- How Welding a Nut Fixes Stripped Bolts
- Essential Safety Precautions Before Welding
- Tools You Need for Successful Welding
- Tips for Strong Welds
- Step-by-Step Guide to Welding a Nut Over the Stripped Bolt
- Avoid Common Mistakes When Welding a Nut Over a Stripped Bolt
- What to Do If Your Weld Fails to Hold?
- What If Welding Doesn’t Work? Alternative Bolt Removal Methods
- Maintain Your Bolts to Prevent Future Stripping
- Frequently Asked Questions
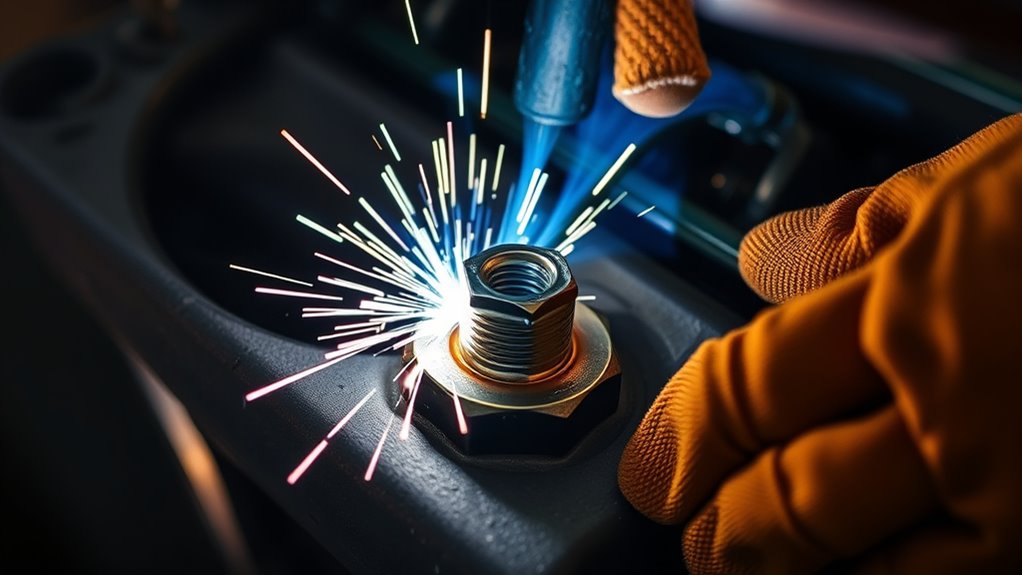
A stripped bolt can stop a simple car repair fast, especially when a socket no longer grips it. To weld a nut over a stripped bolt on your car, disconnect the battery first and clear the area of flammable materials. Then clean the bolt surface, choose a snug nut, set up your MIG welder or flux core welder, and place the ground clamp close to the bolt. This guide shows you how to make a safe weld, remove the bolt, and avoid common mistakes.
Quick Answer
You can remove a stripped car bolt by welding a nut onto the damaged bolt head. The nut gives your wrench a new gripping point, while the heat can help loosen rust or corrosion. Clean the bolt, protect nearby parts, weld for only a few seconds, let it cool, and then turn the nut slowly.
Key Takeaways
- Disconnect the battery before welding near vehicle parts.
- Clean oil, rust, paint, and debris from the bolt before you weld.
- Choose a nut that fits the stripped bolt head with little movement.
- Keep weld time short to avoid heat damage near the repair area.
- Let the weld cool before you apply torque to the nut.
Estimated time: Plan for about 20 to 45 minutes, depending on rust, access, cleaning, and cooling time.
How Welding a Nut Fixes Stripped Bolts
Welding a nut onto a stripped bolt creates a new gripping surface. That new surface lets you apply improved torque during extraction.
The heat from welding can also help break corrosion bonds that may hold the bolt in place. This can make the bolt easier to turn once the weld cools.
By choosing a larger nut, you can increase leverage and stability during the extraction process. This lowers the risk of further damage to the bolt head.
To weld a nut well, start with a clean surface and use controlled heat. Too much heat can weaken nearby parts or damage surrounding components.
This method works well in many automotive applications, where stripped bolts can delay repairs and affect part fitment. Strong proper metal preparation will also improve the quality of your weld.
Products Worth Considering

【Products Include】You will receive 10pcs 3/8In weld nuts,10pcs 5/16In weld nuts,10pcs 1/4In weld nuts, in total of 30pcs,1pc storage box,they come in a clear box for easy storage and portability.Weld nut can install the caster and connect threaded,sufficient quantity and rich sizes can meet your repair or installation needs.

🔧 Multiple Solutions- Includes 18 Popular Sizes of Flat U Nuts Clip, Total 180 Pieces. These Are Reliable Replacement for the Original Part That had Missing or Failed Due to Fatigue.
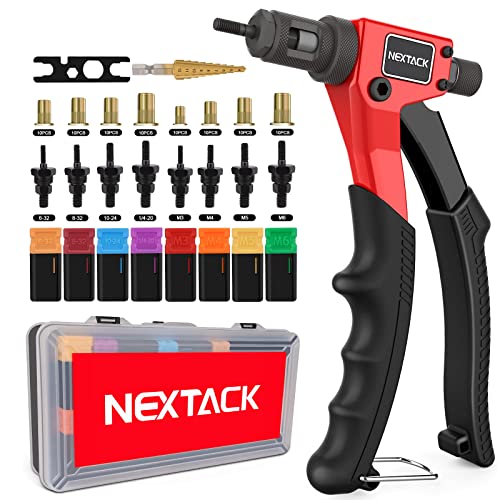
TIGHT SPACE DESIGN: Compact 8 inch right angle style make it easy for grab-and-go to solve out-of-reach riveting projects in confined narrow corner spots. it is an ideal solution for small mid size aluminium rivnut
Essential Safety Precautions Before Welding
Before you begin welding, take safety precautions to protect yourself, your vehicle, and nearby parts. Start by disconnecting the vehicle’s battery to reduce the risk of electrical damage.
Clear the work area of flammable materials and keep a fire extinguisher nearby. If you work near the oil pan, remove the oil pan drain plug only when it makes sense for the repair and the vehicle is safely supported.
Place the ground clamp close to the work area to improve grounding and reduce electrical arcing. Wipe away oil drips or spills because they can ignite near heat and sparks.
Wear proper welding safety gear to protect against sparks, heat, and bright arc light. Use the same care you would use with essential plasma cutting safety gear.
Here’s a quick reference for your safety checklist:
| Precaution | Purpose | Action Required |
|---|---|---|
| Disconnect battery | Prevent electrical damage | Unhook terminals |
| Remove oil pan plug | Alleviate pressure when needed | Unscrew plug if the repair calls for it |
| Use ground clamp | Minimize arcing | Secure clamp properly |
These steps help you weld with more control and lower the risk of fire or electrical damage.
Warning: Do not weld near fuel lines, open fuel vapors, oil-soaked surfaces, or hidden wiring without clearing the area first.
Tools You Need for Successful Welding
To weld a nut onto a stripped bolt, gather the right welding tools and safety gear before you start. This keeps the repair safer and helps you avoid weak welds.
A MIG welder, like the Millermatic 141, can give you good control for small automotive work. You also need a reliable ground clamp, a wire brush, and several nut sizes so you can choose the best fit.
Follow proper safety precautions if the area includes galvanized steel or coated metal. Coatings can affect weld quality and create harmful fumes.
Products Worth Considering

Multipurpose Fit: Repairs at least 98% of the plastics on the market. Suitable for repairing: bumper, dashboard, lamp holder, plastic ring, radiator, spoiler, handles, headlights, plastic wings, car and motorcycle plastic device, etc

COMPATIBILITY: Designed for Lincoln Magnum 100L (K530 series) and Tweco Mini/#1 welding torches. This kit is also a direct fit for YESWELDER FLUX-135PRO Old Version/MIG-140DS PRO/YWM-160/MIG-165DS PRO/MIG-185DS PRO/MIG-205DS PRO/MIG-250PRO/MCT-520.

Accessories: The black tool bag contains a 110V-100W plastic welder, Cutting tip M8, a knife, 2 hot smoothing tips-M6, 38 multi-type welding rods and 800 plastic welding staples (200 flat, 200 wavy, 200 M-type and 200 V-type)
Essential Welding Equipment
When you weld a nut onto a stripped bolt, the right tools make the job easier. You need a welder that you can control in short bursts, plus a ground clamp that gives a stable connection.
Flux core wire can help create a strong bond in some repair settings. You should still clean the bolt well because dirt, oil, and rust can weaken the weld.
| Tool | Purpose | Importance |
|---|---|---|
| MIG Welder | Welds the nut to the stripped bolt | Gives controlled heat for automotive tasks |
| Ground Clamp | Creates a strong electrical connection | Reduces voltage drop and arcing |
| Flux Core Wire | Builds weld material around the nut | Can help in tougher repair conditions |
| Fire Extinguisher | Controls fire risk | Protects you and the vehicle |
Safety Gear Requirements
Welding can solve a tough stripped bolt problem, but you must protect yourself from heat, sparks, and arc light. Start with a welding helmet that uses the right shade for your welder.
Wear flame-resistant gloves to protect your hands from heat and spatter. A welding jacket or apron made from leather or flame-resistant material will help protect your body.
Keep a fire extinguisher within reach before you strike an arc. Also make sure your workspace has good ventilation, since welding can create harmful fumes and gases.
Tips for Strong Welds
Strong welds start with clean metal. Remove oil, grease, paint, rust, and loose debris from the stripped bolt before you weld.
Use a high-quality MIG or flux core welder set to the right range for the bolt and nut size. Choose a weld nut that closely matches the stripped bolt’s size for better alignment and torque transfer.
Preheat the surrounding area slightly only when the part and location allow it. This may reduce thermal stress and improve weld penetration on a badly rusted bolt.
Watch the five parameters of welding so you can tune your settings for a stronger joint. Limit your welding time to a few seconds at a time so you do not overheat the bolt or damage nearby components.
Short, controlled welds usually work better than long, hot welds in tight automotive areas. Let the weld cool before you test the nut with a wrench.
Pro tip: Test-fit the nut before welding so it sits flat and leaves enough room for your socket or wrench.
Step-by-Step Guide to Welding a Nut Over the Stripped Bolt
Use these steps when you can reach the stripped bolt safely and the nearby area can handle welding heat. Stop if the bolt sits near fuel, hidden wiring, rubber parts, or other heat-sensitive parts that you cannot protect.
- Prepare the workspace. Clear the area of oil, loose debris, and flammable materials. Keep a fire extinguisher nearby before you start.
- Disconnect the battery. Remove battery power before welding on or near the vehicle. This helps protect sensitive electrical components.
- Clean the stripped bolt. Use a wire brush, grinder, or suitable cleaner to expose clean metal. Clean metal helps the weld bond to the bolt.
- Choose the right nut. Pick a nut that fits over the stripped bolt head without too much side movement. A snug fit improves alignment and strength.
- Attach the ground clamp. Place the clamp close to the work area for a stable connection. A poor ground can cause weak welds and extra arcing.
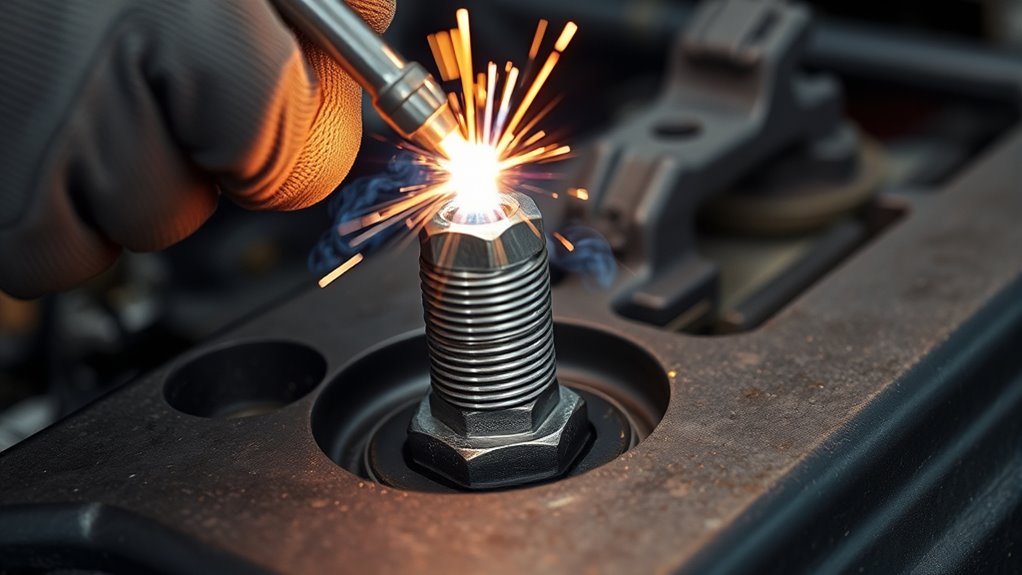
- Weld the nut in short bursts. Use a flux core welder or MIG welder to fill the center of the nut and bond it to the bolt. Limit the weld time to a few seconds at a time to reduce heat damage.
- Let the weld cool. Allow the weld and bolt to cool before you apply torque. Turning the nut while the weld is too hot can weaken the bond.
- Remove the bolt slowly. Fit a wrench or socket on the welded nut and apply steady pressure. If the bolt moves, keep the motion slow and controlled.
- Repair the threads if needed. If the hole threads suffered damage, consider re-tapping the threads before you install a new bolt.
Proper preheat temperature can help reduce cracking risk in some metals. Use heat with care because many vehicle parts sit close to rubber, plastic, wiring, and seals.
Avoid Common Mistakes When Welding a Nut Over a Stripped Bolt
When welding a nut onto a stripped bolt, proper preparation matters as much as the weld itself. Clean the bolt, choose the right nut size, and use short welds that give you a strong bond without excess heat.
If the part has zinc coating, remove the coating from the weld area before welding. Removing zinc coating can improve weld quality and reduce contamination.
Never ignore essential safety precautions. Poor prep can cause weak welds, fire risk, and damage to nearby vehicle parts.
Proper Preparation Steps
Before you start welding a nut onto a stripped bolt, prepare the area carefully. This prevents common mistakes that can ruin the repair.
First, disconnect the battery and remove nearby flammable materials. Then clean the stripped bolt to remove oil, rust, paint, and debris.
Next, attach the ground clamp securely to the workpiece. Place it close to the weld area so the welder has a stable electrical path.
Limit your welding time to short bursts to avoid overheating the bolt. Use a snug-fitting nut and fill gaps with welding wire only when needed.
Effective Welding Techniques
Good welding technique starts with a clean bolt surface. Dirt, oil, and rust can stop the weld from bonding well.
Use a flux core welder or MIG welder and keep the ground clamp close to the bolt. This reduces resistance and helps the arc stay more stable.
Limit each weld burst to a few seconds. Too much heat can damage the bolt, surrounding threads, or nearby vehicle parts.
If the nut has a gap around the bolt, use welding wire to fill the space and build strength. Let the weld cool fully before you try to remove the bolt.
Essential Safety Precautions
Welding a nut onto a stripped bolt can be simple, but safety controls the outcome. Use the checklist below before you strike an arc.
| Safety Tip | Importance |
|---|---|
| Disconnect the battery | Prevents electrical issues |
| Remove flammable materials | Reduces fire hazards |
| Secure the ground clamp | Supports a stronger weld |
Before you weld, wipe away oil or grease to improve weld quality. Watch for smoke, flame, or melted nearby parts while you work.
Wear proper personal protective equipment (PPE), including gloves and a welding helmet. This protects you from sparks, heat, and harmful ultraviolet (UV) rays.
What to Do If Your Weld Fails to Hold?
If your weld doesn’t hold, inspect the weld before you try again. Look for poor penetration, gaps, contamination, or a weld that only stuck to the nut and not the bolt.
A bad weld often comes from inadequate heat, poor cleaning, or poor technique. Clean the bolt again to remove oil, rust, coating, and old weld material.
Consider using a larger nut for welding if the first nut did not give enough surface area. You can also adjust your current and technique, then fill gaps with more welding wire.
Proper proper penetration matters because the weld must grip the bolt, not only the nut. If repeated attempts fail, stop and consider a different bolt removal method before you damage the part further.
What If Welding Doesn’t Work? Alternative Bolt Removal Methods

When welding a nut onto a stripped bolt does not work, you still have several removal options. Choose the safest method based on bolt access, rust level, and nearby parts.
First, try grinding the rounded bolt head square so a wrench can grip it. If that does not work, a manual impact driver may add enough force to loosen the bolt.
You can also use a left-hand screw extractor. As it turns counterclockwise, it grips the bolt and may help back it out.
If corrosion causes the problem, heat the bolt with a torch only when the surrounding area can handle heat safely. The heat may expand the metal and help break the bond.
As a last resort, drill out the bolt and re-tap the hole, or use a helicoil to restore the threads. If you try welding again, match your amperage settings to the metal thickness for a better weld.
Maintain Your Bolts to Prevent Future Stripping
Stripped bolts can cause delays, but good maintenance can lower the risk. Inspect bolts and fasteners during repairs so you can catch wear, rust, or thread damage early.
Use the correct tools, including torque wrenches, when the manufacturer provides torque specifications. This helps you avoid over-tightening, which can strip threads or round bolt heads.
Apply anti-seize compounds to threaded bolts when the location and service manual allow it. Anti-seize can reduce friction and help prevent bolts from seizing.
Replace worn or damaged bolts instead of forcing them back into service. Keep a simple maintenance log of repairs and replacements so you can track problem areas over time.
These habits can reduce future stripping and help your vehicle stay reliable. Using the correct amperage during repairs can also improve weld quality and help protect fasteners.
Frequently Asked Questions
What to Do if a Bolt Is Stripped on a Car?
If you find a stripped bolt on a car, first stop using the wrong socket or wrench. Try a better gripping tool, apply heat when safe, use an extractor, or weld a nut onto the bolt if you have the right tools and protection.
Does JB Weld Work on Stripped Threads?
JB Weld may help with light thread repair in some low-stress situations, but it should not replace a proper mechanical repair. Clean surfaces matter, and you should plan for a stronger fix if the part handles load, heat, or vibration.
Can You Weld Bolts and Nuts?
Yes, you can weld bolts and nuts when the metal type and repair location allow safe welding. Clean the surfaces, secure the ground clamp, and control heat so the weld bonds well without damaging nearby parts.
What Metal Is Hardest to Weld?
Tungsten ranks among the hardest metals to weld because it has a very high melting point and can crack if handled poorly. Metals like chromium can also require special technique and close heat control.
Conclusion
Welding a nut onto a stripped bolt can give you a strong new grip when normal tools fail. Start with safety, clean the bolt well, and weld in short bursts so you do not overheat nearby parts.
If the weld fails, check your prep, nut fit, and heat settings before you try again. Use alternative removal methods when welding creates too much risk for the vehicle part.
Good bolt care, correct torque, and early replacement of damaged fasteners can prevent the same problem later. With the right approach, you can finish the repair and keep your car ready for the next job.


