A rear axle housing can warp fast if you weld it like a normal steel bracket. Clean metal, even heat, solid fixturing, and short welds give you the best chance of keeping it straight. This guide shows you how to prep, tack, weld, check, and correct the housing without losing alignment.
Quick Answer
Clean the axle housing to bare metal, preheat it evenly, and hold it in an alignment jig before welding. Tack it at 12, 3, 6, and 9 o’clock, then weld short 1-inch sections in an alternating pattern. Check straightness often and correct high spots before they turn into permanent distortion.
Key Takeaways
- Clean the housing to bare metal so the weld bonds to sound material.
- Preheat broad areas evenly to reduce thermal shock and cracking risk.
- Use an alignment jig so the tubes and bearing saddles stay square.
- Weld short, alternating sections instead of one long continuous bead.
- Check straightness often and correct high spots while the housing still responds.
Before You Begin
Set up the housing before you strike an arc. You’ll need a wire brush or grinder, a torch for preheating, clamps, an alignment jig, a straight edge, and the right filler for the housing material.
Plan on slow, controlled work. A careful weld job may take a few hours because you need time for cleaning, fixturing, welding, cooling, and repeated alignment checks.
Warning: Welding axle housings involves heat, fumes, and structural parts, so use proper protective gear and work in a ventilated area.
Clean and Preheat the Axle Housing
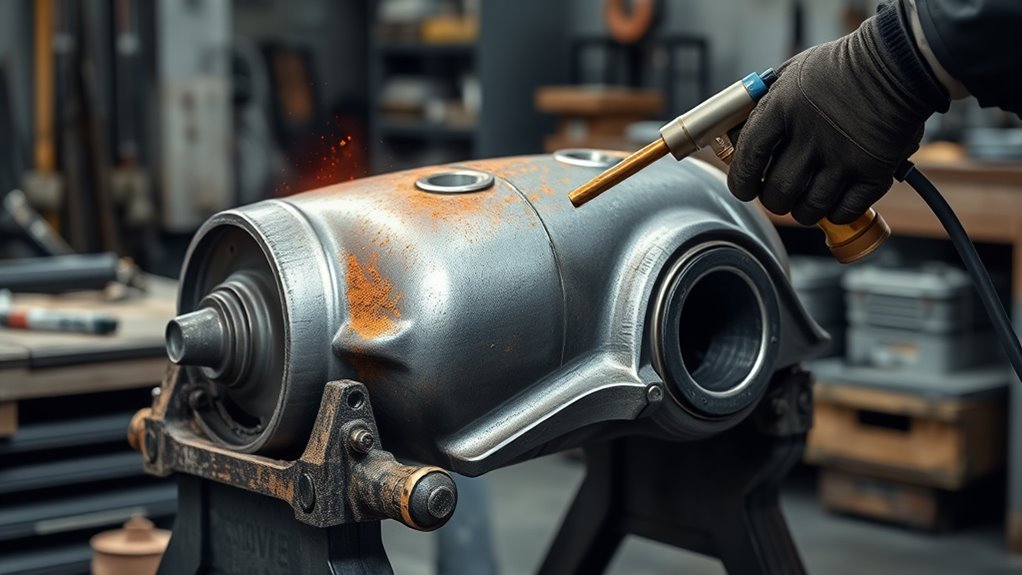
Start by thoroughly cleaning the axle housing with a wire brush or grinder. Remove grease, dirt, paint, rust, and scale so the weld can bond to clean metal.
You need a bare, sound surface before any welding begins. Contamination can weaken fusion and create weld defects.
Next, preheat the housing with a torch over a broad area, not just the seam. Even preheat helps you reduce thermal shock and limit warpage.
If you’re working with nodular iron or cast sections, use extra care with heat control and filler choice. Many cast housings need nickel-based filler and slow cooling to reduce cracking risk.
Keep the temperature steady while you weld so the metal doesn’t cool too fast and distort. After you finish, cover the housing with a welding blanket or wrap to slow cooling and relieve stress.
This method helps you control the material instead of letting heat control the job. It also helps you protect the axle housing from avoidable damage.
Use proper ventilation in the workspace to reduce your exposure to welding fumes.
Mount the Housing in the Alignment Jig
Once the housing has cooled under wrap, move it into the alignment jig. Seat it securely at the main bearing saddles so the tube stays true during welding.
Use clamps to lock the rear axle housing in place. Any shift can pull the assembly out of line and weaken your work.
Before you start the welding axle process, verify that brackets, supports, and added tabs sit square and match the build specs.
If your jig lets you rotate the housing, set it for the section you’re working on. That position gives you clean access to the joint and better puddle control.
Check the setup with a straight edge before and during each pass to catch warpage early. A stable alignment jig gives you the precision you need without fighting the part.
When you mount the rear axle housing correctly, you protect fitment, preserve strength, and reduce hidden distortion. Follow maximum fillet weld size guidelines so the weld supports the part without adding excess heat.
Tack the Housing at 12, 3, 6, and 9
Tack the housing at the 12, 3, 6, and 9 o’clock positions. This locks in your initial alignment before you run longer welds.
Place each tack welded point on the axle tubes with equal spacing. Even spacing helps the shell stay true and keeps one side from pulling out of line.
Place each tack evenly on the axle tubes so the housing stays true and nothing gets pulled out of line.
Feather both sides of every tack to improve adhesion and soften stress at the edges. After the four tacks, recheck alignment right away and confirm the housing still sits straight in the jig.
If it’s off, correct it now. Don’t let a bad setup dictate the final build.
These tacks act as anchor points. They help you keep control while you prepare for the next weld passes.
Use proper safety precautions when welding galvanized steel or any coated part.
Work deliberately, measure twice, and make sure each tack supports a precise, durable rear axle housing.
Weld Short Sections to Control Heat
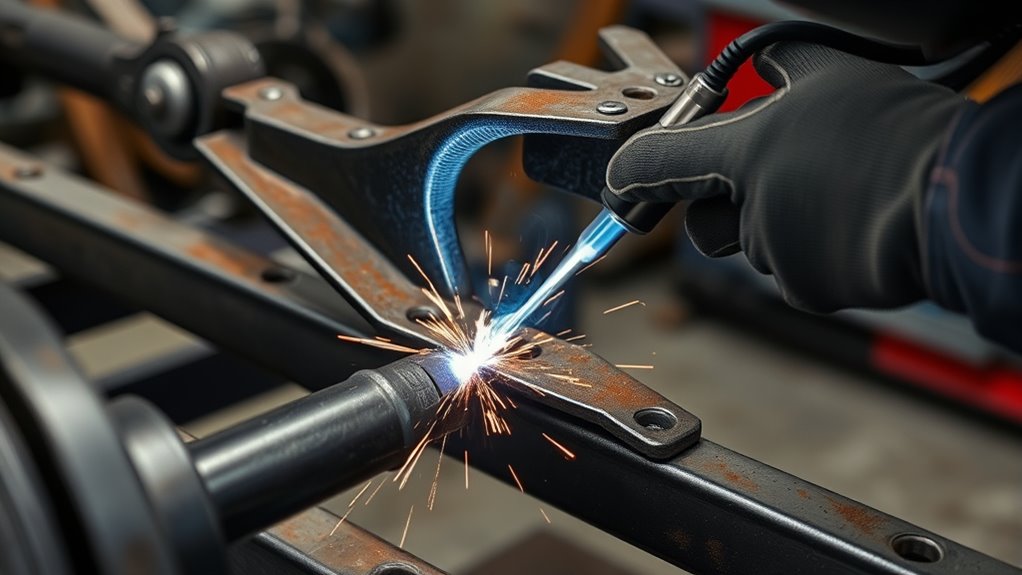
With the housing locked in at 12, 3, 6, and 9, move to short welds to keep heat under control. Weld in sections no longer than 1 inch, then move to another spot instead of running one continuous bead.
Use an alternating pattern to spread heat across the housing and reduce distortion. Give each pass time to cool before you strike the next arc.
Keep your starts and stops feathered so the welded edges blend cleanly and don’t leave sharp high spots. Each short segment should support the structure, not overpower it.
Use proper amperage settings so you avoid burn-through and maintain weld integrity during the process.
Pro tip: Let the housing cool between passes until you can hold alignment without chasing heat movement.
Follow These Welding Steps in Order
- Clean the housing to bare metal and remove all grease, rust, paint, and scale.
- Preheat the housing evenly over a broad area to reduce thermal shock.
- Clamp the housing in an alignment jig at the bearing saddles.
- Verify brackets, tabs, and supports before you tack anything in place.
- Tack the housing at 12, 3, 6, and 9 o’clock.
- Recheck alignment before you add more weld.
- Weld short 1-inch sections in an alternating pattern.
- Cool the housing slowly and inspect it with a straight edge.
- Correct high spots with controlled heat when alignment starts to move.
Check for Warpage and Correct High Spots
After the welds cool, check the axle housing with a straight edge. Confirm that it still sits straight and true.
Slide the edge along the tube and watch for warpage. Any gap or rocking point can mark a high spot that affects alignment.
Don’t guess. Measure both sides, then rotate the housing and inspect the axle flanges for consistency.
If you find a high spot, heat it gradually with a torch just enough to relieve stress. Let it cool slowly so you don’t create more warpage.
Repeat the check until the straight edge lies flat and the flanges read even. A small misalignment can affect handling and tire wear, especially with larger tires.
This step protects your work and helps the rear end run true, track straight, and hold under load. Good shielding gas coverage also helps prevent porosity and supports weld integrity.
Common Mistakes to Avoid
Don’t run one long bead around the housing. Long welds pack too much heat into one area and can pull the tube out of line.
Don’t skip the jig or rely on sight alone. A housing can look straight while the bearing saddles or flanges sit out of square.
Don’t cool the part with water or compressed air. Fast cooling can increase stress and may raise cracking risk in cast or nodular sections.
Frequently Asked Questions
Can You Weld a Differential Housing?
Yes, you can weld a differential housing, but the right method depends on the material. Cast and nodular housings need controlled preheat, compatible filler, short welds, slow cooling, and careful alignment checks.
What Metal Is Hardest to Weld?
Cast iron ranks among the hardest common metals to weld because it can crack, absorb contamination, and react poorly to fast temperature changes. Nodular iron also needs strict heat control and a filler that matches the job.
Can Bell Housing Be Welded?
Yes, you can weld a bell housing if you confirm the material first. You need proper preheat, compatible filler, controlled cooling, and a crack inspection before you put the part back into service.
What Is the Golden Rule in Welding?
Control heat from start to finish. Use clean metal, correct amperage, short welds, steady movement, and cooling time between passes so the part stays strong and aligned.
How Do You Know if an Axle Housing Warped After Welding?
Check it with an alignment bar, straight edge, or fixture after the welds cool. Gaps, rocking, uneven flange readings, or tight spots can show that the housing moved during welding.
Conclusion
A straight axle housing starts with clean metal, even preheat, solid fixturing, and short welds. Tack the housing evenly, weld in small sections, and check alignment after each stage.
Correct small high spots before they become bigger problems. When you work slowly and measure often, you finish with a rear axle housing that’s strong, true, and ready for service.


