
Welding a vehicle subframe is not a universal patch job. The subframe may carry the engine, steering gear, suspension, or drivetrain loads, and an incorrect repair can change wheel position, handling, or crash performance. Before cutting or welding, identify the exact component and confirm what the automaker allows for that vehicle.
Quick Answer
Weld a subframe only when the vehicle-specific OEM repair procedure expressly permits it. Some steel components have approved repair locations and methods, while many aluminum, cast, heavily corroded, bent, cracked, or mounting-point-damaged subframes require replacement. Structural welding should be completed and measured by a qualified repair technician before the vehicle returns to the road.
Key Takeaways
- Use the VIN, model year, drivetrain, and build information to obtain the correct OEM repair procedure before welding.
- Do not assume a subframe is repairable because the remaining metal looks thick or solid.
- Match the OEM-specified material, joint design, welding process, wire, gas, and corrosion protection.
- Measure mounting points before and after the repair; a strong-looking weld cannot correct distorted geometry.
- Complete electrical isolation, fire protection, scans, alignment, torque checks, and any required calibrations before driving.
At a Glance
| Time Required | Varies by teardown, corrosion, measurements, repair method, coating, scans, and alignment; a full structural job may take one or more working days. |
| Difficulty | Advanced structural repair. Professional equipment, vehicle-specific service information, welding qualification, and measurement skills are normally required. |
| Tools Needed | OEM service information, lift or approved supports, structural measuring equipment, approved welder and consumables, clamps and fixtures, PPE, fume extraction, fire protection, torque tools, scan tool, and alignment equipment. |
| Cost | There is no reliable universal price. Request itemized estimates covering inspection, teardown, the repair or replacement part, fasteners, corrosion protection, scans, alignment, and calibrations. |
What’s in This Article
- Understanding the Subframe’s Role in Vehicle Structure
- Identify the Exact Component Before Planning a Repair
- Check the OEM Repair Procedure and Recalls
- Assessing Subframe Damage: Repair or Replace?
- Before You Begin Subframe Welding
- Subframe Welding Workflow When Repair Is Approved
- Post-Repair Measurements, Scans, and Alignment
- Common Subframe Repair Mistakes
- Cost Considerations for Subframe Repairs
- How to Care for a Repaired Subframe
- Frequently Asked Questions
- Conclusion
- Sources
Understanding the Subframe’s Role in Vehicle Structure
A subframe is a rigid assembly attached to the vehicle body or chassis. Depending on the design, it may support the engine, transmission, steering rack, differential, control arms, suspension links, or other major parts. Front subframes are also called engine cradles or K-members, while rear units may be called suspension crossmembers or rear cradles.
The first question is not “Can this metal be welded?” It is “Does the automaker permit this exact component and damage location to be welded?”
The subframe helps maintain the location of suspension and steering parts under braking, cornering, acceleration, and road impact. Corrosion, cracking, torn mounts, or distortion can move those parts away from their designed positions and cause steering pull, clunks, vibration, poor alignment, or uneven tire wear.
A subframe is not the same as every structural part under the vehicle. Welded floor rails, aprons, body mounting brackets, rockers, and frame rails are part of the body or chassis structure and may follow different sectioning and joining procedures.
Identify the Exact Component Before Planning a Repair
Confirm the name and construction of the damaged component before deciding how to repair it. Record the VIN, model year, make, model, drivetrain, body style, and build date. A vehicle line may use different subframes for gasoline, hybrid, electric, front-wheel-drive, all-wheel-drive, or performance versions.
Determine whether the part is:
- A removable steel engine cradle or suspension crossmember
- An aluminum or mixed steel-and-aluminum assembly
- A cast or hydroformed component
- A welded body bracket or rail rather than a removable subframe
- Covered by a corrosion recall, service campaign, warranty extension, or special repair procedure
Note: A magnetic test alone cannot identify a steel grade, heat treatment, layer count, or repair permission. Use the OEM body or collision-repair information for the exact vehicle.
Check the OEM Repair Procedure and Recalls
Retrieve the current repair procedure before removing coating, drilling, cutting, heating, straightening, or welding. OEM1Stop links technicians to repair-information systems maintained by participating automakers. Use the vehicle-specific body repair manual, service manual, parts catalog, and relevant position statements.
The procedure should answer these questions:
- Is repair allowed, or must the complete subframe be replaced?
- Which areas may be straightened, sectioned, reinforced, or welded?
- What material and thickness are used at the damaged location?
- Which joint design, weld type, wire, shielding gas, machine, and settings are required?
- Does the part use structural adhesive, rivets, spot welds, plug welds, or special fasteners?
- Which dimensions and datum points must be checked?
- Which bolts, nuts, collars, washers, or mounts are one-time-use?
- Which scans, alignments, steering procedures, or calibrations are required afterward?
Do not assume that a subframe is weldable because another model uses a similar-looking part. Honda and Acura body-repair publications, for example, state that certain aluminum or mixed-material front subframes must not be repaired when damaged. The instruction applies to the listed vehicles, not automatically to every vehicle, but it shows why model-specific information is essential.
Before paying for structural work, enter the 17-character VIN in the NHTSA recall lookup. A corrosion or structural defect may already have a manufacturer remedy.
Warning: Do not weld a subframe when no approved procedure can be found. The absence of a procedure is not permission to create one.
Assessing Subframe Damage: Repair or Replace?
Inspect the complete assembly, not only the visible hole or crack. Remove loose scale and dirt without grinding away evidence needed to judge the damage. Check the top, bottom, seams, internal cavities, drain openings, mounting flanges, brackets, and the opposite side of the vehicle.
Look for:
- Perforation, heavy scaling, delamination, or swelling along seams
- Cracks extending from weld toes, bolt holes, brackets, or formed corners
- Elongated mounting holes or torn suspension, steering, engine, or body mounts
- Buckles, kinks, ripples, crushed sections, or changed cross-sectional shape
- Previous plates, heavy grinding, brazing, heating, or undocumented welds
- Corrosion extending into a boxed section beyond the visible opening
- Loose captive nuts, broken studs, damaged locating collars, or distorted flanges
Measure the component and its mounting points against OEM dimensions before cutting. Compare diagonal measurements and side-to-side locations where the procedure permits that comparison. A subframe can look straight while a suspension or steering mounting point remains out of position.
Products Worth Considering
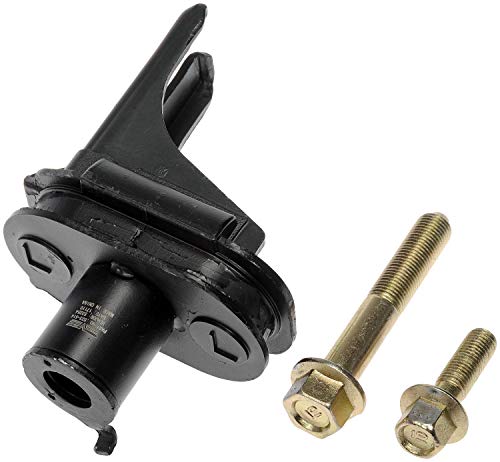
Direct replacement - fits and performs like the original equipment on specific vehicles

Replacement Is Usually the Safer Choice When
- The OEM states that the component is non-repairable.
- The material or construction cannot be positively identified.
- The part is aluminum, cast, ultra-high-strength, heat-treated, or mixed-material and no repair procedure covers the damage.
- Rust extends through a mount, seam, reinforcement, or large section of a boxed member.
- A crack reaches a suspension, steering, engine, transmission, differential, or body mounting point.
- The component is kinked, twisted, heavily bent, crushed, or dimensionally unstable.
- A previous repair removed too much metal or altered the original load path.
- The approved repair cannot be completed with available training, measuring equipment, fixtures, or welding equipment.
Warning: Do not drive a vehicle with a cracked, separated, heavily corroded, or moving subframe mount. Have the vehicle transported to a qualified repair facility.
Before You Begin Subframe Welding
Proceed only after the approved repair procedure, replacement boundaries, measurements, and safety plan are documented. Structural work should be performed on a level lift, bench, or support system suitable for the vehicle and the required measurements.
What You’ll Need
- Vehicle-specific OEM service and body-repair information
- A lift, frame bench, or approved support equipment using the specified lift points
- Mechanical or electronic structural measuring equipment
- The OEM-approved welder, wire or brazing consumable, shielding gas, and joint-preparation tools
- Matching OEM replacement material or the specified service part
- Fixtures, clamps, locating tools, and heat-resistant shielding
- Welding helmet, safety glasses, gloves, protective clothing, hearing protection, and suitable respiratory protection
- Local exhaust ventilation appropriate for welding and removed coatings
- Fire extinguisher and fire-watch equipment
- Torque wrench, angle gauge when required, scan tool, and alignment equipment
- Approved weld-through primer, epoxy primer, seam sealer, cavity wax, and underbody coating
Electrical, Fuel, and Fire Safety
Follow the OEM electrical-isolation procedure before welding. On a conventional vehicle, this may include key-off timing, battery disconnection, module precautions, and ground-clamp placement. On a hybrid or EV, the high-voltage shutdown and verification procedure must be completed by a trained person with the specified protective equipment.
Do not rely on disconnecting only the 12-volt battery on a hybrid or EV. Current manufacturer guidance may require removal or isolation of high-voltage components, and welding near an HV battery may be prohibited.
Inspect both sides of the weld area. Remove or protect fuel and vapor lines, brake hoses, wiring, SRS components, sound deadening, carpet, foam, seam sealer, undercoating, plastic parts, and other combustibles. Follow OEM procedures before disturbing refrigerant or coolant lines; refrigerant must be recovered with approved equipment rather than vented.
OSHA hot-work requirements call for fire-safe conditions, protection or removal of combustibles, suitable fire-extinguishing equipment, and a fire watch when required. A required fire watch must continue for at least 30 minutes after welding or cutting to check for smoldering material.
Welding and grinding can release metal, paint, coating, adhesive, and corrosion-product fumes. Use source extraction and PPE appropriate to the identified materials. OSHA lists welding fumes, ultraviolet radiation, burns, electrical shock, and eye injuries among the major welding hazards.
Pro Tip: Photograph the damage, factory seams, fasteners, routing, labels, and measurements before disassembly. Include a ruler or measurement display in the photos so the repair record shows more than appearance alone.
Subframe Welding Workflow When Repair Is Approved
The following workflow applies only when the OEM provides or expressly permits the repair. The service procedure controls every step and overrides general welding advice.
- Document the starting condition. Record measurements, corrosion extent, crack length, mounting-point locations, prior repairs, diagnostic trouble codes, and alignment symptoms before disassembly.
- Remove the assembly or nearby parts as directed. Many bolt-on subframes are removed before repair or replaced as assemblies. Support the engine, transmission, steering, suspension, or battery exactly as the manual requires.
- Clean only to sound, identifiable material. Remove coating, contamination, and corrosion far enough to inspect the full damage. Stop if thinning or corrosion extends beyond the approved repair boundary.
- Prepare the specified service part or repair material. Match the required alloy, thickness, shape, flange, reinforcement, overlap, and grain or forming direction. Do not substitute generic sheet metal.
- Restore the component to the specified dimensions. Fixture the assembly or replacement section before welding. Recheck mounting holes, diagonals, height measurements, and bracket positions.
- Set up the approved welding process. Use the specified GMAW, resistance spot welding, MIG brazing, or other approved joining method. Follow the required wire, gas, polarity, pulse mode, hole size, weld count, spacing, and access requirements.
- Make test welds when required. Use material of the same type and thickness. Inspect or destructively test the coupons according to the OEM or equipment procedure before welding the vehicle part.
- Tack and remeasure. Place the specified tacks or temporary fasteners, then confirm fit and dimensions before completing the joint.
- Follow the approved weld sequence. Control heat and distortion through the specified sequence, spacing, cooling intervals, and ground location. Do not add extra welds or reinforcement plates unless the procedure calls for them.
- Inspect the completed joint. Check weld size, penetration evidence, nugget or plug-weld quality, undercut, porosity, cracks, burn-through, joint tie-in, and surrounding distortion. Use any nondestructive or destructive verification required by the procedure.
- Restore corrosion protection. Clean the repair, apply the specified primer and seam sealer, coat exposed surfaces, and treat accessible cavities. Preserve drain openings rather than sealing them shut.
Note: Short weld passes may reduce heat buildup in some approved procedures, but “short passes” are not a substitute for the OEM weld type, sequence, spacing, or cooling instructions.
Products Worth Considering

New Brand Design:New design, Hot Stapler Plastic Repair Kit can meet your different needs, easily weld cracked and damaged plastic parts, support more professional DIY making and save cost.

Powerful Plastic Welder:The Allturn's Hot Stapler get your plastic repairs done faster and more efficiently than ever before

[15-Second Bolt Heating] Heats bolts in 15s using electromagnetic fields to break rust and corrosion bonds for easy removal. Faster, cleaner, and more precise than oxy-acetylene torches – no messy cleanup.
Post-Repair Measurements, Scans, and Alignment
A repair is not complete when the weld cools. Reinstall the subframe and related parts using the specified sequence, locating tools, new fasteners, torque values, and torque-angle steps. Some bolts, collars, nuts, washers, or mounts must not be reused.
Complete the following checks when required by the vehicle procedure:
- Final structural dimensions and mounting-point measurements
- Fastener torque and witness-mark verification
- Pre- and post-repair diagnostic scans
- Steering rack centering and steering-angle procedures
- Four-wheel alignment and a printed alignment report
- Ride-height or suspension-position checks
- ADAS, stability-control, ride-control, or steering calibrations
- Brake-line, fuel-line, coolant-line, refrigerant-line, wiring, and ground inspections
- Leak checks and confirmation that drains and heat shields are restored
- A controlled road test only after the vehicle passes static checks
Stop and correct the cause if alignment cannot be brought into specification, the steering wheel does not center, the vehicle pulls, new fault codes appear, a mount shifts under torque, or a repaired joint shows movement.
Common Subframe Repair Mistakes
- Starting without the OEM procedure: Similar-looking parts can have different materials and repair limits.
- Welding over rust: A bead cannot restore steel that has lost thickness beyond the approved repair area.
- Using generic patch metal: Thickness alone does not match strength, alloy, forming, layers, or reinforcement.
- Choosing a process by convenience: MIG, TIG, flux-core, brazing, and resistance welding are not interchangeable.
- Adding oversized plates or extra welds: Unapproved reinforcement can create stiff transitions and move stress into another area.
- Skipping measurements: A neat weld can still leave the suspension or steering mounts out of position.
- Grounding through bearings or electronics: Place the welding return clamp as the OEM and welder manufacturer direct, close to the work when permitted.
- Reusing restricted fasteners: Stretched, coated, locking, or one-time-use hardware may not provide the required clamp load twice.
- Ignoring the opposite side: Sparks and conducted heat can ignite hidden insulation, seam sealer, foam, or undercoating.
- Skipping corrosion protection: Bare seams and cavities can rust rapidly after factory coatings are removed.
- Skipping scans or calibration: Structural or steering work may affect systems that do not show an immediate dashboard warning.
Cost Considerations for Subframe Repairs
Subframe costs vary too widely for one dependable national price range. Access, material, corrosion, drivetrain layout, labor rates, parts availability, measuring time, and calibration requirements can change the total substantially.
Ask each shop for an itemized estimate covering:
- Initial inspection, measurements, and diagnostic scans
- Engine, drivetrain, steering, suspension, exhaust, or battery support and removal
- A new, remanufactured, or inspected used subframe
- Authorized welding or section repair, when permitted
- One-time-use bolts, mounts, collars, and related hardware
- Primers, seam sealer, cavity wax, paint, and underbody coating
- Reassembly, fluid or refrigerant service, scans, alignment, and calibration
- Repair documentation and warranty terms
A used subframe can reduce the parts cost, but it should be checked for corrosion, cracks, previous repairs, correct part identification, and dimensional damage before installation. Confirm that the part number and revision fit the VIN and drivetrain.
When damage came from a collision or road impact, review the insurance estimate for OEM procedures, measurements, required fasteners, scans, corrosion protection, alignment, and calibration. A low estimate may omit operations that are necessary for a complete repair.
How to Care for a Repaired Subframe
Inspect the repaired or replaced area at routine service and after winter driving, deep-water exposure, off-road impacts, or a collision. Pay close attention to seams, drain holes, mounting brackets, fasteners, and areas where coating was restored.
- Wash away salt and packed dirt. Clean the underside without forcing water into disconnected electrical parts or damaged seams.
- Check coatings and seam sealer. Repair chips, lifted edges, and exposed metal with compatible products.
- Inspect cavities. Renew cavity wax when the product or repair procedure calls for it.
- Watch for movement. Fresh witness marks, fretting, cracked paint, loose fasteners, or shiny metal around a mount can indicate movement.
- Monitor alignment and tire wear. A new pull, crooked steering wheel, or uneven wear deserves prompt inspection.
- Document follow-up checks. Keep photos, alignment printouts, scan reports, invoices, material information, and repair measurements with the vehicle records.
Do not cover active corrosion with thick undercoating. The rust must be assessed and treated first, or the coating can hide continued deterioration.
Frequently Asked Questions
Is it safe to weld a subframe?
It can be safe only when the vehicle-specific OEM procedure permits the repair and the technician follows its material, joint, welding, measurement, electrical-isolation, corrosion-protection, and post-repair requirements. When repair is prohibited or no approved procedure exists, replace the component.
Is MIG or TIG better for subframe repair?
Neither process is automatically better. The OEM may specify GMAW, resistance spot welding, MIG brazing, adhesive and fasteners, another approved method, or complete replacement. Use only the process, equipment, consumable, joint design, and settings authorized for that vehicle and repair location.
Can you patch a rusted subframe?
Only when the OEM permits a repair and the corrosion remains within the approved limits and location. Rust around suspension, steering, drivetrain, or body mounts; widespread scaling; internal delamination; or perforation beyond the repair boundary usually supports replacement rather than a patch.
When should a subframe be replaced instead of welded?
Replace it when the OEM marks it non-repairable, the material cannot be identified, corrosion reaches critical mounts or reinforcements, the part is kinked or twisted, a crack crosses a load-bearing area, or the approved repair cannot be completed with the required equipment and measurements.
Does the battery need to be disconnected before welding?
Follow the complete OEM electrical-isolation procedure. A conventional vehicle may require more than simply removing a battery cable, and a hybrid or EV requires trained high-voltage shutdown and verification. Never assume that disconnecting only the 12-volt battery makes an electrified vehicle safe to weld.
Does a subframe repair require a wheel alignment?
Usually, yes, when the subframe locates suspension or steering parts or has been removed, shifted, repaired, or replaced. Follow the OEM procedure and obtain a printed alignment report. Some vehicles also require steering-angle, stability-control, suspension, or driver-assistance calibrations.
How much does it cost to weld or replace a subframe?
There is no dependable universal range. The total depends on the vehicle, material, corrosion, damage, labor rate, teardown, part availability, fasteners, coating, scans, alignment, and calibration. Compare itemized estimates rather than judging the repair by welding labor alone.
Can a welded subframe pass a vehicle inspection?
That depends on the jurisdiction, the vehicle, and the quality and authorization of the repair. Passing an inspection does not by itself prove that an OEM procedure was followed. Ask the local inspection authority and keep the OEM procedure, measurements, repair invoice, alignment report, and scan records.
Safety Disclaimer: This article provides general information and does not replace the repair procedure for a specific vehicle. Structural damage, welding, high-voltage isolation, refrigerant service, alignment, and calibration should be handled by qualified professionals with the required equipment. Do not drive a vehicle with suspected subframe separation, severe corrosion, torn mounts, or unstable steering or suspension.
Conclusion
Safe subframe work begins with identification and OEM repair information, not with a welder. Confirm the exact component, check recalls, measure the mounting points, and determine whether repair is permitted. When welding is approved, use the specified process and materials, isolate electrical and fire hazards, restore corrosion protection, and prove the repair through measurements, scans, torque checks, alignment, and required calibrations. Choose replacement whenever the procedure or damage leaves doubt about structural integrity.
Sources
- OEM1Stop — access to current automaker repair-information resources.
- American Honda Motor Co., 2015 TLX Body Repair Information — model-specific subframe repairability and material guidance.
- Honda Body Repair Information — high-strength-steel welding restrictions and approved repair-method guidance.
- Tesla Model Y Body Repair Procedure — technician qualification, electrical isolation, test welds, and approved GMA equipment.
- OSHA 29 CFR 1910.252 — welding fire prevention, combustible protection, PPE, and fire-watch requirements.
- National Highway Traffic Safety Administration Recall Lookup — VIN-based recall and manufacturer-campaign checks.




