How to Weld Truck Bed Panels and Corners
What’s in This Article
- How to Prep Truck Bed Panels for Welding
- How to Tack Truck Bed Corners
- How to Weld Truck Bed Panels Without Warping
- When to Stitch Weld vs. Run a Full Seam?
- How to Fill Gaps and Stop Burn-Through
- How to Grind and Straighten Bed Panel Welds
- How to Finish Truck Bed Corners for Paint
- Frequently Asked Questions
Truck bed panel welding gets messy fast when rust, poor fit-up, and excess heat work against you. Clean the metal first, mark accurate cut lines, and fit the patch with a tight 1/32 to 1/16 inch butt gap or a 1/2-inch lap joint. Clamp everything firmly, place small MIG tack welds, and use short stitch welds to control warping before you grind flush and prime the repair.
Quick Answer
To weld truck bed panels, clean the metal to bare steel, fit the patch tightly, and clamp it so it can’t move. Tack the panel in a balanced pattern, weld short stitches, and let the metal cool between welds. Finish by grinding the bead flat, checking for pinholes, sealing the repair, and priming the surface.
Key Takeaways
- Clean rust, paint, oil, and dirt from both sides of the weld area before welding.
- Use a tight butt gap or a proper lap joint so the patch stays easier to control.
- Place tack welds in a spread-out pattern to reduce heat buildup and panel movement.
- Use stitch welds on thin truck bed sheet metal to lower the risk of warping.
- Grind slowly, check the surface often, and prime bare metal soon after finishing.
How to Prep Truck Bed Panels for Welding

Start by cleaning the truck bed panels to remove rust, dirt, paint, undercoating, and oil. You need clean bare metal before the weld can fuse well. Use a grinder, scraper, wire wheel, or solvent wipe where the repair allows it.
Use a scratch awl or marker to mark exact cut lines for the patch panel. Cut slowly, then test-fit the patch before you weld. A careful fit helps you keep the bed shape and panel alignment under control.
Check the panel edges before you choose the joint style. Use a 1/2-inch overlap for a lap joint, or keep a 1/32 to 1/16 inch gap for a butt joint. If the edges need more weld area, bevel them lightly without thinning the panel too much.
Clamp or fixture the panels securely so they won’t shift, twist, or pull out of position while you weld. Precise prep gives you cleaner fusion and a stronger repair. Remove all contaminants to reduce porosity and inclusions during the welding process.
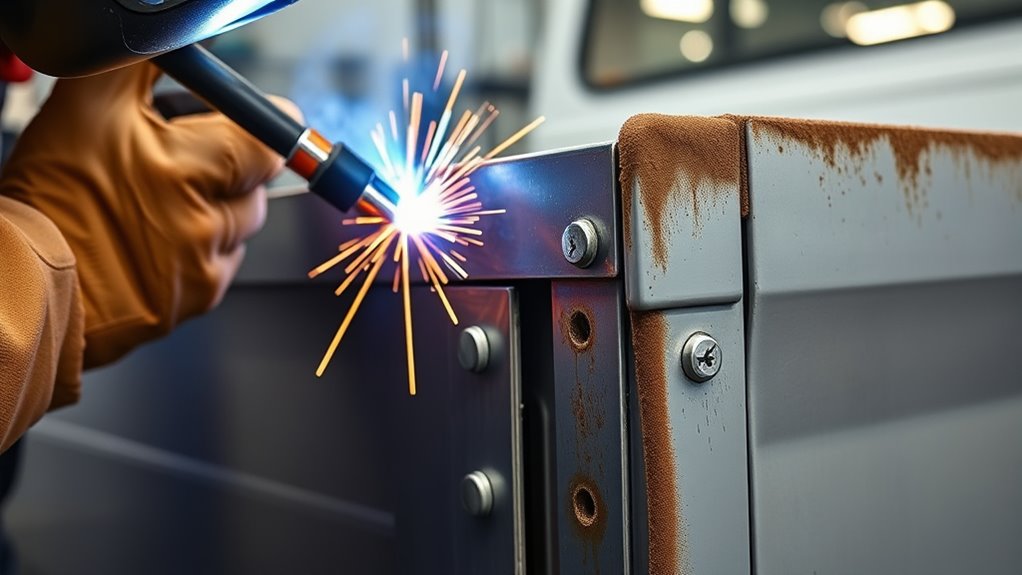
How to Tack Truck Bed Corners
Position the truck bed corner panels accurately, clamp them tight, and confirm the fit before you strike an arc. Set your MIG welder low enough for thin sheet metal, then place tack welds every 1 to 2 inches where the joint needs close control. Use wider spacing during early setup if the panel starts to pull.
Let each tack cool before the next one. Check the alignment with a hammer and dolly so you can correct small movement before full welding. Clean metal supports a stronger bond and helps prevent weld defects, so review proper cleaning metal basics before you start.
Prep and Fit Up
Before you tack weld the truck bed corners, clean the area to remove rust, dirt, sealant, and old coating. Scribe a clear cut line around the damaged section. Trim the old metal about 1/2 to 3/4 inch inside that line when the repair style calls for it.
- Clamp the patch panel firmly.
- Check edge alignment and gap.
- Verify that the panel sits flush.
- Recheck the fit before you strike an arc.
Use fixtures or locking clamps to hold the panel in place. A tight fit up helps you control penetration, reduce distortion, and prepare the corner for clean tack welds.
Tack Sequence Control
With the patch panel clamped and flush, add tack welds in a controlled sequence. This locks the truck bed corner without pulling it out of shape.
Set the butt joint with a slight 1/32 to 1/16 inch gap. Start tack welding about 6 inches apart during the first pass. Work around the corner instead of driving heat into one spot.
Place the next tack on the opposite side, then move again to balance heat across the joint. Let every tack cool before you add the next one.
After you finish the first tack pattern, check alignment and flushness across the seam. Correct any shift while the joint still gives you room to work.
This sequence gives you control, a clean fit, and a corner that stays true.
Heat and Warpage
Heat control matters when you tack truck bed corners. Thin sheet metal can warp fast when you put too much heat into one area. Keep early tacks about 6 inches apart, and use short bursts so the heat can spread out.
- Set your welder low enough to limit heat.
- Back the joint with a dolly, copper bar, or plate when access allows it.
- Recheck alignment after every few tacks.
- Let the panel cool before the next pass.
This steady sequence keeps the metal flatter, prevents burn-through, and protects panel integrity.
You guide the truck bed with controlled heat and precise placement. If a tack pulls the edge, correct it now so your final welds stay true.
Warning: Keep flammable bed liners, fuel residue, wiring, and undercoating away from the weld area before you strike an arc.
How to Weld Truck Bed Panels Without Warping
Start with a tight panel fit-up so the edges stay aligned and the joint gap stays uniform. Poor fit-up forces you to add more filler metal, which adds more heat.
Place tack welds about 6 inches apart to hold position. Then weld in short sections with steady travel speed and controlled heat to limit distortion.
Use a copper backing bar when you can reach the back side of the joint. It can absorb heat and support the weld puddle. Let each pass cool naturally before you continue.
Clean the metal and remove heavy rust before welding so the repair keeps better strength.
Panel Fit-Up
A tight fit-up helps keep truck bed panels from warping during weld repair. With proper panel fit-up, you control heat, preserve alignment, and reduce distortion. Cut your patch slightly oversized, then trim it until the seam closes with a small, even gap.
- Trim for a snug seam.
- Secure both panels firmly.
- Check alignment before welding.
- Use a dolly to support the shape between welds.
When you hold the work rigid, you resist heat-driven movement and protect structural integrity.
Keep your weld speed steady and your heat low enough for thin steel. That discipline gives you cleaner joints and less rework.
Tack-Weld Strategy
Once you clamp and align the panels, tack-weld them about 6 inches apart to limit heat buildup. Use a controlled tack weld sequence, and jump across the seam so each spot cools before the next one.
Lightly hammer each tack weld if you see a rise or crown. A quick tap can flatten the joint and prevent distortion. Watch your travel speed and amperage, then adjust them before the panel overheats.
| Step | Action | Result |
|---|---|---|
| 1 | Place a tack weld | Locks alignment |
| 2 | Jump locations | Spreads heat |
| 3 | Let tacks cool | Stabilizes panel |
| 4 | Hammer lightly | Flattens metal |
| 5 | Check settings | Protects panel shape |
Heat Control
With the tacks in place, your next job is controlling heat so the truck bed panel stays flat. Good heat control keeps thin steel from shrinking, twisting, or bowing while you weld.
- Set your machine low, around 50 to 60 amps, and test on scrap first.
- Move at a steady pace, and don’t linger in one spot.
- Weld short sections, then let the panel cool between passes.
- Clamp a copper backing plate behind the joint to absorb heat and support the puddle.
Keep your tack welds about 6 inches apart during the first stage so the panel can release heat.
If you spot a rise, use a hammer and dolly right after welding to knock it flat. Disciplined heat control stays precise, calm, and focused on preventing warping.
Pro tip: Practice the same gap, wire, and heat settings on scrap metal before welding the truck bed.
When to Stitch Weld vs. Run a Full Seam?
When you weld truck bed panels, choose stitch welds for thin sheet metal and broad cosmetic areas. Short, spaced welds reduce heat buildup and help limit warping.
Use each stitch weld to control distortion while still locking the panel in place. This method gives you room to correct fit-up between welds. It also helps you keep the joint straight without forcing the metal.
Each stitch weld controls distortion, gives you room to adjust fit-up, and helps keep the joint straight.
Run a full seam when the joint carries more stress or when the repair needs maximum structural integrity. A continuous bead ties the metal together more completely, but you must control heat and maintain accurate alignment.
Access to the joint also matters. If you can’t reach both sides easily, stitch welding may give you a safer and more flexible repair path. Preheating does not apply to typical thin truck bed sheet metal, but it can matter for some cast parts, as explained in this guide to preheating cast iron.
Match the weld style to the job. Let the panel thickness, joint purpose, and access decide the method.
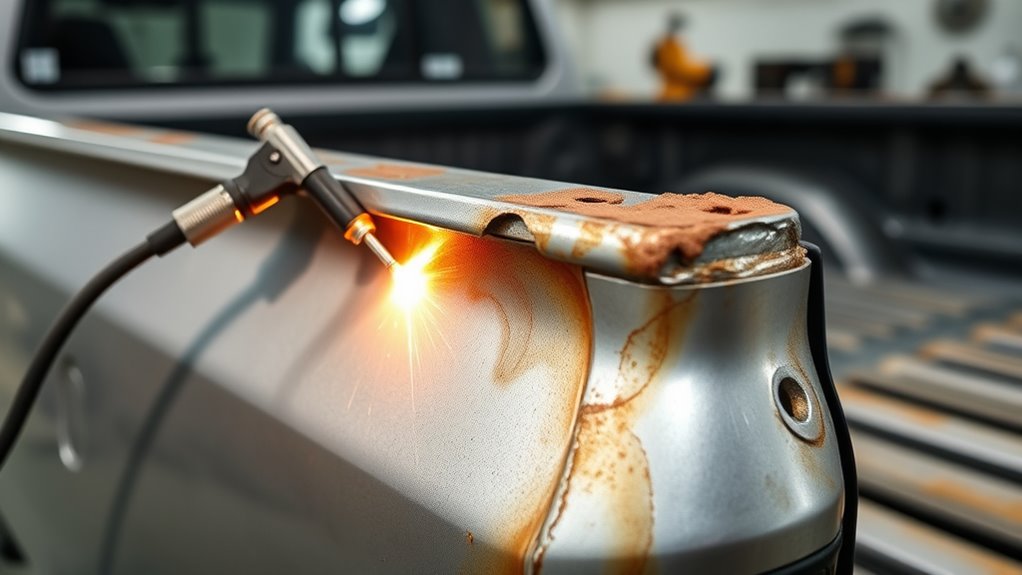
How to Fill Gaps and Stop Burn-Through
To fill gaps and avoid burn-through on truck bed panels, keep butt-joint gaps tight at about 1/32 to 1/16 inch. A smaller gap gives the weld less open space to bridge.
When you fill gaps, control heat with care. Start with lower amperage, then raise it only as needed to wet the edges without blowing through thin steel.
- Place tack welds about 6 inches apart to lock alignment and spread heat.
- Use copper backing behind the joint to absorb excess heat and support the puddle.
- Keep travel speed steady, and don’t dwell in one spot.
- If burn-through happens, stop immediately and let the metal cool.
- Bridge the hole with small tacks, then grind and inspect the repair.
This method keeps the panel sound, limits distortion, and helps you weld with precision. Proper gas flow also helps you keep the weld clean and reduce porosity.
How to Grind and Straighten Bed Panel Welds
Start with a disc grinder and a flap wheel to knock down the excess weld bead. Keep your passes controlled so you don’t overheat the panel and cause new warping.
Begin with about 50-grit to remove the bulk of the bead. Then move through finer grits until you reach about 120-grit for a smoother surface.
Keep the grinder at a consistent angle with steady pressure. Don’t carve divots or leave ridges. Work in short sections, check flatness often with a straightedge, and use a hammer and dolly to correct low spots.
If the panel feels hot, stop and let it cool. Heat can bend the metal and undo your careful welding. Using appropriate grit sizes helps you get a smooth finish without damaging the metal.
Once the weld sits level and the panel feels even, use an orbital sander to refine the surface.
That controlled grind gives you a clean foundation for primer, filler, and paint.
How to Finish Truck Bed Corners for Paint
With the truck bed corner welds ground flush, clean the area thoroughly and inspect it for low spots. You now need to turn the repair into a surface that can hold a durable coating.
- Sand the corner with a 50-grit disc to remove high spots and blend the weld.
- Follow with 120-grit to refine the surface and create a uniform scratch pattern.
- Wipe the metal with degreaser to remove dust, oil, and other contaminants.
- Fill low spots with compatible body filler, then block-sand it smooth before priming.
Apply an automotive primer over the repaired corner and let it cure fully.
Wear flame-resistant clothing, welding gloves, and proper eye protection during the welding process.
Once the primer cures, inspect the finish under good light before you apply the topcoat. This sequence gives your weld repair a clean edge and keeps the corner ready for service.
Frequently Asked Questions
Is it better to TIG or MIG weld body panels?
MIG welding usually works better for truck bed and body panels because it lets you weld faster. You can control heat well with short tacks, thin wire, and careful settings. Use TIG when you need finer control, but expect slower work and a higher skill demand.
Where do you start a weld when welding a corner?
Start near the strongest fitted point where the panels meet cleanly. Place the first tack there, then move around the joint with short stitches. This balanced pattern helps you control heat and reduce distortion.
What is the best welding method for body panels?
MIG welding often gives you the best mix of speed, control, and ease for body panels. Use thin wire, proper shielding gas when your setup allows it, and short tack welds. Butt welds can make clean repairs, but lap joints can work well where the repair design allows them.
Is it better to weld or glue body panels?
Welding works better for areas that need metal fusion or structural strength. Panel adhesive can help on some non-structural panels because it avoids welding heat. Follow the vehicle maker’s repair guidance when the panel affects safety or load paths.
How do you know if the panel is getting too hot?
The panel may crown, oil-can, discolor heavily, or pull away from the seam when it gets too hot. Stop welding and let the metal cool before you continue. Shorter welds and wider spacing help you regain control.
Safety Disclaimer: This article is for informational purposes only and does not replace professional welding, auto body, or safety advice. Wear proper protective gear, control fire risks, and consult a qualified repair professional when a truck bed repair affects structure, fuel systems, or road safety.
Conclusion
A strong truck bed panel repair starts with clean metal, tight fit-up, and patient heat control. Prep the panel, tack the corners, stitch the seam, and grind the welds without rushing the metal. Before paint, check for pinholes, skim low spots, and seal every bare surface that needs protection. When you work in small, controlled steps, you restore strength, fit, and finish with far less rework.


