Welding in a replacement trunk floor is a rust repair job that rewards patience more than speed. You need clean metal, a tight-fitting panel, controlled MIG tack welds, and sealed bare steel on both sides. Before you strike an arc, make the car fire-safe, protect nearby wiring and fuel parts, and plan how you will reach the underside after welding.
Quick Answer
To weld in a trunk floor, cut the rusty metal back to solid steel, clean and test-fit the replacement panel, apply weld-through primer only where hidden overlaps will be welded, then tack the panel in place. Use short, staggered MIG welds, cool between welds, grind lightly, seam seal both sides, and coat all bare metal.
Key Takeaways
- Cut only until you reach clean, solid metal, then make the replacement panel fit without forcing it.
- Use tack welds, plug welds, and short stitch welds instead of one long bead, which can warp thin trunk-floor sheet metal.
- Set the MIG welder from the door chart or a trusted calculator, then tune the setting on scrap from the same gauge before welding the car.
- Seal, prime, and paint the top and underside of the repair so moisture cannot creep behind the new panel.
At a Glance
| Time Required | 1 full day for cutting, fitting, and welding; 1 to 2 extra days for seam sealer, primer, paint, and undercoating cure time |
| Difficulty | Intermediate to advanced DIY body repair |
| Tools Needed | MIG welder, cut-off wheel or air saw, spot-weld cutter, grinder, clamps, copper backing bar, drill, wire brush, respirator, welding helmet, gloves, and fire extinguisher |
| Cost | About $150 to $600 for a repair panel, wire, gas, primer, seam sealer, paint, and consumables, not including welder purchase or rental |
Warning: Trunk-floor welding creates sparks, fumes, and fire risk. Follow OSHA welding and cutting fire-prevention guidance, keep an extinguisher nearby, remove or shield combustibles, disconnect the battery, protect wiring, and check the underside of the car during and after welding.
Prep the Trunk Floor for Welding
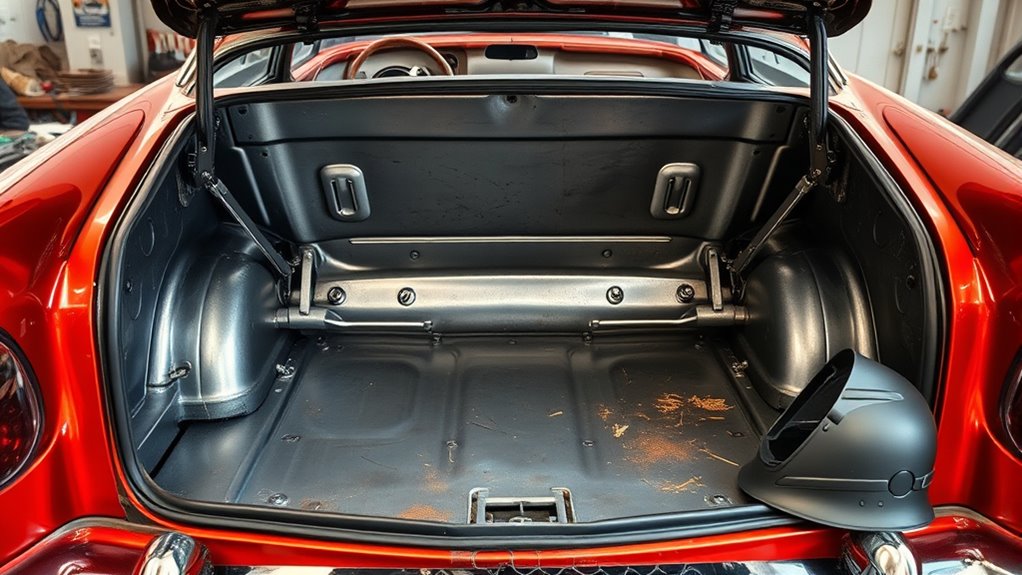
Start by stripping the trunk area so you can see the full repair. Remove carpet, sound deadener, seam sealer, loose undercoating, trim panels, wiring clips, and anything that can melt or catch fire. Disconnect the battery before cutting or welding.
Inspect the top and underside of the trunk floor. Look for fuel lines, brake lines, wiring, exhaust parts, vent tubes, and the fuel tank. If heat or sparks can reach them, remove them or protect them with a welding blanket or metal shield. Keep a second person on fire watch when possible.
Cut out all rusted or damaged sections until you reach clean, solid metal. Do not stop at the edge of the visible rust if the steel is thin, pitted, or soft. Tap the surrounding area with a pick or small hammer, then mark the real edge of the repair.
Clean the existing floor and replacement panel at least 1 inch beyond the seam. Remove paint, scale, seam sealer, oil, and surface rust with a wire wheel, sanding disc, or abrasive pad. If you use POR-15 Metal Prep, use it as a metal etch and rust-neutralizing prep after degreasing, then rinse and dry the panel fully before primer or coating.
Apply weld-through primer only to hidden overlap areas that will be welded and sealed later. Keep the actual arc area clean enough for a stable weld. If you are welding over zinc-coated replacement metal, grind the coating back from the weld zone and use ventilation because zinc-bearing coatings create hazardous fumes. For more detail, see this guide on how to grind off zinc before welding.
Gather Tools, Materials, and Safety Gear
Having everything ready keeps the panel from shifting while you hunt for tools. It also helps you stay focused on heat control once welding starts.
| Category | What You Need |
|---|---|
| Cutting and fitting | Cut-off wheel, air saw, spot-weld cutter, drill, file, grinder, marker, straightedge, and cardboard for templates |
| Welding | MIG welder, solid wire or approved flux-core wire, shielding gas if using solid wire, clamps, magnets, copper backing bar, and scrap metal for test welds |
| Protection | Welding helmet, respirator rated for welding fumes, eye protection, hearing protection, cotton or leather sleeves, and heat-resistant welding gloves |
| Finishing | Weld-through primer, epoxy primer or rust-inhibiting coating, seam sealer, paint, undercoating or bed liner, cavity wax, masking tape, and brushes |
For auto sheet metal, a MIG welder with solid wire and shielding gas is usually easier to control than flux core because it creates less spatter and cleaner welds. Flux core can work when gas shielding is not practical, but it needs careful cleanup and more ventilation. Review proper preparation if you choose flux core.
Cut Out the Rusted Floor Cleanly
Assess the rusted area from both sides, then cut out only the damaged floor until you reach solid, clean metal and a sound edge for the replacement panel. Use a cut-off wheel, air saw, or body saw, and keep your light aimed at the seam so you can see the cut line.
When the trunk floor is spot welded to braces, rails, or drop-offs, use a spot-weld cutter instead of slicing through the support below it. Preserving good factory structure makes the repair stronger and gives you better points for plug welds.
| Step | Goal |
|---|---|
| Trim to solid metal | Create a clean edge that can hold a weld |
| Preserve factory spot-weld flanges | Avoid weakening braces, rails, and drop-offs |
| Deburr and clean the seam | Prevent gaps, contamination, and burn-through |
After cutting, vacuum the area and clean the existing floor and new panel at least 1 inch around the seam. Remove paint, debris, and corrosion. Do not leave acid prep, oil, or solvent trapped between overlapping panels because it can contaminate the weld or weaken coating adhesion later.
Fit the Replacement Trunk Floor
With the old metal cut away, test-fit the replacement trunk floor and trim any excess until it sits snugly against the body structure without forcing it. A panel that has to be pulled into place will move when heat hits it.
You need a precise fit so the replacement floor follows the factory contours and meets clean, solid metal where rust was removed. Check every flange, edge, and seam against the opening, then mark high spots and refine them with a cut-off wheel, body file, or sanding disc.
For a butt-welded seam, keep the gap tight and even. A common target is no wider than the wire diameter, but the real goal is a gap small enough to bridge without burn-through. For a lap seam or factory-style flange, make sure the overlap sits flat and has enough clean contact area for plug welds.
Drill or punch holes for plug welds where the original floor joined braces or flanges. Keep the holes consistent, usually about 5/16 inch, and space them close enough to mimic the strength of the original spot-weld pattern. If you are unsure how large a weld should be on a flange, review maximum fillet weld size guidance so you do not pile on oversize welds that add heat without adding useful strength.
Clamp the panel firmly in place, then check the trunk side and underside one more time. Confirm that braces, drain holes, spare-tire well contours, tank straps, and body mounts still line up. A clean fit now saves grinding later and gives you a better base for seam sealer and long-term corrosion protection.
Pro Tip: Make a cardboard template before trimming the repair panel. Sneak up on the final fit with small cuts instead of trying to remove the full amount in one pass.
Set Up the MIG Welder and Practice First
Most classic-car trunk floors are thin sheet metal, often around 18 to 20 gauge, so heat control matters more than deep penetration. Use the chart inside your welder, the machine manual, or a trusted tool such as the Miller MIG solid-wire welding calculator as a starting point.
For solid-wire MIG on mild steel, many body repairs use small wire, such as .023 or .024 inch ER70S-6, with 75/25 argon-CO2 shielding gas. Your exact voltage and wire-feed speed depend on the machine, wire diameter, gas, joint design, and metal thickness, so do not rely on a single fixed setting.
Before welding the car, make test welds on scrap from the old trunk floor or the same-gauge replacement panel. The weld should sound steady, wet into both pieces, and leave minimal burn-through. Break or bend a test coupon if possible. If the weld sits on top, increase heat slightly or slow down. If the edge disappears, reduce heat, move faster, or use a copper backing bar.
Note: Welding fumes can contain metal particles. Use ventilation, avoid breathing the plume, and use respiratory protection suited to the job. CDC/NIOSH notes that welding fumes are composed of metals and may include manganese exposure concerns.
MIG Weld the Floor Without Warping
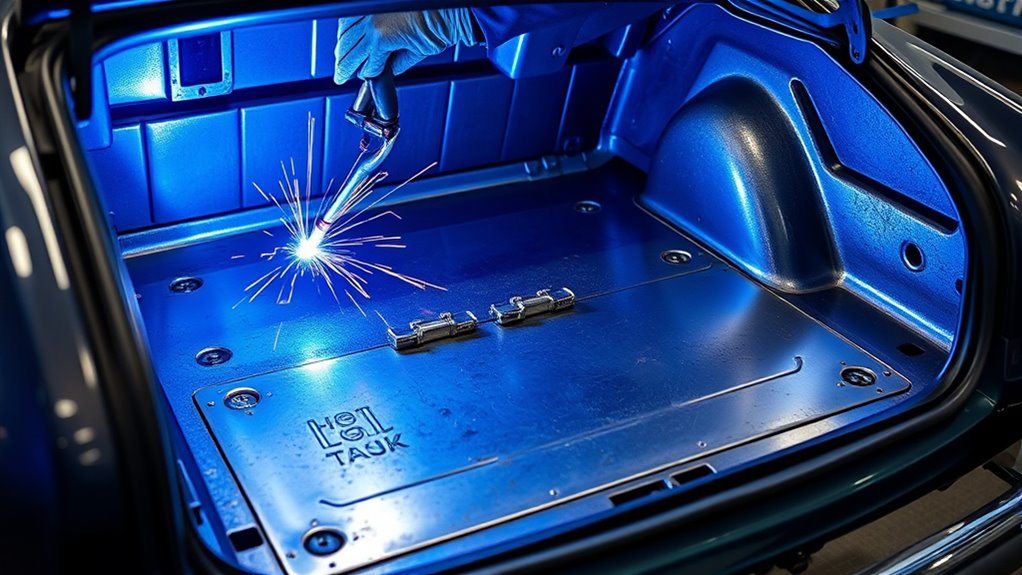
Begin with tack welds spaced around the repair so the panel cannot drift. Place the first tacks at opposite sides, then add more tacks every few inches while checking that the panel stays flush. Do not fully weld one side before moving to the other.
Use short, individual welds around the perimeter, alternating spots to spread heat and stop warping. Let each area cool before welding nearby again. Keep a damp rag nearby for controlled cooling around the work area, but do not quench the weld so hard that you shock the metal.
- Keep each weld short, usually a tack or brief stitch.
- Move from one side of the panel to the opposite side.
- Let the panel cool between passes.
- Use a copper backing bar behind butt seams when you can reach them.
- Watch for oil-canning, edge lift, and panel shrinkage.
- Clean the nozzle and contact tip if spatter starts affecting gas coverage.
For plug welds, hold the arc on the lower support first, then spiral outward to fill the hole and tie into the top panel. The finished plug weld should be flat enough to grind lightly but fully fused around the edge.
If you are using flux core, check your flux core MIG welding settings, remove slag between welds, and expect more cleanup than solid-wire MIG.
Inspect, Grind, and Fix Small Weld Defects
After the welds cool, inspect the entire seam from the top and underside. Look for pinholes, missed edges, cold welds, burn-through, and gaps near braces. Shine a bright light from one side while you check the other side if access allows.
Grind only as much as needed. Thin trunk-floor sheet metal is easy to weaken if you grind every weld perfectly flat. Use a flap disc or small grinding wheel and keep it moving. If you find a pinhole, clean the area, add a quick tack, let it cool, and inspect again.
| Problem | Likely Cause | Fix |
|---|---|---|
| Burn-through | Too much heat, wide gap, or weak thin metal | Lower heat, use shorter tacks, add copper backing, or trim back to stronger metal |
| Weld sitting on top | Cold setting, poor ground, dirty metal, or fast travel | Clean the joint, improve ground contact, and retune on scrap |
| Panel warping | Too many welds in one area | Skip around, cool between welds, and avoid long beads |
| Seam sealer lifting later | Dust, oil, uncured coating, or bare rust under the sealer | Clean, scuff, prime as required by the product, and let each layer cure |
Seal and Paint the New Trunk Floor
Once the welds have cooled and passed inspection, clean the repair with wax and grease remover that is safe for your coating system. Blow dust from the seams, then seal every seam on both sides of the new trunk floor with automotive seam sealer to block moisture.
| Step | Purpose |
|---|---|
| Seal seams | Stop moisture intrusion |
| Prime or coat welds | Increase corrosion resistance |
| Add liner or undercoating | Protect the underside from road debris and moisture |
| Dry fully | Preserve adhesion before trim goes back in |
Apply epoxy primer, rust-inhibiting paint, or a coating such as POR-15 Rust Preventive Coating over properly prepared metal. Make sure every product in the stack is compatible with the layer below it. Some coatings need scuffed metal, some need a specific primer, and some need topcoat timing to be followed closely.
After primer or coating cures, apply paint in the trunk and undercoating or bed liner underneath if you want extra impact protection. Use cavity wax inside boxed braces or overlapping flanges where moisture can hide. Let the sealant and paint dry completely before reinstalling trim, wiring, fuel components, or the spare tire.
Troubleshooting After the Repair
Before calling the job finished, check fit, strength, and sealing. Pour a small amount of water around the trunk weatherstrip area, then inspect the new floor and seams for leaks. Do not soak fresh coatings before they cure.
- If water appears at a seam: dry the area, clean it, and add seam sealer after confirming the coating is compatible.
- If the panel flexes near a brace: inspect the plug welds from the underside and add welds only where the metal is clean and properly supported.
- If rust shows through paint: strip that spot back, remove the rust, re-prep the metal, and recoat it.
- If a fuel smell appears after welding: stop using the vehicle and inspect the tank, filler neck, vent lines, and fuel lines before driving.
Frequently Asked Questions
What is the golden rule in welding a trunk floor?
The golden rule is to fit the metal tightly before welding. Clean both pieces, keep butt-weld gaps small, clamp the panel flush, and weld in short, controlled tacks. A tight fit reduces burn-through, grinding, distortion, and weak welds.
What kind of welder do I need to weld on a car?
A MIG welder is usually the best choice for trunk floors and other auto body sheet metal. Solid wire with shielding gas is cleaner and easier to control than flux core, though flux core can work if you clean well and manage spatter. TIG can also work, but it is slower and requires more skill.
Is it illegal to weld a vehicle frame?
It depends on where you live, what part of the vehicle is being repaired, and whether the repair affects roadworthiness, inspection, insurance, or crash structure. A trunk floor patch is usually body repair, but frame rails, suspension mounts, and crash structures should be repaired only with the correct OEM procedure or by a qualified shop.
What is the back weld process?
Back welding means welding or reinforcing the joint from the back side after the first side is welded. On a trunk floor, that may mean adding plug welds or touching up missed areas from underneath when access allows. Clean the underside first, protect fuel and brake parts, and use the same heat-control approach.
Do I need to seam seal both sides of a trunk floor repair?
Yes, seal both sides when you can reach them. The trunk side blocks spills and condensation, while the underside blocks road spray, dirt, and salt. Seam sealer works best over clean, properly primed or prepared metal, depending on the product instructions.
Can I weld a trunk floor with flux-core wire?
Yes, but solid-wire MIG with shielding gas is usually cleaner for thin auto body steel. Flux core creates more spatter and slag, so you need careful cleanup between welds and before seam sealer. Practice on scrap first so you do not burn through the panel.
Conclusion
A clean trunk-floor repair comes down to preparation, fitment, heat control, and sealing. Cut the rust back to solid steel, make the replacement panel sit flush, and use short, staggered MIG welds instead of a long bead. Then inspect both sides, fix pinholes, seam seal every joint, and coat the bare metal. Done carefully, the repair restores strength, keeps water out, and gives your classic car a trunk floor that is ready for years of use.
Sources
- OSHA 1910.252 General Requirements — welding, cutting, fire prevention, fire watch, PPE, and ventilation guidance
- OSHA Welding, Cutting, and Brazing Hazards and Solutions — welding hazards, fumes, UV, burns, eye damage, and PPE overview
- CDC/NIOSH Welding Fumes and Manganese — welding fume composition and exposure concerns
- Miller MIG Solid-Wire Welding Calculator — starting-point MIG settings by material and wire setup
- POR-15 Metal Prep — metal etching, rust-neutralizing, rinse, and coating-prep guidance
- POR-15 Rust Preventive Coating — rust-inhibiting coating use and surface-prep guidance


