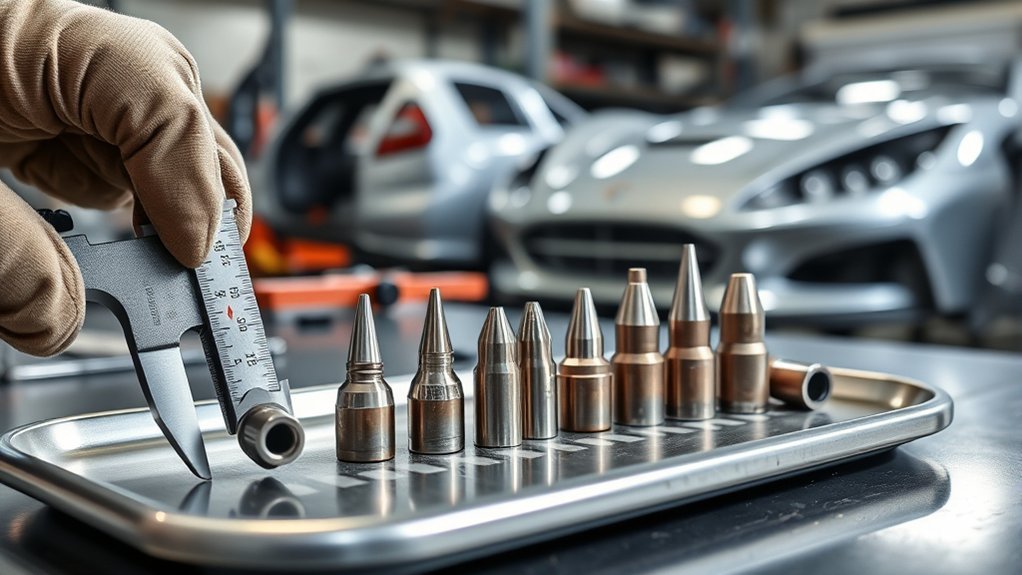
For most auto body MIG welding, a 1/2-inch nozzle bore is a practical starting point when it matches your gun. Move to a 3/8-inch tapered nozzle only when restricted access requires it, or use a 5/8-inch bore when you have more room and need broader shielding. The correct choice must fit your gun, cover the weld puddle, and let you see the joint clearly.
Quick Answer
A 1/2-inch MIG nozzle is a common starting point for thin auto body panels. Choose a compatible 3/8-inch taper for cramped seams or a 5/8-inch bore for open joints and broader gas coverage. Use the largest nozzle that reaches the joint without blocking your view.
Key Takeaways
- Gun compatibility comes first. The nozzle must match the gun, diffuser, retaining head, and contact-tip system.
- A 1/2-inch bore balances visibility and shielding on many compact MIG guns used for body work.
- Use a 3/8-inch taper only when the joint is difficult to reach and the smaller nozzle still shields the puddle.
- A 5/8-inch bore suits open seams, larger puddles, and applications that need more gas coverage.
- Nozzle size does not control burn-through. Voltage, wire-feed speed, travel speed, fit-up, and weld sequencing control heat input.
- Keep the nozzle and diffuser clean because blocked gas passages can cause porosity and unstable welding.
At a Glance
| Common Starting Size | 1/2-inch bore when compatible with the MIG gun |
| Restricted Access | 3/8-inch short taper or bottleneck, if available for the gun |
| Open or Wider Joint | 1/2 to 5/8 inch for broader shielding coverage |
| Best Shape | Short taper or bottleneck for access; straight or conical for open joints |
| Material | Brass for low-to-medium heat and spatter resistance; copper for higher heat or longer arc-on time |
| Main Selection Rule | Use the largest compatible nozzle that reaches the joint and leaves a clear sightline |
What Size MIG Nozzle Works for Auto Body Work?
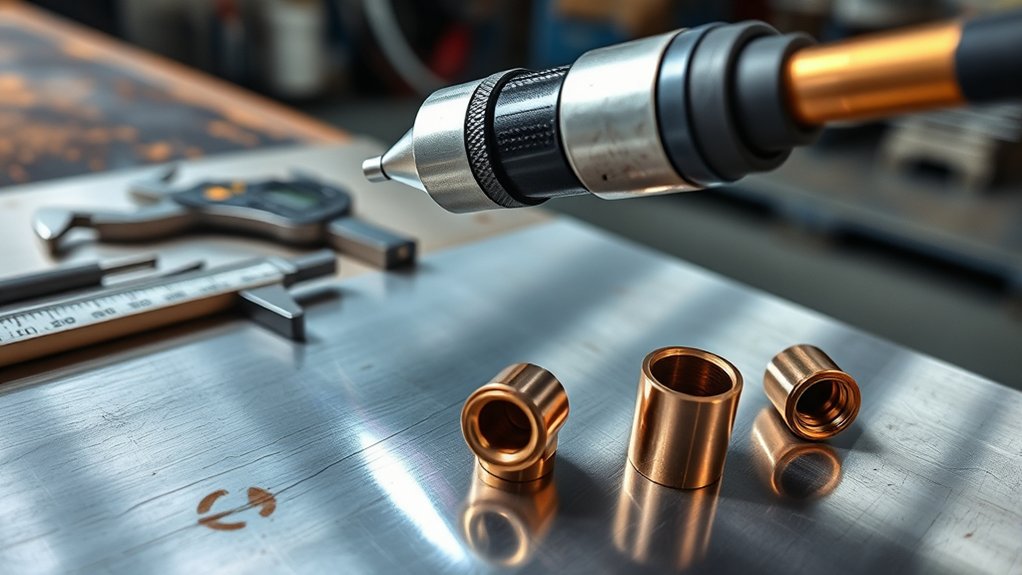
A 1/2-inch bore is a sensible starting point for many compact MIG guns used on door skins, quarter panels, floor pans, rocker panels, and patch repairs. It normally provides enough room for shielding gas to cover a small short-circuit weld puddle without making the front of the gun unnecessarily bulky.
A 3/8-inch bore can help when a flange, brace, wheel arch, or recessed seam limits access. Treat it as an access solution rather than a low-heat setting. The smaller opening must still provide complete gas coverage, and it must be a listed consumable for your gun.
A 5/8-inch nozzle makes sense when the joint is open, the puddle is wider, or spatter buildup would quickly restrict a smaller opening. It may also suit plug welds, floor-pan seams, thicker brackets, and longer welds. If it blocks your view or prevents the contact tip from reaching the joint at the correct angle, it is too bulky for that location.
Miller’s consumable-selection guidance recommends basing the opening on puddle size, shielding-gas demand, and access. Its general rule is to use the largest nozzle that still fits the application.
Nozzle Bore Versus Outside Diameter
The listed nozzle size normally refers to the inside bore or orifice, not the nozzle’s outside diameter. Two nozzles can have the same 1/2-inch bore but very different outside profiles. A heavy-duty nozzle may have thick walls, while a slim bottleneck nozzle may fit a restricted joint more easily.
Check both measurements when access is tight:
- Bore or inside diameter: Influences the size of the shielding-gas envelope and how quickly spatter can restrict the opening.
- Outside diameter: Determines whether the nozzle physically fits between panels, braces, flanges, or adjacent components.
- Nozzle length: Affects reach and how clearly you can see the puddle.
- Tip position: Determines whether the contact tip is recessed, flush, or protruding relative to the nozzle.
Check MIG Gun Compatibility First
Do not buy a nozzle by bore size alone. Match the part number or consumable series listed for your MIG gun. The nozzle must fit the gun’s diffuser or retaining head and provide the intended contact-tip position. A similar-looking nozzle from another system may fit loosely, leak gas, place the tip incorrectly, or damage the insulator.
Before changing sizes, confirm:
- The gun model and amperage rating.
- Whether the nozzle is thread-on or slip-on.
- The diffuser or retaining-head series.
- The compatible contact-tip series.
- The available bore, length, taper, and tip-position options.
- That a slip-on nozzle seats fully and remains secure.
Warning: Do not choose the smallest nozzle only for visibility. If the gas envelope cannot cover the molten puddle, the weld may develop porosity. Also stop if a nozzle is loose, electrically shorted to the tip, or damaged around its insulator.
Best MIG Nozzle Shapes for Tight Body Panels
Nozzle shape affects access independently of bore size. Common profiles include straight, conical, bottleneck, and short or long taper. Some manufacturers use terms such as bottleform for a reduced working end.
Short-taper and bottleneck nozzles are usually the most useful shapes for confined body-panel work. They improve the sightline around inner wheel arches, rocker-panel edges, trunk seams, floor corners, and narrow flanges. A short taper normally collects less spatter than a long, narrow taper because its working end is less restrictive.
Straight or conical nozzles suit open repair areas where access is not a problem. Their wider working profile can cover a larger puddle and may remain usable longer before spatter restricts the opening. However, they can hide a small tack location when the gun approaches at a shallow angle.
Bernard and Tregaskiss advise choosing the largest profile that still provides the required joint access. They also note that narrow, long-taper nozzles can collect spatter more readily.
Pro Tip: If a straight nozzle blocks your view, try a short taper with the same compatible bore before changing voltage or wire speed. That improves access without confusing nozzle shape with heat control.
Products Worth Considering

For MIG Welding Gun Torch & Lincoln Magnum 100L and Tweco Mini/#1

Package Including 10pcs x 0.035" Contact Tip, 2pcs x Gas Nozzle, 2pcs x Gas Diffuser.

MIG welding gun accessory kit (0.035") for Miller Millermatic M-25/M-40 and Hobart H MIG gun.
Choose Nozzle Size for Low and High Heat
Welding current and arc-on time affect how much heat the front-end consumables must withstand. They do not make the nozzle an amperage control. Choose the bore for access and shielding, then choose the wall thickness and material for the expected duty cycle.
Small Nozzle for Restricted, Short-Duration Work
A 3/8- or 1/2-inch compatible nozzle can work well for brief short-circuit tacks on thin automotive sheet metal when the puddle remains fully shielded. Its main advantages are access and visibility.
To prevent burn-through, reduce total heat input instead of relying on the nozzle. Follow the machine’s setting chart, make short spaced tacks, allow the panel to cool, maintain close fit-up, and move around the repair rather than concentrating heat in one area.
Larger Nozzle for Greater Gas Demand and Duty Cycle
A 5/8-inch or larger compatible bore may be useful when welding thicker brackets, making wider plug welds, or running longer beads. A larger opening can cover a larger puddle and remain less restricted as spatter accumulates.
The larger bore does not create penetration or eliminate spatter. Penetration follows the welding parameters, wire, polarity, joint preparation, torch angle, and travel speed. Spatter can increase because of incorrect voltage, dirty metal, contaminated wire, excessive stick-out, unstable wire feeding, or poor gas coverage.
Note: A 7/8-inch nozzle is not a standard requirement for body work. Use it only when it is compatible with the gun and the weld actually needs that bore. Most outer-panel repairs benefit more from a compact gun front end and controlled tack sequencing.
Set Contact-Tip Position, Stick-Out, and Gas Flow
A correct bore can still produce poor results when the contact tip, wire stick-out, or gas flow is wrong. These settings work as one system.
Contact-Tip Position
For the short-circuit transfer commonly used on thin steel, a flush or slightly protruding contact tip is often appropriate because it supports the short electrode stick-out used for this process. Follow the consumable maker’s specified position because some guns use a fixed recess.
Do not force a recessed-tip nozzle onto a setup designed for a flush tip. An incorrect tip-to-nozzle relationship can reduce visibility, change effective stick-out, encourage spatter buildup, and weaken gas coverage.
Wire Stick-Out
Keep the wire extension short and consistent according to your machine and wire instructions. Excessive stick-out lowers effective welding current, makes the arc less stable, increases spatter, and moves the arc farther from the nozzle’s protected gas envelope.
Shielding-Gas Flow
Set the flow while gas is moving through the gun. Follow the welder, regulator, wire, and shielding-gas instructions rather than selecting flow from nozzle diameter alone. Miller’s current DIY guidance gives 25 to 35 cubic feet per hour as a general range for short-circuit MIG welding, but the correct setting can vary with the equipment and conditions.
More flow is not always better. Very high flow can create turbulence that pulls surrounding air into the shielding stream. If porosity appears, check for drafts, leaks, a loose gun connection, blocked diffuser holes, a dirty nozzle, excessive gun angle, and excessive stick-out before turning the flow higher.
| Symptom | Check First | Likely Correction |
|---|---|---|
| Pinholes or porosity | Gas supply, leaks, drafts, nozzle blockage, dirty metal | Restore clean, steady coverage rather than increasing flow blindly |
| Puddle is hidden | Nozzle outside diameter and taper | Use a compatible short taper or bottleneck |
| Heavy spatter | Voltage, wire speed, stick-out, contamination, feeding | Correct the process cause, then clean the nozzle |
| Nozzle overheats | Duty cycle, loose connections, nozzle material | Allow cooling and use the specified copper or heavy-duty consumables |
| Gas flow changes during welding | Spatter, diffuser holes, nozzle seating, hose leaks | Clean, reseat, or replace the damaged component |
MIG Nozzle Materials That Hold Up Best
MIG nozzles are commonly made from brass, copper, or plated copper. Choose the material for heat exposure, arc-on time, and expected spatter rather than appearance.
- Brass: Resists spatter adhesion well and works effectively in low-to-medium heat applications. It is a useful choice for intermittent body-panel tacks when the gun manufacturer offers it.
- Copper: Handles intense heat better and suits higher amperage, longer welds, or longer arc-on time.
- Plated copper: Uses a protective surface to help reduce adhesion and oxidation while retaining the heat-handling characteristics of the copper body.
- Heavy-duty construction: Uses thicker walls and insulation for demanding applications. It can be unnecessarily bulky for delicate outer-panel work.
Water-cooled MIG guns and nozzles are designed for extreme industrial duty. They are normally unnecessary for standard door-skin, quarter-panel, rust-patch, and floor-pan repairs.
How MIG Nozzle Size Affects Gas Coverage
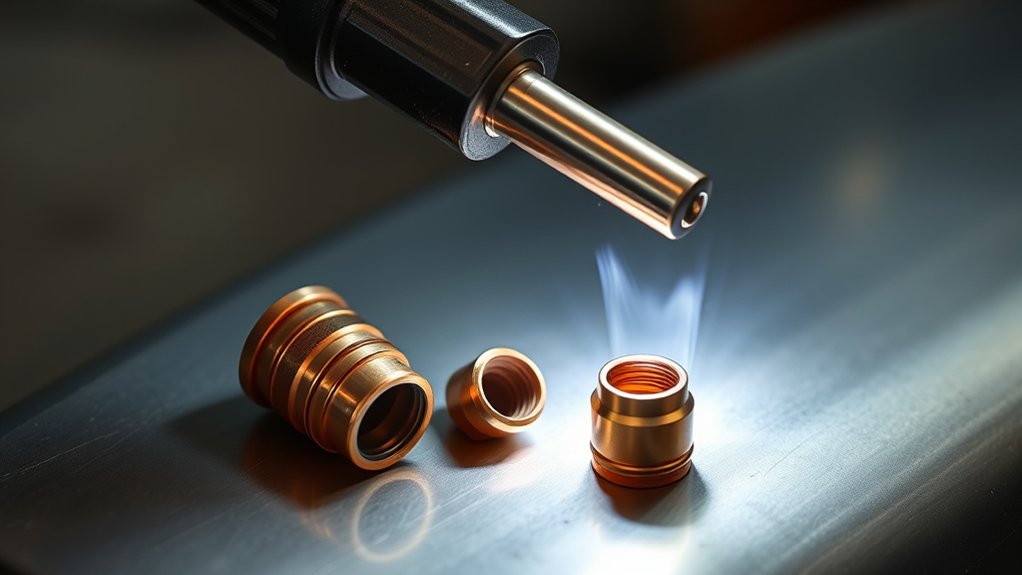
The nozzle directs shielding gas around the wire, arc, and molten puddle. A wider bore can cover a larger area, while a narrow taper can reach deeper into a restricted joint. Neither option works properly if the nozzle is clogged, the diffuser ports are blocked, the gas is disturbed by a draft, or the wire extends too far beyond the nozzle.
| Nozzle Type | Coverage and Access | Best Use |
|---|---|---|
| 3/8-inch short taper | Compact envelope with excellent access | Narrow seams when the puddle remains fully shielded |
| 1/2-inch short taper or conical | Balanced visibility and coverage | General body-panel tacks, patches, and seams |
| 5/8-inch conical or straight | Broader coverage but a bulkier sightline | Open seams, plug welds, floor pans, and thicker repair areas |
| Long taper | Extended reach with a restricted working end | Deep or obstructed joints that cannot be reached with a short taper |
If the gas coverage is poor, do not assume that the nozzle is automatically too small. Test the gas at the gun, check that a slip-on nozzle is fully seated, inspect the diffuser, shield the work from drafts, clean the joint, and verify the specified tip position.
The best MIG nozzle for auto body work is the largest compatible nozzle that reaches the joint, preserves your sightline, and completely shields the weld puddle.
Auto Body Welding Safety Before You Start
Nozzle selection is only one part of a safe vehicle repair. Before striking an arc, identify the panel material and obtain the vehicle-specific body repair procedure. Modern vehicles may require squeeze-type resistance spot welding, GMA plug welding, MIG brazing, weld bonding, riveting, or another attachment method in specific locations.
I-CAR advises using MIG brazing only where the vehicle maker specifies it. Do not substitute a convenient MIG process or nozzle for an OEM-required repair method, especially on structural parts or advanced high-strength steel.
Warning: Follow the vehicle maker’s battery, restraint-system, electronics, hybrid, and EV shutdown procedures before welding. Inspect both sides of the panel for fuel lines, wiring, modules, insulation, seam sealer, undercoating, carpeting, and other hidden combustibles. Keep suitable fire protection nearby and monitor the repair area after hot work.
Remove paint, corrosion, sealers, and coatings from the weld zone as required by the repair procedure. Use suitable eye, face, hand, hearing, and body protection. Provide local exhaust or effective ventilation because welding fumes and heated coatings can be hazardous. OSHA’s welding-fume guidance identifies toxic fumes, radiation, burns, and inadequate ventilation as significant hazards.
Place the work clamp as close to the repair as practical and follow OEM directions so welding current does not pass through bearings, wiring, modules, or other unintended paths. On a hybrid or EV, high-voltage isolation must follow the manufacturer’s procedure and may require qualified personnel.
Store and Clean MIG Nozzles the Right Way
A clean, undamaged nozzle keeps gas flow more consistent and reduces interruptions. Store new consumables in their original packaging or a clean, divided container where they cannot be dented, scratched, or contaminated.
Proper Nozzle Storage
| Action | Purpose | Result |
|---|---|---|
| Keep new parts packaged | Prevents dents, scratches, and dirt | More consistent fit and easier cleaning |
| Separate used sizes and styles | Avoids mixing incompatible consumables | Faster, safer setup |
| Handle cooled parts with clean gloves | Protects hands and limits contamination | Cleaner threads and seating surfaces |
| Inspect before installation | Finds damage before welding | Fewer gas leaks and front-end failures |
Cleaning to Prevent Spatter Buildup
Allow the gun to cool, remove the nozzle according to the gun instructions, and clean loose spatter with a nozzle-cleaning tool or soft wire brush. Do not hammer, crush, drill, or distort the bore. Inspect the diffuser’s gas holes at the same time.
A light application of compatible anti-spatter compound can reduce adhesion. Do not soak the complete nozzle or cover the diffuser ports. Bernard and Tregaskiss warn that excessive compound can saturate the insulator, trap debris, block gas holes, and cause unbalanced shielding.
When to Replace a MIG Nozzle
Replace the nozzle rather than continuing to clean it when you find:
- A dented, oval, cracked, or badly eroded bore.
- A damaged or electrically compromised insulator.
- A nozzle that no longer seats tightly on its retaining system.
- Burning, melting, or severe discoloration from overheating.
- Spatter fused so firmly that removal would damage the surface.
- Persistent gas leakage or uneven flow after the diffuser and connections have been checked.
- Evidence that the nozzle is shorting against the contact tip.
Best Nozzles for Common Auto Body Repairs
The table below gives starting points, not universal requirements. Use only sizes and profiles listed for your MIG gun, and confirm that the nozzle fully shields your test weld.
| Repair Type | Suggested Starting Nozzle | Why It Works |
|---|---|---|
| Small rust patch | 3/8- to 1/2-inch short taper | Improves sightline around short, spaced tacks |
| Door skin or quarter-panel patch | 1/2-inch short taper | Balances access, visibility, and gas coverage |
| Rocker-panel flange | Compatible bottleneck or short taper | Reaches recessed joints without an excessively long taper |
| Floor-pan seam | 1/2- to 5/8-inch conical nozzle | Provides broader coverage where access is more open |
| GMA plug weld | 1/2- to 5/8-inch bore | Leaves room to center the wire while covering the circular puddle |
| Thicker bracket or mount | 5/8-inch copper or specified heavy-duty nozzle | Handles greater heat and longer arc-on time |
Products Worth Considering

Gel eliminates erratic operation with a film that will not clog orifices and threads on MIG nozzles and contact tips

The blades cut away the built up spatter helping prolong the nozzle life, and reduces the chances of wire sticking.

Compatible Welder Models: this compatible with KP1939-1 replacement kit is designed for use with 170A flux core welders; Before ordering, please confirm your welder uses the KP1939-1 nozzle interface by checking your welder manual or comparing the nozzle size with our product images
Common MIG Nozzle Mistakes to Avoid
- Buying by bore alone: Confirm the complete gun and consumable series before ordering.
- Assuming smaller means cooler: Nozzle size does not replace correct voltage, wire speed, travel, fit-up, and tack sequencing.
- Using a tiny taper with poor coverage: Restricted access does not justify exposing the puddle to air.
- Using an oversized nozzle that hides the joint: Broader coverage is not useful when you cannot place the wire accurately.
- Ignoring tip position: An incorrect recess or protrusion changes stick-out and gas delivery.
- Turning gas flow excessively high: Turbulence can introduce air and cause porosity.
- Welding with packed spatter: Buildup can obstruct flow or create an electrical short between the nozzle and tip.
- Dipping the full nozzle in compound: Excess material can damage the insulator or block the diffuser.
- Skipping the OEM body repair manual: The vehicle maker, not nozzle convenience, determines the allowed attachment process.
How to Test Your Nozzle Before Welding a Car Panel
Use clean scrap that matches the panel’s material and thickness. Include the same joint type where possible, because a lap seam, butt patch, and plug weld behave differently.
- Install a nozzle, diffuser, and contact tip approved for the gun.
- Confirm the contact-tip position and wire size.
- Set voltage and wire speed from the welder’s chart or qualified repair procedure.
- Set shielding-gas flow while gas is moving.
- Check for leaks, blocked ports, and drafts.
- Make several short tacks using the same torch angle and sequence planned for the vehicle.
- Check visibility, arc stability, spatter, bead shape, penetration, and porosity.
- Adjust one variable at a time so you know which change improved or harmed the result.
If visibility is poor but shielding is sound, try a compatible short taper. If porosity appears, inspect the gas system and joint cleanliness before changing bore size. If the panel burns through, reduce heat input and improve tack sequencing rather than installing a smaller nozzle.
Frequently Asked Questions
What size MIG wire should I use for car body work?
.023/.024-inch and .030-inch solid wire are common choices for thin automotive steel. Smaller wire can make low-output control easier, while .030 inch offers more range on slightly thicker repairs. Use the size supported by your welder, drive rolls, liner, contact tip, repair procedure, and panel thickness.
What size spray nozzle should I use for automotive paint?
A paint-gun fluid tip is unrelated to a MIG nozzle. There is no universal size for every basecoat, clearcoat, or primer. Use the coating manufacturer’s technical data sheet and the spray-gun manual because viscosity, gun design, air pressure, and local regulations affect the required tip.
Should I use .030- or .035-inch MIG wire?
For thin outer panels, .030 inch is normally easier to control than .035 inch, although .023/.024 inch may provide even finer low-output control on a compatible machine. Reserve .035 inch for metal and settings that need its higher deposition capability. Follow the welder chart and the vehicle repair procedure.
How do I choose the right MIG nozzle size?
Confirm gun compatibility first. Then choose the largest bore and outside profile that reaches the joint, gives you a clear sightline, and completely shields the puddle. A 1/2-inch bore is a common starting point, with smaller tapers for restricted access and larger bores for open or higher-demand welds.
Is a smaller MIG nozzle always better for auto body welding?
No. A small nozzle improves access, but its opening can become restricted by spatter sooner and may not cover a wider puddle. Use a small taper only where access requires it and verify the result on matching scrap.
Is MIG nozzle size the same as contact-tip size?
No. Nozzle size normally describes the nozzle’s inside bore. Contact-tip size matches the welding-wire diameter, such as .023, .030, or .035 inch. Both parts must belong to a compatible consumable system.
How much shielding-gas flow should I use?
Follow the welder, wire, and gas instructions. A general short-circuit MIG starting range is often around 25 to 35 CFH, but the correct flow depends on the equipment and conditions. Excessive flow can create turbulence, so fix drafts, leaks, blockage, and excessive stick-out instead of continually increasing the setting.
When should I replace a MIG nozzle?
Replace it when the bore is dented or badly eroded, the insulator is damaged, it no longer seats securely, it overheats repeatedly, or hardened spatter cannot be removed without changing its shape. Also replace a nozzle that causes persistent leakage or shorts against the contact tip.
Sources
- Miller: How to Choose MIG Welding Consumables — nozzle opening, contact-tip position, materials, and shielding coverage
- Bernard and Tregaskiss: Understanding MIG Welding Nozzles — nozzle shapes, bore selection, materials, storage, and duty cycle
- Miller: MIG Shielding Gas for DIY Applications — gas selection, flow, turbulence, leaks, and consumable cleaning
- Bernard and Tregaskiss: Maintaining GMAW Consumables — nozzle cleaning, anti-spatter use, and storage
- OSHA: Welding Fumes and Safety Requirements — ventilation, protective equipment, radiation, and fume hazards
- I-CAR: Who Requires or Recommends MIG Brazing? — following vehicle-specific OEM attachment procedures
Conclusion
For many auto body jobs, start with a compatible 1/2-inch nozzle. Move to a 3/8-inch short taper when access is restricted or a 5/8-inch bore when an open joint needs broader coverage. Do not select a nozzle by diameter alone. Check its outside profile, material, tip position, retaining system, and compatibility with your gun.
The nozzle directs shielding gas, but it does not control panel heat by itself. Prevent burn-through with correct machine settings, close fit-up, short spaced tacks, and a controlled welding sequence. Test the complete setup on matching scrap, keep the nozzle and diffuser clean, and follow the vehicle maker’s repair and safety procedures before welding on the car.