Plastic-to-wood repairs fail for a simple reason: the two materials behave differently. Wood is porous and moves as moisture changes, while plastic may be smooth, flexible, solvent-sensitive, or difficult for adhesive to wet. The strongest glue for plastic on wood therefore depends on the exact plastic, the joint shape, and the conditions the finished part must survive.
In the shop, I treat this bond much like any other joint. I identify the materials first, choose a compatible adhesive, prepare both surfaces, and test the process on scrap before trusting the finished assembly. That approach matters more than buying the tube with the largest strength number on its label.
For many rigid plastics, a toughened two-part epoxy is the best all-around starting point. Polyethylene and polypropylene are important exceptions: they usually need an adhesive or primer system specifically labeled for low-surface-energy plastics. The steps below show how to choose the right product and build a bond that lasts.
Image by homewayout
Quick Answer
For ABS, acrylic, polycarbonate, and many other rigid plastics, a toughened two-part epoxy is usually the strongest all-around glue for plastic on wood. For polyethylene or polypropylene, use a specialty adhesive labeled for low-surface-energy plastics. Clean, abrade, clamp, and cure the joint exactly as the adhesive manufacturer directs.
Key Takeaways
- There is no single adhesive that is strongest on every kind of plastic.
- Toughened epoxy is a dependable choice for many rigid, bondable plastics, but ordinary epoxy is unreliable on PE and PP.
- Polyurethane glue can work on compatible materials, but its expanding foam does not make it a structural gap-filler.
- Joint design, surface preparation, clamping, temperature, and full cure time can matter as much as adhesive chemistry.
- Use mechanical fastening or an engineered joint for overhead, vehicle, pressure, load-bearing, or life-safety applications.
At a Glance
| Time Required | About 30–60 minutes for identification, preparation, mixing, and clamping; handling and full cure times vary by product and may extend to 24 hours or longer. |
| Difficulty | Easy to moderate; PE, PP, flexible panels, large surfaces, and structural joints require more planning. |
| Tools Needed | Compatible adhesive, sandpaper or abrasive pad, lint-free cloths, approved cleaner, mixing tools, clamps, gloves, and eye protection. |
| Cost | Low to moderate. Specialty PE/PP adhesives generally cost more than common epoxy, polyurethane, or cyanoacrylate products. |
Why Bonding Plastic to Wood Can Be Difficult
Wood and plastic give an adhesive two very different surfaces. Dry wood has pores and fibers that help many adhesives form a mechanical grip. Plastic is usually nonporous, and its surface may contain mold-release residue, oil, polish, paint, oxidation, or additives that interfere with adhesion.
The plastic family also matters. ABS, acrylic, polycarbonate, and rigid PVC are generally easier to bond than polyethylene and polypropylene. PE and PP have low surface energy, which means an ordinary liquid adhesive may bead up instead of spreading across the surface. If the adhesive cannot wet the plastic, it cannot form a dependable bond.
Movement adds another challenge. Wood changes size as humidity changes. Thin plastic sheet can expand with heat, bow under clamp pressure, or flex when loaded. A hard epoxy may be ideal for a rigid bracket but unsuitable for a large flexible panel that needs a more elastic adhesive layer.
The strongest plastic-to-wood bond comes from matching the adhesive to the plastic, joint design, load, and environment—not from choosing the highest advertised strength number.
The Top Adhesives for Plastic-to-Wood Bonds
The best adhesive family depends on what the plastic is made from and how the joint will be used. Check the package or technical data sheet for both “plastic” and “wood”; a product that bonds one surface well may not bond the other.
| Adhesive Type | Best Uses | Main Advantages | Important Limits |
|---|---|---|---|
| Toughened two-part epoxy | Rigid ABS, acrylic, polycarbonate, PVC, composite plastic, and well-prepared wood | Strong, water-resistant bond; fills controlled irregularities; available in rigid and tougher formulations | Usually poor on untreated PE, PP, PTFE, and silicone; exposed epoxy may need UV protection |
| Specialty LSE acrylic or MMA adhesive | PE, HDPE, PP, TPO, and other hard-to-bond plastics when listed by the manufacturer | Designed to wet plastics that reject ordinary glue; often tough and impact-resistant | More expensive; may have a strong odor; mixing equipment and strict PPE may be required |
| Polyurethane glue | Close-fitting wood joints paired with compatible rigid plastic | Moisture-resistant; bonds many dissimilar materials; useful on porous wood | Expands during cure and needs firm clamping; foam expansion is not a strong structural gap fill; compatibility varies by plastic |
| Cyanoacrylate with or without primer | Small, close-fitting, rigid parts and fast positioning | Very fast set; thin bond line; easy to apply in small amounts | Can be brittle under peel, shock, heat, or repeated flex; PE and PP require a specifically matched primer system |
| Flexible construction or urethane adhesive | Large panels, vibration, moderate movement, and flexible sheet when both materials are listed | More movement tolerance than rigid epoxy; useful across larger areas | Slower cure; lower initial strength; some formulas do not bond PE or PP |
| Hot-melt adhesive | Mock-ups, templates, temporary positioning, and light decorative work | Fast, inexpensive, and reversible with heat in many cases | Poor choice for heat, sustained load, outdoor exposure, peel stress, or permanent structural work |
Ordinary PVA wood glue is intended for porous wood-to-wood joints. It may dry on plastic, but it normally does not form a dependable permanent bond to a smooth plastic surface.
Products Worth Considering
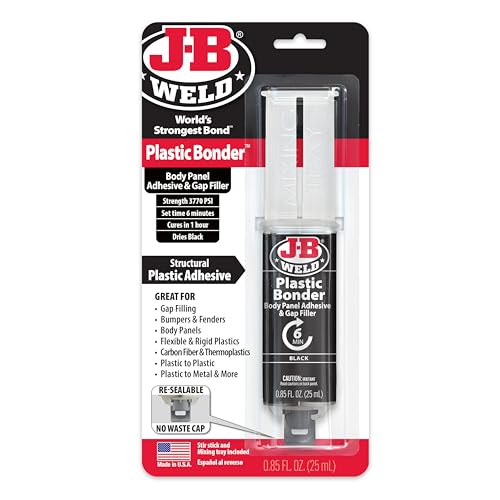
Plasticbonder: Is A Quick-Set, 2 Part, Urethane Adhesive System That Provides Strong, Lasting Repairs And Works On Thermoset, Carbon Fiber Composites, Thermoplastics, Coated Metals, Concrete & More.
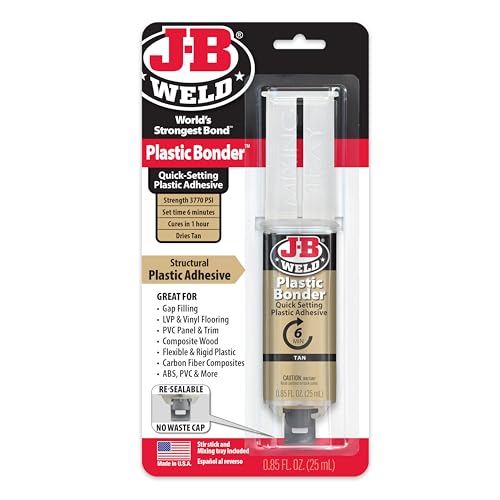
J-B WELD PLASTICBONDER (Tan): A quick setting and multipurpose two part urethane adhesive & gap filling system that provides a strong and lasting bond to many plastic surfaces. J-B Weld PlasticBonder is great for DIY plastic repairs, filling dents, bumper repairs and more! J-B Weld PlasticBonder now comes in a syringe allowing for an easy 1:1 mix ratio. The unique syringe has a re-sealable cap that prevents drying out and leaking, allowing for multiple uses!

J-B Weld Plasticweld: A Hand Mixable Two Part Epoxy Putty Stick That Is Formulated To Repair And Rebuild Various Plastic Compounds And Surfaces. J-B Weld Plasticweld Is Designed For Diy Plastic Repairs On Abs, Pvc & Cpvc Pipes And Plastics, Auto Bumpers And More! Plasticweld Is Certified By The Nsf And Is Safe For Contact With Potable Water
Why Epoxy Is Often the Best All-Around Choice
A toughened two-part epoxy is a practical first choice when the plastic is compatible, the pieces are reasonably rigid, and the finished joint needs good resistance to moisture, impact, or vibration. Epoxy can bridge small surface irregularities, bond porous wood, and form a strong layer between dissimilar materials.
Epoxy works best when it can wet both materials and lock into scratches or pores. WEST SYSTEM recommends surfaces that are clean, dry, and sanded, with contaminants removed before sanding so they are not ground into the material. Its guidance also recommends controlled clamping rather than squeezing the adhesive completely from the joint. See the manufacturer’s epoxy surface-preparation guidance and bonding and clamping instructions.
Slow-cure epoxy is not automatically stronger than every fast formula, but it often provides more working time for large assemblies and careful alignment. Use the ratio, working time, clamp time, service temperature, and full-cure time listed for the exact system. Do not assume that every two-part product mixes one-to-one by volume.
Note: Epoxy is not automatically suitable for polyethylene, polypropylene, PTFE, silicone, or every flexible plastic. The package or technical data sheet must list the plastic or provide an approved preparation method.
For outdoor work, protect any exposed epoxy fillet or surface when the manufacturer calls for paint or a UV-resistant finish. Sunlight can degrade unprotected epoxy over time even when the bond is otherwise moisture-resistant.
Choosing the Right Adhesive for the Plastic Type
Look for a molded resin abbreviation such as ABS, PC, PMMA, PVC, HDPE, PE, or PP. A resin identification number can help, but it is not a complete material specification. In particular, code #7 means “other or mixed plastic”; it does not prove that the part is ABS or polycarbonate. The NIH plastic resin code guide lists the common numbered families.
| Plastic | Bonding Difficulty | Good Starting Choice | Special Considerations |
|---|---|---|---|
| ABS | Usually manageable | Toughened epoxy or a compatible structural acrylic | Abrade lightly and avoid a cleaner that softens or crazes the surface. |
| Acrylic or PMMA | Manageable but solvent-sensitive | Clear or toughened epoxy specifically listed for acrylic | Test cleaners and adhesive on scrap because stress cracking may appear later. |
| Polycarbonate or PC | Moderate | Plastic-compatible toughened epoxy or flexible structural adhesive | Avoid unapproved solvents and rigid joints on parts that flex. |
| Rigid PVC | Usually manageable | Compatible epoxy, polyurethane, or construction adhesive | PVC solvent cement is mainly for PVC-to-PVC joints and is not a wood adhesive. |
| Polystyrene or PS | Moderate and solvent-sensitive | A low-solvent adhesive specifically labeled for polystyrene and wood | Strong solvents may dissolve, pit, or craze the plastic. |
| PE, HDPE, or LDPE | Difficult | Specialty LSE acrylic or a complete adhesive-and-primer system labeled for PE | Do not assume sanding alone makes ordinary epoxy dependable. |
| PP | Difficult | Specialty LSE acrylic or a matched polyolefin primer-and-adhesive system | Test the exact PP grade because fillers and surface texture affect adhesion. |
| Unknown plastic | Uncertain | Identify it, ask the manufacturer, or use a removable mechanical attachment | Always perform a scrap or hidden-area test before committing to the assembly. |
3M’s current low-surface-energy plastic guidance describes specialty two-part acrylic adhesives designed for many grades of PP, PE, and TPO. Use that category when ordinary glue beads up or peels cleanly from the plastic.
Warning: Do not flame-treat unknown plastic with a handheld torch. Industrial flame treatment requires controlled equipment and verified process settings. A DIY torch can ignite or deform the part and may create hazardous smoke. Use a manufacturer-approved primer or an adhesive made for the plastic instead.
Prep Work: Setting Up Both Surfaces for Success
Preparation should follow a simple order: identify, clean, dry, abrade, and remove dust. Clean before sanding when grease, oil, wax, polish, or mold-release residue may be present. Otherwise, sanding can spread contamination across the surface.
Prepare the wood: Make sure it is sound, dry, and free from loose finish, rot, dust, wax, and oil. Sand enough to expose clean wood and flatten high spots. End grain and very porous wood may need a thin wet-out coat when the selected epoxy system recommends one.
Prepare the plastic: Remove surface contamination with a cleaner approved for that plastic. Mild soap and water followed by complete drying may be safer than a strong solvent on an unknown or stress-sensitive plastic. If the adhesive manufacturer permits abrasion, scuff the bonding area evenly without cutting deeply into a thin part.
Remove dust: Vacuum or wipe away loose sanding dust using a clean, lint-free material. Do not touch the prepared area with bare fingers afterward.
Dry fit the joint: Confirm alignment, clamp access, overlap, and squeeze-out control before mixing adhesive. Mask visible edges if cleanup will be difficult.
Pro Tip: Make two or three small test coupons with the same wood, plastic, preparation, adhesive thickness, and cure conditions. After full cure, compare where each coupon fails. Torn wood or broken plastic usually shows a better bond than adhesive that peels cleanly from one surface.
Step-by-Step: How to Glue Plastic to Wood
- Identify the plastic. Look for a molded abbreviation, product drawing, manufacturer specification, or resin code. Treat PE and PP as special cases.
- Choose a compatible adhesive. Verify that the technical data lists the plastic family and a porous substrate such as wood. Check whether the joint needs rigidity, flexibility, water resistance, heat resistance, or impact tolerance.
- Read the label, technical data sheet, and safety data sheet. Confirm the mix ratio, working time, application temperature, clamp time, full-cure time, ventilation, glove material, eye protection, and cleanup method.
- Dry fit and improve the joint shape. Use a lap joint or broad bonding area where possible. Avoid relying on a narrow edge or a joint that will constantly peel away from one side.
- Clean and dry both materials. Remove oil, wax, polish, mold release, old adhesive, and loose coating. Test any cleaner on a hidden area first.
- Abrade when the adhesive instructions call for it. Scuff the plastic evenly and sand the wood to clean, solid material. Remove all dust.
- Mix accurately. Dispense the exact ratio specified by the manufacturer. Scrape the sides and bottom of the mixing container and blend until the color and texture are uniform.
- Apply a controlled bond line. Spread enough adhesive to wet the surfaces and accommodate minor irregularities. Do not assume that a thicker layer is stronger.
- Join the parts without excessive sliding. Align them while the adhesive remains within its stated open or working time.
- Clamp evenly. Use enough pressure to prevent movement and create good contact. For epoxy, a small amount of squeeze-out can show that the surfaces are contacting, but excessive pressure may starve the joint.
- Remove or shape squeeze-out as directed. Follow the adhesive manufacturer’s cleanup method. Avoid acetone or other aggressive solvents unless they are approved for both the adhesive and the plastic.
- Allow a full cure. Keep the assembly within the specified temperature range and do not load it merely because the surface feels hard. Handling strength and full service strength are different.
- Inspect and test gradually. Look for lifted edges, cracking, soft adhesive, movement, or clean peeling before placing the joint into service.
Note: Do not use a heat lamp, heat gun, oven, or torch to accelerate curing unless the adhesive technical data provides a controlled heat-cure procedure and the plastic can tolerate that temperature.
Joint Design Matters as Much as Glue Choice
An adhesive joint usually handles broad shear loads better than concentrated peel or prying loads. Whenever possible, overlap the plastic and wood instead of bonding two thin edges together. A wider overlap spreads the force across more adhesive and reduces stress at the edge.
Avoid creating a hard step where a flexible plastic sheet can bend repeatedly at the end of the glue line. A flexible adhesive, tapered transition, larger overlap, or mechanical retainer may work better for a moving panel.
Large plastic sheets can expand and contract more than wood as temperature changes. A rigid full-surface epoxy bond may transfer that movement into the plastic, wood, or adhesive layer. Large exterior panels often need a flexible adhesive system, controlled bond-line thickness, or a fastening design that permits movement.
Do not depend on glue alone for overhead parts, handrails, seats, vehicle components, pressure-containing parts, lifting points, guards whose failure could cause injury, or assemblies required to meet a building or fabrication code. Use an engineered joint, approved mechanical fasteners, or both.
Using Polyurethane Glue Correctly
Moisture-cured polyurethane glue can be useful when the exact product lists both wood and the plastic. Original Gorilla Glue, for example, instructs users to add a small amount of moisture to one surface, apply a thin layer to the other, clamp tightly for one to two hours, and allow about 24 hours for best cure results.
The cured glue expands, but that expansion should not be treated as structural gap filling. Foamed adhesive has less solid material than a close, controlled bond line. Shape the parts to fit, apply a thin amount, and clamp evenly so expansion does not push the plastic out of alignment or bow a thin panel.
Polyurethane glue can also stain skin and is difficult to remove after cure. Wear the protective gloves specified by the manufacturer and control squeeze-out before it hardens.
When Super Glue Is Enough
Cyanoacrylate, commonly called super glue, is useful for small, rigid, close-fitting pieces. It sets quickly and forms a very thin bond line, which makes it handy for trim, models, signs, guides, and temporary positioning.
Its weaknesses are poor gap filling and limited tolerance for peel, shock, repeated flex, and some hot or wet environments. Standard cyanoacrylate is also unreliable on PE and PP. A primer-assisted system may work, but the primer and adhesive must be designed and sold as a matched system for that plastic.
Because cyanoacrylate bonds skin rapidly, keep fingers away from the joint and follow the label’s first-aid instructions. Do not use cotton or wool to wipe a spill unless the product manufacturer says it is safe; some cyanoacrylates can react rapidly with those fibers and produce heat.
When Glue Meets Welding in the Shop
Mixed-material fabrication sometimes combines a welded metal frame with a wood core and plastic panel. The safe order is normally to complete welding, grinding, and other hot work first. Allow the metal to cool, remove residue, finish the metal as required, and then install the wood and plastic with adhesive.
Do not use cured epoxy as a thermal barrier and do not weld next to wood, plastic, solvent, or uncured adhesive. OSHA’s welding and cutting fire-prevention requirements call for movable fire hazards to be removed or protected, suitable extinguishing equipment, and additional precautions when combustibles are close to the work.
Welding voltage, wire-feed speed, electrode class, preheat, and joint preparation must be selected for the metal, thickness, process, position, machine, and applicable welding procedure. A generic setting such as 18–22 volts cannot safely cover every steel frame or MIG machine.
ASME BPVC Section IX concerns qualification of welding, brazing, and fusing procedures and personnel. It does not approve a plastic-to-wood adhesive joint. A regulated or safety-critical hybrid assembly must meet the project’s applicable design code, drawings, adhesive specifications, inspection plan, and test requirements.
Warning: Never weld, braze, torch-cut, or grind against an assembled wood-and-plastic panel unless the work is controlled under an appropriate hot-work procedure. Heat conducted through metal can ignite hidden wood or damage plastic and adhesive on the opposite side.
Common Bond Failures and How to Fix Them
The adhesive peels cleanly from the plastic: The plastic may be PE or PP, the surface may still contain contamination, the cleaner may have left residue, or the adhesive may be incompatible. Identify the plastic and switch to a listed LSE adhesive or approved primer system.
The adhesive peels from the wood: The wood may be damp, dusty, coated, oily, rotten, or too porous for the application method. Remove the failed adhesive, expose clean solid wood, allow it to dry, and follow the epoxy system’s wet-out instructions when applicable.
The adhesive cracks through its own thickness: The joint may be flexing more than the adhesive can tolerate, the bond line may be too thick, or the adhesive may have cured in cold conditions. Use a tougher or more flexible product and improve the joint geometry.
The plastic or wood breaks while the adhesive remains attached: This is called substrate failure and often indicates that adhesion was stronger than the material at that test point. It does not automatically prove that the entire assembly is safe for a higher load.
The panel lifts at one edge: The joint is probably being peeled rather than loaded evenly. Increase overlap, add an edge retainer, change the force direction, or use a more flexible adhesive.
Polyurethane foam pushed the pieces apart: Too much adhesive, uneven clamp pressure, or poor alignment may be responsible. Remove the failed glue mechanically, restore close contact, and reapply a thin layer according to the product instructions.
The adhesive stays soft or gummy: Possible causes include the wrong mix ratio, incomplete mixing, low temperature, expired material, chemical contamination, or an incompatible cleaner. Remove the uncured material using the manufacturer’s approved method and start again with fresh adhesive.
Pros and Cons of Each Main Adhesive
Epoxy: The main advantage is strong, controlled bonding across many rigid materials. It can also form fillets and handle small irregularities. The drawbacks are mixing, limited working time, possible brittleness, plastic-compatibility limits, difficult cleanup, and the need to protect some exposed applications from UV.
Polyurethane: It bonds many dissimilar materials and tolerates moisture once cured. The drawbacks are expansion, staining, difficult cleanup, and uneven performance on smooth or low-surface-energy plastics.
Cyanoacrylate: It is fast and convenient for small, precise parts. Its thin, rigid bond is less suitable for broad gaps, impact, flex, and peel stress.
Specialty acrylic or MMA: These products are often the best route for PE, PP, and demanding multi-material assemblies. They can be tough and fast, but may cost more, smell stronger, and require special dispensers, mixing nozzles, ventilation, or PPE.
Flexible construction adhesive: It can tolerate movement across larger surfaces, but it may take longer to cure and may not provide the rigid positioning needed for a small precision joint.
Products Worth Considering

4250 PSI – Gorilla's Strongest Epoxy Formula
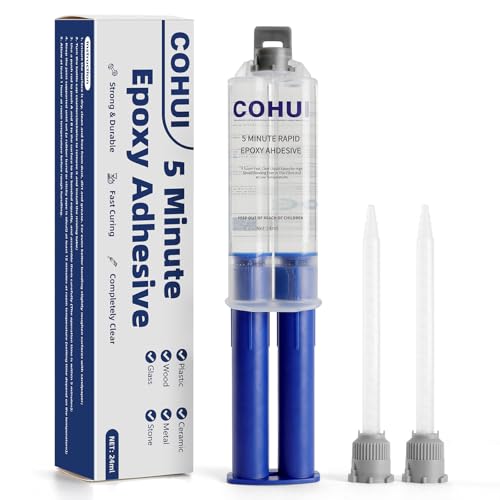
【Easy to Use & Rapid Cure】: Our premium clear 2 part epoxy glue features a user-friendly AB component design—simply install the mixing tube and push the push rod for evenly mixed components A and B, no messy measurements needed! This 5 minute epoxy resin offers the perfect balance of working time and speed: you get just enough time to adjust parts for precise bonding, then it sets firmly in 5 minutes at room temperature, far faster than regular adhesives. Fully cures in 24 hours to deliver unbeatable durability, making it a must-have for DIY enthusiasts and quick repairs.

Two-part epoxy paste to replace missing or rotted wood is resistant to dry rot, UV light, fresh and salt water
Real-World Plastic-to-Wood Applications
Plastic-to-wood adhesive joints appear in workbench tops, guards, storage systems, signs, trailer interiors, kayak accessories, display fixtures, marine panels, jigs, and workshop organizers. The same adhesive is not right for every example.
A rigid ABS guard on a small oak base may suit toughened epoxy. A large plastic liner over plywood may need a flexible adhesive that accommodates movement. An HDPE wear strip may require an LSE adhesive or mechanical fasteners. An outdoor panel needs drainage, protected edges, and an adhesive rated for the expected temperature and moisture.
Mechanical fasteners can improve redundancy, but they do not automatically double the joint strength. Screws may crack thin plastic, create leaks, split wood, or concentrate stress. Drill proper clearance and pilot holes, use washers where needed, and confirm that the fastener layout allows the plastic to expand.
For non-critical projects, testing a small coupon is often the cheapest way to avoid wasted material. For a commercial, structural, or safety-related assembly, use documented manufacturer data and a design review rather than relying only on a bench test.
Conclusion: Building a Strong Plastic-to-Wood Bond
For many rigid plastics, a toughened two-part epoxy is the best all-around glue for plastic on wood. It is not a universal answer, however. PE, HDPE, and PP usually need a specialty low-surface-energy adhesive or a complete primer-and-adhesive system made for those plastics.
Identify the plastic, confirm compatibility, prepare both surfaces, design the joint to avoid peel, clamp without starving the bond, and wait for full cure. Protect exterior epoxy where required and keep all welding or other hot work separate from the wood, plastic, and adhesive.
Before trusting a permanent repair, make a scrap coupon or test a hidden area. A few minutes spent checking compatibility can prevent a failed panel, damaged project, or unsafe joint later.
Frequently Asked Questions
Can I weld plastic to wood instead of gluing it?
No conventional welding process joins plastic directly to wood. Thermoplastic welding joins compatible plastics to one another, while metal welding joins suitable metals. For a mixed assembly, weld the metal structure first, let it cool, and then attach the wood and plastic with a compatible adhesive or mechanical fastening system.
Is Gorilla Glue stronger than epoxy for plastic on wood?
Not as a universal rule. Original Gorilla Glue can bond wood to some compatible plastics, but it expands and requires close contact and firm clamping. A toughened epoxy is often more predictable on rigid ABS, acrylic, polycarbonate, or PVC. Neither is normally the first choice for untreated PE or PP.
How long will a plastic-to-wood bond last outdoors?
There is no dependable universal lifespan. Durability depends on the adhesive, plastic, wood moisture, sunlight, temperature cycling, standing water, joint stress, and surface preparation. Use an exterior-rated product, protect exposed epoxy from UV when required, seal or design vulnerable edges, and inspect the joint periodically.
What is the best glue for ABS plastic on oak?
A toughened two-part epoxy that lists ABS and wood is a strong starting choice. Remove contamination, dry both materials, abrade the bonding areas as directed, remove dust, clamp evenly, and wait for the full listed cure. Test the process on scrap ABS and oak before using it on a valuable assembly.
Can hot glue hold plastic to wood?
Hot-melt glue can hold a light decorative part or temporary jig, but it is usually a poor choice for sustained loads, warm locations, outdoor exposure, vibration, or a permanent structural joint. Use epoxy, a compatible polyurethane, or a specialty plastic adhesive when long-term strength matters.
What glue should I use for polyethylene or polypropylene on wood?
Use a structural adhesive specifically labeled for PE, HDPE, or PP, such as a compatible low-surface-energy acrylic system. Some cyanoacrylate products also use a matched polyolefin primer. Standard epoxy, wood glue, and ordinary super glue are usually unreliable on untreated PE or PP.
Should I add screws after gluing plastic to wood?
Fasteners can add retention or backup, but they must be designed for the materials. Use clearance holes in plastic, pilot holes in wood, and washers where needed. Avoid overtightening, which can crack plastic or squeeze it into a distorted shape. Safety-critical work should use an engineered fastening plan.
Sources
- WEST SYSTEM — Surface Preparation — supports the clean, dry, and sanded preparation sequence.
- WEST SYSTEM — Bonding and Clamping — supports wet-out, bond-line, overlap, fillet, and clamping guidance.
- 3M — Bonding Low-Surface-Energy Plastics — supports specialty adhesive selection for PE, PP, and TPO.
- Gorilla Glue — Original Gorilla Glue Instructions — supports moisture activation, thin application, clamping, expansion, and cure guidance.
- CDC/NIOSH — Epoxies and Resins Safety — supports ventilation, PPE, eye protection, and uncured-resin precautions.
- OSHA 29 CFR 1910.252 — Welding, Cutting, and Brazing — supports hot-work fire prevention around combustible materials.