Trailer hitch welding is not a routine upgrade. The safe choice depends first on the exact year, make, model, trim, frame or body structure, towing rating, and the hitch manufacturer’s installation instructions. A clean bead cannot make an unapproved attachment point safe, and welding can reduce the strength of some modern vehicle steels.
Quick Answer
Use a vehicle-specific bolt-on hitch unless the vehicle maker and hitch manufacturer expressly allow a weld-on installation. A weld-on receiver must be a rated, purpose-built product attached to approved structural points by a qualified welder using a documented procedure. Never improvise by welding a standard hitch or receiver to a car frame.
Key Takeaways
- Start with the owner’s manual, OEM repair information, and the exact hitch instructions—not a generic welding recommendation.
- A factory-welded hitch can still be a bolt-on product; “welded construction” does not mean it should be welded to the vehicle.
- Do not weld to a unibody rail, crumple zone, heat-treated frame, or high-strength steel unless the vehicle maker provides an approved procedure.
- The towing limit is the lowest rating among the vehicle, hitch, ball mount, ball, coupler, and other required equipment.
- Load-bearing hitch welding, electrical isolation, and final inspection belong with qualified professionals.
At a Glance
| Time Required | No universal time; vehicle verification, fit-up, welding, cooling, coating, and inspection all vary by the approved product and procedure. |
| Difficulty | Advanced structural and automotive work; professional installation is the safe default for any weld-on towing receiver. |
| Tools Needed | OEM service information, rated hitch instructions, vehicle lift or approved stands, measuring and clamping tools, welding equipment specified by the procedure, ventilation, fire protection, and inspection tools. |
| Cost | Varies widely by vehicle, hitch, fabrication, corrosion repair, electrical work, and inspection; get a written quote before modifying the vehicle. |
What’s in This Article
- When Trailer Hitch Welding Is Appropriate
- Bolt-On vs. Weld-On Trailer Hitches
- Verify the Vehicle and Hitch First
- Best Welding Method for a Trailer Hitch
- MIG Welding a Trailer Hitch
- Stick Welding a Trailer Hitch
- TIG Welding for Custom Hitch Builds
- Prep Metal for a Stronger Hitch Weld
- Protect the Vehicle Before Welding
- Match the Weld to the Load Rating
- Inspect and Maintain the Installed Hitch
- When to Call a Professional Welder
- Frequently Asked Questions
- Safety Disclaimer
- Conclusion
- Sources
Warning: Do not weld a standard bolt-on hitch, loose receiver tube, bumper hitch, or homemade bracket to a vehicle. Do not weld near a fuel tank, fuel or brake line, airbag component, wiring harness, battery, high-voltage cable, or combustible undercoating until the exact OEM protection and isolation procedure has been completed.
When Trailer Hitch Welding Is Appropriate
Trailer hitch welding is appropriate only in a narrow set of cases. The hitch must be designed for weld-on installation, the vehicle manufacturer must allow welding at the proposed structural location, and the installer must follow the hitch drawing and a qualified welding procedure. A purpose-built universal weld-on receiver, for example, may include side plates, specified weld locations, capacity limits, and instructions to weld to recognized standards.
That is different from taking a vehicle-specific bolt-on hitch and welding it to the car. Many receiver hitches are welded together at the factory but are engineered to bolt to existing holes or weld nuts in the vehicle. Their factory welds do not authorize welding the assembly to the frame.
Some vehicle makers expressly warn owners not to cut, drill, weld, or modify the hitch because doing so can reduce its rating. Ford also directs owners to use the lowest rating in the towing system. Check the exact owner’s manual and service information for your VIN before any fabrication. Ford’s towing guidance shows why the vehicle-specific instructions control the decision.
Pro Tip: Search the hitch catalog with the exact year, make, model, trim, drivetrain, and body style, then confirm the result against the VIN-specific owner’s manual. A hitch that fits a similar model may use different mounting points or have a different rating.
Bolt-On vs. Weld-On Trailer Hitches
A vehicle-specific bolt-on hitch is usually the first choice for a passenger car, crossover, SUV, or pickup. It uses engineered brackets, supplied fasteners, specified holes, and published torque values. It is removable, easier to inspect, and less likely to expose the vehicle structure to uncontrolled heat.
A weld-on hitch can make sense for an approved commercial chassis, specialty vehicle, or custom application when no suitable bolt-on product exists. It is not automatically stronger. Strength depends on the receiver design, side plates, base metal, weld geometry, heat input, load path, and the vehicle structure. A rigid-looking connection can still crack beside the weld or damage a heat-treated rail.
Do not choose by appearance alone. Compare service access, corrosion protection, future removal, warranty impact, frame repair history, and whether the manufacturer permits the proposed attachment. Existing galvanized-steel welding precautions also matter when zinc-coated parts are involved.
The safe towing limit is the lowest rating in the entire system—not the largest number printed on one component.
Verify the Vehicle and Hitch First
Before comparing welding processes, verify that the vehicle is allowed to tow the intended trailer and that an approved hitch exists. Use this order:
- Confirm towing approval. Read the owner’s manual for the exact vehicle. Some cars and electrified models are not rated to tow in every market or configuration.
- Record every limit. Check maximum trailer weight, tongue weight, gross vehicle weight rating, gross axle weight ratings, payload, and gross combination weight rating where provided.
- Identify the structure. Determine whether the proposed attachment is a conventional frame rail, heat-treated rail, hydroformed section, unibody rail, subframe, bumper reinforcement, or crash-management part.
- Check repair history. Rust, collision damage, previous straightening, drilled holes, cracks, and old welds can disqualify an attachment point.
- Read both sets of instructions. The vehicle maker and the hitch manufacturer must both permit the installation method.
- Confirm the full towing setup. Match the receiver, ball mount, hitch ball, coupler, safety chains, wiring, and trailer brakes to the intended load.
Note: “Weld-on hitch” should mean a rated product whose instructions require welding. It should not mean a homemade receiver or a bolt-on hitch altered after purchase.
Best Welding Method for a Trailer Hitch
There is no single best process for every trailer hitch. The correct choice comes from the approved drawing or welding procedure specification, base-metal grade, thickness, joint design, position, access, environment, and required filler-metal strength. A process label such as MIG, stick, or TIG does not prove that the finished connection is suitable for towing.
Clean surfaces, correct fit-up, suitable consumables, controlled heat input, and verified fusion matter more than a generic amperage chart. An amperage range can help with practice and setup, but a structural hitch joint still needs a procedure written for the actual material and joint.
MIG Versus Stick and TIG
| Method | Where It May Fit | Main Limits |
|---|---|---|
| GMAW/MIG | Clean steel in a controlled shop; efficient production and fabrication | Shielding gas is wind-sensitive; wire, gas, transfer mode, and machine output must match the procedure |
| SMAW/Stick | Some approved thicker-steel and outdoor fabrication | Slag must be removed; electrode handling, position, low-hydrogen controls, and welder skill are critical |
| GTAW/TIG | Specialty fabrication needing precise heat and filler control | Slow deposition; cleanliness and operator control are demanding; not a default choice for high-volume structural welds |
| FCAW | Approved shop or field work, depending on whether the wire is gas-shielded or self-shielded | Wire classification, polarity, shielding, fume level, and procedure must be verified |
Match the Method to the Approved Procedure
MIG often gives clean, efficient welds on properly prepared steel in a shop. Stick may be practical for some thicker components or field work. TIG offers precise control for specialty parts. Those are broad process traits, not installation instructions.
Do not select a 6011 root pass and 7018 fill pass simply because that combination appears in a generic guide. E6010, E6011, and E7018 electrodes have different operating characteristics and storage requirements, but none is automatically correct for a hitch. The engineer or manufacturer must specify the permitted process, joint preparation, filler classification, preheat, interpass limits, weld size, sequence, and inspection.
Likewise, a machine name or a single current value cannot establish capacity. An HH175-class MIG machine or a 250EX-type power source may be suitable for some work within its rated output, but neither “3/16 to 1/4 inch” nor “about 130 amps” proves that a particular hitch weld is safe.
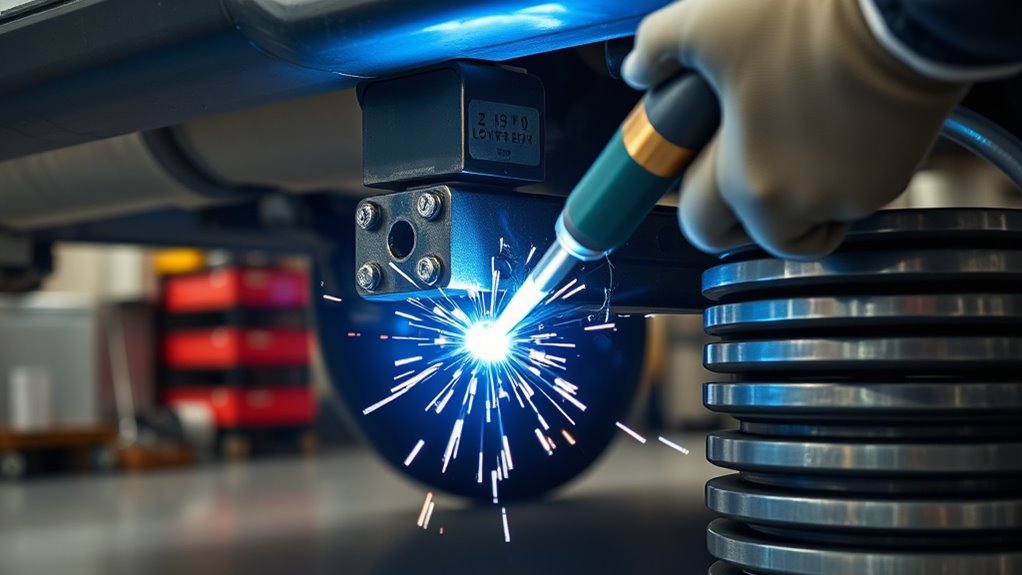
MIG Welding a Trailer Hitch
MIG welding can be efficient for an approved steel hitch assembly because it produces a continuous weld with good productivity. It works best when the base metal is known, the joint is clean and accessible, the machine has enough duty cycle and output, and the wire and shielding gas match the welding procedure.
Shielding gas can be blown away by wind, causing porosity and poor fusion. Move the job indoors or use a process and procedure designed for field conditions rather than turning up the gas flow without control.
A smooth bead is not proof of penetration, base-metal compatibility, or structural capacity.
Short-circuit transfer may be specified for some thinner sections, while other joints may require a different transfer mode or process. Travel angle, contact-tip distance, wire-feed speed, voltage, and heat input must come from the procedure and a successful qualification test—not appearance alone. Review wire-feed and voltage relationships as background only.
Stick Welding a Trailer Hitch
Stick welding can provide strong fusion on some approved thicker-steel hitch components and is less dependent on external shielding gas than MIG or TIG. It still requires clean, sound steel, correct joint preparation, suitable electrodes, controlled technique, and complete slag removal.
Light surface contamination tolerance is not permission to weld over rust, paint, scale, oil, or undercoating. Clean the joint to the condition required by the procedure. The same basic defect-prevention principles described in these clean-metal and weld-control tips apply, but a towing connection needs professional qualification.
Stick Welding Basics
Arc length, travel speed, work angle, electrode angle, amperage, polarity, and bead sequence all affect fusion and the heat-affected zone. A qualified welder should verify the setup on procedure-qualification material before welding the vehicle.
After every pass, remove slag and inspect for visible cracks, undercut, overlap, arc strikes, porosity, incomplete tie-in, and distortion. Visual checks are necessary, but they do not reveal every internal defect.
Electrode Selection
E6010 and E6011 electrodes are known for forceful, penetrating arcs, while E7018 is a low-hydrogen electrode commonly used where a procedure calls for that classification. E7018 must be stored and handled according to the consumable manufacturer’s instructions. Do not substitute one electrode for another or invent a root-and-cap sequence on a load-bearing hitch.
| Electrode | General Trait | Hitch-Welding Rule |
|---|---|---|
| E6010 | Deep-penetrating DC electrode | Use only when the procedure and power source permit it |
| E6011 | Deep-penetrating AC/DC electrode | Not a universal root-pass choice |
| E7018 | Low-hydrogen electrode with controlled handling needs | Use only with specified storage, polarity, preheat, and procedure controls |
Hitch Prep and Fit
Fit the purpose-built hitch and side plates exactly as the manufacturer shows. Clamp the assembly without forcing misaligned parts into place. Gaps, short side plates, poor access, and off-center receivers can change the load path and invalidate the published rating.
Preheat may be required, prohibited, or limited depending on the steel and procedure. Never apply generic preheat to a vehicle rail. Record the actual base metal, joint fit-up, environmental conditions, consumables, and welder identification when the job requires traceability.
TIG Welding for Custom Hitch Builds
TIG welding offers precise heat and filler-metal control, which can help on specialty brackets, stainless components, or engineered aluminum assemblies. It is slower than MIG or stick and places high demands on cleanliness, access, and operator skill.
Use tungsten, shielding gas, filler metal, and current type that match the base metal and the qualified procedure. A correct filler-rod selection is essential, but the filler chart alone does not establish joint design or capacity. The same warning applies to generic TIG settings for stainless steel.
Do not TIG-weld an aluminum receiver or bracket to a steel vehicle frame. Dissimilar-metal attachment requires an engineered mechanical transition, corrosion control, and a design that addresses fatigue. For routine passenger-vehicle hitch installation, an approved bolt-on steel hitch is usually the more practical choice.
Prep Metal for a Stronger Hitch Weld
A strong weld starts with known, sound base metal. Remove paint, rust, oil, sealant, galvanizing, powder coat, and undercoating from the specified weld and ground-clamp areas using the method allowed by the manufacturer. Do not grind away structural thickness or damage nearby wiring, fuel lines, brake lines, seam sealer, or corrosion protection.
Prepare bevels, root openings, backing, and fillet dimensions only as shown on the drawing or procedure. Proper fillet-weld sizing depends on the thinner connected part, joint geometry, loading, and design requirements; a larger bead can add harmful heat without adding usable strength.
After welding and acceptance, restore corrosion protection with compatible primer, seam sealer, cavity wax, and topcoat as the vehicle maker requires. Keep coatings off mating surfaces and fastener seats unless the instructions say otherwise.
Warning: OSHA advises cleaning coatings and residues that may create toxic exposure and using ventilation or local exhaust to control welding fumes. Galvanized steel can produce zinc-oxide fume, and burning undercoating can release hazardous smoke.
Protect the Vehicle Before Welding
Vehicle welding can damage electronics or ignite hidden materials. Follow the OEM service procedure rather than a universal battery rule. Depending on the vehicle, the procedure may require saving settings, powering down modules, disconnecting one or more 12-volt batteries in a specified order, disabling the supplemental restraint system, isolating high voltage, and waiting a stated time before work begins.
Disconnecting both 12-volt terminals is not a complete safety plan for a hybrid or electric vehicle. High-voltage cables, battery packs, charge circuits, and pyrotechnic disconnects require model-specific training and equipment. Honda’s published repair information for an Accord Hybrid, for example, directs technicians to isolate high voltage before welding or electrical repair and warns that heat can weaken ultra-high-strength steel. Honda body-repair guidance illustrates why the exact OEM procedure matters.
- Place the welding return clamp on clean metal as close to the weld as the procedure allows so current does not travel through bearings, hinges, modules, or wiring paths.
- Shield or remove fuel and brake lines, wiring, batteries, sensors, interior trim, acoustic foam, seam sealer, and underbody coatings near the heat zone.
- Use a fire watch, suitable extinguisher, welding blankets, and a post-work inspection on both sides of the panel or rail.
- Do not weld on a vehicle with a leaking fuel system, damaged high-voltage battery, unknown chemical contamination, or hidden combustible material in the heat path.
Match the Weld to the Load Rating
A hitch rating is valid only for the product in its tested configuration and installation. Welding extra plate, changing side-plate width, shortening brackets, drilling new holes, adding a receiver extension, or modifying the cross tube can change the forces and void the stated capacity.
Compare the vehicle’s maximum trailer weight and tongue weight with the hitch, ball mount, ball, coupler, and trailer ratings. Also account for passengers, cargo, accessories, and tongue weight in the vehicle’s payload and axle loads. Never raise the limit by installing a higher-class hitch on a vehicle with a lower towing rating.
Purpose-built hitches are commonly evaluated under recognized towing standards. SAE J684 covers trailer couplings, hitches, and safety chains, while SAE J3352 addresses conventional weight-carrying towing-system test loads in its stated scope. Standards are not a substitute for the vehicle and hitch instructions, but they are stronger evidence than an untested homemade design. See the official SAE J684 page and SAE J3352 page.
Generic amperage-by-thickness guidance can help explain welding fundamentals, but only the qualified procedure can connect machine settings to a rated hitch installation.
Inspect and Maintain the Installed Hitch
Do not “test” a new hitch by attaching a heavy trailer and driving. Acceptance should follow the hitch instructions, the welding procedure, and any engineering or inspection plan. A qualified inspector should check fit-up records, weld location and size, arc strikes, undercut, overlap, cracks, porosity, incomplete fusion indications, distortion, clearance, and restored corrosion protection.
Visual inspection cannot confirm every internal condition. If the design or procedure calls for magnetic-particle, dye-penetrant, ultrasonic, radiographic, or proof-load testing, have the specified method performed and documented by qualified personnel. Do not invent a proof load or jack against the receiver.
Before towing, confirm:
- The receiver is centered, level as designed, and clear of the exhaust, spare tire, suspension, sensors, and body panels.
- All required hardware is installed and torqued to the product specification.
- Safety-chain attachment points are part of the rated design and are not attached to a weak bumper or unapproved bracket.
- Trailer lighting, brakes, breakaway equipment, and the correct ball or coupling are working.
- No crack, rust bleed, coating failure, loose fastener, or deformation appears after the first towing cycle or during periodic inspections.
When to Call a Professional Welder
Call a professional before any load-bearing hitch weld. The job needs more than the ability to run a bead: the installer must understand vehicle structures, fatigue loading, joint design, welding procedures, heat control, corrosion restoration, electronics, and inspection.
Stop and obtain OEM or engineering help when the vehicle has a unibody, hydroformed or heat-treated rail, ultra-high-strength steel, collision damage, heavy rust, previous frame repair, hybrid or electric drive, air suspension, rear-mounted battery, fuel tank near the proposed weld, or no published weld-on procedure.
If cutting is part of fabrication, treat it as a separate hazard. Plasma cutting has its own electrical, fume, fire, and compressed-gas requirements; review plasma-cutter power, duty cycle, and gas considerations without assuming the cutting setup is suitable for welding.
A qualified installer should provide the hitch model, vehicle identification, procedure used, welder qualification where required, inspection results, capacity labels, and maintenance instructions. That record is more valuable than a verbal claim that the weld “looks strong.”
Frequently Asked Questions
Can I weld a tow hitch to my car?
Only when the vehicle maker permits welding at the proposed location and the hitch is specifically designed for weld-on installation. Most passenger vehicles are better served by a vehicle-specific bolt-on hitch. Do not weld a standard receiver or bolt-on hitch to a car without written manufacturer guidance.
What is the hardest part of a trailer hitch welding job?
The hardest part is usually proving that the vehicle structure, hitch design, base metal, load path, and welding procedure are compatible. Thin sections, high-strength steel, limited access, old corrosion, and dissimilar metals add risk, but the engineering decision comes before the welding technique.
Should I disconnect the battery when welding on a vehicle?
Follow the exact OEM service procedure. It may require disconnecting one or more 12-volt batteries, disabling airbags, isolating high voltage, protecting modules, and placing the return clamp close to the weld. Disconnecting both battery terminals by itself is not enough for every vehicle, especially a hybrid or EV.
Is it better to push or pull a weld?
The correct travel direction depends on the process, electrode or wire, joint position, shielding, and qualified procedure. Do not choose push or pull based on a slogan. Use the technique that produced acceptable test results for the same joint and material.
How do I know if a hitch weld is safe?
You cannot confirm safety from bead appearance alone. Verify that the vehicle and hitch permit welding, the welder followed an approved procedure, the joint matches the drawing, and a qualified inspector accepted the work. Complete any nondestructive examination or proof testing required by the design.
Does welding a hitch increase towing capacity?
No. Welding cannot raise the vehicle manufacturer’s towing, tongue-weight, payload, axle, or combination-weight limits. The usable capacity remains the lowest rating in the complete towing system.
Can I weld a hitch to a unibody vehicle?
Do not weld to a unibody rail or crash structure unless the vehicle maker publishes an approved procedure for that exact location and application. Heat can alter high-strength steel and change crash performance. A vehicle-specific bolt-on hitch is normally the safer route.
Safety Disclaimer: This article is general information, not a welding procedure, engineering approval, vehicle repair manual, or towing authorization. Hitch fabrication and vehicle welding can cause structural failure, fire, toxic-fume exposure, airbag deployment, electric shock, loss of vehicle control, injury, or death. Follow the exact vehicle and hitch manufacturer instructions and use qualified professionals.
Conclusion
The right trailer hitch is the one approved for the exact vehicle and installed exactly as designed. Choose a vehicle-specific bolt-on hitch when one is available. Consider welding only for a purpose-built weld-on receiver with written vehicle approval, a qualified procedure, professional installation, and documented inspection. Clean metal and a neat bead matter, but engineering, ratings, electronics protection, and the complete load path decide whether the setup is safe.
Sources
- Ford Owner’s Manual: Recommended Towing Weights — supports using the lowest rating and warns against cutting, drilling, welding, or modifying the hitch.
- CURT 15903 Universal Weld-On Receiver Hitch Instructions — shows that legitimate weld-on use depends on a purpose-built product, defined weld locations, capacity limits, clean metal, and welding standards.
- SAE J684: Trailer Couplings, Hitches, and Safety Chains — identifies the recognized standard covering automotive trailer coupling and hitch equipment.
- SAE J3352: Conventional Towing System — covers conventional weight-carrying towing-system test loads within its published scope.
- OSHA: Controlling Hazardous Fume and Gases During Welding — supports coating removal, ventilation, local exhaust, and welding-fume controls.
- Honda Body Repair Information: Accord Hybrid — provides an OEM example of high-voltage isolation and high-strength-steel welding restrictions.


