If you work in a garage, machine shop, or fabrication workspace, a few smart DIY workshop tool upgrades can save time, improve accuracy, and make welding projects easier to repeat. This guide focuses on practical tool ideas that support clamping, cutting, grinding, measuring, fit-up, and alignment.
These ideas are ideal if you want stronger workholding, cleaner edge prep, better repeat cuts, and fewer “measure it again” moments before tack welding.
Quick Verdict: Best DIY Tool to Build First
Start with the tool that fixes your biggest bottleneck. If parts move during tacking, build better clamping accessories first. If cut lengths drift, build a fence and stop system. If grinding angles vary, build a controlled grinder jig. If you repeat the same layout often, build a marking template or setup plate.
Products Worth Considering

Mount on the Right Angle Bracket, Riser Block, or Clamping Squares for push down clamping at an elevated height

12-Piece Welding Table Fixture Pin Set: This set includes 12 fixture pins (5/8" x 1" x 2") for welding tables with 5/8" (16mm) Holes. Easy to use, these pins ensure secure positioning for precise welds, improving efficiency across various welding tasks.

Why DIY Workshop Tools Improve Welding Quality
Welding quality rarely fails because of missing talent alone. Many problems begin with setup: poor fit-up, weak clamping, inconsistent alignment, and repeated measurement errors. DIY workshop tools help by making workholding and positioning more reliable before the arc starts.
Common welding pain points DIY tools can solve
- Inconsistent alignment when re-clamping parts for tack welds and final welds.
- Slow setup time from measuring, adjusting, and rechecking the same parts repeatedly.
- Parts slipping under heat, vibration, or grinding pressure.
- Uneven outcomes because your tooling does not guide parts, tools, or templates consistently.
When a tool is built well, it becomes repeatable. That matters more than adding a fancy feature.
DIY Workshop Tool Ideas at a Glance
| DIY Tool Idea | Best For | Main Benefit | Build Difficulty | Key Safety Check |
|---|---|---|---|---|
| Motorcycle brake disc vise | Small parts, brackets, tabs, and compact workholding | Stable clamping from a rigid base | Moderate | Inspect the disc for cracks and mount it securely |
| Sliding angle grinder jig | Repeatable beveling, edge prep, and controlled grinding | More consistent grinder travel | Advanced | Keep the guard functional and avoid disc binding |
| Sliding or indexing fence | Repeat cuts, matching parts, and fast layout | Better length and angle repeatability | Easy to moderate | Lock the fence so it cannot shift under cutting force |
| Clamping accessories | Reducing slippage, gap movement, and heat distortion | Improved fit-up control | Easy | Keep clamps clear of direct weld heat when possible |
| Marking and setup system | Repeat holes, offsets, angles, and assembly layouts | Faster layout with fewer mistakes | Easy | Verify the first reference mark before repeating it |
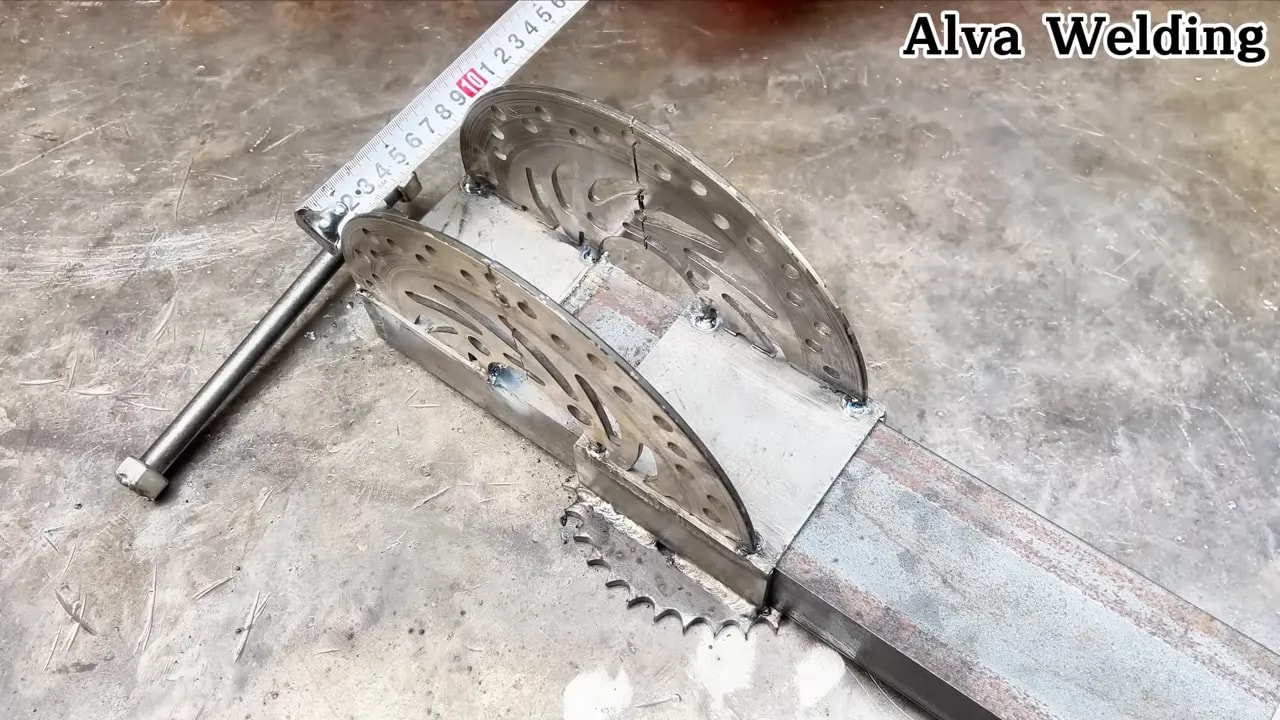
Idea #1: Build a Strong DIY Vise From a Motorcycle Brake Disc
A motorcycle brake disc can work as a compact base for a small vise or clamping fixture when it is intact, flat enough for your design, and mounted to a rigid plate. The goal is not just clamping force. The real value is stable gripping so your work stays aligned through tack welding, grinding, and fitting.
Products Worth Considering

【Compatibility】This motorcycle disc brake piston spreader tool can be widely used across several brands of motorcycles such as Harley, Yamaha, Victory, Indian and more. It is also ideal for all small cars, SUVs, and light trucks, catering to diverse vehicle models' brake maintenance needs.

【Efficient Tool】- It helps to push the brake piston of the brake caliper backward without damaging the piston surface.

Material: Bicycle disc brake pad alignment tool is made of better high-carbon steel heat treatment and hardening, which makes the mountain bike bicycle disc brake pad adjustment tool parts strong and durable, super hard and impact resistant. It is specially made for disc brake gap indicator. These brake pads are inserted tighter and are not easy to slip and can be used for a long time. The useful alignment tool for bicycle installation auxiliary rotor can solve your braking problem.
What makes this approach useful
- Heat-tolerant structure compared with light-duty shop scraps or thin plates.
- Good rigidity when the disc is mounted to a thick, flat base.
- Useful surface geometry for fastening, indexing, or building a compact fixture.
Materials and parts to plan
- Motorcycle brake disc that is not cracked, badly warped, or severely corroded
- Mounting plate or base frame, preferably thick steel
- Moveable jaw and fixed jaw stock made from robust plate or suitable jaw material
- Screw or actuator mechanism, such as a bench vise screw, lead screw, or jack screw
- Replaceable contact pads if you need to protect finished or thin parts
- Fasteners, welding consumables, square, ruler, calipers, and layout tools
Build and alignment checklist
- Inspect the disc: confirm there are no cracks around mounting holes and no structural damage in the friction area.
- Check flatness: avoid using a disc that rocks badly on a flat surface unless the design can safely compensate for it.
- Square and mount the base: align the disc to your mounting plate so tightening force does not twist the fixture.
- Decide the clamping direction: choose whether the vise will hold flat stock, small tubes, tabs, or odd shapes.
- Fit the jaws accurately: aim for parallel faces so the screw applies force evenly.
- Test clamping force without welding: tighten gradually and check for jaw rocking, plate flex, and fastener movement.
- Add contact materials if needed: soft pads help protect thin parts; harder pads improve bite on rough stock.
Safety notes for welding on a clamped vise setup
- Never clamp unstable or cracked components to a vise base.
- Expect heat movement when welding near the vise. Recheck alignment after a test weld.
- Keep the screw, jaw pads, and fasteners away from direct weld heat when possible.
- Use appropriate PPE: welding helmet, gloves, hearing protection, and eye protection for cutting or grinding steps.
Idea #2: Sliding Angle Grinder Jig With Bearings for Repeatable Grinding
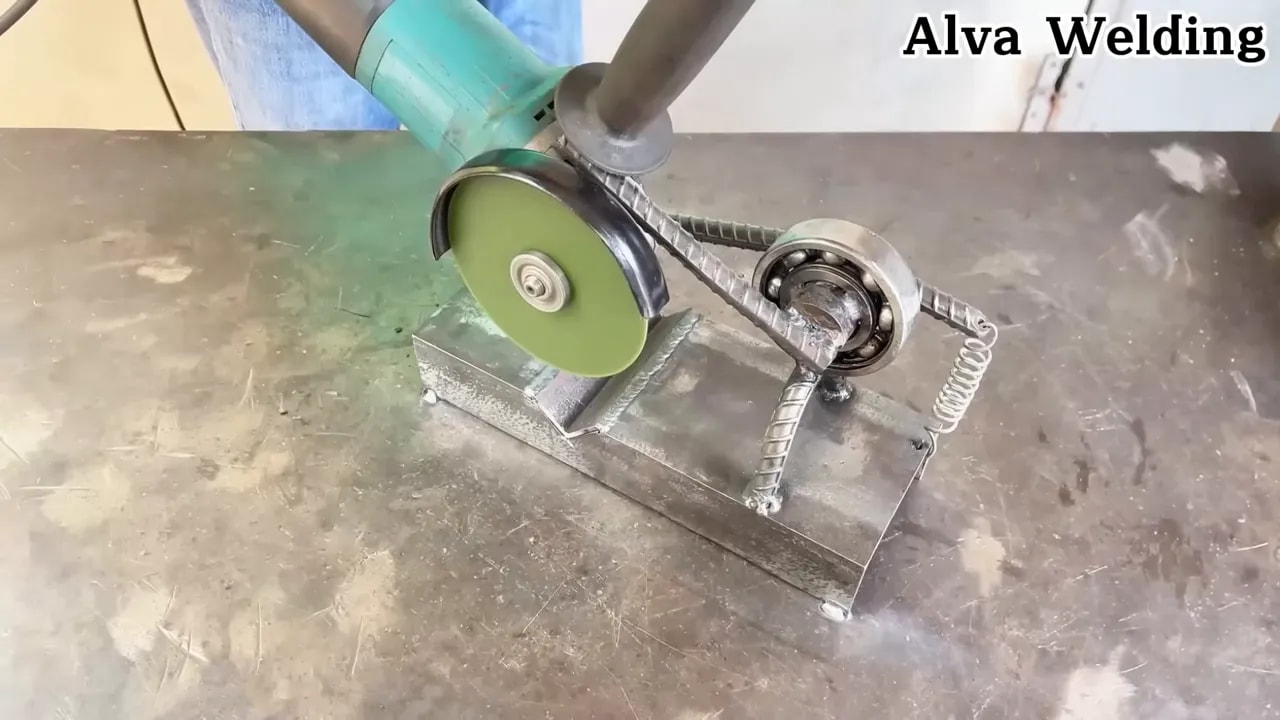
An angle grinder jig with a sliding mechanism can turn rough, uneven grinding into a more controlled process. Bearings help the grinder ride along a defined path, which can reduce operator-dependent variation during beveling, flattening, and edge prep.
Where this jig helps most
- Flattening and beveling edges consistently for weld prep
- Grinding repeatable passes on brackets and plate assemblies
- Setting a controlled angle for small fabrication tasks
- Reducing hand-position variation when multiple parts need the same finish
Key design features to prioritize
- Rigid rails: flimsy rails defeat the purpose and can increase binding risk.
- Low-friction motion: bearings reduce snagging and jerky movement.
- Repeatable stops: mechanical stops create consistent depth and travel limits.
- Secure workpiece clamping: the jig guides the grinder, but it does not replace proper workholding.
- Guard clearance: the grinder guard must remain installed and functional.
Build approach for a practical adjustable grinder jig
- Select the grinder: confirm the jig can fit the grinder head shape, handle position, switch access, ventilation openings, and guard clearance.
- Design the guide rails: choose straight, parallel rails and check alignment before welding or drilling final holes.
- Install bearings: mount bearings rigidly, then verify smooth travel with no tight spots.
- Attach grinder mounts: use a stable bracket and avoid wobble, flex, or clamp pressure on weak plastic parts.
- Add stops and adjustment: provide a way to set grinding depth for different material thicknesses.
- Run a dry test: unplug the grinder or remove the battery, remove the disc, and move the grinder through its full travel.
- Perform a test pass on scrap: confirm the cut path, spark direction, grinding pressure, and finish before working on real parts.
Angle grinder safety checklist
- Use the correct disc type and RPM rating for your grinder and material.
- Keep guards installed, functional, and unobstructed.
- Do not defeat safety switches, handles, guards, or ventilation openings.
- Do not force the grinder. Let the disc do the work.
- Stand to the side of the disc path. If binding occurs, stop immediately.
- Control sparks, keep flammables away, and allow hot metal to cool safely.
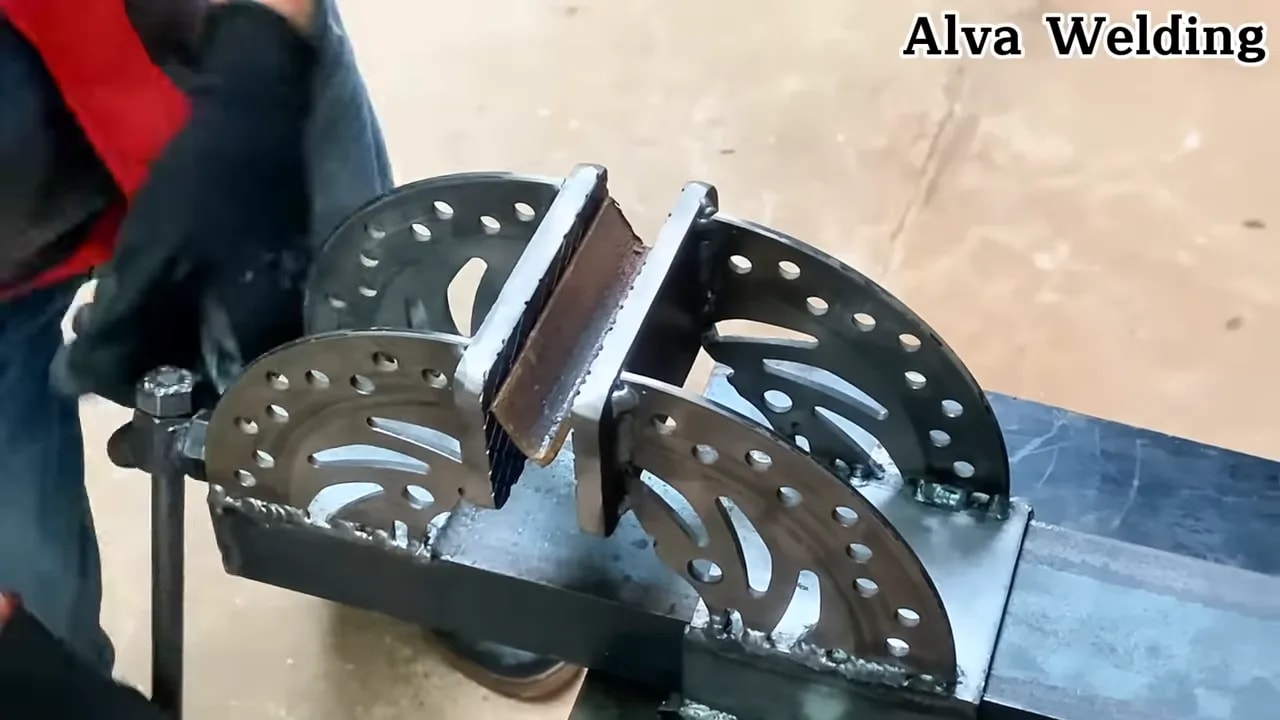
Idea #3: Sliding or Indexing Fence for Fast, Accurate Cuts
Many DIY welding frustrations begin before welding, during cutting and fit-up. A sliding fence system can make repeat cut lengths and angles more consistent. The concept is simple: add a fence or index plate that locks quickly and returns accurately.
What to build
- A small fence system for a cutoff tool
- A strip-based sliding guide that clamps at preset intervals
- An adjustable angle index block for repeated bevel angles
- A stop block for matching multiple brackets, tabs, or spacers
Framework for accuracy
Accuracy comes from three things: measurement, repeatable stops, and rigid clamping.
- Measurement: use a tape scale, steel ruler, or engraved ruler on the base.
- Repeatable stops: add detents, pins, or physical stop surfaces for common lengths.
- Rigid clamping: your fence must not shift under cutting force.
Practical tips for welding-ready parts
- After cutting, deburr edges before fit-up.
- Test fit the first piece, then lock the jig and repeat.
- Use a simple quality-control step: verify squareness, length, and thickness before tack welding.
- Mark the fence settings for common repeat jobs so you can return to them later.
Idea #4: Clamping Accessories That Prevent Weld Warping and Slippage
Even strong welding clamps can be improved with DIY add-ons. The simplest upgrades often include sacrificial contact surfaces, shaped pads, and quick-set alignment guides. These reduce slip during tack welds and help control distortion caused by heat and shrinkage.
DIY clamping add-ons to consider
- Replaceable jaw pads: bolt-on pads that grip without marring delicate material.
- Tubing V-block inserts: cradle round tube, pipe, or rod more securely.
- Right-angle alignment blocks: help hold corners square before tack welding.
- Passive heat shields: reduce heat transfer into clamps where practical.
- Spacer tabs: help preserve intentional gaps for penetration and bead shape.
Heat management habits that pair with tooling
- Tack in sequence: distribute tacks to balance shrinkage.
- Skip and return: avoid welding one side continuously when distortion matters.
- Use clamps and spacers: maintain gaps intended for penetration and bead shape.
- Let parts cool while constrained: release clamps only after the part is stable enough to hold its shape.
Quick before-welding fit-up check
- Are edges tight or intentionally gapped?
- Is the part square or aligned to a template?
- Will the clamp be in the heat zone during welding?
- Can you access the weld area without repositioning?
- Can the part move when it heats, shrinks, or is bumped by the torch?
Idea #5: Build a Simple Marking and Setup System for Repeat Jobs
Many DIY projects fail on repeatability, not fabrication. A marking and setup system helps you set the same offsets, angles, and placements each time. You can build it from a few steel plates, a square, and a set of repeatable reference marks.
Version A: Template plate for hole placement
- Cut a base plate
- Transfer hole coordinates carefully
- Use hardened bushings or simple guide holes for fast marking
- Include a clamping lip if the part needs to index the same way every time
Version B: Fence-and-stop setup for bending and assembly
- Mount a fence to a base plate
- Add adjustable stops to set lengths
- Add an angle reference block for consistent alignment
- Label common positions so repeat jobs do not require fresh layout from scratch
Why this improves welding outcomes
When fit-up is consistent, weld parameters become easier to repeat. That means less time troubleshooting bead shape, penetration, and distortion issues caused by shifting parts.
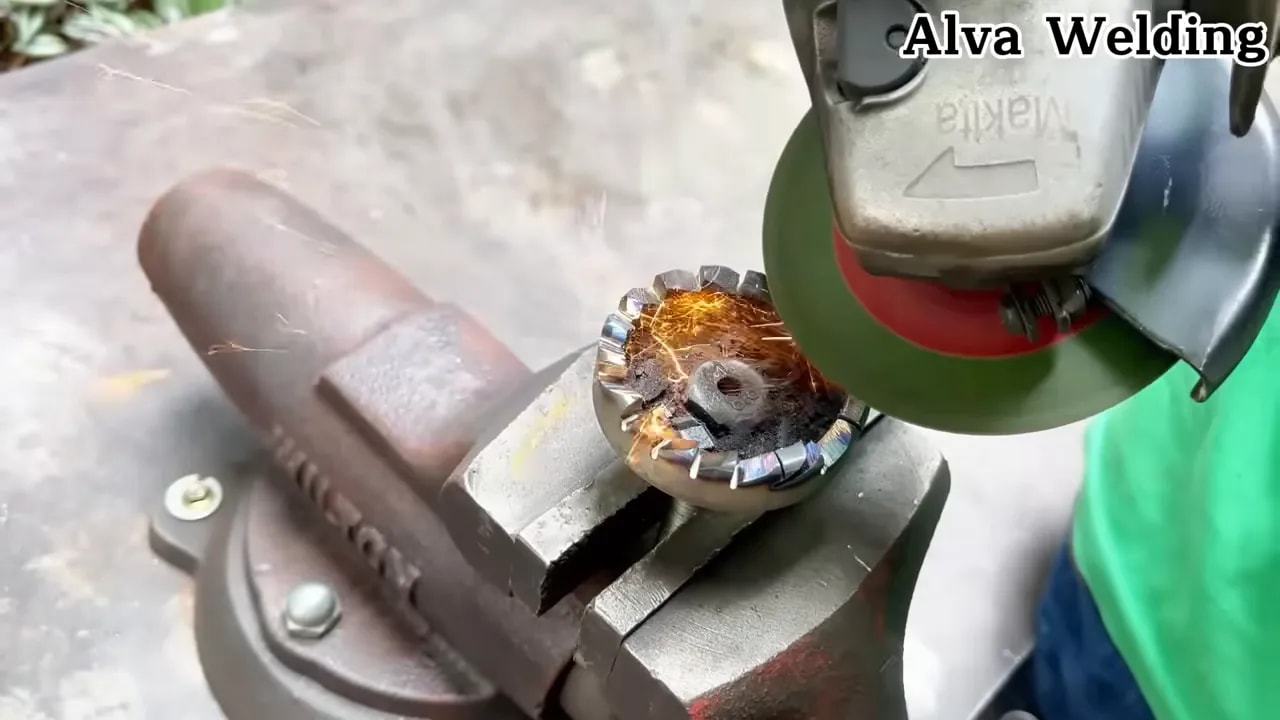
Before You Build: Practical Planning Checklist
Before cutting steel for a DIY workshop tool, answer a few basic questions. This helps prevent a tool that looks strong but does not work accurately.
- What problem is the tool solving? Clamping, cutting, grinding, marking, alignment, or repeatability?
- What material thickness will it handle? Thin parts need different pads and pressure than heavy plate.
- Does it need adjustment? Fixed jigs are faster, but adjustable jigs are more flexible.
- Can it be checked with a square? Build reference surfaces that are easy to verify.
- Can you reach the weld or cut safely? A tool that blocks access may slow you down.
- Can it fail safely? Avoid designs where a small fastener, thin tab, or cracked base carries the whole load.
Common Mistakes When Building DIY Welding Tools
DIY tools can be excellent, but a few mistakes lead to frustrating failure. Avoid these before committing to fabrication.
1) Building something rigid but not square
A jig that is solid but misaligned will produce consistent wrong results. Use a square and verify alignment before final welding or machining.
2) Underestimating clamping forces
Tools that clamp well for light tasks can fail when welding heat and shrinkage add stress. Ensure clamping points are stable and not relying on thin plates or weak tack welds.
3) Ignoring disc and grinder binding risks
Grinding jigs can bind if tolerances are too tight or if rail alignment is off. Always test on scrap and remove the disc before dry motion checks.
4) Making measurements good enough for cutting, but not for welding
Welding fit-up often needs tighter consistency than rough cutting because misfit can create stress, gaps, and poor fusion. Aim for repeatable results and verify the first part carefully.
5) Skipping a safety-first test cycle
Every new tool should go through:
- dry fit and travel checks
- test clamping with scrap pieces
- first-pass trial welds or grinding passes in a controlled area
- final inspection for loose fasteners, sharp edges, wobble, and unexpected movement
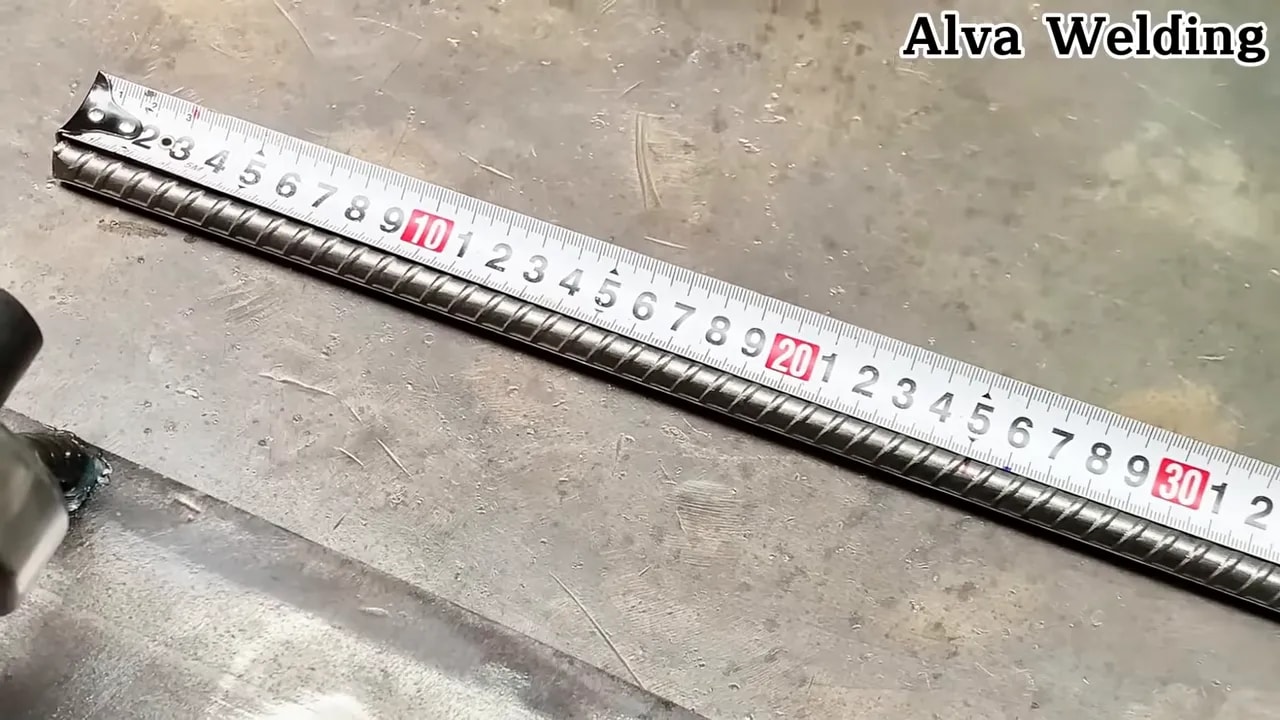
Materials, Tools, and Setup Tips
Tool choice depends on what you are building. Still, a few general guidelines help your DIY tool work better, last longer, and stay safer.
Materials that tend to perform well
- Thicker base plates for vibration resistance and reduced flex
- Replaceable pads for jaw surfaces and contact points
- Quality bearings and rails for sliding mechanisms
- Heat-resistant design near welding zones
- Mechanical stops for repeatable lengths, depths, and angles
Tools that improve build accuracy
- Steel ruler, calipers, and a reliable square
- Drill press or accurate drilling guide
- Grinder or belt sander for edge finishing
- Clamps and an angle reference setup
- Marker and scribing tools for repeat layout
Basic setup workflow for every tool build
- Design for adjustment: include a way to fine-tune where accuracy matters.
- Build the reference: start with the square, then add dependent features.
- Test alignment before final welding: tack first, verify, then finish.
- Finish and deburr: smooth edges prevent binding and improve safety.
- Document the settings: note common stop positions and dimensions.
How to Choose Which DIY Workshop Tool to Build First
If you want the biggest impact with the least effort, prioritize tools that improve setup and repeatability.
Decision guide
- If your welds are inconsistent, start with workholding or marking templates.
- If edge prep takes too long, build a grinder jig or bevel guide.
- If cutting measurements drift, build a fence and stop system.
- If parts slip during tacking, add clamps with better contact pads and alignment blocks.
- If you repeat the same part often, create a template plate or indexing setup.
Most workshop improvements come from reducing variability, not from adding complexity.
FAQ
What is the best DIY workshop tool improvement for beginners?
The best starting point is usually a simple clamping and marking system. Templates, reference blocks, and quick-stop fences make parts fit consistently, which improves weld setup right away without requiring complex machinery.
How do I make sure my DIY welding jig stays square?
Verify squareness early using a reliable combination square or right-angle reference. Tack key reference points first, test fit with scrap, then finalize. Recheck alignment after any heat-heavy welding operations.
Are motorcycle brake discs safe to reuse in tool builds?
They can be useful for rigid compact fixtures, but only if the disc is intact and suitable for the load. Inspect for cracks, severe corrosion, warping, and structural damage. If you are unsure, choose a new or known-good component instead of risking a weak base.
What safety steps should I follow when building a grinder sliding jig?
Use rigid rails, add stops to prevent over-travel, and perform dry movement tests with the disc removed. Keep the grinder guard functional, use discs rated for the grinder, keep clear of the disc path, control sparks, and test on scrap before any real work.
How can I reduce weld warping with DIY tooling?
Use better clamping at the right points, maintain intentional gaps, and distribute weld heat. Tack in a balanced sequence, weld in sections, and allow the part to cool while constrained to preserve geometry.
What should I measure to confirm a repeatable fit-up?
Confirm squareness or alignment, joint gap if required, and overall length. For tube and plate assemblies, also verify that both sides sit at the intended distance before tacking.
When should I avoid building a DIY welding tool?
Avoid a DIY build when the tool would carry heavy loads you cannot safely calculate, when it requires defeating a power tool guard, or when failure could cause serious injury. In those cases, a purpose-built commercial fixture or professionally designed setup is safer.
Key Takeaways
DIY workshop tools matter because welding success is largely a setup problem. A strong clamping base, a sliding grinder guide for controlled grinding, reliable fences for consistent cutting, smarter clamping accessories, and a simple marking or indexing system can make your results more repeatable.
Start with the tool that targets your biggest bottleneck. Build for rigidity and adjustment. Test on scrap. Then document your settings so future projects go faster and look cleaner.