Duty cycle limits tell you how long you can weld in a 10-minute span before the machine must cool, and in auto body work that directly affects speed, bead consistency, and heat control. If you exceed the rating, the welder can overheat, shut down, or weaken the joint. Higher amperage lowers duty cycle, especially on MIG repairs. You need to match output to the job and manage cooling breaks, and there’s more to optimize.
What Duty Cycle Means in Auto Body Welding

In auto body welding, duty cycle is the percentage of a 10-minute period that you can weld continuously before the machine needs to cool down. You use this rating to judge how long your welding machines can operate before overheating.
If your MIG welder has a 40% duty cycle at 180 amps, you can weld for 4 minutes, then let it rest for 6. That limit isn’t a weakness; it’s the operating boundary that keeps output stable and protects the tool from thermal stress.
A 40% duty cycle means 4 minutes of welding, then 6 minutes of cool down.
A higher duty cycle, such as 60% to 100%, lets you weld longer with fewer pauses, which matters when you’re handling larger body panels or repeated passes.
In smaller repair sections, you may need shorter bursts to preserve precision and prevent distortion. Understanding flux core welding can also help you adapt to various materials and conditions, maximizing your efficiency and effectiveness.
When you understand duty cycle, you control the pace of work, plan each seam, and keep your process disciplined, efficient, and free from avoidable failure.
Why Duty Cycle Matters for Repairs
When you’re planning auto body repairs, duty cycle matters because it sets the limit on how long your welder can run at a given amperage before it needs to cool down. You can’t ignore it; welding beyond the rating raises heat, triggers thermal overload protection, and can weaken joints or damage panels.
| Rating | Run Time | Cooldown |
|---|---|---|
| 60% @ 200A | 6 min | 4 min |
| 40% @ 200A | 4 min | 6 min |
| High-load MIG welders | Longer pauses | Stable output |
| Lower amperage settings | Less heat | More continuity |
| Poor maintenance | Malfunctions | Safety risk |
You’ll keep repair flow tighter when you match amperage settings to the task and respect cooldowns. MIG welders often need higher duty cycle capacity for extended seams, so check ratings before you start. That discipline protects your work, your equipment, and your right to repair efficiently without interruption. Additionally, understanding welding current is essential to ensure optimal performance and prevent overheating.
How to Calculate Welder Duty Cycle
To calculate welder duty cycle, divide the actual operating time by a 10-minute cycle and multiply by 100:
Duty Cycle (%) = (Actual Operating Time / 10) × 100.
You can calculate a welder duty cycle by measuring only the arc-on time, not idle time.
If you run at 180 amps for 4.5 minutes, the duty cycle is 45%, so the machine can weld for 4.5 minutes before a cooling period.
To find safe runtime, reverse the formula:
To find safe runtime, reverse the formula: duty cycle percentage divided by 100, then multiplied by 10.
Maximum Operating Time = (Duty Cycle % / 100) × 10.
A 30% rating at 220 amps means 3 minutes of continuous work, then 7 minutes off.
Higher amperage usually shortens duty cycle, while lower amperage extends it.
When you calculate correctly, you control heat, protect the machine, and keep your repair process efficient and self-directed. Understanding the importance of MIG welder functionality ensures that your welding projects meet necessary standards and safety guidelines.
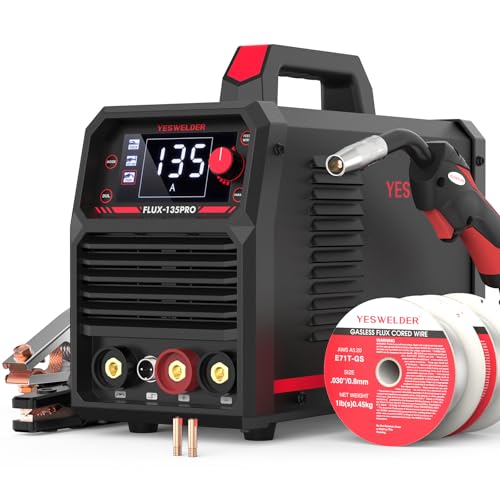
Products Worth Considering

MULTIFUNCTIONAL: A 4-in-1 welder, capable of Flux Core MIG/Gas MIG/ Stick/Lift TIG (need to purchase extra tig lift torch). This unit caters to a wide range of welding...
Duty Cycle Needs for MIG, TIG, and Stick
You’ll need a higher duty cycle for MIG because auto body work often runs continuous welds at elevated amperage, which increases heat load and shortens machine on-time. TIG usually operates at a lower duty cycle since you’re welding thinner material with shorter, precision-focused passes that allow more cooling time. Stick welding also tends to use a lower duty cycle, but its manual operation and heavier applications can still require you to match the machine’s limits to the joint thickness and weld length. Maintaining proper duty cycles is essential to avoid overheating and ensure efficient welding.
Products Worth Considering

VERSATILE 7-IN-1 MULTI-PROCESS WELDING PLATFORM: Tackle a wide range of materials with 7 integrated welding processes: Manual MIG, Synergic MIG, MMA (Stick), Lift TIG, Flux-Cored, Spot Welding, and Spool Gun-ready capability, offering unmatched flexibility for repair, fabrication, and DIY projects
MULTI PROCESS: Experience the convenience of a high-quality, budget-friendly 3-in-1 welding machine that masterfully handles Gasless Flux Core MIG/Stick/Lift TIG(additional 10-25 lift TIG torch required). This unit caters to a wide range of welding applications and meets your various welding needs.
MIG Duty Cycle Demands
MIG welding usually demands a higher duty cycle than stick or TIG because it runs longer, draws more current, and often needs sustained output for automotive bodywork.
You should read every duty cycle rating before you set higher amperage, because MIG welding can need 60-100% capacity for long sessions or only 30% at 200A, giving you 3 minutes on and 7 minutes off.
That math matters when you want clean seams without interruption. On thinner panels, you can often hold a longer arc time and still prevent overheating.
Use the machine’s duty cycle ratings to match the setting to the task, keep heat in check, and avoid downtime.
That lets you work with control, efficiency, and fewer failures.
TIG And Stick Needs
TIG welding often needs a high duty cycle because you’re working with lower amperage, longer continuous arcs, and tight control on thin material. So, 60% to 100% is common when you want stable heat and clean welds.
As your amperage rises, the duty cycle drops, so you must plan pauses to manage heat generated and protect the joint. With TIG welding, that balance keeps you precise and in control.
Stick welding usually works with a lower duty cycle, often 20% to 40%, because you weld in shorter bursts and let the machine rest. That makes Stick welding flexible when you need freedom across different thicknesses.
In both processes, you choose the setting that matches the metal, the arc time, and the thermal load.
What Lowers Duty Cycle on the Job
Your duty cycle drops when you run higher amperage, because the welder generates more heat and needs longer cooling intervals.
Thicker material and higher voltage both raise heat input, which increases thermal load and shortens continuous run time.
Hot ambient conditions make that worse by reducing cooling efficiency and pushing the machine toward thermal overload sooner. Additionally, gas pressure needs can impact the duty cycle, as insufficient pressure may lead to increased heat generation and inefficiency.
Higher Amperage Use
Higher amperage settings reduce duty cycle because they generate more heat, forcing the welder to spend more time cooling between runs.
When you raise amperage, your Duty cycle drops, and cooling time becomes a hard constraint on production. At 200A, you may only weld about 3 minutes before a 7-minute pause.
That tradeoff matters when you’re joining thicker panels, where higher amperage is often necessary. If you push closer to the machine’s limit, thermal overload rises, and equipment failure becomes more likely.
You also risk degraded weld quality from unstable arc performance and excess heat input. To work efficiently, you need to match higher amperage to the job, schedule breaks deliberately, and protect weld integrity while keeping your process free from avoidable stoppage.
Heat And Environment
Heat and site conditions can cut duty cycle just as quickly as amperage settings do, because elevated ambient temperature, high humidity, and direct sunlight all make it harder for the welder to shed heat.
When you work in this environment, the machine reaches overheating faster, so you lose welding time and wait longer for cool-down.
- High heat raises internal component temperature and shortens duty cycle.
- Humidity blocks heat dissipation, so the unit stays hot longer.
- Confined spaces and sunlight intensify thermal load, demanding tighter planning.
You also need to watch material thickness and power stability.
Thicker panels push amperage up, while weak generator or outlet voltage can spike heat and reduce efficiency.
Manage placement, airflow, and scheduling to protect performance and keep your work free from avoidable shutdowns.
How to Spot Duty Cycle Limits
When a welder approaches its duty cycle limit, you’ll usually see the machine start to lose consistency before it shuts down entirely. You need to watch for declining arc stability because reduced output often appears before a full stop. That’s your cue to monitor temperature and performance while you operate within the rated duty cycles. Overheating can also show up as odd sounds or vibration, which means the thermal load is climbing fast. Always ensure proper equipment inspections to prevent these issues from escalating.
| Signal | Meaning |
|---|---|
| Arc flicker | Duty cycle limit is near or reached |
| Noise or vibration | Overheating is developing |
| Auto shut-off | Thermal protection has engaged |
If the arc becomes unstable, pause and let the unit cool. Many welders protect themselves with automatic shut-off, but you shouldn’t wait for it. You gain control by reading the machine’s behavior early, then breaking before quality drops. That discipline keeps you independent, accurate, and ready for the next weld.
What Duty Cycle Rating Fits Auto Body Work
A duty cycle rating of at least 40% is a practical baseline for auto body work, since panel repairs usually involve frequent short welds rather than long continuous runs. You need this margin to keep the duty cycle aligned with real shop rhythms and to protect weld quality.
- For MIG welding, choose 60% or higher if you expect longer seams and fewer pauses.
- For thin automotive materials, lower amperage often gives you higher duty, which suits precise panel work.
- If you weld all day in a repair bay, a 60-80% machine gives you more freedom and steadier output.
You should match the machine to the task, not the hype. A higher duty cycle lets you work with less interruption, while still respecting the limits of your equipment. Additionally, understanding duty cycle can significantly improve your efficiency and output in the workshop.
That control matters when you’re shaping clean repairs on automotive materials and aiming for reliable, repeatable results.
How to Prevent Overheating and Extend Duty Cycle
To prevent overheating and preserve duty cycle, you need to manage amperage, cooling time, and thermal load together.
Keep your amperage within spec, because higher output cuts Duty cycle fast and raises overheating risk. If you can weld at 145A instead of 200A, you may double usable runtime.
Schedule cooling breaks before the case gets hot; at a 30% rating, three minutes of arc time should be followed by seven minutes off.
Use appropriate techniques like shorter welds and intermittent passes to reduce heat concentration and keep the torch stable.
Clean the welder, vents, and fan paths so airflow stays unrestricted, since dust traps heat and weakens cooling.
You should also factor in environmental factors: heat and humidity push the machine harder, so cooler air gives you more margin. Additionally, ensure you have proper air pressure requirements to maintain optimal performance without overheating.
When you control these variables, you extend Duty cycle, avoid shutdowns, and weld with greater freedom.
Frequently Asked Questions
What Is a Duty Cycle and How Does It Affect Welding?
A duty cycle tells you how long you can weld before cooling; it shapes welding techniques, equipment maintenance, safety practices, metal types, and electrode selection, because overheating reduces quality, damages gear, and risks injury.
How Long Can You Weld With a 60% Duty Cycle?
You can weld 6 minutes in every 10-minute cycle with a 60% duty cycle. Your welding efficiency depends on heat management, machine specifications, operator safety, and workpiece preparation to prevent overheating and shutdowns.
What Does 70% Duty Cycle Mean?
A 70% duty cycle means your welding equipment can run 7 minutes in every 10, then cool 3. You’ll maintain arc stability, manage thermal management, choose metal types wisely, and follow safety precautions.
What Does a 60% Duty Cycle Mean?
You get 6 minutes of welding in 10, then 4 minutes cooling—because, obviously, machines enjoy breaks more than you do. Check welding machine specifications, use heat management techniques, respect metal thickness considerations, apply electrode selection tips, and monitor arc stability factors.
Conclusion
When you match your welder’s duty cycle to the job, you keep your repair rhythm steady and your welds clean. You avoid thermal shutdowns, protect the torch, and preserve metal integrity. In auto body work, that means less warping, fewer interruptions, and better control on thin panels. Read the rating, watch the clock, and let the machine cool before heat builds into a flaw. That discipline keeps you welding accurately, job after job.


