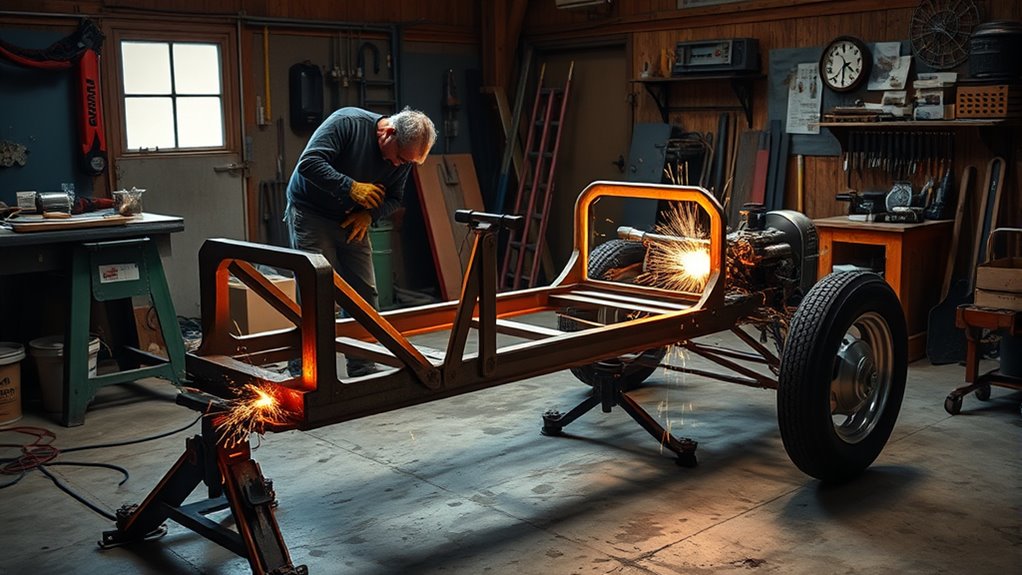
Start with a straight Model A or T chassis, then verify local frame laws before you cut steel. Set up a clean, ventilated workspace, wear proper PPE, and use mild-steel tubing, clamps, and a MIG welder. Measure from a flat reference surface, mark wheelbase and ride height, then cut and fit every section accurately. Tack weld in a staggered pattern, recheck alignment, and finish with controlled welds, suspension checks, and thorough weld inspection for stronger results.
Pick the Best Rat Rod Frame
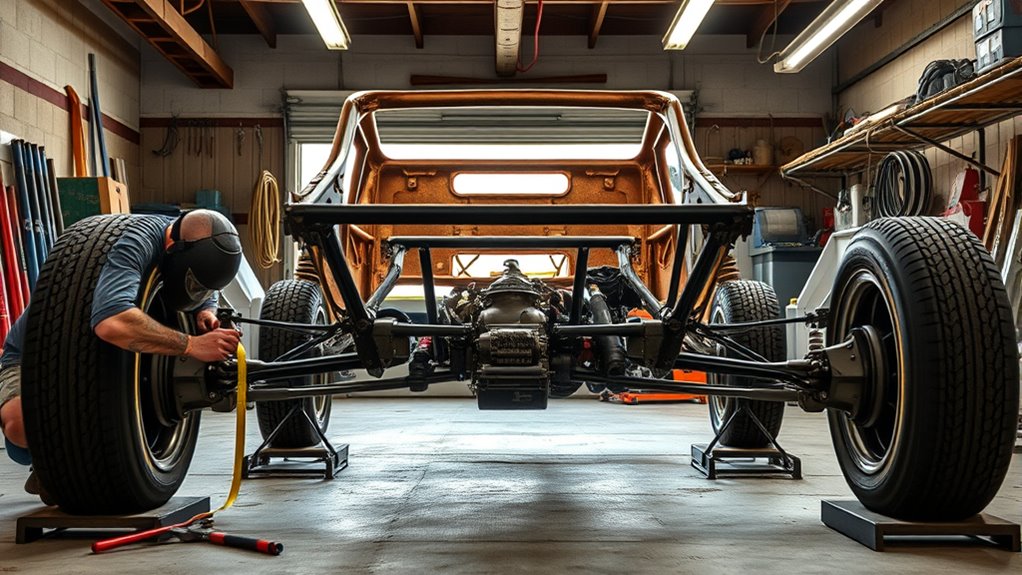
When you pick a rat rod frame, start with a Model A or Model T chassis if you want a classic profile and strong customization potential.
Start with a Model A or Model T chassis for classic style and strong customization potential.
You can pick the best rat rod frame by matching the chassis to your build’s function: cruiser, show car, or race. Heavy-duty steel tubing gives you the stiffness and load capacity you need, while clean metal, sound joints, and uncracked welds protect the structure’s integrity.
Inspect every weld and junction closely; rust or distortion weakens the frame and limits what your welding skills can safely correct. Choose dimensions that support your ride height and stance, because form still has to look pretty without sacrificing control. Additionally, ensure that your welds are sized according to the maximum fillet weld size for optimal strength and compliance with standards.
Check local regulations before you commit, since frame modifications must stay legal.
When you evaluate the frame this way, you gain mechanical freedom through disciplined selection, not guesswork, and you set a solid base for the rest of the build.
Products Worth Considering

Designed for 1928–1931 Compatible with Ford Model A – Makes it easy to install a GM transmission into a Model A frame, using the same style crossmember featured in Speedway assembled chassis.

Upgraded material - this replacement brake line kit is made of stainless steel for greater corrosion resistance

Upgraded replacement - the replacement fuel lines in this kit are made of stainless steel for added corrosion resistance
Gather Tools, Steel, and Safety Gear
You’ll need a MIG welder, angle grinder, clamps, and the right fasteners to build and fixture the frame accurately. Choose mild steel tubing in practical sizes, such as 1.5″ to 2″ square or round stock, to balance strength, weldability, and fabrication control. Set up a clean, well-lit, ventilated workspace, and wear a welding helmet, gloves, and flame-resistant clothing before you strike an arc. Additionally, ensure your workspace has proper ventilation to avoid respiratory issues while welding.
Products Worth Considering

E71T-GS FLUX CORE WIRE: This self-shielding, AWS E71T-GS flux-cored wire excels due to its advanced core design, delivering exceptional arc stabilization and high feedability for effortless welding. The core also incorporates powerful deoxidizing agents, ensuring clean, reliable welds even when welding through light rust or mill scale.
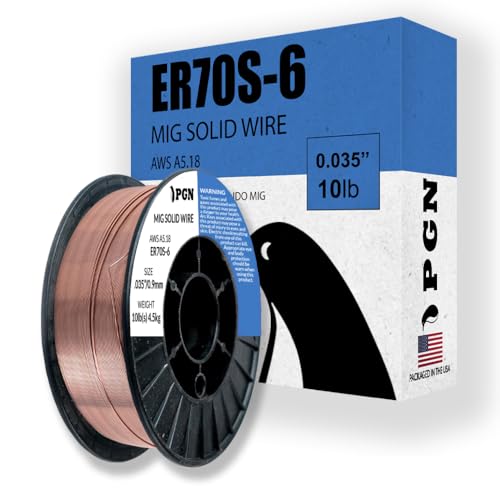
Do Your Best Work ... Color all your clients impressed with the precision and arc control of the ER70S-6 solid MIG welder wire. You'll love the low splatter whether you're performing single or multi-pass welds. Great for T-joints, butt welds & lap welds.
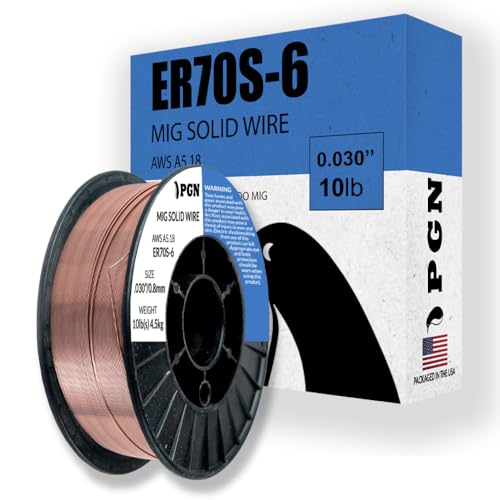
Do Your Best Work ... Color all your clients impressed with the precision and arc control of the ER70S-6 solid MIG welder wire. You'll love the low splatter whether you're performing single or multi-pass welds. Great for T-joints, butt welds & lap welds.
Essential Tools And Gear
Start with the right tools and materials: a MIG welder gives you controllable, beginner-friendly welds, while a grinder and plasma cutter handle edge prep and accurate cuts.
You’ll also need a welding helmet, gloves, and flame-resistant clothing to shield you from sparks and heat.
Use clamping tools to lock frame members in position, because alignment errors and heat distortion compound fast.
Add a tape measure, square, and level to verify dimensions before you strike an arc.
This setup keeps your work methodical and frees you from guesswork.
- MIG welder
- Grinder and plasma cutter
- Welding helmet and gloves
- Clamping tools, tape, square, level
Choose Strong Steel
Strong steel sets the foundation for a rat rod frame, so choose mild steel or DOM tubing for their weldability and structural strength. You need high-quality stock with consistent wall thickness because weak material compromises load paths and weld integrity.
Mild steel gives you predictable fusion, while DOM tubing offers tighter tolerances and better strength-to-weight performance. Gather a MIG welder, angle grinder, metal cutting saw, and clamps so you can cut, fit, and lock components accurately.
Use a level and square to verify alignment before you strike an arc. Wear a welding helmet, gloves, and fire-resistant clothing to shield yourself from heat, sparks, and UV exposure.
Clean every surface by removing rust, paint, and debris, and your welds’ll penetrate deeper with less risk.
Prep Your Workspace
Before you weld a rat rod frame, set up a dedicated workspace with a sturdy welding table, strong lighting, and good ventilation so you can work accurately and safely. Clear flammables, level the floor, and arrange your tools so every motion stays deliberate and efficient.
Gather a MIG welder, angle grinder, clamps, and a welding helmet before you strike an arc. Keep 1.5-inch square tubing and thinner-gauge sheet metal within reach for structure and brackets.
- Place safety gear at the bench edge
- Check gloves, face shield, and fire-resistant apron
- Verify ventilation and spark control
- Align material, tools, and measurements
This disciplined setup gives you control, reduces error, and frees you to fabricate with precision.
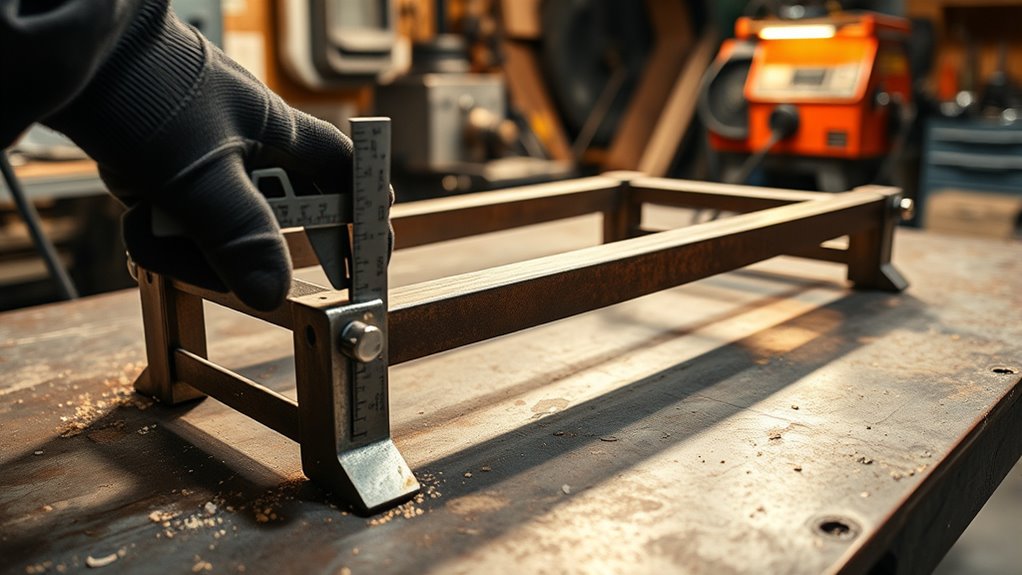
Measure and Mark the Frame Layout
You’ll set your frame lines first, using your design dimensions to mark the full layout on a flat surface with a chalk line or tape measure.
Then you’ll establish square reference points with a framing square so each corner holds a true 90-degree angle.
Finally, you’ll check wheelbase spacing against your component layout and label each section to keep every cut and joint in exact position. Ensure that your metal is clean before you start welding for the best results, as clean base metal enhances weld quality.
Set Your Frame Lines
Set your frame lines by establishing the rat rod’s final dimensions and overall shape from reliable measurements tied to the vehicle’s specs and intended design. You’ll set your frame lines by transferring those measurements onto a flat workspace with a chalk line or straight edge.
Mark locations for crossmembers and suspension mounts now, not later, so the layout stays controlled and the chassis can breathe without distortion. Consider a wood or PVC mock-up if you need to test geometry before cutting steel.
- Verify each measurement twice.
- Align marks with intended component placement.
- Trace clean, visible reference lines.
- Correct deviations before fabrication begins.
Precise marks give you freedom from guesswork and keep the build disciplined, accurate, and structurally sound.
Square Reference Points
With your frame lines established, lock in square reference points by checking the frame’s overall dimensions against your blueprint and marking the key corners and joints.
Use a tape measure to map each point, then measure diagonally between opposite corners to confirm the layout isn’t drifting. A square tool helps you verify every angle stays at 90 degrees, so make adjustments before any cut goes going.
Mark each cut and weld location with chalk or a permanent marker, and make sure one side doesn’t pull the frame out of square.
Recheck every dimension and reference mark now; this prevents wasted material and keeps your build aligned. Precision here gives you control, and control gives you freedom when the welds start.
Check Wheelbase Spacing
Start by dialing in the wheelbase, usually somewhere between 100 and 120 inches depending on the proportions you want. Then measure from the front axle point to the rear axle location with a tape measure and mark that span on a flat, level surface.
- Verify the frame is square by checking diagonal measurements.
- Use chalk or paint to map cuts, welds, and axle points.
- Recheck all measurements before you cut steel.
- Adjust until both sides match within tight tolerance.
This layout locks your rat rod’s stance and keeps the frame honest. Precise measurements free you from guesswork and prevent twist, bind, and weak weld geometry.
If the wheelbase drifts, the whole build loses control and proportion. Lock it down now, and you’ll weld with intent.
Cut and Fit the Frame Pieces
Measure and cut the frame pieces from heavy-duty steel tubing to match your design specs, keeping strength, durability, and joint geometry in mind. Use cutting tools like a plasma cutter or band saw to make precise sections, and account for every angle where parts will later weld.
You’ll want each piece to align with the chassis plan, because small deviations compound fast and weaken the structure. Clean every cut edge with a grinder or flap disc to strip rust, scale, and contamination that can compromise fusion.
Place the parts in a jig or fixture so they stay locked in position while you test fit the assembly. Check all measurements again, then verify the fit from multiple viewpoints before you proceed. Also, ensure you maintain proper weld settings to achieve strong and reliable joints.
When you control geometry this carefully, you don’t just build a frame—you assert mechanical freedom through accuracy, ensuring the frame can carry load, resist distortion, and serve as a solid base for the next stage.
Tack Weld the Rat Rod Frame
Align and secure all frame members before you strike an arc, because tack welding’s job is to lock the assembly in place for final welding. You’ll use tack welding to hold frame components with precision, not to build strength yet.
Clean each joint first; rust and debris weaken adhesion and compromise structural integrity. Set your welder low and make short, controlled tacks that bite for only a second or two. Place them at critical intersections where the tubes meet, since those points carry alignment loads during assembly.
- Use a staggered pattern
- Space tacks 4 to 6 inches apart
- Check alignment after every few tacks
- Reposition clamps if movement appears
This approach distributes heat evenly and cuts distortion, so your frame stays true. You’re not welding blindly; you’re engineering freedom through disciplined control. Remember that surface preparation is crucial for achieving strong welds and avoiding issues like porosity.
Every tack should confirm fit, preserve geometry, and keep the chassis ready for the next stage without introducing unnecessary stress.
Finish the Frame Welds
With the frame tacked and checked, you can run the final welds to lock in full structural strength. Clean every joint first; grind off rust, paint, and oil so your bead bites into bare metal.
On frame joins, add quarter-inch plates where the structure needs more load capacity, and weld them fully with controlled passes. Keep using the tacking welds as reference points so parts don’t shift while you finish.
Watch heat input closely; if the frame starts pulling, shorten your arc, increase travel speed, or back off wire speed to reduce distortion. At critical stress points, use plug welding through prepared holes to tie layers together and spread force through the section.
Remember to maintain correct polarity to ensure optimal arc stability and weld quality throughout the process.
Work methodically, alternating sides when needed, so you preserve alignment and keep the frame true. Your goal isn’t just fusion; it’s a rigid, durable chassis that lets you move forward with confidence and build on your own terms.
Check Suspension Mounts and Axle Placement
Before you lock in the suspension, verify that every mount sits at the correct height and angle so the frame will hold proper ride quality and handling.
Mark each location, measure twice, and don’t trust eyeballed placement; a little bit of error here can throw off alignment and structural integrity.
Use a level to confirm the axle runs parallel to the frame, because a twisted setup invites steering pull and uneven load transfer.
Next thing, check the axle-to-frame distance and make sure you’ve got clearance for full suspension travel without body or component contact.
Check the axle-to-frame distance and confirm there’s enough clearance for full suspension travel without any contact.
If you’re going for a freer, dialed-in ride, adjustable mounts can help you fine-tune geometry after initial assembly. Additionally, understanding proper joint preparation will enhance the overall strength and quality of your welding connections.
- Confirm mount height and angle
- Level the axle against the frame
- Measure clearance at full travel
- Use adjustable mounts for tuning
Grind, Clean, and Inspect the Welds
Grind every weld zone down to clean, bare metal so rust, paint, oil, and other contaminants don’t compromise joint strength. You’ll improve weld preparation techniques by exposing sound parent metal and by rejecting cracked, pitted, or distorted sections before they lock into the frame.
After fabrication, use surface cleaning methods like a wire brush or flap disc to strip slag, spatter, and oxidation from the bead and surrounding heat-affected area. This gives you a smooth finish and stronger adhesion for paint or coating systems that protect your build.
Then apply inspection best practices: visually check each weld for uniform profile, then tap-test for dull responses that can signal voids, lack of fusion, or undercut. Mark any suspect area, document rework, and reinforce only where the structure demands it. Additionally, be mindful of proper ventilation to disperse dust and fumes during the grinding process, as this enhances safety and prevents fire hazards.
That discipline keeps your rat rod frame honest, durable, and free enough to hold its line under real road loads.
Frequently Asked Questions
Why Do Welders Coat Welding Rods With WD-40?
You coat welding rods with WD-40 to boost welding rod preservation, gain rod coating benefits like smoother flow and cleaner surfaces, and sometimes improve arc stability; you’ll also consider WD 40 alternatives, though excess creates smoke and defects.
Is It Legal to Weld a Trailer Frame?
Yes, you can, if your trailer modifications obey local laws. Like reforging a bridge under inspection, your DIY welding must meet safety regulations, DMV rules, and structural standards. You’ll need permits, records, and careful execution.
How to Weld at Home Without a Welding Machine?
You can’t truly weld at home without a machine, but you can use DIY welding alternatives: brazing, soldering, or metal epoxy. Choose welding techniques suited to thin, nonstructural parts, clamp firmly, ventilate well, and test strength.
How to Dry Welding Rods at Home?
Beat the clock: dry your welding rods in a 200°F oven for 30–60 minutes, then store them with humidity control in airtight welding rod storage. Use rod preservation techniques, reject rusted rods, and keep your workflow free.
Conclusion
When you finish welding, you see a straight, solid rat rod frame taking shape like a steel spine in the shop light. You have cut, fitted, and stitched each joint with care, and now the frame carries the weight of your work. Check every mount, grind every sharp edge, and inspect each bead for strength. If you stay precise, you’ll leave with a chassis that looks rough, feels honest, and stands ready for the road.


