What’s in This Article
- What Is Brazing?
- Brazing Tools for Automotive Metal
- Before You Begin Brazing Automotive Metal
- Step-by-Step Guide to Preparing Metal Surfaces
- How to Heat and Use Aluminum Welding Rods Effectively
- Safety Measures for Brazing Automotive Metal
- Troubleshooting Common Brazing Problems
- Frequently Asked Questions
- Conclusion
You can braze automotive metal without a full welder, but you need clean metal, steady heat, and the right filler rod. Start with basic tools such as a propane torch, aluminum welding rods, flux, gloves, and eye protection. This guide shows you how brazing works, how to prepare the joint, and how to avoid weak bonds, warping, and safety risks.
Quick Answer
To braze automotive metal without a welder, clean both surfaces, apply the right flux, heat the joint evenly, and let the filler rod flow into the gap. Keep the base metal below its melting point. Let the joint cool without movement so the bond stays strong.
Key Takeaways
- Clean metal creates a stronger brazed joint than dirty or oxidized metal.
- Flux helps the filler metal flow and protects the joint from oxidation.
- Steady heat works better than direct overheating on one small spot.
- Safety gear and ventilation matter because brazing uses flame, fumes, and hot metal.
- Brazing works well for some repairs, but it does not replace welding for every structural job.
What Is Brazing?
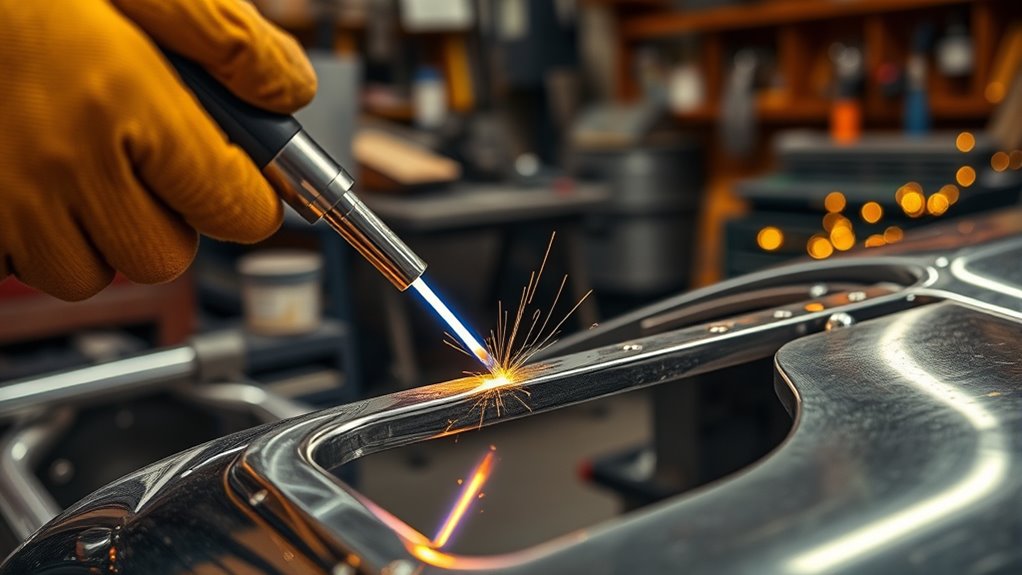
Brazing joins metal with a filler metal that melts above 450°C (842°F). The base materials stay solid, so the process differs from welding. You heat the joint, add filler, and let capillary action pull the molten filler into the gap.
Brazing bonds metal with a high-melting filler while keeping the base materials intact.
You can use brazing to join some dissimilar metals, such as copper to steel or certain aluminum parts with the right rod and flux. That makes it useful for small automotive repairs where welding may add too much heat. Proper surface preparation matters most because dirt, oil, and oxide can block the filler from bonding. Using specialized aluminum flux wire can also help when you work with aluminum components.
A good brazed joint can handle many light to moderate repair jobs. But you should not treat brazing as a direct replacement for welding on critical frame, suspension, or crash-safety parts.
Brazing Tools for Automotive Metal
To braze automotive metal well, you need the right torch, filler rod, flux, and safety gear. The torch must create enough heat for the filler rod without overheating the base metal. A heat-resistant work surface also keeps the project stable and reduces fire risk. Good proper ventilation helps control fumes and keeps your work area safer.
Products Worth Considering

3.6ft Hose for Extra Reach: This propane torch kit have a 3.6ft long gas hose that connects the torch to your propane/Map source, it's handy to get into small places. Warm tips: Gas bottles don't like being upside down
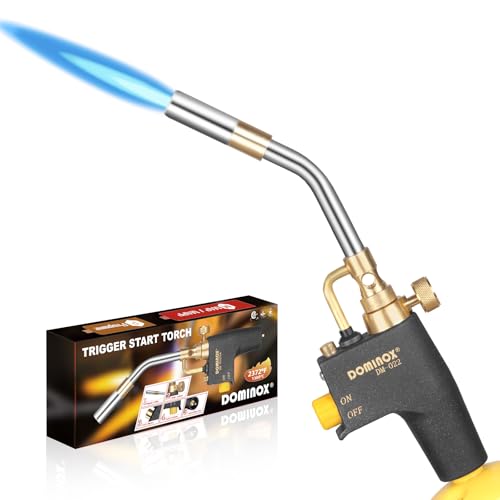
【Powerful Upgrade Propane Torch Head】DOMINOX propane torch head has been upgraded and optimized. 1. The surface of the propane torch handle adopts an anti slip frosted texture to optimize the user experience. 2. The ignition system has been upgraded, the welding torch head can ensure 100% successful ignition every time, improve fuel efficiency. 3. Our map gas torch head is equipped with a pressure regulator inside, you don't have to worry about using it upside down at all, turbo torch can be used upside down for up to 30 minutes.

Powerful Flame Temperature Heat up to 5252°F (2900°C)
Essential Brazing Equipment
Use tools that match the metal and repair size. The wrong filler rod or flux can leave a weak joint, even when your torch work looks clean.
- Propane torch: Provides heat for light brazing work and small repairs.
- Aluminum welding rods: Help join aluminum when the rod matches the alloy and repair type.
- Flux: Cleans the joint during heating and helps the filler metal flow.
- Torch trigger: Gives you better flame control during close work.
- Safety gear: Protects your eyes, hands, skin, and lungs from heat and fumes.
A welding blanket or heat-resistant mat helps protect nearby painted panels, trim, and wiring from heat damage.
Recommended Torch Types
Choosing the right torch affects heat control and joint quality. Propane torches work for simple DIY brazing tasks and small automotive parts.
For thicker metal or harder repairs, an oxy-acetylene torch can provide much higher heat. MAPP gas torches burn hotter than propane and may help you heat some joints faster.
Choose brazing rods made for the base metal, such as aluminum or copper. A rod that melts at the right temperature will flow better and reduce damage to the workpiece.
Safety Gear Requirements
Safety gear protects you from flame, hot filler, fumes, and sharp metal edges. Do not start brazing until your work area and protective gear are ready.
Use these safety items:
- Safety goggles: Protect your eyes from flame glare, sparks, and debris.
- Heat-resistant gloves: Protect your hands when you handle hot parts.
- Flame-retardant apron: Protect your clothing and skin from sparks and hot filler.
- Respiratory protection: Reduce fume exposure when ventilation alone is not enough.
- Fire extinguisher: Keep one nearby before you light the torch.
Warning: Remove fuel, oil, rags, wiring, plastic trim, and other flammable items before heating automotive metal.
Before You Begin Brazing Automotive Metal
Estimated total time: 30 to 90 minutes, depending on cleaning, joint size, and cooling time.
Check the metal type before you begin. Automotive parts can use mild steel, aluminum, stainless steel, galvanized steel, or coated panels. Each material may need a different filler rod, flux, and heat level.
Avoid brazing load-bearing safety parts unless you know the repair standard for that part. Frames, suspension mounts, brake parts, steering parts, and crash structures need approved repair methods.
What You’ll Need
- Propane, MAPP gas, or oxy-acetylene torch
- Correct brazing rods for the base metal
- Flux made for the rod and metal type
- Wire brush, grinder, or sandpaper
- Degreaser or acetone for cleaning
- Clamps or locking pliers
- Heat-resistant mat or welding blanket
- Safety goggles, gloves, apron, and ventilation support
Step-by-Step Guide to Preparing Metal Surfaces
Preparing metal surfaces is one of the most important steps in brazing. Clean, bright metal gives the filler a better surface to bond with. Oil, paint, rust, and oxide can cause the filler to bead up or pull away.
- Clean the joint area. Remove grease, paint, rust, and road grime with a cleaner and a wire brush.
- Grind or sand the surface. Expose bright metal so the filler can bond to the base material.
- Test the fit. Align the parts and keep a small, even gap for the filler to flow through.
- Apply flux. Coat the cleaned joint area with the correct flux for your filler rod.
- Clamp the parts. Hold the pieces steady so they do not shift during heating or cooling.
- Preheat the joint. Warm the metal gradually to reduce thermal shock and warping.
Proper fit matters because large gaps weaken the joint. You should also avoid touching the cleaned area with bare hands because skin oil can reduce adhesion. Cleaning metal thoroughly can improve the overall strength of the joint.
Here’s a step-by-step breakdown:
| Step | Action | Purpose |
|---|---|---|
| Cleaning | Remove rust and contaminants | Helps the filler bond |
| Smoothing | Use a wire brush or grinder | Exposes clean metal |
| Applying Flux | Coat cleaned surfaces | Protects the joint and aids flow |
| Aligning Parts | Check fit and gap | Reduces weak spots |
| Preheating | Heat gradually with the torch | Reduces warping risk |
Following these steps gives you a better base for successful brazing.
Products Worth Considering

3pcs Wire Brush Set: Wire brush set includes stainless steel brush, nylon bristles and brass brush. These will be good for tackling most light duty jobs at hand particularly those requiring reaching small spaces

【Sturdy Stainless Steel Bristles】Deck brush have steel wire bristles that are capable of supplying the abrasive force, and are made of stainless steel so they won’t rust and are sturdy enough for long-term use, ideal for cleaning durable hard surfaces that normal soft bristles cannot work well on.

Package includes: 1 large cleaning brush (Flat) ; 1 small cleaning brush (Wave)
How to Heat and Use Aluminum Welding Rods Effectively
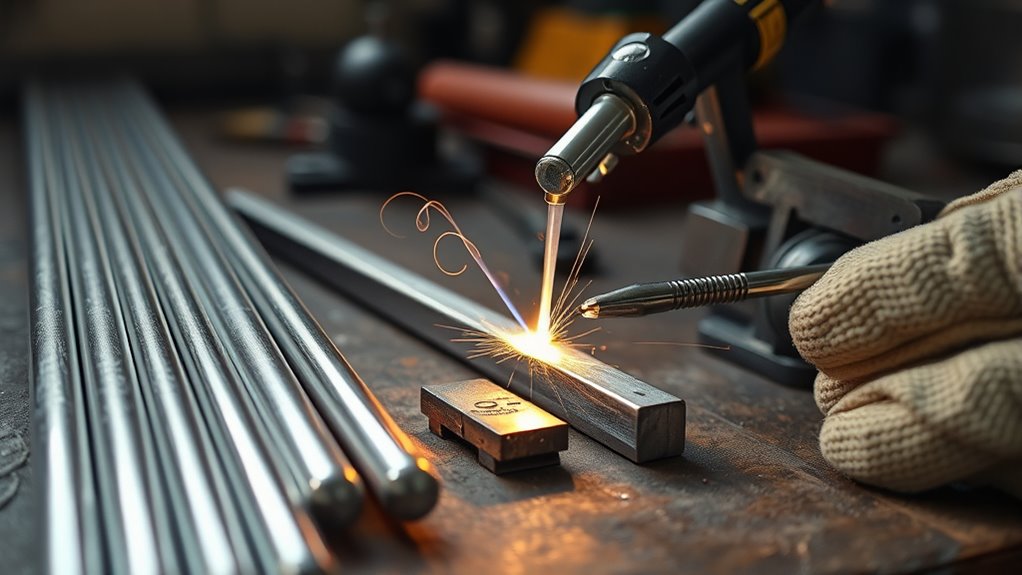
To heat and use aluminum welding rods, start with clean aluminum and a torch that gives steady heat. Aluminum forms oxide quickly, so surface prep matters more than many beginners expect. Heat the base metal evenly, then touch the rod to the joint and let it flow without melting the base metal. Proper surface prep helps create stronger and cleaner repairs.
Proper Tool Selection
Select the right tools before you heat the joint. Aluminum needs clean surfaces, the correct rod, and careful heat control.
- Propane Torch: Gives enough heat for many small aluminum brazing repairs.
- Aluminum Welding Rods: Use rods designed for brazing, not general steel work.
- Wire Brush or Grinder: Remove the oxide layer that can block bonding.
- Flux: Use flux that matches the rod and aluminum type.
Surface Preparation Techniques
Good surface preparation starts with thoroughly cleaning the metal. Use a stainless steel wire brush, grinder, or sandpaper to remove oxidation and dirt. Do not use the same brush on steel and aluminum because it can contaminate the joint.
After you clean the metal, apply a suitable flux to the joint area. Flux helps bonding and slows oxidation during heating.
Preheat the joint slowly with a propane torch until the rod begins to flow when touched to the heated metal. Avoid melting the aluminum base metal because aluminum can soften quickly once it reaches high heat.
Effective Heating Methods
Use steady, even heat instead of blasting one small point. Move the torch in a controlled pattern so both sides of the joint heat at the same rate.
- Clean the surfaces. Remove oxidation with a wire brush or sandpaper.
- Apply flux. Cover the joint area with the right flux for your rod.
- Heat the base metal. Move the torch evenly across the joint.
- Touch the rod to the joint. Let the heated metal melt the rod, not the flame alone.
- Fill the gap. Let the filler flow across the joint without forcing it.
- Cool the joint naturally. Keep the parts still until the filler hardens.
Pro tip: Heat the base metal first, then feed the rod when the joint reaches the right temperature.
Safety Measures for Brazing Automotive Metal
Brazing automotive metal requires strict safety measures. Always wear safety goggles, gloves, and flame-resistant clothing to protect yourself from sparks and hot metal splashes.
Work in a well-ventilated area so fumes do not build up. Keep a fire extinguisher nearby, and remove combustibles before you light the torch.
Clean the metal before heating because grease, paint, and coatings can create fumes. Galvanized metal needs extra caution because heated zinc coating can release harmful fumes.
Know the material before you start because different metals may need unique fluxes and brazing rods. Use appropriate respiratory protection when fumes, coatings, or poor airflow increase inhalation risk.
These safety steps protect you and improve the quality of the joint. They also help you avoid fire damage around paint, wires, hoses, and nearby parts.
Note: Remove or shield nearby electronics, rubber parts, and painted panels before you apply torch heat.
Troubleshooting Common Brazing Problems
Brazing problems usually come from dirty metal, weak heat control, poor fit-up, or the wrong filler rod. Fix the simplest cause first before you restart the repair.
Symptoms of a Poor Brazed Joint
- The filler beads up instead of flowing into the joint.
- The joint cracks after cooling.
- The filler pulls away from one side of the metal.
- The base metal warps or burns through.
- The joint looks dull, dirty, or porous.
Common Causes and Fixes
- Dirty surfaces: Clean the metal again until it looks bright and free from oil.
- Wrong flux: Use flux made for your base metal and filler rod.
- Too little heat: Heat both sides of the joint until the rod flows smoothly.
- Too much heat: Move the torch more evenly and avoid holding flame on one spot.
- Joint movement: Clamp the parts and let them cool without shifting.
If you notice a poor bond, check the alignment and overlap before adding more filler. A joint that looks filled on top may still have a weak bond underneath. Using self-shielded flux-cored wire can help in some welding applications, but brazing still needs the correct filler and flux.
When to Get Professional Help
Get professional help when the part supports vehicle weight, steering, braking, or crash protection. A weak repair in these areas can put you and others at risk. You should also stop if the metal keeps cracking, warping, or burning through.
Frequently Asked Questions
What Is the Best Way to Bond Metal to Metal Without Welding?
Brazing works well for many metal-to-metal repairs because it uses heat and filler metal without melting the base pieces. Soldering works for lower-temperature jobs, while metal adhesives can help with light-duty bonding. Choose the method based on strength needs, heat exposure, and the metal type.
What Is the Strongest Way to Permanently Join Two Pieces of Metal?
Welding usually creates the strongest permanent joint because it fuses the base metals together. Brazing can still create strong joints for many repairs, especially when you join dissimilar metals or want lower heat. Use welding for critical structural parts unless the repair guide allows brazing.
What Two Metals Cannot Be Welded Together?
Aluminum and steel are difficult to weld together with common shop methods because they melt and expand differently. They can also form brittle compounds at the joint. In many cases, brazing, mechanical fastening, or special industrial methods work better.
Can I Braze Instead of Weld?
You can braze instead of weld for many light and moderate repairs. Brazing uses lower heat, so it can reduce warping and help with dissimilar metals. Do not use it as a shortcut for structural vehicle repairs unless the repair method specifically allows it.
How Strong Is Brazing on Automotive Metal?
Brazing can be strong when you clean the metal, choose the right filler, and control the heat. Joint design also matters because overlap gives the filler more surface area to bond. A poorly cleaned or overheated joint can fail even with the right rod.
Conclusion
Brazing automotive metal without a welder works best when you focus on clean metal, proper flux, steady heat, and safe handling. Start with a small non-critical part before you move to a repair that matters more. Check your joint after cooling, and redo the prep if the filler did not flow cleanly. With patience and control, you can make cleaner, stronger metal repairs at home.


