Mark each spot weld clearly, then use a sharp drill bit and a center punch so the bit won’t wander. Start with a small pilot hole, then step up to a larger bit and drill only through the top panel. Watch for the seam to open, and stop before you hit the lower layer. If the weld still holds, use an air hammer to split it cleanly. Keep going and you’ll pick up the finer details fast.
Tools for Drilling Out Spot Welds
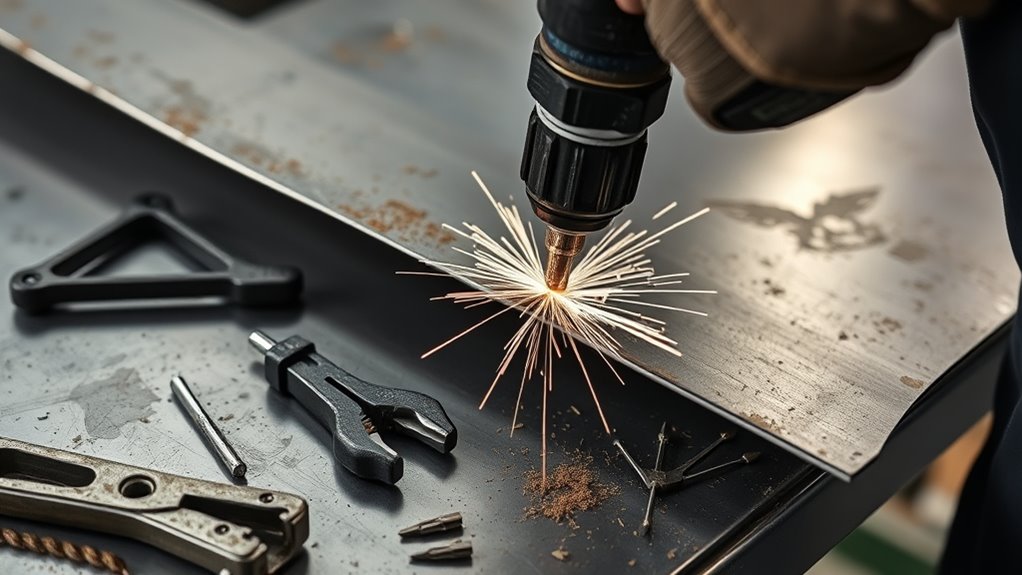
When you drill out spot welds, the right tools make the job faster and cleaner. You can use a drill as the most cost-effective, straightforward method to remove the weld without fighting the panel.
Choose a sharp, quality bit like a Dewalt-style cutter, because a dull bit wanders and tears the surrounding metal. If the joint is stubborn, an air hammer can help break the bond after you’ve started the cut.
Use a sharp, quality bit to keep the cut clean; dull tools wander and damage the panel.
Begin with an eighth-inch pilot hole, then step up to a bit close to half an inch to finish the separation. Keep your depth controlled; you only need to reach near the first layer of metal, not punch through both sheets.
Watch for the panels to start separating, because that tells you you’re close to clean weld removal. With the right setup, you take back the panel, reduce damage, and keep the repair precise. Additionally, ensure that you size welds according to the thinner member in joints to prevent melt-back during the repair process.
Products Worth Considering

Various Sizes: 13 sets of drill bits include 1/16", 5/64", 3/32", 7/64", 1/8", 9/64", 5/32", 11/64", 3/16", 13/64", 7/32", 15/64", 1/4", can meet more needs

Includes 10 Step Sizes: 1/4", 3/8", 1/2", 5/8", 3/4", 7/8", 1", 1-1/8", 1-1/4", 1-3/8"

135 Degree Split point tip design to help reduce walking
Mark the Spot Welds Before Drilling
You should visually inspect the panel and locate each weld center before you drill, since accurate targeting starts with a clear reference point.
Mark each drill target with a marker, and use a center punch if needed to keep the bit from wandering.
Trace the panel seams and verify the spacing of every mark so you don’t miss any welds or misalign the drill pattern. Additionally, ensure that you are wearing proper PPE to protect yourself from potential hazards during the drilling process.
Locate Weld Centers
Start by visually inspecting the panel and marking the exact center of each spot weld before you drill. Make sure every mark sits on the first layer’s true center so you’re cutting spot welds cleanly, not chasing the edge.
Use a marker or center punch to create small indentations; they’ll guide the bit and keep it from skating across the metal. Keep each target clearly visible and accurately placed, because a misplaced hit can scar the surrounding panel and lock you into extra repair work.
If you’re dealing with a row of welds, use a template or guide to keep spacing uniform. Precise location gives you cleaner separation, less tool wear, and more control over the panel you’re freeing.
Mark Drill Targets
With the weld centers located, mark each target clearly with a marker or scribe before you drill. Inspect the panel again and verify each spot weld’s exact position, because precision here keeps your cut controlled and your hands free from wasted work.
A crisp mark gives you a reliable reference, so you can simply drill into the center without wandering. Keep your layout visible and consistent, and don’t rush the setup. Check every mark, then adjust any that look off before you start.
Accurate targets help you focus your effort, protect the surrounding metal, and make the pilot holes land where they should. When you commit to clean marking, you work with intention, not guesswork, and that’s how you remove the welds with confidence.
Trace Panel Seams
Trace the panel seams carefully to pinpoint each spot weld before you drill. Use a marker or scribe to identify every weld with sharp, visible reference points.
When two layers overlap, mark both faces so you can keep panel alignment and center the bit on the fastener, not the sheet. This improves weld visibility, shortens layout time, and helps you choose the right drilling techniques for the material thickness.
Trace the full seam, then plan the removal order so you don’t gouge adjacent metal or warp the flange. Clear markings let you work with intent, not guesswork, and they free you to remove the panel cleanly with less rework.
Precise layout turns drilling into controlled separation.
Drill a Pilot Hole in Each Weld
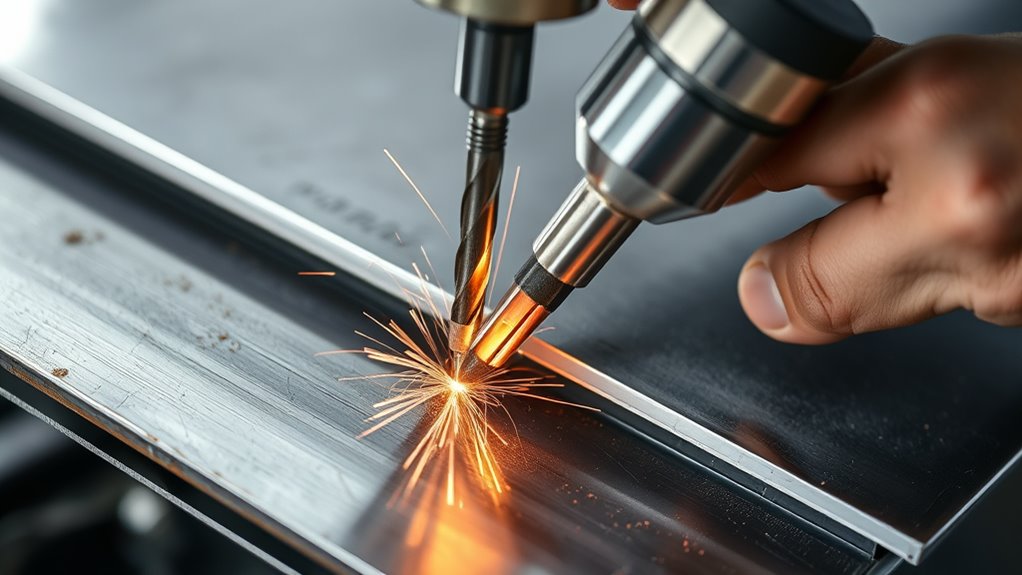
Start each spot weld by placing an 1/8-inch bit directly in its center to form a clean pilot hole.
Using a high-quality bit, such as Dewalt, helps you cut accurately without wandering into the surrounding metal.
Drill only until you’re near the first layer, then stop and switch to a larger bit after the panels begin to separate. Proper cleaning of aluminum can also help prevent issues during the drilling process.
Pilot Hole Placement
Drill a small pilot hole in each spot weld with an eighth-inch bit to lock in accurate placement before you move up to the larger cutter. This step gives you the pilot hole benefits of tighter control, cleaner starts, and better panel alignment.
You’re using precision drilling to guide the larger bit, so it tracks the weld center instead of wandering into surrounding metal. Keep your hand steady, and let the bit only establish the path.
Once every weld has a centered hole, you can move to the larger cutter with confidence. Proper pilot hole placement streamlines removal, helps you reach the weld efficiently, and supports the freedom to separate panels without extra damage or corrective work.
Small Bit First
Use an eighth-inch bit to cut a pilot hole in the center of each spot weld; this gives the larger cutter a precise path and helps keep it from wandering into the surrounding panel.
That pilot hole importance shows up immediately when you apply steady pressure and let the bit start cleanly. Choose quality drill bit types, such as Dewalt, so you don’t dull the edge or chew up the sheet metal.
Once the guide hole is in place, switch to a larger bit, ideally near half an inch, and follow the hole straight through the weld.
These weld removal techniques let you shear the bond without punching through both panels. Watch for panel separation as your cue that the weld’s broken free.
Center Each Weld
Center each spot weld and bore an eighth-inch pilot hole straight into the middle of the weld, keeping the bit controlled so it cuts only down to the first layer of metal and doesn’t punch through both panels.
Use tight weld alignment techniques and steady pressure so you stay centered. Prioritize drill bit selection; a sharp Dewalt-style bit cuts cleaner, runs cooler, and lasts longer.
Watch the chips and feel the resistance shift as the weld begins to separate. Respect panel integrity considerations by stopping before you breach the lower sheet.
Then step up to a larger bit, about half an inch, to finish removal.
- Mark each weld clearly
- Hold the drill square
- Check gap formation often
- Stop at first-layer depth
- Enlarge only after loosening
Use a Larger Bit to Remove the Weld
**
Step up to a larger bit, ideally close to 1/2 inch, and let it remove the spot weld after you’ve started a pilot hole with an 1/8-inch bit. This drill bit selection is central to effective weld removal techniques because it cuts the weld cap fast while keeping control over the surrounding sheet metal. Keep the bit centered, apply steady pressure, and drill only until the bond breaks. You’re not chasing depth; you’re freeing the seam. Check often for slight layer separation, which tells you the weld is loosening. If the panels begin to part, stop and assess before continuing. Precision matters here: too much drilling can create needless holes and weaken the panel. Use these panel preparation tips to clear the way for clean disassembly and easier new panel installation. When you work deliberately, you reclaim the metal without damage and open the path to a stronger rebuild. Additionally, ensure you clean metal thoroughly before starting to avoid complications during the drilling process.
Products Worth Considering

Cobalt M42 drill bit – provides upgraded M42 Cobalt jobber-length bits designed for durability, high heat resistance and Hardened surface for stainless steel, cast iron, titanium, light-gauge metal and aluminum

Extra Long Drill Bits: 1/2 inch x 12 inch aircraft drill bit, 1-Piece. Ideal for drilling wood, plastic, PVC, thin metal sheets

What You Get: This drill bit set for metal includes 5 – 1/2 Inch x 6 Inch bits of the same size.
Stop Before You Drill Into the Bottom Panel
As you drill, stop just before the bit reaches the bottom panel so you don’t punch through and weaken the structure.
You need tight drill depth control to keep panel integrity intact while you execute weld removal techniques. Start with an eighth-inch pilot hole, then move to a quality larger bit from a reputable brand like Dewalt for cleaner cuts and less wandering.
Drill only until you’re close to the first layer; that’s enough to release the spot weld without cutting into the support below. Watch the metal, not just the tool, and keep your pace steady.
Drill just to the first layer, watching the metal closely so you release the weld without cutting into the support below.
- Use a pilot hole to guide the larger bit.
- Keep the bit square to the surface.
- Stop at the first sign of layer separation.
- Choose sharp bits for cleaner removal.
- Preserve the bottom panel for a stronger repair. Additionally, maintaining proper amperage control during welding can help ensure the integrity of your auto body panel.
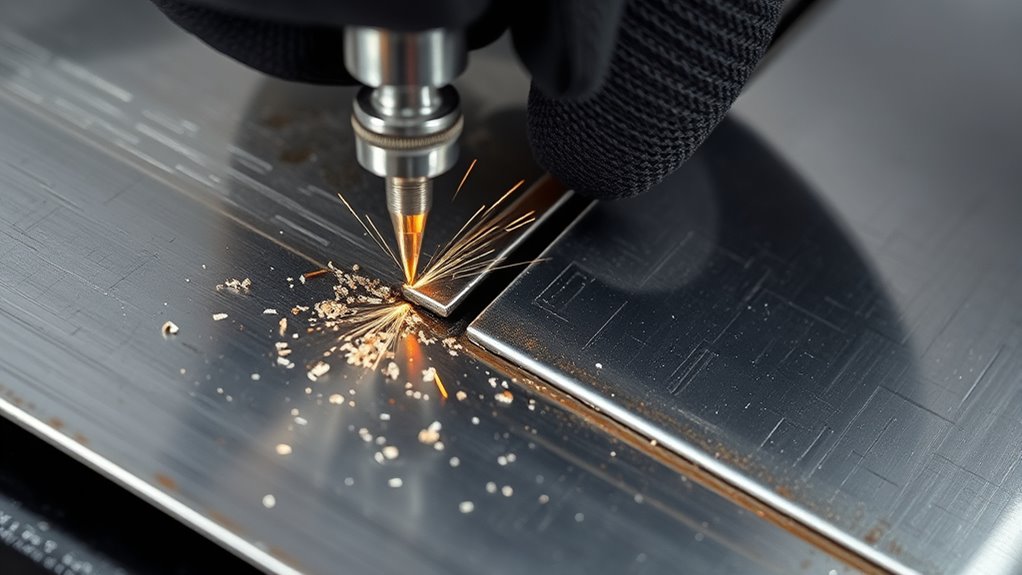
Check for Panel Separation as You Drill
As you drill, watch for a slight gap between the panels, since that separation shows you’re cutting the weld instead of the base metal. Use the opening as a progress check and stop before the bit starts to penetrate the lower panel. If the panels still won’t split cleanly, drill just enough to finish the weld, then switch to an air hammer for controlled separation. Remember to ensure that all zinc residues are removed before welding, as this will help achieve a cleaner finish.
Watch For Metal Separation
Watch for metal separation as you drill, because a slight opening between the panels usually means the spot weld is nearly through. Start with an eighth-inch pilot hole, then compare drilling techniques comparison so you can keep the bit centered and protect weld integrity assessment.
You’ll see the panel edge relax before breakthrough; that’s your cue to slow down and preserve panel alignment importance.
- Focus on the weld, not the sheet.
- Stop before you cut into the second panel.
- Let separation guide your pace.
- Use a larger bit only after the pilot hole.
- If you’ve slotted the weld, an air hammer can finish the split.
This disciplined approach keeps the joint controlled, removes only what you need, and supports clean, liberated panel work.
Drill Progress Check
Once the bit starts biting into the weld, check your progress often by looking for panel separation. Use disciplined drill techniques so you can read the joint, not just cut it.
As the bit opens the weld, watch for a visible slot; that tells you the bond is weakening and you’re near release. Measure your control against the panel materials in front of you, since thickness varies and changes the feed you need.
Keep your safety precautions active: steady grip, clear eye protection, and firm panel support. Regular checks let you avoid over-penetration, preserve the surrounding metal, and decide when the weld needs another pass or when the panels are ready for air-hammer separation.
Stay deliberate; liberation starts with precise removal.
Stop Before Penetration
Stop just before the bit breaks through the first layer of metal, because drilling past the weld can leave an unwanted hole in both panels.
Control penetration depth with a steady drill technique, and keep the bit centered on the weld identification mark, not the surrounding sheet. Use a small pilot hole first, then move to a bit near half an inch for clean removal.
As you drill, pause often and check for panel separation; a visible gap tells you the weld is nearly free. Inspect the area up close so you can confirm full release without damaging both layers.
- Watch for separation.
- Stay on the weld.
- Limit depth.
- Inspect closely.
- Finish cleanly.
Create a Slot to Start Splitting the Panels
Drill a pilot hole through the center of the weld with an 1/8-inch bit to establish your starting point, then switch to a larger bit, about 1/2 inch, to widen the hole into a slot. Use deliberate drill bit selection and keep the cutter centered so your slot creation techniques stay clean. Stop when you’re just shy of the first metal layer; that leaves the panel intact while opening access. Slight panel bending methods can lift the edge and expose hidden welds without fighting the joint.
| Step | Action | Result |
|---|---|---|
| 1 | Center punch | Stable start |
| 2 | 1/8-inch bit | Pilot hole |
| 3 | 1/2-inch bit | Wider slot |
| 4 | Controlled depth | No breakthrough |
| 5 | Bend panel lightly | More weld access |
That slot gives you room to separate the rocker from the inner panel with control, speed, and less wasted effort.
Use an Air Hammer to Separate the Panels
With the slot opened, you can use an air hammer to split the rocker panel from the inner panel cleanly. Fit the right chisel attachment, then guide it into the slot and work along the drilled weld line. These air hammer techniques let you separate metal with control, so you don’t force the panel or warp the flange. If the panel resists, bend it slightly to open the weld area and improve access. That small adjustment often boosts weld removal efficiency and keeps the cut path predictable.
- Hold the tool steady and let the chisel do the work.
- Advance a short distance at a time.
- Follow the existing gap, not the outer skin.
- Use panel separation tips to avoid prying too hard.
- Stop once the rocker panel breaks free from the inner panel.
Using a copper backing plate during welding can also help minimize burn-through and improve overall panel integrity. With practiced control, you’ll detach the panels quickly, cleanly, and with less damage, keeping your repair path free.
Clean Up the Spot Weld Area
Once the panels are separated, remove any metal shavings and debris from the spot weld area so you can inspect the surrounding metal clearly.
Use spot welds techniques that favor control: vacuum the seam, then brush away residue with a wire brush or grinder. Keep your passes light so you don’t thin the parent metal.
Check the exposed edge for rust, distortion, or hidden damage; any flaw you leave now can compromise the repair later.
For effective metal preparation, clean until the surface feels uniform and bare, with no paint, seam sealer, or loose scale. If you find corrosion, perform rust removal now rather than after the new panel is in place.
Finish by vacuuming again and wiping the area clean so no dust or grit remains. You want a contaminant-free surface because clean metal gives you the strongest possible weld and the freedom to build a lasting repair on your terms. Ensure you remove mill scale and other contaminants to prevent porosity in your welds.
Fit the New Rocker Panel and Weld It In
Before you fit the new rocker panel, make sure the mounting area is clean and free of debris so the panel sits snugly against the existing structure.
Position the replacement carefully, checking rocker panel alignment with the factory holes and body contours. Use clamps or temporary screws to hold it steady while you verify fit and adjust as needed.
Once it sits true, weld with controlled heat and steady travel speed so you get full penetration without warping the metal. Apply sound welding techniques that match factory strength and spacing.
- Check panel alignment from both ends
- Confirm door gaps stay even
- Clamp before every tack weld
- Watch heat to avoid distortion
- Inspect seams for gaps after welding
After the welds cool, perform seam inspection along every joint. Look for pinholes, cracks, or uneven fusion, then clean the area thoroughly. Grinding off the zinc layer before welding can help prevent metal fume fever and improve weld quality.
Finish by applying primer or paint to protect the repair and keep the panel ready for the road.
Frequently Asked Questions
Can You Drill Out Spot Welds?
Yes, you can drill out spot welds explained: use a pilot bit, then a larger bit. Avoid common mistakes like overdrilling; follow safety precautions, stop at the seam, and separate the panels cleanly.
What Size Drill Bit for Spot Welds?
Use an 1/8-inch drill bit to mark the seam like a lantern, then switch to about 1/2-inch for spot weld removal. Choose quality drill bit types for clean auto body repairs; you’ll work free, precisely.
How to Detach Spot Welding?
You detach spot welding by drilling a pilot hole, enlarging it until the weld releases, then separating panels with an air hammer. Use proper welding techniques, panel preparation, and safety measures for clean liberation.
Which of the Following Tools Can Be Used to Remove Spot Welds?
Drill bits and an air hammer remove spot welds, not spot welders—an old-school hack. You’ll judge metal thickness, drill carefully to the first layer, and follow safety precautions so you free panels cleanly.
Conclusion
You’ve now drilled the spot welds and separated the panels with control and care. Keep your bit centered, stop before you cut into the lower panel, and use the air hammer only when the slot is ready. Clean the joint thoroughly so the new rocker panel sits flush and welds cleanly. Done right, this process is like peeling back a seam without tearing the fabric—precise, clean, and ready for repair.


