A burnt MIG tip usually means your wire feed, tip size, or ground is off. Shut off the welder, remove the nozzle, and inspect the contact tip for melted edges, pits, or spatter. Replace it with the exact wire size, then set stick-out to about 3/8 to 1/2 inch. Check wire-feed speed, drive-roll tension, liner cleanliness, and ground clamp contact on bare metal. If the problem keeps coming back, there’s more to sort out.
Why MIG Tips Burn Back

MIG tips burn back when the wire melts faster than it feeds, so the wire retracts into the contact tip instead of staying at the arc. You’ll see wire burning back when your feed speed can’t keep up with heat input, and the arc grabs the wire before it clears the tip.
Too little stick-out, especially under 3/8 to 1/2 inch, puts the wire too close to the arc and drives overheating. A weak ground can drop voltage and let the wire keep moving while the arc destabilizes, which invites burnback.
Too little stick-out can overheat the wire, destabilize the arc, and trigger burnback.
You also create trouble when the contact tip has grooves or metal buildup that choke wire delivery. Old or rusty filler wire resists smooth feeding, so the wire hesitates, surges, and burns back.
To stay in control, match feed speed, keep proper stick-out, secure your ground, and use clean wire that moves freely. Additionally, proper gas flow is crucial to prevent burnback, as it helps maintain a stable arc and supports consistent wire feeding.
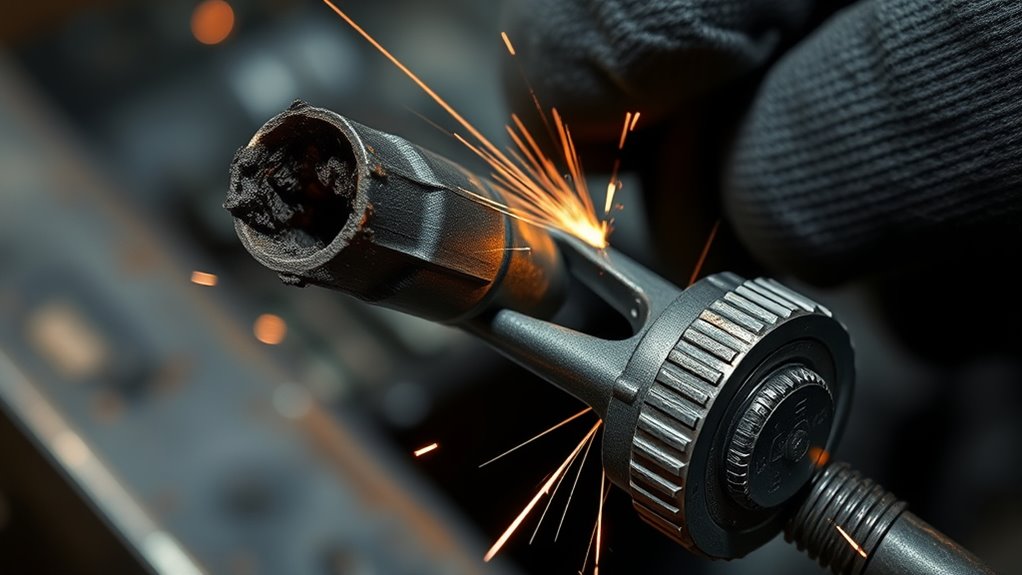
Inspect the Burned Contact Tip
Start by inspecting the contact tip for melted edges, pitting, and any buildup of fused wire or debris. When you inspect a burnt tip, you can see whether heat, arc instability, or poor feeding has already weakened it.
Check the bore and face closely; distortion tells you the tip’s service life is ending, and buildup can choke wire movement. Clean light contamination with a brush or dedicated tool, but don’t force out heavy slag that’s locked to the metal.
- Look for rough, cratered surfaces.
- Inspect for fused spatter blocking the opening.
- Verify the tip isn’t overheated from long duty cycles.
- Check standoff distance to avoid future damage.
If the tip shows severe wear, replace it after you inspect the rest of the torch setup. A clean, properly positioned tip keeps wire feeding smooth and protects your work from burnback, giving you more control and freedom at the arc. Additionally, ensure that wire feed problems are addressed to prevent recurring issues.
Replace the Contact Tip With the Right Size
If cleaning didn’t fix the problem, replace the contact tip with one that matches your wire diameter exactly—for example, use a .030-inch tip for .030-inch wire. A mismatched tip restricts feed, increases heat, and raises burnback risk.
When you replace the contact tip with the right size, you restore stable current transfer and smoother wire delivery. Shut the welder off first, then press the gun trigger to release wire tension before disassembly.
Remove the old tip and inspect it for melting, pitting, or metal buildup; those signs confirm it’s done. Install the new tip firmly, but don’t overtighten it. Using YESWELDER MIG Welding Contact Tips ensures compatibility and optimal performance.
Afterward, run a short test bead and watch for steady feed and clean arc starts. Make this check part of routine maintenance so you catch wear early.
Solid equipment keeps you in control, reduces waste, and helps you weld with more freedom and less frustration.
Products Worth Considering

1. Package Includes 30 Premium Quality .030” (Ø0.8mm)welding Tips.

Premium quality Lincoln/Tweco style standard 11-30 (0.030") contact tips for 100L and Mini MIG guns

Mig Welding gun accessory kit 0.030" for Miller Hobart with mig welding contact tip,gas nozzle,gas diffuser for Miller Millermatic M-10, M-15 and Hobart H-9,H-10
Check Wire Feed Speed and Tension
Check the wire-feed speed next, because a slow setting can let the wire melt back into the contact tip before it advances. Set wire feed to match the wire size, material, and welding amperage, then test a short bead.
If the arc stutters or the tip overheats, increase feed slightly until the transfer stays steady. Too much tension on the filler wire can also drag the wire, so back off the drive rolls just enough to keep positive drive without crushing the wire.
- Verify smooth wire movement at the feeder.
- Look for grooves or buildup on the contact tip.
- Confirm the liner is cut square and sized correctly.
- Recheck wire feed after each adjustment.
You’re not chasing perfection; you’re restoring control. Make one change at a time, then weld again and watch for burnback. Remember, proper preparation is key to ensuring a stable welding process and reducing issues like overheating.
Stable wire feed keeps the tip cooler and helps you keep welding on your terms.
Products Worth Considering
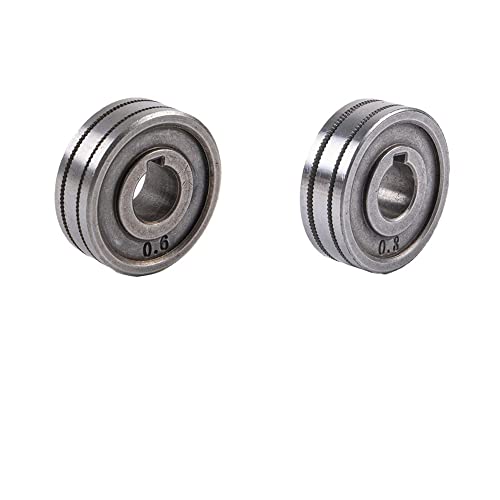
These rollers are used for feeding MIG wire on welding machines, fits directly onto the motor shaft.
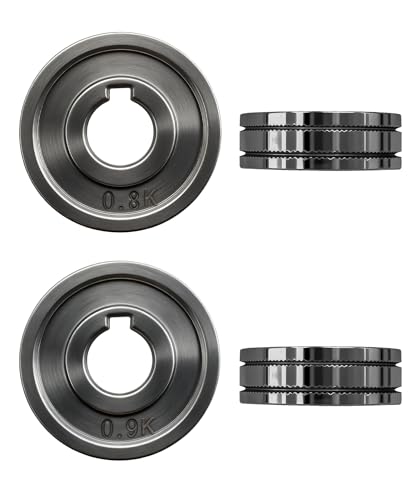
Package Contents: You will get 2* Drive Roll

Quality Steel Construction: Made from premium hardened steel, these wire feed drive rollers offer outstanding wear resistance, durability, and reliable performance for your daily welding needs
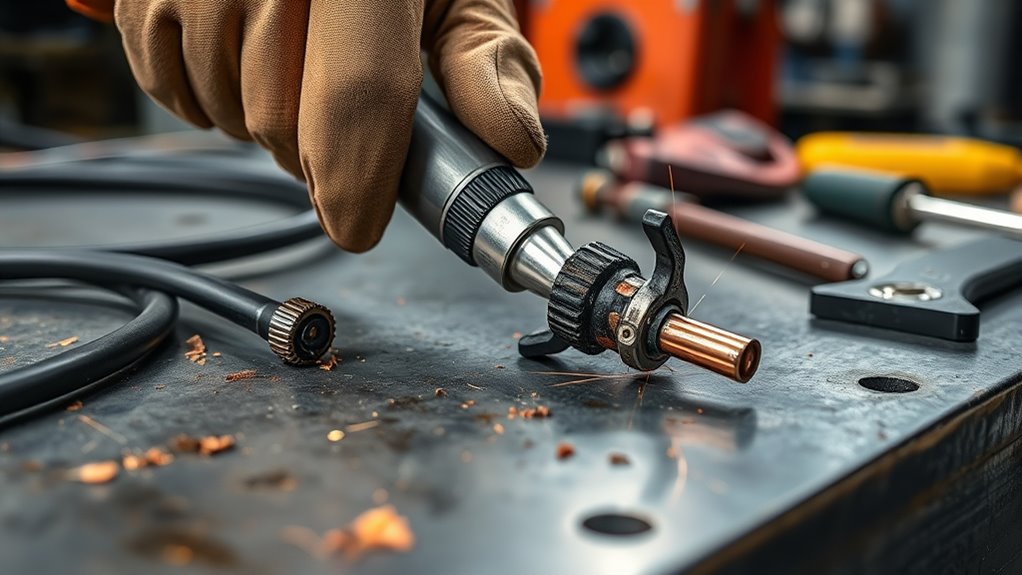
Clean the Liner and Nozzle
Remove the nozzle and inspect it for spatter or buildup that could be choking wire flow, then clear out any debris before reinstalling it. Next, clean the liner and nozzle so wire can move without drag. Use compressed air to blow through the torch liner and clear hidden obstructions. Check the liner’s condition and trim it to the right length if it’s miscut or damaged. Clean the contact tip thoroughly, because molten wire can fuse inside and starve the arc. Remember, maintaining a clean system is crucial for optimal arc stability and preventing further issues.
| Check | Action |
|---|---|
| Nozzle | Remove spatter and buildup |
| Liner | Blow out with compressor |
| Tip | Clean or replace if packed |
| Fit | Confirm proper liner length |
If cleaning doesn’t restore smooth feeding, replace the nozzle and contact tip. Worn parts won’t hold consistent flow, and forcing them only keeps you stuck in burnback trouble. Keep the system open, clean, and free.
Set the Correct Stick-Out and Tip Recess
Set your stick-out to 3/8 to 1/2 inch, and keep the contact tip about 8–10 mm from the workpiece to hold a stable arc and reduce burnback. Adjust tip recess to match your amperage; higher current usually needs a deeper recess to keep the tip from overheating. Watch the balance between heat and reach, and recheck the setting often so you don’t crowd the workpiece or damage the tip. Additionally, maintaining the correct polarity settings is essential to ensure optimal arc stability and prevent overheating of the tip.
Proper Stick-Out Length
A proper stick-out helps keep the arc stable and the contact tip cool. You should hold the stick-out length at 3/8 to 1/2 inch so the wire feeds cleanly and burnback stays low.
Keep the electrode at least 1/2 inch from the work surface to avoid crowding the puddle and overheating the tip. A longer wire stick-out can also move the tip farther from arc heat, which helps prevent wire meltback.
- Check stick-out before each pass.
- Watch it during travel.
- Correct any drift fast.
- Keep your hand steady and your setup free.
Tip Recess Adjustment
When you adjust tip recess, match it to the welding current so the contact tip stays protected from excess arc heat and burnback.
Use tip recess adjustment to set a stick-out of 3/8 to 1/2 inch, then verify the tip sits correctly inside the nozzle. As current rises, move the tip deeper to reduce overheating and limit burnback.
Keep checking stick-out during work; small shifts can throw off weld quality and wear the tip fast. If the recess is wrong, wire feed can turn erratic and you’ll swap tips too often.
Align the tip length with the nozzle so shielding gas covers the puddle cleanly and the arc stays stable. This control gives you cleaner, more autonomous welding.
Balance Heat And Reach
Dial in a stick-out of 3/8 to 1/2 inch so the arc transfers heat efficiently without driving burnback into the tip. You keep the puddle honest and your weld path free.
Match tip recess to current: hotter settings need more recess to shield the tip from heat. Hold stick-out steady, and set wire speed so the arc stays stable. If you crowd the work, heat piles up fast; if you reach too far, the arc gets lazy and erratic.
- Check stick-out before every pass
- Increase recess with higher amperage
- Tune wire speed to prevent burnback
- Recheck after changing joint position
Fix the Grounding Connection
Check that the ground clamp is tight on clean metal and firmly attached to the workpiece. Then inspect the grounding cable and its connections for corrosion, looseness, or damage. A solid ground helps keep voltage stable and reduces burnback at the tip. Ensuring a secure ground connection is crucial for maintaining optimal voltage levels, which in turn minimizes burnback and enhances overall weld quality.
Check Ground Clamp
A loose or poorly grounded clamp can cause voltage drop, unstable arc behavior, and burnback at the MIG tip, so make sure the ground clamp is firmly attached to a clean, unpainted part of the workpiece.
- Tighten the ground clamp until it bites metal solidly.
- Remove paint, rust, and spatter where the clamp grips.
- Inspect the clamp jaws for wear or corrosion.
- Use a multimeter to confirm continuity.
If the arc still stutters, reposition the ground clamp closer to the weld zone and retest. A reliable ground keeps current flowing cleanly, reduces resistance, and helps you weld with control.
Don’t let a weak connection box you in; lock in a direct path, restore stability, and keep the tip from burning back again.
Inspect Cable Connection
Now inspect the grounding cable and connection points for damage, looseness, or corrosion, since a bad path can still cause voltage drops and burnback even when the clamp seems tight.
You need a clean, direct return path to keep your MIG arc stable and your tip protected. Inspect cable connection at the clamp, lugs, and workpiece contact, and tighten anything loose.
Clean rust, paint, and spatter from the grounding surface so the clamp bites into bare metal. Use a multimeter to verify continuity from the clamp to the machine frame; low resistance means the path’s healthy.
Check that the ground cable gauge matches your welding current, because an undersized lead overheats and wastes power.
Replace damaged conductors now and weld with confidence.
Clean or Replace Rusty Wire
Before you feed new wire through the welder, remove any rust or corrosion from the wire surface, since buildup can restrict feeding and trigger burnback. To clean or replace rusty wire, inspect the spool closely and act fast. Rust interrupts conductivity, creates drag, and weakens weld consistency.
Remove rust from welding wire before feeding; corrosion can restrict wire movement, cause burnback, and weaken weld consistency.
Use a wire brush or abrasive cloth to strip contamination from accessible sections. If the corrosion has spread deep or the wire looks pitted, replace it instead of forcing it.
- Check the wire before each job.
- Brush off light surface rust immediately.
- Replace wire with heavy corrosion or damage.
- Store spools in a dry, sealed place.
Keep your feed path free and your welds stable. Clean wire moves smoothly, maintains arc quality, and supports reliable penetration. Using high-quality wire, like the flux core welding wire ensures optimal performance and enhances your welding process.
When rust keeps returning, don’t fight it—swap the spool and stay in control of your work.
Match the Nozzle to MIG or Flux Core
If the wire is clean but the tip still burns out, check that the nozzle matches the process you’re running. You need a MIG nozzle when you’re shielding the weld with gas; it opens wider and focuses that gas around the puddle for a stable bead.
If you’re running flux core, use a gasless nozzle that protects the diffuser threads and suits the compact setup. Don’t mix them and expect clean results.
Match the nozzle size to the wire too: a .030 wire needs a .030 nozzle so coverage stays centered and the tip doesn’t overheat from poor shielding.
When you switch between MIG and flux core, change the nozzle with it. That small part controls how the process breathes, and the right fit gives you cleaner work without extra drag or waste.
Choose the nozzle that fits your method, and keep your setup aligned with the job. The advanced core design of YESWELDER Flux Core MIG Wire enhances arc stabilization, which can help reduce the risk of tip burnout during your welding tasks.
Prevent Burnback With Better Setup
Set your wire-feed speed so the wire feeds slightly faster than it melts, because a slow feed can trigger burnback and weld the wire to the tip. Tune it until the arc stays stable and the wire doesn’t hesitate. You’re not guessing; you’re asserting control over the process.
- Replace worn or clogged contact tips before they choke feeding.
- Keep at least half an inch of electrode stick-out to move heat off the tip.
- Blow out the torch liner with compressed air so wire slides freely.
- Check the ground clamp and cable for a solid, low-resistance connection.
When grounding drops voltage, burnback gets more likely and your puddle loses authority. Proper filler match enhances weld quality and strength, making it crucial to your setup. Clean feed path, correct stick-out, and proper tip size work together.
If the wire still drags, raise feed speed a bit more and inspect the liner again. A tuned setup keeps heat where you want it and lets you weld without fighting the machine.
Frequently Asked Questions
How to Fix a Welding Tip?
Replace the tip if cleaning can’t restore it. Check Tip Maintenance by clearing melted wire, matching tip size to wire, setting wire-feed speed, and keeping stick-out at 3/8–1/2 inch for reliable welding.
What Is the Best Welder Brand?
Lincoln Electric often leads the pack, but Miller, Hobart, ESAB, and Everlast each shine like different torches. You’ll choose by Welder Performance, budget, and features, then weld free with the machine that fits your hands.
How to Unclog MIG Welder Tip?
Turn off the welder, remove the tip, and brush out debris. Soak stubborn buildup in solvent, dry it fully, then reinstall. Practicing Tip Maintenance keeps wire feeding smooth and lets you weld with more freedom.
Why Does My MIG Welder Keep Burning Back to Tip?
About 70% of burnback stems from feed issues: your wire’s likely moving too slowly, grounding’s weak, or the tip’s worn. You’ll fix it with Tip Maintenance, proper tension, clean liners, and longer stick-out.
Conclusion
By checking the tip, you fix the burnback. By matching the tip size, you restore smooth feeding. By cleaning the liner, nozzle, and ground, you steady the arc. By using clean wire and the right nozzle, you reduce heat and spatter. By setting your wire feed and tension correctly, you prevent repeat damage. Keep your MIG welder tuned, keep your parts clean, and keep your welds consistent for better performance every time.


