Clean Welding Gloves the Right Way
What’s in This Article
- Clean Welding Gloves the Right Way
- What You Need to Clean Welding Gloves
- Remove Dirt and Grinding Dust
- Dry Welding Gloves Without Damage
- Condition Welding Gloves for Flexibility
- Store Welding Gloves Between Jobs
- Spot Signs Your Gloves Are Wearing Out
- When to Replace Welding Gloves?
- Choose Durable Welding Gloves
- Care for Shared TIG Gloves
- Frequently Asked Questions
- Conclusion
Dirty welding gloves can stiffen, crack, smell bad, and lose comfort faster than you expect. To keep your gloves working longer, brush off dust and debris after each use, then wipe them with a damp cloth and mild leather cleaner.
Don’t soak them or use harsh chemicals. Air-dry them away from direct heat, then apply a light leather conditioner when the leather feels dry. Store them flat in a cool, dry place, and inspect seams, palms, and stitching for wear before each welding session.
Quick Answer
Clean welding gloves by brushing off loose dust, wiping the leather with a lightly damp cloth, and using mild leather cleaner only when needed. Let them air-dry away from heat, then condition dry leather lightly. Replace the gloves when you see thinning leather, loose stitching, cracks, burns, or reduced heat protection.
Key Takeaways
- Brush welding gloves after each use to remove dust, grit, and grinding debris.
- Use mild leather cleaner or saddle soap, but never soak leather welding gloves.
- Air-dry gloves naturally, because direct heat can stiffen and crack leather.
- Condition dry leather lightly to help preserve flexibility and comfort.
- Replace gloves when damage weakens grip, seams, leather thickness, or heat protection.
Clean Welding Gloves the Right Way
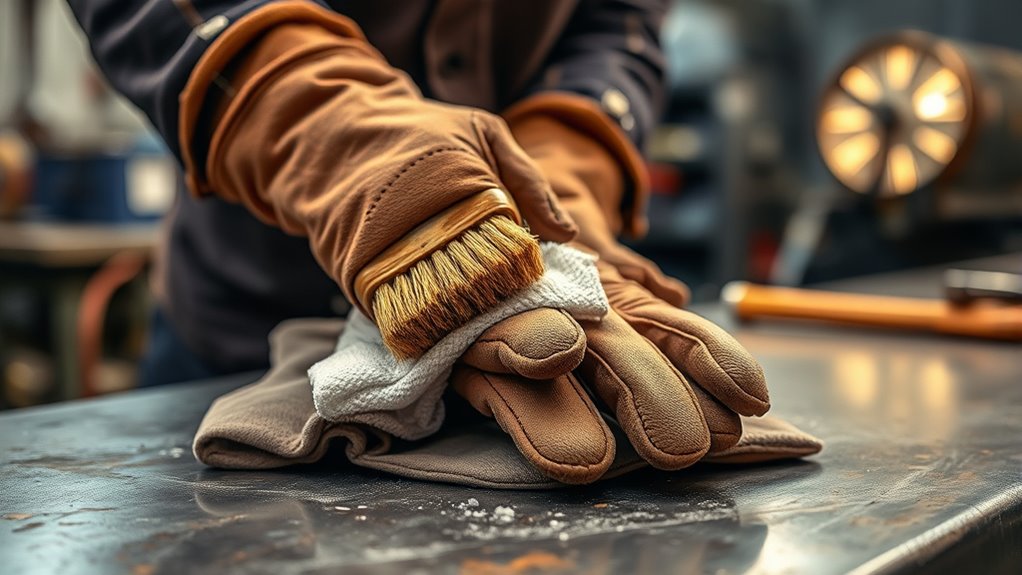
To clean welding gloves the right way, start by brushing off loose debris and dust with a soft bristle brush. Then wipe them with a slightly damp cloth and cold water. This simple step protects leather gloves from grit that can grind into the surface.
Don’t use harsh chemicals or direct heat, since both can weaken leather and shorten service life. If you want to use a mild leather cleaner, test it first on a hidden spot so you don’t stain or damage the glove.
After wiping, use a clean damp cloth to remove any residue. Then pat the gloves dry with a towel. Never wring, twist, or squeeze them hard.
Let them air dry fully in a ventilated area, away from heaters or sunlight. As you finish, inspect stitching and leather thickness. Catching wear early helps you keep control, stay safer, and keep your gear ready for work.
Regular glove care also helps protect the Kevlar stitching used in some welding gloves.
What You Need to Clean Welding Gloves
You’ll need a mild leather cleaner or saddle soap, lukewarm water, a clean cloth, a soft-bristle brush, and towels for drying.
Use only safe cleaning tools that won’t scratch or stiffen the leather. Test any cleaning solution on a hidden spot first.
Keep a leather conditioner on hand, too. It can help restore flexibility after cleaning when the leather feels dry. Regular care can support the durability of cowhide leather and help your gloves last longer.
Products Worth Considering

COLOR-SAFE SOFTNESS – If keeping the original color of your glove is important to you, look no further. Trusted by players and coaches alike, our Sarna glove conditioner nourishes leather without darkening. Reds, blues, pinks, and other modern glove colors will stay true. Fast-absorbing care keeps the pocket flexible and game-ready, with no greasy feel.

DEEP-CONDITIONING LEATHER BALM — This natural leather conditioner is made with beeswax and plant-based oils that penetrate the grain of the leather to restore moisture, suppleness, and a healthy sheen to dry or stiff leather.

SOFTENS, PROTECTS & RESTORES | Glove conditioner that treats leather ball gloves without adding weight
Cleaning Supplies Needed
Before you start cleaning welding gloves, gather a few simple supplies. You need a mild leather cleaner or saddle soap, a soft-bristle brush or cloth, lukewarm water, and a towel for drying.
These cleaning supplies help you remove grime without stripping strength from the leather. They also help you avoid damage from rough scrubbing or harsh cleaners.
- Mild cleaner: lifts dirt without harsh damage.
- Soft brush or cloth: clears dust and grinding debris.
- Towel and leather conditioner: dries the gloves, then restores flexibility.
Mix a small amount of cleaner with lukewarm water, never hot water. Wipe the gloves with control, then dry them fully with a clean cloth so moisture doesn’t linger.
If the gloves get heavy use, add leather conditioner after drying to keep them supple and durable.
Safe Cleaning Tools
Start with the right tools: a soft-bristle brush or cloth, mild leather cleaner or saddle soap, lukewarm water, and a clean damp cloth for rinsing. These glove-safe cleaning tools lift grinding dust and debris without scarring the material.
First, dry-brush the surface. Then mix a small amount of cleaner with lukewarm water and apply it lightly.
Test the solution on a hidden spot before full cleaning to catch discoloration or damage early. If the material stays sound, continue with controlled wiping.
After cleaning, use a damp cloth to remove soap residue so your gloves stay ready for work. Finish with leather conditioner if needed to preserve flexibility and extend service life.
Remove Dirt and Grinding Dust
A quick brush-down after each use helps keep welding gloves in good condition. It removes loose dirt and grinding dust before debris works into the material.
Remove dirt with a soft brush, then follow with a soft cloth slightly dampened with cold water. This simple routine keeps contaminants from settling into leather and weakening protection.
- You protect the gloves’ surface, so they stay dependable longer.
- You stop abrasive dust from grinding away at the fibers.
- You keep your hands ready for work without the drag of buildup.
Inspect the gloves after every job and clean visible spots right away. Don’t use hot water or harsh chemicals, because they can damage the leather and reduce performance.
Regular cleaning also helps ensure the premium grain elkskin leather used in some gloves stays flexible and durable over time.
After wiping, let the gloves air-dry in a ventilated area. This helps reduce trapped moisture and preserves the glove’s integrity, giving you durable gear for the job.
Dry Welding Gloves Without Damage
Air-dry your welding gloves in a well-ventilated area, and keep them away from direct sunlight or heat sources. Pat them dry with a clean towel after cleaning, but don’t wring or twist them.
This careful drying step helps keep their shape intact and prevents leather damage. Regular maintenance also helps the gloves maintain their heat resistance capabilities and overall durability.
Air Dry Naturally
After washing or heavy use, let your welding gloves dry naturally in a well-ventilated area. Moisture can escape without damaging the leather.
You should air dry them flat, which helps preserve shape, prevents creasing, and keeps them ready for work. Keep the process simple and controlled, so you avoid premature wear.
- Keep your gear comfortable for longer use.
- Protect your hands with leather that stays flexible.
- Reduce trapped moisture before you store the gloves.
Wait until they’re completely dry before reuse. Damp gloves can feel weak, smell bad, and lose comfort during work.
After drying, inspect seams, fingers, and palms for hidden damage or soft spots. If you notice breakdown, handle it early.
Avoid Heat Sources
Keep welding gloves away from direct heat sources so the leather doesn’t stiffen, crack, or lose flexibility.
To dry them safely, air dry them in a well-ventilated area after you pat off excess moisture with a towel. Don’t wring or twist the leather, because that can distort fibers and shorten service life.
Avoid heat sources like radiators, heaters, and dryers. High heat exposure can weaken the material and reduce heat resistance.
Warning: Don’t use a clothes dryer, heat gun, heater, or open flame to speed up glove drying.
Check the gloves regularly for stiff spots, surface cracking, or reduced suppleness. These signs can mean the leather has started to break down.
By controlling drying conditions, you keep the gloves usable longer and preserve the protection you rely on. Handle them with care, and let natural airflow do the work.
Keep Shape Intact
Once your welding gloves are dry, store them flat in a well-ventilated area. This prevents crumpling, folding, and shape loss.
This simple step helps keep shape intact and preserves the fit you rely on during hard work. Never stuff them into a bag or stack heavy gear on top.
Instead, let them rest flat, so the leather stays aligned and ready. For high-quality gloves, a little care protects long-term performance.
- You avoid stiffness that traps your hand.
- You keep cleaner control during welding tasks.
- You extend the life of gear that protects your hands.
Lightly condition leather with a soft cloth, and skip washing machines or harsh detergents. Inspect for cracks or thinning, then replace worn gloves fast.
Condition Welding Gloves for Flexibility
To keep welding gloves flexible, apply a small amount of leather conditioner every few weeks if the leather feels dry. Use a soft cloth and work it evenly across the surface.
This routine helps preserve the leather’s natural oils, so your gloves stay smooth, supple, and ready for hard use. When you maintain flexibility, you reduce stiffness and help the gloves hold their shape and comfort during welding tasks.
After heavy use, conditioning matters more because heat and welding debris can dry the leather faster. Use just enough product to coat the material lightly.
Too much conditioner can leave residue and make gloves feel greasy. With consistent care, you keep your hands free to work without fighting rigid gear.
Pro tip: Condition only clean, fully dry gloves so you don’t trap dirt or moisture in the leather.
Remember that welding gloves protect against heat, sparks, and abrasion. Proper maintenance supports safety and performance, but it cannot restore gloves that have serious damage.
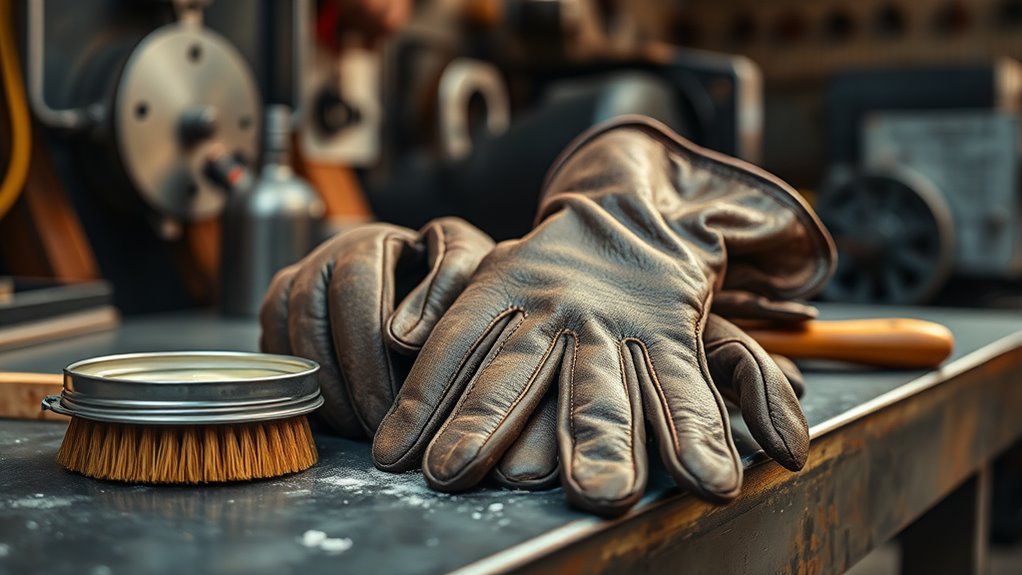
Store Welding Gloves Between Jobs
After you condition your welding gloves, store them in a cool, dry place so heat and moisture don’t break down the leather.
When you store a good pair properly, you protect the work you’ve already done and keep your gear ready for the next job.
Lay the gloves flat, keep them clean, and don’t cram them into a crowded tool bag. Compression can distort the fit and weaken the seams.
Keep them away from direct sunlight, which can fade and dry the leather. Use a breathable pouch or open shelf so air can circulate and help reduce odor and moisture.
Check stored gloves regularly, and you’ll stay in control of your safety and your craft. Make sure your storage method supports general safety guidelines and keeps gloves away from sharp or dirty tools.
- Protect your hands.
- Preserve your ability to work safely.
- Keep your gear ready.
Spot Signs Your Gloves Are Wearing Out
Check your gloves for visible wear and tear, like thinning leather on the palms, loose stitching, or worn seams. If they feel stiff, discolored, or harder to flex, they may have lost some protective performance.
You should also watch for reduced grip or heat resistance, since those signs can mean it’s time to replace them. Good habits and proper maintenance can extend glove life and improve protection.
Visible Wear and Tear
Even if your welding gloves still look serviceable at a glance, you should inspect them daily for visible wear and tear before each use.
Check the palms and fingers for thinning leather, since worn spots reduce protection fast. A proper glove should not show loose stitching, cracked seams, or heavy heat discoloration.
- Catch damage early, and you keep better control.
- Miss damage, and sparks can turn small flaws into hazards.
- Replace gloves when grip or tactile feedback drops, because precision matters.
Run your hands over the leather, compare both gloves, and reject anything that looks compromised. This quick check keeps you safer and free to work without avoidable risk.
Loss of Flexibility
Loss of flexibility is a clear sign your welding gloves are wearing out. Watch for leather that feels stiff, cracks at stress points, or limits natural finger movement.
You’ll notice your grip weakening and your hand position becoming less precise, which can slow you down and limit control. If the palm leather thins, your dexterity drops further, and the glove stops supporting smooth movement.
Discoloration from heat exposure can also point to damaged fibers that restrict motion. Check your gloves regularly for loss of tactile sensitivity, because reduced feel often means the material’s pliability has faded.
When flexibility fades, your gloves don’t give you the freedom or heat resistance you need to work safely and efficiently.
Reduced Heat Protection
When your gloves start losing heat protection, the first signs usually show up in the leather and seams.
Check the palms for thinning, especially where friction runs highest. That wear can signal reduced heat protection and mean it’s time to replace the gloves.
Look for loose stitching, frayed seams, discoloration, stiffness, and cracking at stress points. Each defect weakens thermal resistance and puts your hands at risk.
If tools feel sharper or less controlled in your grip, the gloves may no longer shield you properly.
- Don’t ignore a singed look.
- Don’t trust frayed seams.
- Don’t gamble with numb hands.
Inspect them before every welding session. When damage spreads, replace the gloves and keep your work clean, safe, and controlled.
When to Replace Welding Gloves?
You should replace welding gloves as soon as they show thinning leather, loose stitching, visible wear, or any damage that could weaken protection.
To stay safe, inspect welding gloves before every shift and after heavy use. Look for discoloration, stiffness, or any drop in heat resistance, because these changes can signal material breakdown.
If you lose tactile sensitivity and can’t handle tools or parts with control, the gloves aren’t doing their job. Don’t wait for a failure, because minor damage can expose your hands to burns, sparks, and abrasion.
Track how often you use them and replace welding gloves on a schedule that matches your workload. Frequent welding demands faster replacement than occasional tasks.
Regular checks keep your gear effective and help protect you from preventable injury. When the gloves stop shielding, gripping, or flexing properly, retire them immediately and get a new pair.
Also keep your work area free from flammable materials to improve safety while welding.
Choose Durable Welding Gloves
Once you know when gloves need replacing, choose a pair that lasts longer in the first place. Pick durable welding gloves made from premium leather for better heat and abrasion resistance.
Choose durable welding gloves made from premium leather for better heat resistance, abrasion protection, and longer-lasting performance.
If you run tungsten inert gas (TIG) welding, choose a design that keeps tactile control without trapping you in bulk. Check for reinforced stitching and extra layers at seams, palms, and thumbs, because those zones take the hardest hits.
- Feel the fit: full finger coverage and a snug wrist closure keep heat and debris out.
- Verify ratings: EN388 and EN407 labels can help compare mechanical and thermal protection.
- Prioritize function: gloves should move with you, not against you.
When you choose well, you protect your hands, cut waste, and stay ready to work. Selecting high-quality gloves can also support heat resistance during plasma cutting tasks.
Keep them properly stored after use, and they’ll stay ready longer.
Products Worth Considering

360° Heat-Resistant Protection: In addition to the full leather heat‑insulating fabric, the fleece lining serves as an extra heat‑resistant layer that blocks high‑temperature spatter and arc radiation heat generated during MIG welding. The extra‑long cow split leather cuffs prevent welding slag from entering the sleeves, providing comprehensive protection for the wrists and forearms during operations in various positions such as flat welding and vertical welding.

CERTIFIED HEAT WORK PROTECTION: Tested to EN388 3133X, EN407 433X4X and EN12477 Type A standards, these welding gloves withstand daily exposure to heat, flames, spatter or sparks, and extreme temperatures up to 932°F (500°C), while helping protect against abrasion, tearing, puncture, heat and welding-related hazards for heavy-duty hot work.

PREMIUM MATERIALS. Durability with high grade of US split leather available on the market. Got the CE EN388 and EN407 Certificates. Full cow split leather back till the cuff. Unlike other stiff welding gloves, these gloves are softer. Heat and flame resistant for all types of welding.
Care for Shared TIG Gloves
Shared TIG gloves need extra care, because shared use can quickly turn into a hygiene and safety issue. Bring your own gloves whenever possible, because personal gear reduces cross-use problems and protects your fit.
If you must share gloves, follow a clear cleaning routine before and after each use. Wipe exterior surfaces with a glove-safe cleaner, then let the gloves dry fully before storage.
Don’t soak leather gloves in disinfectant, and don’t use bleach unless the glove maker says it’s safe. Strong chemicals can damage leather, stitching, and protective coatings.
Note: For shared gloves, follow your shop’s personal protective equipment policy and the glove maker’s cleaning instructions.
Inspect them daily for burns, punctures, loose seams, or hardened leather, and retire damaged pairs immediately. Store shared gloves in breathable pouches, out of direct sunlight, so they keep shape between shifts.
Teach every user why hygiene matters and how to handle gloves properly. Skill and care work together in a safer shop.
Gloves made from flame-resistant materials can improve safety during plasma cutting tasks. When you treat shared personal protective equipment (PPE) as a collective resource, you keep the shop cleaner and more durable for everyone.
Frequently Asked Questions
How to Make Welding Gloves Last Longer?
Clean them regularly with gentle cleaning methods, condition dry leather as needed, inspect for wear, and store them in a cool, dry place. These habits help extend glove life, keep the leather flexible, and preserve protection.
How Long Should Welding Gloves Last?
Welding gloves can last weeks to months, depending on use, heat exposure, material quality, and care. Premium leather often lasts longer, but you should replace any glove with thinning leather, cracks, loose seams, or reduced heat resistance.
How Often Do You Oil Your Gloves?
Condition leather welding gloves every few weeks during heavy use, or whenever the leather feels dry. Use a light amount after cleaning and drying, so the gloves stay flexible without a sticky residue.
Can You Wash Welding Gloves in a Washing Machine?
You should not wash leather welding gloves in a washing machine unless the manufacturer clearly allows it. Machine washing can soak the leather, distort the shape, and weaken stitching.
What Are the 5 C’s of Welding?
The 5 C’s of welding often refer to cleanliness, control, consistency, care, and compliance. You can apply them to glove care by keeping PPE clean, checking it often, and replacing unsafe gear before work starts.
Conclusion
Clean welding gloves last longer when you remove grit, dry them naturally, condition dry leather, and inspect damage early. Build the habit after each welding session, because small care steps protect your hands and your gear.
Before your next job, check the palms, seams, fingers, and wrist area for wear. Replace the gloves before damage turns into a burn, cut, or loss of control.
Good glove care gives you safer hands, better grip, and gear that stays ready when the work starts.


