Fresh welds can begin developing surface rust quickly when heat-damaged coatings and bare steel remain exposed to damp air. For an automotive steel-panel repair to last, you need to remove contamination, restore the coating on accessible metal, seal disturbed joints, refinish exposed surfaces, and protect hidden cavities. This guide focuses on automotive mild-steel panel repairs, where the vehicle maker’s repair procedure and each product’s technical data sheet should control the final process.
Quick Answer
To prevent rust after welding an automotive steel panel, let the metal cool, remove scale, rust, oil, and dust, then apply a compatible two-part epoxy primer to accessible bare steel. Restore seam sealer and underbody coatings, refinish exposed areas, and apply cavity wax inside hidden sections after painting.
Key Takeaways
- Follow the vehicle maker’s repair procedure and use products approved for the selected paint system.
- Finish all welding and correct pinholes or poor welds before applying corrosion protection.
- Apply compatible epoxy primer to accessible bare steel before seam sealer unless the sealer is specifically approved for another substrate.
- Use weld-through primer only where the OEM and welding procedure permit it.
- Complete refinishing before applying cavity wax inside repaired panels and hidden joints.
- Inspect edges, seams, drain openings, and underbody coatings after harsh use or later repair work.
At a Glance
| Time Required | Several work sessions; flash, cure, and recoat times depend on the selected products |
| Difficulty | Intermediate; advanced when structural panels, catalyzed coatings, or enclosed cavities are involved |
| Tools Needed | Abrasives, approved cleaner, clean wipes, primer equipment, seam-sealer applicator, cavity wand, topcoat equipment, PPE, and inspection light |
| Cost | Varies by repair size, access, paint system, and the number of corrosion-protection products required |
Before You Begin: Rust-Prevention Basics
Work in a dry, well-ventilated area and keep the repair free from oil, silicone, dust, and moisture. Locate the vehicle-specific body repair procedure before coating a structural or welded replacement panel. The OEM instructions may specify where to use epoxy primer, seam sealer, adhesive, weldable sealer, weld-through primer, undercoating, and cavity protection.
Estimated active time: Plan for several short work sessions. Cleaning, primer, seam sealer, surfacer, topcoat, underbody coating, and cavity wax may each have separate flash, cure, and recoat requirements.
- Read the label, technical data sheet, and safety data sheet for every cleaner and coating.
- Wear chemical-resistant gloves, eye protection, and protective clothing suited to the products you use.
- Use the ventilation and respiratory protection required by the product SDS. Some catalyzed spray coatings require professional spray facilities or supplied-air respiratory protection.
- Keep ignition sources, welding sparks, grinding sparks, heaters, and open flames away from coating vapors.
- Use clean abrasives, approved surface cleaner, lint-free wipes, epoxy primer, compatible seam sealer, cavity wax, and the specified refinish products.
During the welding and grinding stages, wear suitable flame-resistant protective clothing. OSHA also identifies ventilation, eye protection, respiratory protection, and control of flammable spray materials as separate safety requirements for coating work.
Warning: Do not spray cleaner, primer, seam sealer, undercoating, paint, or cavity wax near hot metal, sparks, smoldering insulation, an open flame, or another ignition source. Let the repair cool completely and inspect both sides of the panel before opening or spraying a container.
Use the Correct Corrosion-Protection Sequence
The correct order prevents one material from contaminating or weakening the next. Exact steps vary, but a typical automotive steel-panel repair follows this sequence:
- Check the OEM procedure. Confirm the approved joint, weld type, adhesives, sealers, primers, and corrosion-protection locations.
- Prepare inaccessible mating surfaces before assembly. Preserve factory E-coat where possible and apply only the weld-through primer, adhesive, or weldable sealer specified for the joint.
- Complete and inspect the weld. Correct pinholes, porosity, incomplete fusion, excessive gaps, and remaining rust before applying a coating.
- Dress and clean accessible metal. Remove spatter, loose scale, oxidation, oil, and abrasive residue without thinning the panel unnecessarily.
- Prime accessible bare steel. Apply the compatible primer, number of coats, and film build specified by the coating maker.
- Restore seam sealer and underbody materials. Match the OEM location and function without blocking drains.
- Complete the refinish process. Apply compatible surfacer, basecoat, clearcoat, industrial topcoat, chip guard, or undercoating as the repair requires.
- Protect hidden cavities. After refinishing, apply cavity wax through factory access points during final assembly.
No single spray protects every part of a welded repair. Accessible steel, sealed seams, hidden overlaps, painted surfaces, and enclosed cavities require different materials applied in the correct order.
Match the Product to the Repair Location
| Repair area | Typical protection | Important limit |
|---|---|---|
| Accessible bare weld and heat-affected area | Compatible epoxy or approved direct-to-metal primer followed by the required refinish system | Follow the primer’s sanding, cleaning, coat, film-build, and recoat instructions |
| Disturbed exterior or interior seam | Compatible primer and automotive seam sealer | Use direct-to-metal sealer only when its instructions and the repair procedure allow it |
| Inaccessible overlap before welding | OEM-specified weld-through primer, weldable sealer, adhesive, or retained E-coat | Do not assume weld-through primer belongs in every joint |
| Boxed panel, rail, rocker, pillar, hem, or hidden flange | Automotive cavity wax applied after refinishing | Keep wax away from unfinished paint, adhesive surfaces, brakes, exhaust parts, and electrical contacts |
| Wheelhouse or underbody repair | Primer, seam sealer, chip guard, and undercoating specified for the location | Do not cover drain holes, fastener seats, heat shields, or service points |
Clean and Prepare Bare Welds First
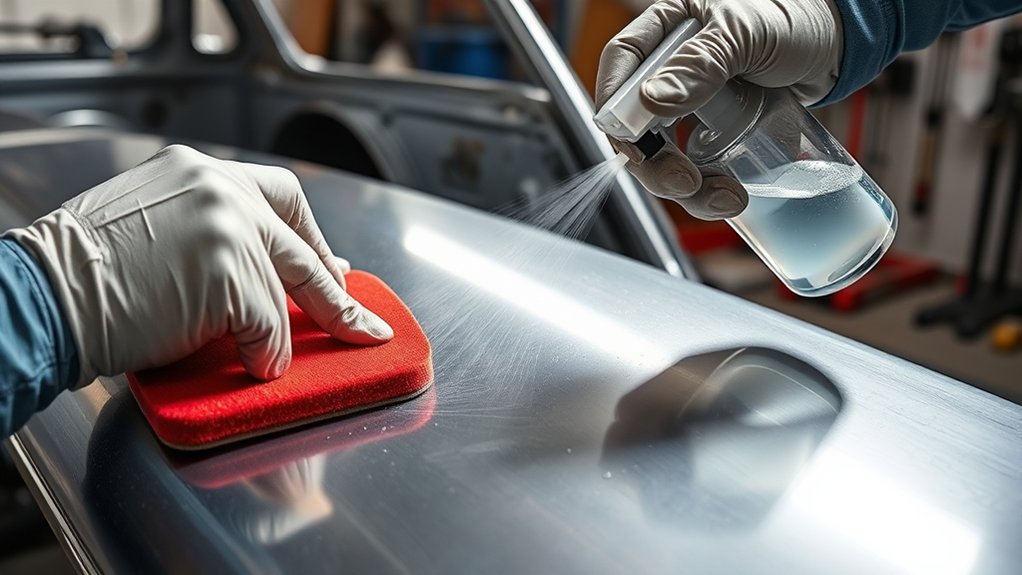
Start by letting the repair cool and checking the weld from every accessible side. Correct pinholes, missed sections, porosity, or incomplete fusion before you cover the area. A coating can hide a defect, but it cannot repair one.
Remove weld spatter, loose scale, light oxidation, paint damage, grease, and grinding dust. Use an abrasive and grit that suit the panel and the primer maker’s instructions. Avoid excessive grinding that thins the weld or surrounding sheet metal.
Vacuum or blow away abrasive residue, then clean the area with the cleaner approved for your paint system. Use clean, lint-free wipes and allow the metal to dry fully. Proper preparation supports reliable paint adhesion and reduces the risk of contamination becoming trapped beneath the coating.
Do not automatically apply an acid etch, phosphoric treatment, or self-etching primer. Some products are compatible with epoxy and seam sealer, while others are not. Use a metal conditioner only when the selected coating system specifically requires it.
If active rust remains in a structural joint or weld area, remove it to sound metal or replace the affected section. A rust converter may suit limited non-structural surface corrosion when its instructions allow it, but it does not replace cutting out weak metal or cleaning a weld joint correctly.
Note: Oily moisture-displacing sprays can interfere with primer and paint. If one was used for temporary storage protection, remove every residue with the cleaner specified by the coating manufacturer before sanding and priming.
Apply Compatible Primer to Accessible Bare Steel
Once the weld is sound, clean, and dry, protect accessible bare steel as soon as practical. Many automotive repair procedures call for a two-component epoxy primer on bare metal before seam sealer and refinishing products. However, the vehicle maker and paint-system instructions should determine the approved primer and substrate preparation.
Mix, reduce, induct, spray, or brush the primer exactly as its technical data sheet directs. Cover the weld face, weld toes, ground edges, heat-damaged coating, and every exposed repair edge. When you can reach the back side of the panel and prepare it correctly, coat that side as well.
Do not substitute a universal “two or three coats” rule. Apply the specified number of coats and required dry-film build. Respect flash times, temperature limits, sanding requirements, and the recoat window. Applying too much material at once can cause runs, slow curing, solvent trapping, or poor adhesion.
Keep the panel free from hand oils, silicone, wax, and dust throughout the process. Careful surface preparation matters as much as the primer itself.
Pro Tip: Prepare and coat the accessible back side of a repair panel before final assembly whenever the OEM procedure allows it. Cavity wax is valuable for blind areas, but it should not replace properly prepared primer on a surface you can reach.
Restore Seam Sealer After Welding
Seam sealer helps keep water, road salt, dirt, and air from entering lap joints, panel seams, hems, corners, and other moisture paths. Restore every disturbed factory-sealed location and any additional location identified by the vehicle maker.
In many automotive coating systems, seam sealer belongs over cured two-component epoxy primer, compatible urethane primer, or intact factory E-coat. Some sealers are approved for direct-to-metal use, but you should use that method only when both the product instructions and repair procedure permit it.
Use an automotive seam sealer approved for the location. Do not substitute general-purpose caulk. Apply the required bead size and shape, work the material into the joint as directed, and check for skips, pinholes, air pockets, or lifted edges. Keep drain slots and factory water paths open.
Do not add a continuous “seal weld” simply to close a seam. Additional welding can increase distortion and alter the intended joint. Use only the weld type, spacing, and length specified by the repair procedure.
Allow the sealer to cure or reach its paintable stage before applying the next product. Inspect it again after curing for shrinkage, cracking, voids, or missed edges. The 3M collision-repair seam-sealer guidance recommends clean substrates and a compatible primer or OEM E-coat in most applications.
Use Weld-Through Primer Only Where Approved
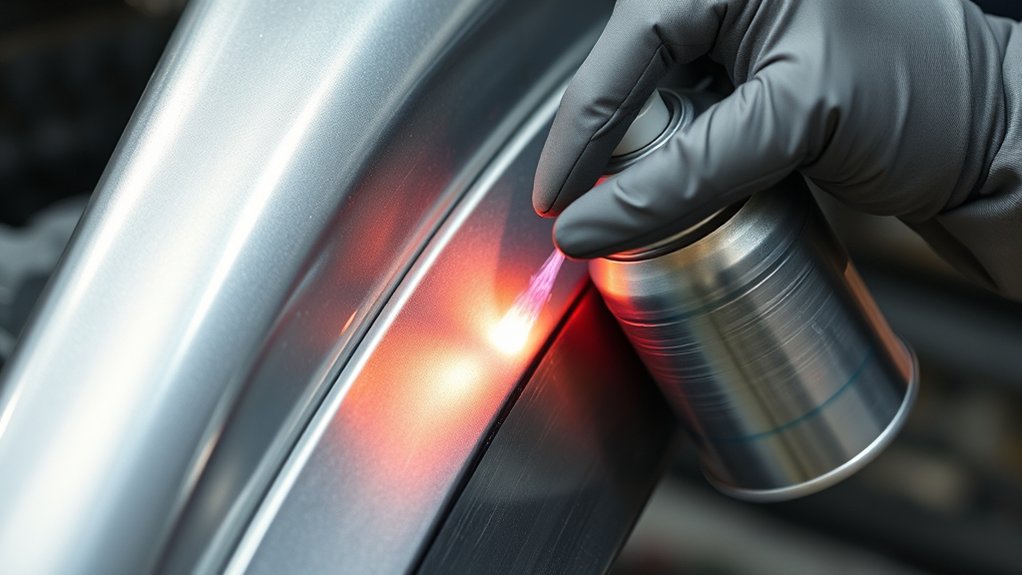
Weld-through primer is generally a conductive, zinc-rich coating used on selected mating surfaces that will become inaccessible after assembly. It is not a replacement for epoxy primer, seam sealer, refinishing, or cavity wax, and it should not be applied automatically to every overlap.
Check the vehicle-specific repair procedure first. Depending on the joint and welding process, the OEM may require weld-through primer, weldable seam sealer, structural adhesive, retained factory E-coat, or another preparation.
When weld-through primer is specified:
- Remove rust, loose coating, mill scale, oil, and contamination from the required mating area.
- Apply only the film thickness and number of coats stated by the product maker.
- Allow the coating to dry for the required time before assembly.
- Keep adhesive areas free from primer unless the repair and adhesive instructions permit it.
- Prepare the direct weld zone as the OEM procedure requires. Some GMA welding procedures require weld-through primer to be removed from the exact weld location.
- Make a test weld on matching material when required and inspect the result for fusion, porosity, and excessive contamination.
I-CAR’s Nissan weld-through-primer guidance illustrates why the welding process and repair procedure matter: the prescribed preparation can differ between resistance spot welding and GMA welding.
Note: A thick weld-through-primer film is not automatically better. Excess material can contaminate the arc or weld pool. Follow the product’s film-build instructions instead of trying to bury the joint beneath a heavy coat.
Add Cavity Wax After Refinishing
Cavity wax protects internal panels, hem flanges, boxed sections, rails, rocker panels, pillars, door shells, and hidden weld backsides that cannot be fully reached with normal refinishing equipment. Apply it after the paint repair is complete and before trim or access panels make the area difficult to reach.
Use an automotive cavity-protection product and follow its application temperature, coat count, flash time, and wand instructions. A 360-degree wand helps distribute material around the inside of a closed section. The selected product may require several passes rather than one heavy flood coat.
Keep cavity wax away from surfaces that still need paint, adhesive, glass urethane, or mechanical bonding. Also avoid brakes, exhaust components, electrical contacts, seat-belt mechanisms, drain paths, and other locations excluded by the vehicle or product maker.
The 3M Cavity Wax Plus procedure, for example, places application after paint repair during final assembly and uses a multi-coat process with cavity wands. Other products may have different instructions.
This automotive sheet-steel process is different from material-specific work such as welding cast iron with flux core. Always match the corrosion-protection method to the metal, component, and service environment.
Protect Hidden Seams
Hidden seams can corrode from the inside out when welding or grinding damages the original E-coat. Use the cavity wand to reach the back of welded flanges, boxed sections, overlaps, and the lower areas where condensation may collect.
- Apply cavity protection only after the metal is cool and refinishing is complete.
- Insert the wand to the far end of the cavity before spraying.
- Withdraw it steadily while spraying so the product overlaps previous coverage.
- Use additional passes only as the product instructions require.
- Check that factory drain openings remain clear.
- Clean overspray from visible paint according to the product instructions.
Where visual inspection is impossible, plan the wand path before spraying and use factory diagrams or access points to estimate coverage. Do not drill blindly near wiring, fuel lines, airbags, reinforcement panels, or structural components.
Apply Through Access Holes
Use factory access or drain holes whenever they provide suitable reach. If the repair procedure permits a new access opening, place it where the wand can reach the affected cavity without damaging a reinforcement, harness, hose, or safety system.
Deburr every drilled opening and protect its bare edge with the specified primer. Install an approved plug when the location requires one, but do not plug a factory drain or ventilation opening.
Allow excess wax to drain as the manufacturer directs. Inspect plugs, access holes, and drain paths during later service. Reapply cavity protection when later repair work disturbs it, when inspection shows incomplete or damaged coverage, or when the OEM or product instructions specify another treatment.
Topcoat and Protect Exposed Areas
Apply the specified topcoat after the primer and seam sealer reach the required recoat stage. On exterior automotive panels, this may include primer-surfacer, sealer, basecoat, and clearcoat. On concealed or utility surfaces, the approved system may use a different durable finish.
Before recoating, sand or scuff only as the coating maker directs. Exceeding the recoat window without the required preparation can weaken adhesion. Keep each layer compatible with the primer and sealer beneath it.
- Check weld toes, panel edges, folds, and overlaps for exposed metal.
- Confirm that seam-sealer edges are fully covered where the system requires paint.
- Restore color coat and clearcoat on visible exterior panels.
- Protect hidden cavities with cavity wax after refinishing.
- Use careful thin-metal preparation and welding technique so the coating is not being used to hide an unsound repair.
Restore Chip Guard and Underbody Coating
A welded wheelhouse, floor pan, rocker, lower quarter panel, or underbody section may also need chip-resistant coating or undercoating. Restore the original location, thickness, texture, and coverage as closely as the repair procedure requires.
Apply these materials over the approved primer and seam sealer. Do not spray them over brakes, exhaust parts, heat shields, grounding points, threaded fasteners, drain openings, identification labels, or service points.
Pro Tip: Photograph the factory seam sealer, chip guard, and underbody pattern before removing damaged material. The reference makes it easier to restore both function and coverage.
Inspect and Maintain the Repair
Inspect welded areas during routine service and after road-salt exposure, flooding, off-road use, collision damage, pressure washing, or later work near the repair. Early coating damage is easier to correct before rust travels beneath the film.
Use a bright inspection light and your fingertips to check exposed seams, edges, plug openings, underbody coatings, and accessible cavity areas. Look for blistering, lifting, chips, cracks, dampness, blocked drains, wax loss, or brown staining at seam edges.
Use proper ventilation and PPE whenever you clean or spray repair coatings.
| Checkpoint | What to inspect | Corrective action |
|---|---|---|
| Weld seam | Rust staining, pinholes, lifted coating, cracked sealer | Remove failed material, correct the cause, clean, reprime, reseal, and refinish |
| Panel edge | Chips, exposed steel, peeling paint | Feather the damage and restore the compatible coating system |
| Cavity or access area | Dampness, blocked drains, disturbed wax, missing plugs | Clear drains, correct water entry, restore plugs, and renew protection as required |
| Underbody coating | Stone chips, cuts, lifting, impact damage | Remove loose material and rebuild primer, sealer, chip guard, or undercoating |
Do not follow an automatic once-a-year cavity-wax schedule unless the product or vehicle maker specifies it. Record the repair date, products used, batch information when available, and later inspection findings. That record helps you reproduce the coating system if the area needs future work.
Troubleshoot Coating and Rust Problems
Flash Rust Appears Before Priming
Do not bury new oxidation beneath primer. Remove it with the approved abrasive, clean the surface again, let it dry, and prime it within the coating maker’s permitted preparation window.
Primer Lifts or Peels
Stop adding coats. Remove the failed material to a sound edge and check for oil, wax, silicone, moisture, incompatible etching products, poor sanding, missed recoat windows, or insufficient cure. Rebuild the coating system according to the manufacturer’s instructions.
Seam Sealer Cracks or Pulls Away
Remove loose sealer instead of covering it. Check whether the substrate was clean, whether the sealer was approved for that substrate, and whether the bead was painted or cured correctly. Reprime exposed steel and reapply compatible sealer.
Paint Develops Fisheyes
Oil, silicone, moisture-displacing spray, or cavity-wax overspray may have contaminated the panel. Stop spraying and follow the paint maker’s correction procedure. Do not apply cavity wax until refinishing is complete.
Rust Returns at an Overlap
Inspect for a leaking seam, missing backside protection, a blocked drain, poor weld quality, or corrosion extending beyond the visible repair. The area may need to be opened so unsound metal can be removed and the complete protection system restored.
Common Mistakes That Let Rust Return
Rust often returns because a small preparation or sequencing step was skipped. Common problems include:
- Coating metal before it has cooled or dried fully.
- Priming over flash rust, scale, grinding dust, oil, or silicone.
- Using an etching product without checking compatibility with epoxy primer or seam sealer.
- Leaving an accessible back side of the weld bare.
- Applying seam sealer to bare steel when the product requires primer.
- Using general-purpose caulk instead of approved automotive seam sealer.
- Adding an unapproved continuous weld to seal a joint.
- Applying weld-through primer to every overlap without checking the OEM procedure.
- Applying weld-through primer too heavily or leaving it in a direct weld zone that should be cleaned.
- Using one heavy primer coat instead of the specified film build.
- Applying cavity wax before paint and contaminating the refinish area.
- Failing to restore chip guard or underbody protection.
- Blocking factory drain holes with sealer, undercoating, plugs, or wax.
- Skipping inspection after road salt, impact damage, flooding, or later repair work.
Note: Dry time, induction time, flash time, film build, sanding requirements, and recoat windows vary by product. Follow the technical data sheet instead of using one fixed schedule for every coating.
Frequently Asked Questions
How do you prevent rust after welding?
Let the weld cool, inspect it, remove scale, rust, oil, and dust, then apply a compatible primer to accessible bare steel. Restore seam sealer, paint, chip guard, and underbody coating where required. After refinishing, apply cavity wax inside repaired panels and hidden joints.
What should you spray on welds to prevent rust?
On accessible automotive steel, use the epoxy or direct-to-metal primer approved by the paint system and repair procedure. Use weld-through primer only on approved mating surfaces before welding, and use cavity wax inside hidden sections after refinishing. No single spray replaces the complete coating system.
Can you put WD-40 on metal to prevent rust?
WD-40 Multi-Use Product can displace moisture and provide temporary protection on some bare metal. It does not replace primer, seam sealer, paint, undercoating, or cavity wax. Remove all oily residue with the coating maker’s approved cleaner before sanding, welding, priming, bonding, or painting.
How soon should you prime bare metal after welding?
Prime it as soon as the weld is cool, fully inspected, dry, and prepared according to the coating system. If flash rust develops first, remove it and repeat the cleaning process rather than trapping it beneath primer.
Do you need cavity wax after welding?
Cavity protection is commonly needed when welding disturbs the inside of a rocker, pillar, rail, door shell, quarter panel, hem, lap joint, or another enclosed panel. Apply it after refinishing, using the access points, coat count, and wand method specified by the vehicle and product makers.
Should you use self-etching primer after welding?
Use it only when the selected paint system specifically calls for it. Acidic self-etching products can be incompatible with some epoxy primers and seam sealers, and self-etching primer alone may not provide the barrier required by the repair procedure.
Can you paint directly over weld-through primer?
Do so only when the weld-through-primer and paint-system instructions permit it. Weld-through primer is mainly intended for selected inaccessible mating surfaces. Accessible welds and surrounding bare steel normally need cleaning and the approved post-weld primer and refinish system.
What should you do if rust returns around the weld?
Remove the failed coating and inspect the metal, weld, seam, backside, and drain path. Find and correct the source of moisture or coating failure before repriming. If corrosion has entered an overlap or weakened the panel, open or replace the affected section instead of covering the rust.
Conclusion
Preventing rust after welding requires more than spraying one product over the bead. Finish and inspect the weld, clean accessible metal, apply the correct primer, restore seam sealer and exterior coatings, protect underbody areas, and add cavity wax only after refinishing.
The vehicle maker’s repair procedure and each coating’s technical data sheet should settle any conflict about substrates, weld-through primer, coat count, cure time, or application order. Careful preparation and complete coverage on both visible and hidden surfaces give the repair its best chance of remaining dry, sealed, and corrosion-free.
Sources
- I-CAR: Honda/Acura Corrosion Protection Guidelines — epoxy-primer, seam-sealer, backside-treatment, and cavity-protection guidance.
- I-CAR: Nissan Weld-Through Primer Guidelines — welding-process and mating-surface preparation requirements.
- I-CAR: When to Apply Corrosion Protection During the Repair Process — cavity-wax timing and repair sequencing.
- 3M Collision Repair: Seam Sealers and Coatings — substrate preparation and primer compatibility.
- 3M Collision Repair: Cavity Wax Plus — application timing, internal coverage, and cavity-wand guidance.
- OSHA: Spray Operations Standards — ventilation, flammable-material, eye-protection, and respiratory-protection requirements.


