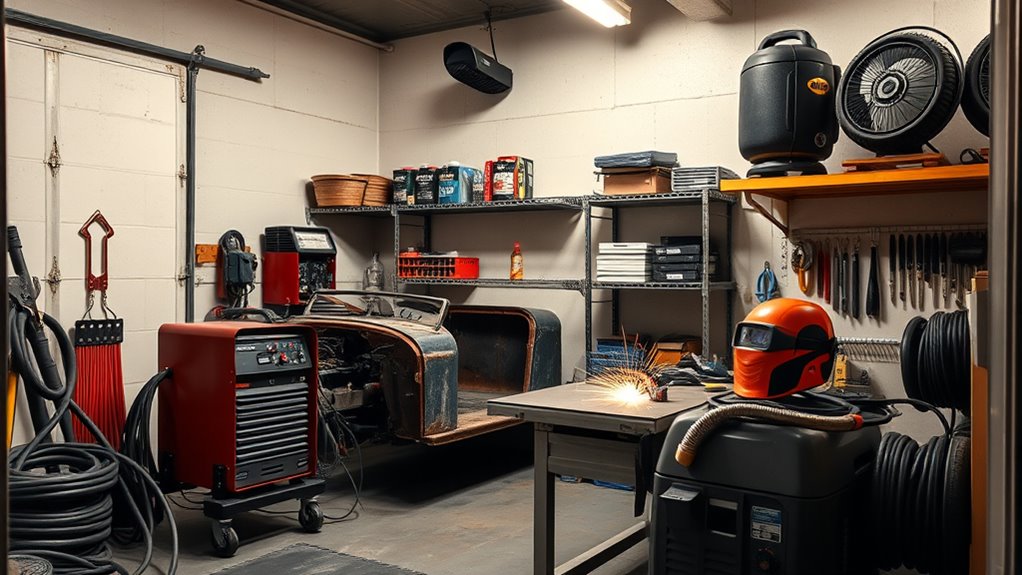
Start by checking your garage layout so you can keep a clear path and fit a compact welding cart, table, and tool storage without crowding the work area. Separate welding and grinding zones by a few feet, verify you’ve got a dedicated 50 amp, 220v circuit, and store cylinders upright away from flammables. Open the garage for ventilation, wear full PPE, and use screens, blankets, and a charged extinguisher to control sparks and hazards as you build a safer shop.
Choose a Garage Welding Setup That Fits Your Space
Before you set up any equipment, assess your garage size to see whether a single-car or two-car layout gives you enough room for safe movement, tool access, and machine placement.
In a tight garage set, choose a portable welding cart so you can roll welding equipment aside and reclaim floor space when you’re not working.
Place the cart where it won’t block access paths, and confirm that your welding area still lets you handle materials without crowding.
If the space is limited, prioritize a compact arrangement over bulky storage.
Keep the layout adaptable so you can shift tools as projects change.
Make sure the garage can support a 50 amp 220v circuit for larger machines before you commit to the final arrangement. Additionally, ensure you have access to a reliable compressed air source for optimal performance of your plasma cutter.
When you plan with precision, you free yourself from clutter, improve control, and build a workspace that supports disciplined, independent fabrication.
Keep ventilation available with an open door or exhaust system.
Products Worth Considering

MULTIFUNCTIONAL USE: Ideal for a wide range of welders such as MIG welders,TIG welders, Stick Welders, plasma cutters, as well as welding tools. This versatile cart is designed for both indoor and outdoor applications, enhancing your welding versatility.
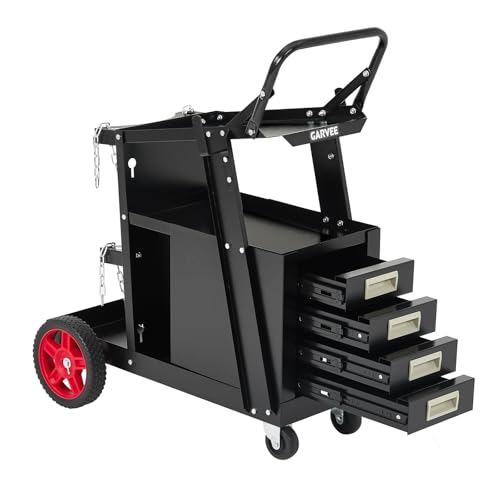
Robust & Durable Construction: Built from high-quality metal with a comprehensive black coating, this welding cart offers superior durability and rust resistance. Featuring a 0.4-inch thick frame, it can safely support loads of up to 220 pounds, ensuring reliable and long-lasting performance even in demanding environments.

✅ Robust Heavy-Duty Construction: Crafted from premium carbon steel with a 1200 lbs load capacity, this welding table delivers exceptional durability and stability. Perfect for professional welding projects in your shop, home, or garage.
Clear Space for Welding and Grinding Zones
You should separate your welding and grinding areas by a few feet so sparks, debris, and dust don’t contaminate the work. Keep the welding zone clear of flammable materials, and place a sturdy metal table near the power source to reduce cable length and trip hazards. Maintain open pathways and store tools in assigned spots so you can move safely and work efficiently. Additionally, ensure you have appropriate PPE readily available to protect yourself while working in these zones.
Separate Work Areas
Set up separate zones for welding and grinding in your garage so each task stays controlled and clean. Assign one area to welding and another to grinding, and keep them isolated to stop debris from moving between tasks.
Use welding blankets or curtains to block sparks and reduce contamination. In the welding zone, place a sturdy, non-flammable welding table for supporting heavy parts.
Keep the grinding zone free of metal shavings and dust so your clean garage stays ready for precision work. Organize clamps, grinders, and consumables within each zone so you can move efficiently without clutter.
Inspect both areas often, remove flammable materials, and keep fire extinguishers within reach. This separation gives you safer, freer control over every build.
Keep Pathways Clear
With your welding and grinding zones already separated, keep the walkways between them open and unobstructed so you can move safely and work without interruption.
You should keep pathways clear of tools, loose cable, scrap, and dust to reduce trip hazards and preserve mobility. Coil welding leads neatly, hang them off the floor, and route power cords along the perimeter so they won’t snag your boots or gloves.
Store grinders, clamps, and filler metal inside their assigned zones, where you can reach them without crossing active work areas.
Inspect the floor before every session and remove flammable debris, rags, and offcuts. A clean garage supports control, and your personal protective equipment works best when you can move freely, respond quickly, and stay focused on the task.
Set Up a Welding Table, Cart, and Clamps
Start by placing a sturdy welding table with a thick metal top in a clean, level area so it won’t warp and can support precise automotive work.
Keep the welding table free of debris, oil, paint, and other flammables so you’re not building risk into the job.
Position your welding cart beside it, then mount the welder so you can roll it where you need it without dragging leads across the floor. A wheeled welding cart keeps your setup organized and lets you work with more freedom.
Use C-clamps to lock panels, brackets, and tubing in alignment before you strike an arc. Tight clamping stops shift, improves joint fit-up, and protects dimensional accuracy.
Add a bench vise to one edge of the table for grinding, cutting, and part shaping.
With the table, cart, C-clamps, and vise arranged for access, you create a controlled workspace that supports clean fabrication and efficient movement.
Products Worth Considering

ROBUST WORKBENCH: Unleash your productivity with this workbench, known as the Klutch Steel Welding Table, which boasts a 4mm thick steel top and a 2mm thick frame. Workbenches like this one can support up to 600 lbs, making it an ideal choice for heavy-duty welding tasks.

BUILT TO LAST: Durable steel construction, powder coated frame and 14 gauge galvanised metal top ensures work bench welding resists wear, corrosion and rust for years to come.

Strong Weight Capacity: Crafted with a sturdy carbon steel frame, the welding table supports up to 800 lbs load-bearing. High-strength frame delivers superior weight capacity, wear and rust prevention, providing stable support for your welding projects.
Plan Safe Power for Your Garage Welder
Check your welder’s outlet type first: smaller units may run on a standard receptacle, but larger machines often need a dedicated 50 amp, 220v circuit.
Have a qualified electrician verify that your garage wiring can handle the load so you don’t trip breakers or overload the circuit.
Keep cords as short as practical and route them safely to reduce voltage drop, cable wear, and electrical hazards. Additionally, confirm breaker and wiring ratings match your welder’s requirements to ensure safe operation.
Outlet Type Needs
Power matters when you set up a garage welder. Check your outlet type needs before you plug in the welding machine. Most small units run on a standard 120V power outlet, but larger models often need a 240V receptacle with a dedicated 50 amp circuit for better output.
Match the plug to the outlet configuration; many look like dryer or oven connectors. Read the welder’s manual, because some machines require a specific outlet or adapter.
Don’t share that circuit with other high-draw tools or appliances. If you need a new outlet, hire a qualified electrician to install it and verify code compliance.
That protects your setup, keeps you independent, and helps you weld safely without unnecessary restrictions.
Circuit Capacity Check
Once you’ve matched the plug and outlet, make certain the circuit can actually carry the welder’s load. Verify circuit capacity first: larger welders often need a dedicated 50 amp, 220v circuit, not a standard household receptacle.
Open your panel and confirm the breakers and feeder wiring can support the extra demand without nuisance trips or electrical hazards. If the math isn’t clear, consult an electrician to evaluate the panel, wiring, and any needed upgrade.
During a test weld, use a voltmeter; if voltage drops more than 10%, improve the connections. Ascertain every welding outlet is grounded properly.
Before you work, check the hoses, then power the machine only after you’ve confirmed the system can deliver stable current and steady, liberated performance.
Safe Cord Routing
Route your welder’s cords along walls or overhead so they stay out of walkways and reduce trip hazards. In garage welding, safe cord routing lets you move freely and keeps electrical hazards in check. Use the shortest practical welding leads for better conductivity and less voltage drop. Match each power cord to the welder’s amperage rating; undersized cord can overheat and ignite. Avoid doorways, pinch points, and sharp edges that can damage insulation and cause failure.
| Check | Action |
|---|---|
| Cord path | Wall-mounted or overhead |
| Cord size | Rated for welder amperage |
| Condition | Inspect before each use |
Inspect cords regularly for cuts, soft spots, or exposed conductors. Replace damaged cables immediately so your workspace stays safe, organized, and ready for independent work.
Store Gas Cylinders and Flammables Safely
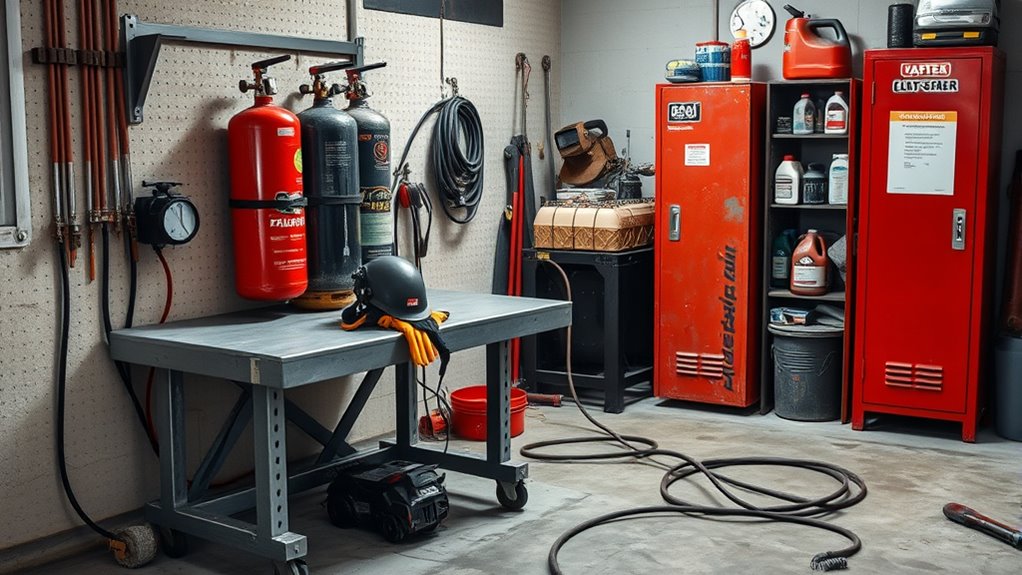
Store gas cylinders upright and secure them with chains or brackets so they can’t tip over and damage the valve.
When you store gas cylinders, keep them in a dedicated area where impacts, heat, and clutter won’t threaten control.
Separate flammable materials such as gasoline, oil, and cardboard by at least 20 feet to reduce ignition risk. Place those flammable materials in metal cabinets or approved containers built for flammable storage, and keep lids closed.
Inspect each cylinder regularly for leaks, rust, or corrosion; if you spot damage, remove the cylinder from service and correct the hazard before welding.
Ensure that all cylinders are labeled clearly to avoid mix-ups and maintain proper ventilation in the storage area.
Keep labels readable so you can identify contents fast. Position a fire extinguisher rated for flammable liquids within easy reach of your welding workspace, and make sure you know how to use it.
Careful storage protects your freedom to work without preventable fire hazards.
Ventilate the Garage Before You Weld
Open the garage door fully before you strike an arc so fresh air can move through the workspace and dilute welding fumes. Keep the garage door open, then add exhaust fans or portable welding aspirators to ventilate the space and pull out toxic gases such as arsenic and lead.
If your garage has windows, open them to create crossflow; if not, use natural ventilation from multiple openings. Aim exhaust vents away from bystanders so you protect others while preserving airflow.
You can also use air blowers to clean lingering smoke from dead zones, but don’t let them recirculate fumes back toward you. Monitor the air and stop work if you feel nausea or dizziness, because those signals mean ventilation isn’t enough. Ensure that you are wearing appropriate PPE for plasma cutting to further enhance safety while you work.
Set up the airflow first, then weld with confidence, control, and the freedom that comes from a clean, breathable workspace.
Gear up With the Right PPE
Before you strike an arc, gear up in flame-resistant clothing, including long-sleeve shirts and pants, to shield your skin from sparks, spatter, and heat.
Choose PPE that lets you move freely while still locking out hazards; liberation starts with protection you can trust.
Choose PPE that moves with you while locking out hazards; freedom on the job starts with trusted protection.
Wear a welding helmet with the correct shade to block UV radiation and intense light, and inspect the lens before each session.
Fit leather welding gloves snugly so you can handle hot parts without burns or cuts.
Put on steel-toed boots to protect your feet from dropped tools, metal, and stray slag.
Check that every item fits properly; loose gear can snag, and tight gear can limit control.
When you dress for the job with purpose, you weld safely and keep your focus on the joint, not on avoidable injuries.
Reliable PPE turns a risky task into disciplined work, ensuring you’re protected against toxic fumes and UV radiation.
Use Screens, Blankets, and Fire Protection
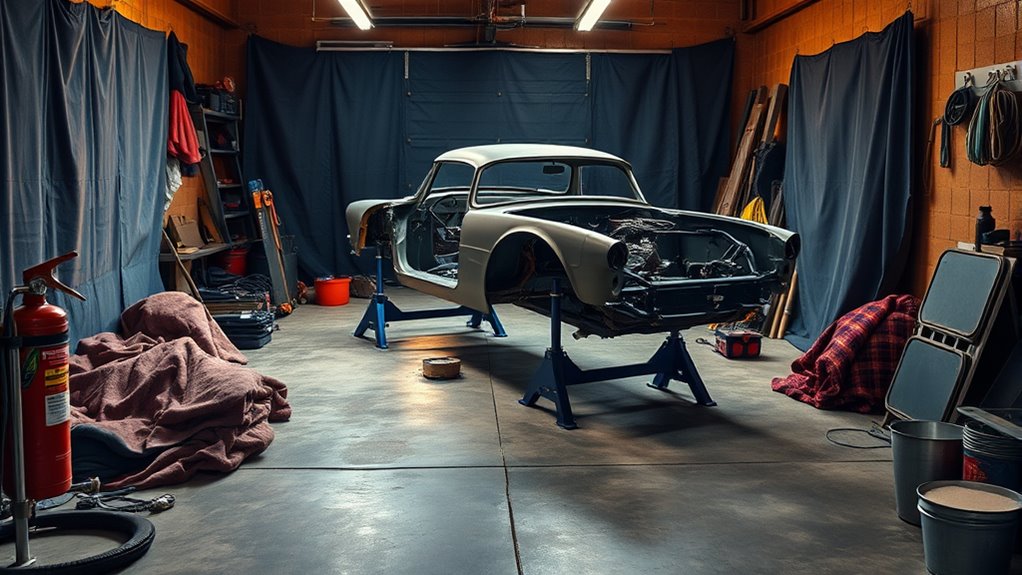
Set up welding screens or curtains around your work area to shield bystanders from sparks and UV radiation while still allowing airflow and visibility.
Position welding screens to define a dedicated zone, contain debris, and keep your workspace open enough to move freely.
Drape flame-resistant blankets over flammable materials, exposed hoses, or equipment such as a gas boiler to block stray heat and spatter.
Before you strike an arc, clear the floor and benches of combustibles, then recheck the area after each pass.
Keep a fire extinguisher within easy reach, fully charged, and rated for metal fires; a Class D unit is the right choice when you’re welding reactive metals.
Inspect screens, curtains, and blankets for damage before every job.
Additionally, ensure your welding area is equipped with essential safety gear to further minimize risks associated with sparks and heat.
When you control sparks, isolate hazards, and maintain ready fire protection, you reclaim your garage as a safer, more capable shop.
Frequently Asked Questions
Can You Weld in a Home Garage?
Yes, you can weld in a home garage if you control fumes, fire risks, and codes. You’ll need welding equipment, safety gear, and smart garage organization to protect yourself and work efficiently.
How to Ventilate a Garage for Welding?
Open doors and windows, then run exhaust systems or a fume extractor to keep air circulation steady. For welding safety, aim for 4–6 air changes hourly, use screens, and monitor gases with a detector.
Can You Make $100,000 a Year Welding?
Yes—you can make $100,000 a year welding if you target specialized welding career paths, build certifications, and pursue freelance opportunities. You’ll maximize income potential by working high-demand regions, mastering high-value processes, and charging premium rates.
Is It Illegal to Weld in Your Garage?
No, you usually can weld in your garage, but you’ve got to check local welding permits, follow safety regulations, and verify insurance requirements. Your municipality, HOA, and code office can restrict or penalize noncompliance.
Conclusion
Once you’ve carved out a clean welding zone, wired reliable power, and tucked cylinders and flammables where they can’t ruin your day, your garage finally starts behaving like a workshop instead of a cautionary tale. Keep the air moving, wear your PPE, and let screens and blankets catch the sparks you don’t. When you set it up right, the most ordinary room in your house turns into a controlled fire scene—minus the emergency call.


