How to Size a Shielding Gas Regulator for MIG Welding
What’s in This Article
- What CFH Does MIG Welding Need?
- How to Match Your Regulator to the Gas
- Flowmeter or Regulator: Which Is Better for MIG?
- How to Set MIG Gas Flow Correctly
- What Changes MIG Gas Flow Outdoors?
- What Regulator Size Do You Need?
- Why Stable Gas Flow Matters
- How to Check for Gas Leaks
- How to Reduce Spatter With Better Flow
- When to Increase CFH for MIG Welding
- Frequently Asked Questions
- Conclusion
Wrong gas flow can make a good MIG setup act like a bad one. Porosity, spatter, and unstable beads often start at the regulator, hose, or flowmeter. To size a shielding gas regulator for MIG welding, match the regulator’s gas type, outlet pressure, fittings, and flow range to your usual welding conditions. The right setup gives you steady shielding, less wasted gas, and cleaner welds.
Quick Answer
Choose a MIG shielding gas regulator or flowmeter that matches your gas, cylinder fitting, hose connection, and normal CFH range. Most indoor MIG work uses about 15 to 30 CFH, while outdoor or drafty work may need about 35 to 40 CFH. Read flow while you hold the gun trigger, then check the bead for porosity, spatter, and stable coverage.
Key Takeaways
- Match the regulator to your shielding gas, cylinder fitting, hose size, and working flow range.
- Use about 15 to 30 CFH indoors, then raise flow only when drafts affect shielding.
- Check flow with the MIG gun trigger held, because idle readings can mislead you.
- Use a flowmeter when you want a clearer reading of actual gas delivery.
- Leak-check every gas connection before welding, especially in confined spaces.
Estimated total time: 10 to 15 minutes for selection checks, setup, flow adjustment, and leak testing.
What CFH Does MIG Welding Need?
How much shielding gas does MIG welding need? You’ll usually set MIG flow between 15 and 30 CFH indoors. Many welders start near 20 to 25 CFH, then adjust from bead quality and work conditions.
That indoor range protects the puddle without wasting gas or causing turbulence. If you weld outside, wind can strip coverage from the weld area. You may need 35 to 40 CFH to help keep contaminants away from the arc.
Don’t guess the setting. Press the trigger while you adjust, because static readings can mislead you. Then watch how cup size, stickout, and airflow change the result.
You’re not trying to use more gas than needed. You’re tuning flow to the job so you can weld with control, quality, and less waste. Aiming for 20-30 CFH as a baseline can help you set a practical starting point.
Before You Begin
Check your gas setup before you choose or adjust a regulator. A few simple checks help you avoid poor shielding, damaged threads, and unsafe leaks.
- Confirm your shielding gas type, such as CO2, argon, or an argon and CO2 blend.
- Check the cylinder valve connection and the required Compressed Gas Association (CGA) fitting.
- Inspect the hose, outlet fitting, and clamps for wear, cracks, or loose parts.
- Use a flowmeter or regulator-flowmeter when you need accurate CFH readings.
- Keep a soap solution ready so you can check every gas connection for leaks.
Warning: Never force a regulator onto a cylinder valve, because mismatched fittings can leak or damage threads.
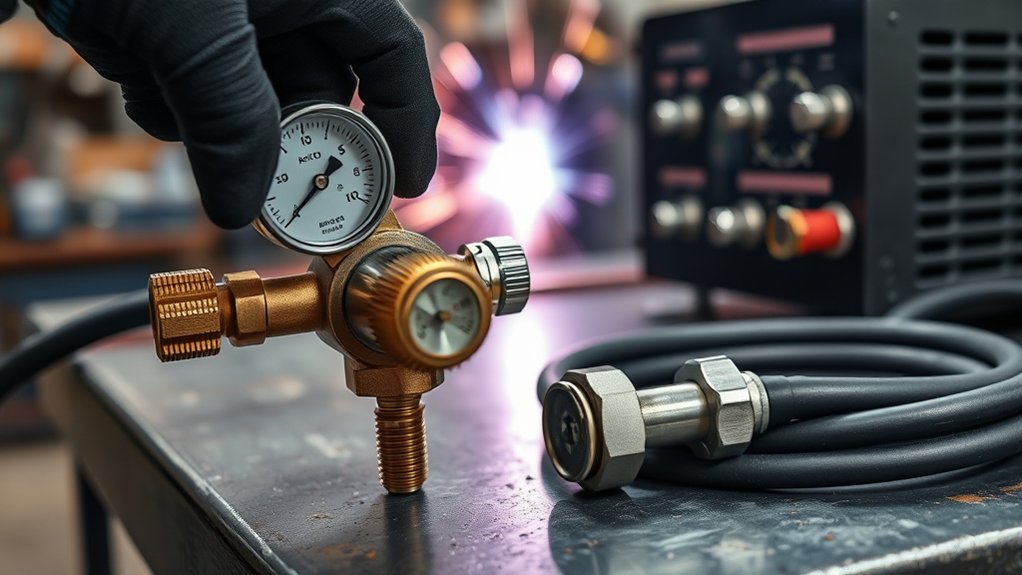
How to Match Your Regulator to the Gas
You need a regulator that matches the shielding gas you’re using. CO2, argon, and mixed gases can use different fittings and flow behavior. Set the flow range to your application, usually 15 to 30 CFH for indoor MIG welding and higher for drafty work.
Verify the cylinder fittings, calibration, and safety features, including pressure relief. Those checks help the regulator operate safely with your gas. You can also use tools like the Peashooter flow meter to check gas flow during setup.
Products Worth Considering

Compatible with CGA-580 tanks: Easily attach this Gas Pressure Regulator/Flowmeter to your Argon, Helium, and CO2 tanks with its CGA-580 inlet connector

APPLICATION: The ARCCAPTAIN gas pressure regulator can be used with argon, helium, and carbon dioxide gas tanks.

WIDE APPLICATION: It easily connects to Argon, Helium, and Argon/CO₂ mixed gas tanks via the CGA-580 inlet nut. No additional adapters are required. Featuring superior airtight and leak-proof performance, it achieves stable and sealed gas supply with minimal gas loss. This regulator is ideal for MIG/TIG welding, chemical processing, general industrial use, and electronics industry applications.
Gas Type Compatibility
Gas compatibility comes first when you size a shielding gas regulator for MIG welding. Argon, CO2, and mixed gases need the right fittings, pressure ratings, and internal parts. A mismatch can hurt performance and create a leak risk.
Check that the regulator suits your chosen gas before you connect it. Verify the manufacturer’s pressure specs so the unit can handle the cylinder and the delivery range. Match inlet and outlet fittings to the cylinder valve and hose connection, because the correct mechanical fit keeps the system sealed.
Correct Flow Range
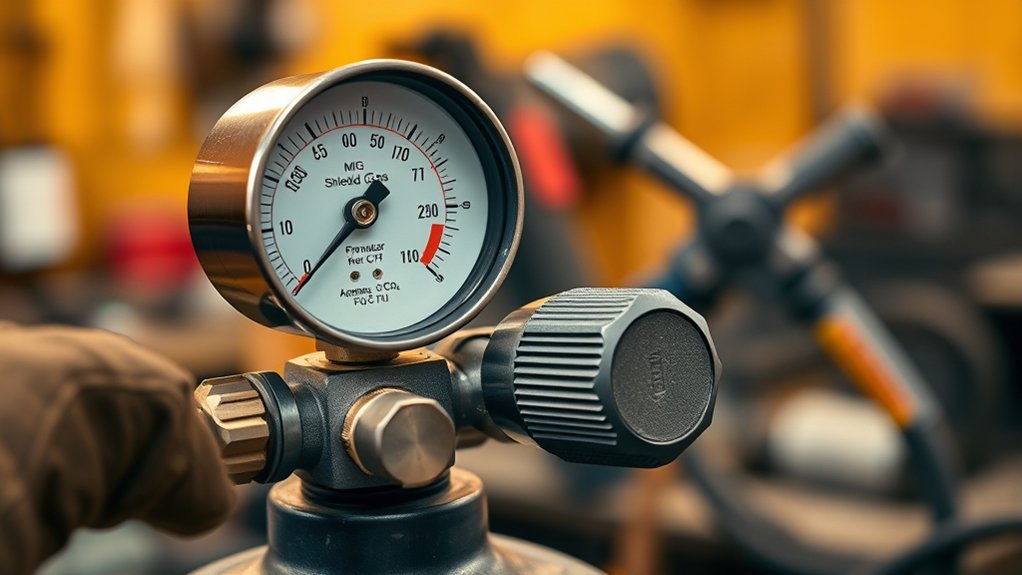
Correct flow range comes next because the regulator has to deliver the gas volume your setup needs. Match gas flow rates to the work environment, not the cylinder size alone. Indoors, 15 to 30 CFH usually covers most general MIG work.
Outdoors, wind can push you toward 35 to 40 CFH. In metric terms, 25 to 30 CFH equals about 12 to 14 L/min, while 35 to 40 CFH equals about 16 to 19 L/min. Press the MIG gun trigger while reading flow, so you measure real delivery, not idle pressure.
A flowmeter gives you a more exact reading than a pressure-only regulator. That precision lets you weld with less waste, more control, and fewer trial-and-error changes.
Fitting and Safety
Once you’ve matched the regulator to the flow range, check fit and gas compatibility. You need a regulator whose fitting matches the gas you’re running. Argon, CO2, and blends can use different CGA-approved connectors and pressure settings.
Don’t force a mismatched fitting. That can damage threads, cause leaks, and create unsafe pressure behavior. Verify the regulator’s pressure rating and use a model that matches your welding duty.
Choose a heavy-duty model for high-demand work or a light-duty unit for occasional welding. Inspect every fitting, nut, and seal before use. Wear, cracks, or dirt can create leaks, and even inert gas leaks can reduce oxygen in tight spaces.
Flowmeter or Regulator: Which Is Better for MIG?
For MIG welding, a regulator-flowmeter setup usually gives you the best control. The regulator controls pressure from the cylinder, while the flowmeter shows actual shielding gas flow. That matters because MIG weld quality depends on steady gas delivery.
A pressure regulator alone holds pressure steady, but it doesn’t always show true flow at the torch. A rotameter-style flowmeter lets you read and adjust gas volume quickly. That helps when wind, hose length, or worksite conditions change.
A regulator still matters because it controls inlet and outlet pressure and protects the system. If you want accuracy, pair both devices so you control pressure and measure flow with confidence. Proper shielding gas flow also helps you reduce waste and keep weld quality steady.
Products Worth Considering

Brand New BETOOLL Argon / CO2 regulator and flow meter.

Application: This Gas Pressure Regulator/Flowmeter Can Be Used with Argon, Helium and CO2 Gas tanks

WIDE APPLICATION: It easily connects to Argon, Helium, and Argon/CO₂ mixed gas tanks via the CGA-580 inlet nut. No additional adapters are required. Featuring superior airtight and leak-proof performance, it achieves stable and sealed gas supply with minimal gas loss. This regulator is ideal for MIG/TIG welding, chemical processing, general industrial use, and electronics industry applications.
How to Set MIG Gas Flow Correctly
With a flowmeter in place, you can set MIG gas flow by reading actual output. Follow these steps to size and adjust your setup with more confidence.
- Confirm the gas type. Match the regulator to CO2, argon, or your argon and CO2 blend.
- Check the fittings. Make sure the cylinder inlet and hose outlet match before you tighten anything.
- Open the cylinder slowly. Watch the high-pressure gauge and stand away from the regulator face.
- Hold the MIG gun trigger. Read flow while gas moves through the system.
- Set your starting flow. Start around 20 to 25 CFH indoors, then adjust from the bead.
- Change flow in small steps. Raise or lower the setting only a little each time.
- Check the weld result. Watch for smooth shielding, stable arc sound, and no porosity.
For CO2, start around 16 to 20 CFH and make small changes. In exposed work, you may need 35 to 40 CFH. Trust weld appearance and sound, not guesswork.
- Read flow with the trigger held.
- Change one increment at a time.
- Watch for smooth shielding and no porosity.
- Match flow to bead quality.
- Use the flowmeter to keep control.
This method gives you disciplined, measurable shielding and frees you from vague regulator settings. Maintaining proper gas purity levels can also support better welding quality.
Pro tip: If your bead improves when you shield the work from drafts, airflow caused the problem, not the regulator size.
What Changes MIG Gas Flow Outdoors?
Outdoors, wind is the main variable that changes MIG gas flow. You usually need to increase flow to keep the shielding envelope intact. You’ll often run 35 to 40 CFH, or about 16 to 19 L/min, to protect the weld pool from oxygen and other contaminants.
Wind speed and direction matter because they disperse shielding gas unevenly. Watch for oxidation, porosity, and an unstable bead, then adjust flow as conditions shift. If the breeze turns turbulent, a larger torch shroud can help focus coverage and reduce gas loss.
You can also build a simple shelter with cardboard or plywood sheets to block direct airflow. That gives you more consistent gas flow and less waste. Tracking gas consumption can also help you avoid shortages during outdoor welding projects.
What Regulator Size Do You Need?
Windy conditions change your gas demand, so the regulator has to match both the process and the environment. Choose regulator size by matching the required delivery range. For MIG work, make sure the unit can cover your normal indoor setting and still allow enough range for drafts.
If you weld in open air, target 35 to 40 CFH when wind steals shielding. Select a unit compatible with argon, CO2, or mixed gas. Verify cylinder pressure rating before you connect the regulator.
- Match regulator size to your normal MIG flow.
- Add margin for outdoor drafts and exposure.
- Confirm gas compatibility before installation.
- Choose single-stage for simplicity and two-stage for tighter control.
- Check cylinder pressure limits before service.
A properly sized regulator gives you steady output without constant adjustment. Two-stage models can reduce pressure creep and repeated tuning. Single-stage units still work for many welding jobs, but they may need more attention as cylinder pressure drops.
Understanding the maximum fillet weld size can also help you keep welding work within practical size limits.
Why Stable Gas Flow Matters
Stable gas flow matters because it keeps a consistent shielding atmosphere over the weld pool. That helps you avoid oxygen contamination, porosity, and weak bead formation. When you hold gas flow steady, the arc gets the environment it needs for clean fusion.
Indoors, you’ll often target 15 to 30 CFH. Outdoors, wind can force you up to 35 to 40 CFH to preserve coverage. If gas flow fluctuates, you may see excessive spatter or a rough bead surface.
For accurate control, use a flowmeter, not only a pressure gauge. It measures gas delivery with more practical detail. Proper ventilation also helps reduce the risk of harmful welding fumes.
How to Check for Gas Leaks
Before you strike an arc, inspect every gas-carrying connection, including the regulator, hose, and fittings. You can’t trust gas pressure readings alone. Verify the system physically before you weld.
Mix a soap solution and brush it onto each joint. Then watch for bubbles that mark escaping gas. Examine the regulator body, hose crimps, and threaded fittings with care.
If you see damage, cracks, or abrasion, replace the part before welding. Keep the cylinder valve closed whenever you’re not using the system. An open valve can release gas unnoticed, especially in confined spaces where inert shielding gas can displace oxygen.
Proper ventilation can also reduce risks linked to gas leaks.
Inspect every gas connection for leaks with soap solution before welding; replace damaged parts and close the cylinder valve.
- Check the regulator inlet seal.
- Inspect the hose for cuts.
- Test each fitting with soap solution.
- Watch for bubbles under operating gas pressure.
- Close the cylinder valve after use.
How to Reduce Spatter With Better Flow
You’ll reduce spatter by keeping flow in the 15 to 30 CFH range for a 75% argon and 25% CO2 mix. If flow runs too high, trim it back in small steps and watch the bead. Excess flow can create turbulence, pull in atmospheric oxygen, and raise spatter risk.
You should also keep stickout under 1/2 inch and match wire feed to travel speed. That keeps the arc stable and the gas shield effective. Maintaining a proper gas flow rate can also help reduce weld defects.
Cut Back on Excess Flow
Excess shielding gas can drive spatter up, especially when flow creates turbulence around the nozzle. Dial it back in small steps toward the lowest setting that still protects the puddle. Your gas flow should shield the weld, not disturb it.
- Lower CFH in small increments.
- Track bead consistency after each change.
- Keep shielding coverage stable.
- Watch for reduced droplet scatter.
- Stop when spatter drops and protection holds.
If spatter persists, verify your setup and align wire feed speed with travel speed. Fine-tuning gives you control, cuts waste, and helps you weld with precision.
Balance Travel and Stickout
Match your travel speed to your wire feed rate so the weld pool stays smooth. An uneven pace can increase spatter and destabilize the arc. Keep your stickout between 1/4 and 1/2 inch.
Longer stickout weakens gas coverage, raises resistance, and invites erratic transfer. Set your gun angle about 15 to 20 degrees in the direction of travel. Then tune gas flow conservatively, starting around 15 to 20 CFH for CO2 or 15 to 30 CFH for a 75% argon and 25% CO2 mix.
When to Increase CFH for MIG Welding
Increase CFH when wind, drafts, larger wire, or a wider weld area threatens adequate shielding coverage. Treat CFH as a control variable, not a fixed number. For small, sheltered welds, 15 to 20 CFH may hold.
For larger projects or .030 to .035 wire, start in the normal indoor range and increase only when the bead shows poor shielding. In drafty bays, 35 to 40 CFH can help reduce gas loss and stabilize coverage. Use proper health precautions when welding galvanized steel because zinc fumes can be harmful.
Treat CFH as a control variable, and raise it when wind or draft threatens shielding and weld quality.
- Wind or drafts: increase CFH in small steps.
- Porosity: check for low flow, leaks, or poor nozzle coverage.
- Larger wire: give the weld area enough coverage.
- 75/25 mix: start around 15 to 30 CFH indoors.
- Breezy work: block airflow before you keep raising flow.
You’re not chasing numbers. You’re protecting clean fusion. Watch the bead, listen for a crisp arc, and let contamination signs guide your adjustments.
Common Mistakes When Sizing a MIG Gas Regulator
Many gas-flow problems come from simple setup mistakes. Avoid these issues before you blame the welder, wire, or gas cylinder.
- Choosing a regulator by cylinder size instead of flow range and gas type.
- Using a pressure gauge reading as if it proves actual CFH at the torch.
- Forcing a fitting that does not match the cylinder valve.
- Raising flow too high instead of blocking wind or fixing leaks.
- Skipping leak checks after changing cylinders, hoses, or fittings.
Note: A bigger regulator does not fix poor shielding if wind, leaks, or wrong stickout cause the problem.
Frequently Asked Questions
How Do I Know What Size Gas Regulator I Need?
You need a regulator that matches your gas type, cylinder fitting, hose connection, and working flow range. For most MIG work, choose a regulator or flowmeter that can deliver stable flow across the 15 to 40 CFH range.
What Should the Gas Regulator Be Set at for MIG Welding?
Start around 20 to 25 CFH indoors, then adjust from bead quality and conditions. Raise the setting for drafts or outdoor work, but avoid excessive flow that creates turbulence.
Is a Flowmeter Better Than a Pressure Regulator for MIG?
A flowmeter gives you a clearer view of actual shielding gas delivery. A regulator still controls cylinder pressure, so a regulator-flowmeter combination gives you the best practical setup.
Can Too Much MIG Gas Flow Cause Spatter?
Yes, too much flow can create turbulence near the nozzle. That turbulence can pull air into the shielding zone and make spatter or porosity worse.
Should I Increase Gas Flow Outdoors?
You may need to increase flow outdoors, especially when wind or drafts disturb the shielding gas. Block the wind first when possible, then raise CFH in small steps.
Conclusion
Sizing your shielding gas regulator for MIG welding starts with matching delivery to your actual CFH needs. Choose a regulator that fits your gas, cylinder, hose, and normal work conditions. Then set flow with the trigger held and confirm the result by checking the bead.
If you weld indoors, start near the middle of the normal range and adjust carefully. If you weld outdoors, control wind before you raise flow too high. Stable gas flow gives you cleaner welds, less waste, and a setup you can trust.


