What’s in This Article
- Understanding Vertical Welding Basics
- Key Tools and Materials Needed for Vertical Welding
- Prepare Your Workspace for Successful Vertical Welding
- Pick the Best Welding Method for Your Vertical Joints
- Step-by-Step Guide to Vertical Welding Techniques
- Overcoming Common Vertical Welding Challenges
- Troubleshooting Vertical Welding Techniques
- Frequently Asked Questions
- Conclusion
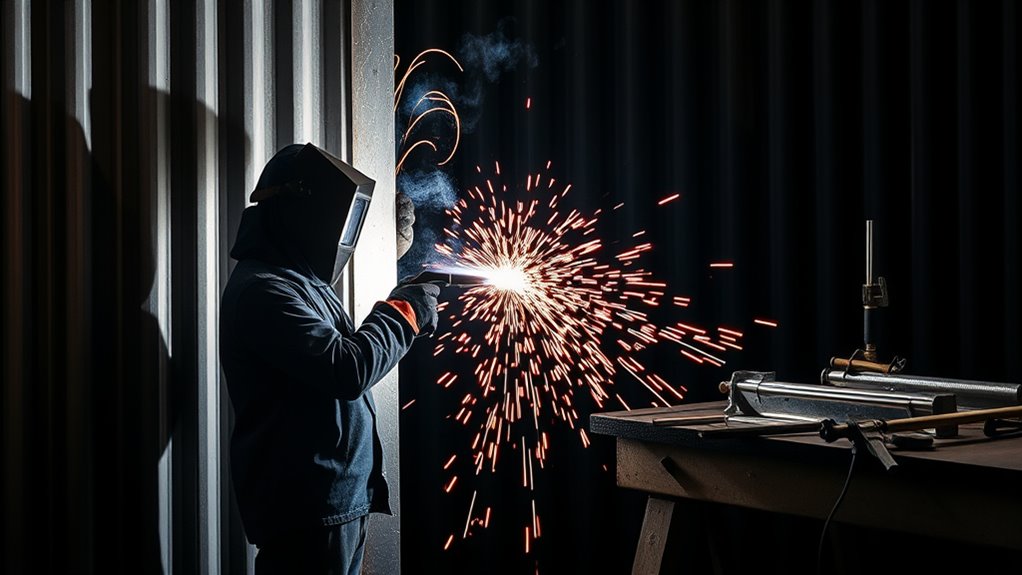
Vertical welding can turn a simple joint into a real test of control. Gravity pulls the molten weld pool down, so you need the right setup, angle, heat, and travel speed. This guide shows you how to weld in the vertical position with safer prep, cleaner technique, and fewer common defects.
Quick Answer
To weld in the vertical position, clean and secure the joint first, then choose vertical up for stronger penetration or vertical down for faster light work. Use a short arc, lower heat, steady travel speed, and small weaving movements to control the weld pool. Keep your safety gear on and watch the puddle at all times.
Key Takeaways
- Clean metal, tight fit-up, and firm clamping help you control vertical welds.
- Vertical up usually gives stronger penetration, while vertical down works better for fast, light welds.
- A short arc and lower heat help reduce sagging, dripping, and undercut.
- Small zig-zag, triangle, or reverse V patterns help support the molten weld pool.
- Good ventilation, flame-resistant clothing, gloves, boots, and eye protection are essential.
Estimated time: Basic setup and practice can take 30 to 60 minutes, depending on your skill level and joint size.
Understanding Vertical Welding Basics
When you weld vertically, gravity changes how the molten weld pool behaves. The puddle wants to sag or drip before it freezes. Your job is to keep that puddle small, steady, and supported.
Good preparation starts with surface cleaning. Remove paint, rust, oil, mill scale, and dirt before you strike an arc. Clean metal lowers the risk of porosity, slag inclusions, and weak fusion.
Clean surfaces help you reduce weld defects and give the weld metal a better bond.
Next, choose the right direction. Use vertical up, also called uphill welding, when you need stronger penetration. Use vertical down, also called downhill welding, when you need speed on thinner material and less penetration.
Select the right electrode or wire for your welding process. For stick welding, AWS 7018 and E6010 electrodes can work well when your machine settings and technique match the joint. Proper fillet weld sizing also helps the joint handle the load it will face.
With the right preparation and method, you can make vertical welds that look cleaner and hold better. Start slow, watch the puddle, and adjust one setting at a time.
Key Tools and Materials Needed for Vertical Welding
To weld vertically, you need tools that help you hold the joint steady and control heat. Start with a reliable welding machine, the correct electrode or wire, and proper safety gear. Keep clamps and cleaning supplies nearby so you can work without stopping often.
Wearing flame-resistant clothing helps protect you from sparks, hot slag, and heat during the welding process.
Products Worth Considering

INCLUDES: (2) Vertical handle toggle clamp (12130)

【High Quality Materials】The main body of the cast iron welders angle clamp is made of high-quality cast iron and steel materials, with high tensile strength and more durable characteristics. The surface of the welding table clamp is sprayed with plastic to prevent rust and corrosion.

SPECIFICATIONS: This Antislip Vertical Toggle Clamp Delivers 396 Lbs Holding Capacity, 3/4" × 1-2/9" Mounting Hole Spacing, and Handle Opens 60°, Designed Specifically for Welding, Drilling, and Metalworking Applications
Key Tools for Vertical Welding
Vertical welding requires a focused set of tools. You need a welding machine that matches your process, such as stick welding, metal inert gas (MIG) welding, or flux-core welding.
For stick welding, choose fast-freezing electrodes and filler rods when the joint calls for them. AWS 7018 and E6010 can help you control the puddle when you use the right settings.
Use personal protective equipment (PPE) every time you weld. Your setup should include a welding helmet, gloves, flame-resistant clothing, and sturdy safety footwear.
Clamping tools help keep the workpieces from moving. Use wire brushes, angle grinders, and measuring tools for cleaning, finishing, and alignment.
Essential Materials Required
Quality vertical welds depend on the right materials as much as the right tools. Use the table below as a simple checklist before you start.
| Material | Purpose | Notes |
|---|---|---|
| Welding Machine | Powers your welding process | Adjust settings for the material |
| Electrodes or Filler Wire | Fuses with the base metal | Choose compatible types for vertical |
| Personal Protective Equipment (PPE) | Protects against hazards | Includes helmet, gloves, and clothing |
You also need clamps to secure your workpieces and cleaning materials to prepare the joint. Proper cleaning improves weld quality and helps create a stronger bond.
Safety Equipment Necessities
Before you weld, check your safety equipment. Vertical welding can drop sparks and hot metal faster than flat welding.
- Wear a welding helmet: Use a proper helmet to protect your eyes and face from arc light and sparks.
- Wear protective clothing: Use flame-resistant long sleeves and pants to protect against heat and molten metal.
- Use welding gloves: Choose leather or heat-resistant gloves that still let you control the electrode or gun.
- Control fumes: Use ventilation, a fume extractor, or respiratory protection when the job requires it.
Wear steel-toed safety boots for extra foot protection and support. Keep exposed skin covered to reduce burn risk.
Warning: Welding fumes, arc rays, sparks, and hot metal can injure you, so use proper protection and ventilation.
Prepare Your Workspace for Successful Vertical Welding
To prepare your workspace for vertical welding, start with proper ventilation. Then place your tools within easy reach, secure the workpiece, and remove fire hazards from the area.
Make sure you have your essential personal protective equipment ready before you strike an arc.
Proper Ventilation Setup
Proper ventilation helps protect your lungs and improves your work area. Welding can create fumes and gases, especially on coated, painted, or dirty metal.
- Use exhaust fans or local exhaust ventilation to pull fumes away from your breathing zone.
- Place your welding station near safe airflow when the job site allows it.
- Use portable air filters or fume extraction in tight spaces when needed.
- Wear suitable personal protective equipment (PPE) when ventilation alone does not control exposure.
Organize Your Tools
A well-organized workspace helps you weld with fewer stops and mistakes. Gather your welding machine, electrodes such as E7018 or E6010, and your PPE.
Clear debris and flammable materials from the work area. Secure the workpiece with clamps or magnets so it does not shift during welding.
Keep a fire extinguisher within reach and know how to use it. Before you start, check your machine settings, including amperage, voltage, and wire feed speed, based on the process and material thickness.
Ensure Safety Equipment
Safety equipment should come before arc time. Protect yourself and nearby people with these steps.
- Wear personal protective equipment (PPE): Use a welding helmet, flame-resistant clothing, gloves, and safety boots.
- Improve ventilation: Keep fumes and gases moving away from your breathing area.
- Keep a fire extinguisher nearby: Remove or cover flammable materials near your welding area.
- Use a welding curtain or screen: Protect nearby people from arc flash and sparks.
Pick the Best Welding Method for Your Vertical Joints

Choosing the right welding method for your vertical joints can affect bead shape, penetration, and control. Stick welding (SMAW) and MIG welding (GMAW) often work well for vertical joints when you set them up correctly.
Stick welding with AWS 7018 electrodes can give you good control and penetration. If you use MIG, lower voltage and wire feed speed in small steps until the puddle stays stable.
Stick welding often gives strong vertical control, while MIG welding needs careful heat and wire-feed adjustment.
Weaving patterns can help you support the molten metal. With stick welding, try a small zig-zag motion. With MIG, try a triangle or reverse V pattern.
These movements help spread heat and build a small weld shelf. Proper stick-out length also helps you keep a stable arc and a cleaner bead.
Match your electrode choice, travel speed, and heat to the method. Small adjustments can improve puddle control and reduce defects.
Products Worth Considering

MODEL: E6013 is a mild-steel general purpose rod. It operates on AC or DC welding current and works well on low voltage AC machines.

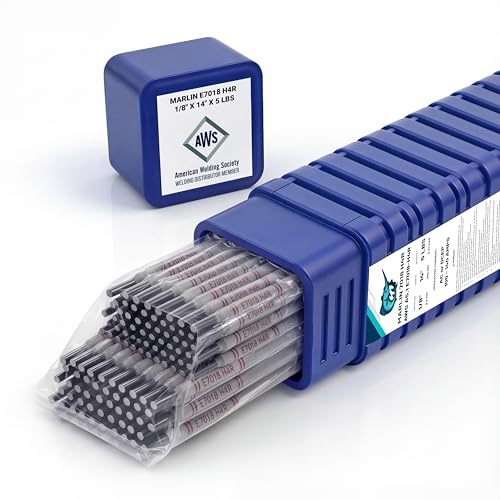
【 AWS-COMPLIANT E7018 LOW-HYDROGEN ELECTRODES 】: Metal Marlin H4R provides premium quality, low-hydrogen, arc welding carbon steel stick electrodes that ensure strong, reliable welds for all projects, ensuring strong and reliable welds with low hydrogen content, conforming to AWS A5.1 E7018 and ASME SFA-5.1 E7018 requirements.
Step-by-Step Guide to Vertical Welding Techniques
Vertical welding becomes easier when you follow a clear order. Use these steps as a basic guide for a vertical-up weld.
- Prepare the joint: Clean the surfaces and remove contaminants that can weaken weld quality.
- Secure the workpiece: Clamp both pieces so the joint stays aligned while you weld.
- Select your electrode or wire: Choose a type that matches your process, base metal, and vertical position.
- Set lower heat: Start with a controlled setting, then adjust amperage, voltage, or wire feed as needed.
- Hold the right angle: Keep a 10 to 15-degree upward angle to help control the weld pool.
- Use a short arc: Keep the arc tight so the puddle does not grow too large or run down.
- Use small weaving motions: Try zig-zag or triangular patterns to build a stable weld shelf. Be careful with zinc fumes when welding galvanized steel, as they can harm your health and affect weld quality.
- Inspect and clean the weld: Remove slag when needed and check for undercut, gaps, porosity, or poor fusion.
Watch the weld pool through the whole pass. Adjust your travel speed and heat if the puddle sags, drips, or becomes too wide.
Pro tip: Practice on scrap metal in the same position before you weld the final joint.
Overcoming Common Vertical Welding Challenges
Mastering vertical welding techniques takes more than knowing the steps. You also need to solve the problems that appear when gravity pulls on the molten weld pool.
Use low amperage settings and a short arc to reduce sagging and dripping. Keep the puddle small enough to control, but hot enough to fuse both sides of the joint.
Watch the puddle often. If you see spatter, undercut, or a wide bead, slow down, reduce heat, or tighten your arc.
Fast-freezing electrodes like AWS 7018 or 6010 can help with puddle control in stick welding. Choosing the right amperage range can also improve arc stability and weld quality.
Use weaving techniques, such as small zig-zag patterns, to create support for each new layer of weld metal. Keep your travel speed steady so lower layers can solidify before you move too far.
Troubleshooting Vertical Welding Techniques
When you troubleshoot vertical welding, focus on the weld pool first. The puddle often shows the problem before the finished bead does.
- Fix sagging: Lower heat, shorten the arc, and move slightly faster.
- Fix undercut: Pause briefly at each side of the joint and avoid moving too fast.
- Fix poor penetration: Use vertical up, improve joint prep, and adjust heat in small steps.
- Fix excess spatter: Check arc length, wire speed, polarity, and surface cleanliness.
- Fix slag inclusions: Clean between passes and avoid trapping slag under the next bead.
For vertical welding, proper joint preparation helps you create strong and consistent welds. Good fit-up reduces gaps, uneven heat, and weak fusion.
Hold your electrode or gun at a 10 to 15-degree upward angle for vertical-up welding. That angle helps you push heat into the joint while keeping the puddle under control.
Frequently Asked Questions
What Is the Best Way to Do a Vertical Weld?
The best way to make a strong vertical weld is to use clean metal, a secure joint, lower heat, and a short arc. Start from the bottom for vertical-up welding when you need better penetration and strength.
What Is the Vertical Position of Welding?
The vertical position means the weld joint runs up and down instead of lying flat. You must control heat, travel speed, and puddle size because gravity pulls the molten metal downward.
When Welding Vertically, Do You Start From the Top or Bottom?
For stronger vertical-up welds, start from the bottom and move upward. For thinner material or faster light work, vertical-down welding may start from the top, but it usually gives less penetration.
What Is the Hardest Position to Weld In?
Vertical welding can feel harder than flat welding because gravity works against the puddle. Overhead welding can also be difficult, so the hardest position often depends on the joint, process, and welder skill.
Why Does My Vertical Weld Sag?
Your vertical weld may sag because the puddle is too hot, too large, or moving too slowly. Lower your amperage or voltage, shorten the arc, and use smaller weaving motions.
Conclusion
Strong vertical welding comes from clean prep, steady heat, and tight puddle control. Start with safe gear, secure the joint, and choose the welding direction that fits your material and strength needs. Practice small beads on scrap metal before you weld an important joint. Each pass gives you a chance to improve your angle, speed, and control.


