What’s in This Article
- What You’ll Need to Weld a Muffler
- How to Prep a Muffler and Exhaust Pipe
- Best Tools for Muffler Welding
- How to Weld a Muffler in Tight Spaces
- Steps to Weld a Muffler to an Exhaust Pipe
- How to Prevent Burn-Through on Thin Exhaust Metal
- How to Test Muffler Welds for Leaks
- How to Seal and Protect Exhaust Welds
- Common Muffler Welding Mistakes to Avoid
- Frequently Asked Questions
- Conclusion
A muffler weld can fail fast if you trap rust, overheat thin steel, or miss a small leak. Clean both the muffler and exhaust pipe to bare metal, bevel the edges slightly, and mark the final alignment before welding. This guide shows you how to prep, weld, test, and protect the joint so the exhaust stays quiet and secure.
Quick Answer
To weld a muffler to an exhaust pipe, clean both parts to bare metal, bevel the edges, clamp the joint in line, and use short metal inert gas (MIG) stitch welds. Keep heat low so you don’t burn through thin exhaust steel. After the weld cools, check for pinholes and leaks before you seal or paint the repair.
Key Takeaways
- Clean rust, paint, oil, and dirt from both parts before you weld.
- Use low heat, short stitch welds, and brief pauses on thin exhaust metal.
- Clamp the pipe and muffler in their final position before you strike an arc.
- Check every bead for pinholes, cracks, and leaks after the weld cools.
- Use muffler paste only as a sealant or temporary repair, not as a replacement for a sound weld.
What You’ll Need to Weld a Muffler
Set up your tools before you crawl under the vehicle or remove the exhaust section. Good prep saves time and helps you keep the joint straight.
- Compact MIG welder with settings for thin steel
- ER70S-6 solid MIG wire for mild steel exhaust work
- Shielding gas, such as 75/25 argon and carbon dioxide, if your wire requires gas
- Grinder, wire brush, or flap disc for bare-metal prep
- Clamps or exhaust stands to hold the parts in line
- Inspection mirror and bright work light
- Welding helmet, gloves, jacket, and eye protection
- Muffler paste and high-temperature paint for final sealing and protection
Work in a well-vented area and keep flammable items away from sparks. Support the vehicle safely before you work underneath it.
How to Prep a Muffler and Exhaust Pipe
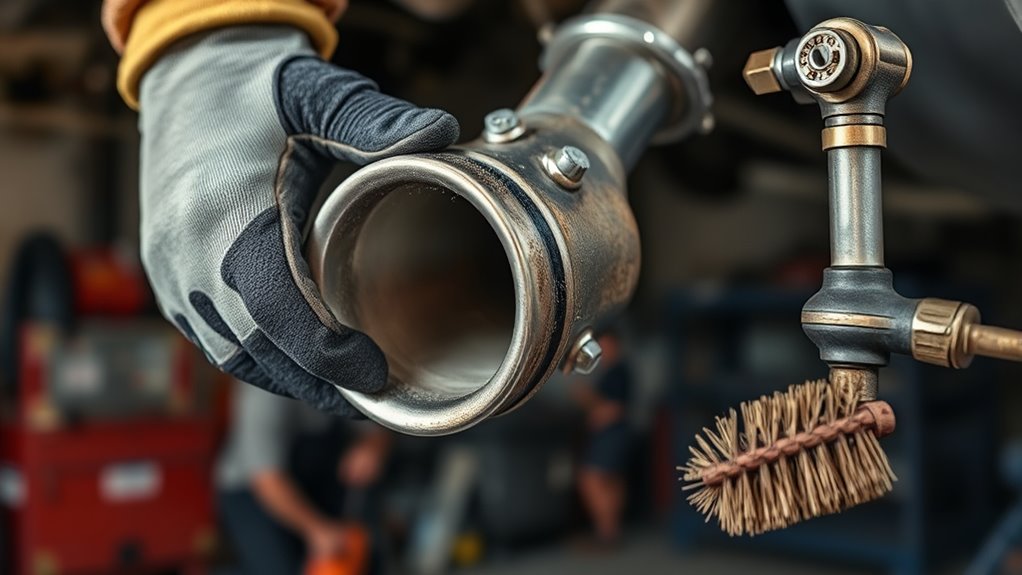
Start by cleaning the exhaust pipe and muffler so both surfaces have no rust, dirt, paint, or oil. Scrub or grind until you reach bare, sound metal.
Use a grinder to bevel the edges of the pipe and muffler. A light bevel improves fit-up and helps the weld penetrate the joint.
Mark the final position of each part before you join them. Clear marks help you keep alignment true and avoid crooked exhaust flow.
Bevel the pipe and muffler edges for better fit-up and penetration, then mark alignment before joining.
If hangers or brackets block access, remove them for more room during installation. Check the joint again after prep, because precise setup supports a stronger connection.
Use dedicated stainless brushes when you work on stainless steel, so you avoid cross-contamination. If you find small pinholes after welding, muffler paste can seal them while you finish the repair.
Products Worth Considering

1.Package Includes : 20×.030" (Ø0.8mm)welding tips, 2×flux core gasless nozzle, 2×gas diffusers, ,totaling 24 components to meet more of your needs.

Package Includes: 10 × .030" (Ø0.8mm)welding tips, 2 × nozzles, 2 × gas diffusers (with left-handed threads).
Best Tools for Muffler Welding
For muffler welding, a compact MIG welder with an 80° tip often works well in tight exhaust spaces. It lets you control the bead without crowding the joint.
Pair it with a swan neck flexible MIG torch when you need better access for top welds. That extra bend helps you place metal where your hand can’t fit.
Keep an inspection mirror nearby so you can check joint alignment, puddle position, and backside coverage without guessing. Good visibility keeps your bead on the seam.
If the joint sits in a difficult location, set a solid ground directly on clean metal. A reliable ground helps the arc stay steady while you weld.
Before you strike an arc, mark the pipe and mock up the muffler so your fit-up stays true. That preparation reduces rework and keeps the exhaust path straight.
When you join stainless steel, control heat input, keep a steady travel speed, and use tools that give you clear access. You can also use a welder with three welding modes to adapt to different materials and positions.
Products Worth Considering

Superior Durability: Our copper nozzles in the Lincoln Magnum 100L & Tweco Mini/#1 MIG welding gun accessories kit are engineered to provide exceptional durability, offering longevity and resistance to spatter adhesion.

Great Set - Set of 49 pieces of necessary gas mig welder consumables parts, enough for using a long time.

1.Package Includes : 20×.035" (Ø0.9mm)welding tips, 2×flux core gasless nozzle, 2×gas diffusers, ,totaling 24 components to meet more of your needs.
How to Weld a Muffler in Tight Spaces
In tight spaces, use a small MIG welder with an 80° tip or a swan neck flexible torch. These tools help you reach top welds without crowding the joint.
If access stays limited, cut and drop the exhaust section so you can work safely. Use an inspection mirror to confirm fit-up and torch position before you weld.
For hard-to-reach areas, clamp the ground directly to clean metal on the workpiece. A stable ground gives you a more reliable weld path.
Clean surfaces also matter in cramped areas. Review these metal preparation tips if the joint has rust, paint, or road grime.
Accessing Hard-to-Reach Welds
Tight exhaust spaces call for the right tools and a careful setup. Use a small MIG welder with an 80° tip for awkward seams.
Switch to a swan neck flexible MIG torch for top welds. If access stays blocked, cut and drop the exhaust section to open the work area.
Before you weld, mark every joint and mock up the parts so alignment stays true under heat.
- Use inspection mirrors to confirm torch angle and puddle control.
- Move the pipe only as much as needed for clear bead access.
- Verify fitment again before you strike an arc.
Work methodically and keep your body away from heat, sparks, and hot metal. A clear layout helps you avoid guesswork.
Tools for Tight Welding
The right tools make cramped muffler welds easier to control. Start with a small MIG welder fitted with an 80° tip so you can reach the seam.
Add a swan neck flexible MIG torch when your hand can’t fit near the joint. Use inspection mirrors to check fit-up, track the seam, and keep the bead in place.
If clearance stays poor, cut and drop a section of exhaust before you strike an arc. Work deliberately and keep the torch stable so the weld stays strong and clean.
Steps to Weld a Muffler to an Exhaust Pipe
Estimated total time: 1 to 3 hours, depending on access, rust, and repair scope.
- Support the vehicle and exhaust so nothing shifts while you work.
- Clean the muffler neck and exhaust pipe to bare metal.
- Bevel the joint edges lightly with a grinder.
- Align the pipe and muffler in their final position, then mark the joint.
- Clamp the parts securely so the seam stays tight.
- Tack the joint in several spots to lock the fit-up.
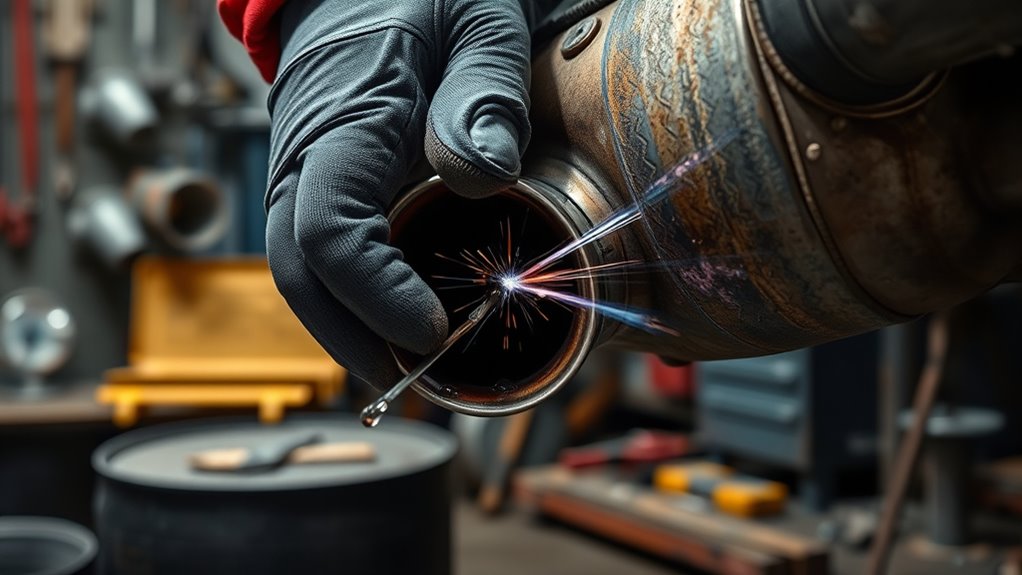
- Stitch weld short sections around the seam, pausing between welds to control heat.
- Inspect the cooled weld for pinholes, cracks, and gaps.
- Test for leaks before you seal or paint the area.
Warning: Never weld near fuel leaks, oily undercoating, plastic lines, or flammable debris.
How to Prevent Burn-Through on Thin Exhaust Metal
Thin exhaust metal burns through fast, so control heat from the start. Use stitch welding instead of long continuous beads.
Set your MIG welder to lower voltage and wire feed speed, then make short welded segments. Pause between segments so the base metal stays intact.
Move the torch quickly and keep your arc tight. If you dwell in one spot, the edge can sag, open up, and weaken the joint.
- Place a backing bar or scrap metal behind the seam to absorb heat.
- Practice on similar-thickness scrap until your settings feel controlled.
- Watch the puddle and stop before the metal sags.
When you weld with discipline, you protect thin exhaust tubing and keep your work clean, strong, and repairable. Proper amperage settings also help control heat and reduce burn-through risk.
Pro tip: Let each stitch cool until the glow fades before you weld the next short section.
How to Test Muffler Welds for Leaks
Once the welds cool, check them for leaks so you can confirm the repair has sealed the exhaust. Start the engine and listen closely around the welds.
Whistling or hissing near the seam usually points to escaping exhaust gas. Use good light and inspect each bead for pinholes, cracks, or gaps.
Test the welds with the hand-over-tailpipe method. Briefly cover the tailpipe opening and feel for pressure loss or air blowing out at the joints.
You can also use smoke testing and watch for smoke leaving the welded seams. Repeat these checks after every repair or installation, because small flaws can become larger leaks.
Wear proper personal protective equipment (PPE) while testing and repairing the system. Exhaust parts can stay hot long after the engine shuts off.
How to Seal and Protect Exhaust Welds
After you confirm the welds are sound, seal pinholes with muffler paste if needed. Press the paste into the joint, then smooth the edges so you leave no voids.
Inspect the welds with the hand-over-tailpipe check. If you feel escaping air, mark the gap and rework it before you finish the repair.
Inspect welds by hand; if you feel escaping air, mark the gap and rework it for a tight seal.
- Seal every joint completely, because small leaks can reduce performance.
- Let the paste cure before you run full heat through the system.
- Coat the welded area with high-temperature paint to slow rust and corrosion.
After the seal sets, apply high-temperature paint in even coats over the weld and nearby metal. Gasless flux core welding, such as work done with gasless flux core welding wire, can help with outdoor repairs when wind would disrupt shielding gas.
Note: Muffler paste can help seal tiny flaws, but it won’t fix a weak, cracked, or poorly fused weld.
Common Muffler Welding Mistakes to Avoid
Many muffler weld failures start before the arc begins. Dirty metal, loose clamps, and poor alignment can all create leaks.
- Skipping bare-metal prep before welding
- Running one long bead on thin exhaust steel
- Welding without enough clearance for torch control
- Forgetting to tack the joint before final welding
- Sealing the weld before you test for leaks
Fix these issues early and you give the repair a better chance to last. If the pipe crumbles during cleaning, replace that section instead of welding over rust.
Frequently Asked Questions
What Type of Welding Is Used for Mufflers?
You typically use MIG welding for mufflers because it handles thin exhaust metal well. Set low heat, use stitch welds, and control penetration so you avoid burn-through.
Can I Weld My Exhaust Myself?
Yes, you can weld your exhaust if you have basic welding skill, the right tools, and a safe work area. Use proper ventilation, eye and skin protection, secure supports, and controlled MIG welds for thin metal.
What Type of Welding Wire Is Good to Weld a Muffler?
ER70S-6 solid MIG wire works well for many mild steel muffler repairs. Use wire size and welder settings that match the pipe thickness, and test on scrap before welding the exhaust.
Will JB Weld Hold Up on Exhaust?
JB Weld usually won’t hold up long-term on hot exhaust parts. It may work as a temporary patch, but vibration and heat make welding or part replacement a better repair.
Do You Need to Remove the Muffler Before Welding?
You don’t always need to remove the muffler, but removal can make the job safer and cleaner. If you can’t reach the seam, drop the exhaust section so you can control the torch and inspect the weld.
Conclusion
A strong muffler weld starts with clean metal, steady alignment, and careful heat control. Prep the pipe, tack the joint, and weld in short stitches so the thin steel stays intact.
After the weld cools, inspect the bead and test for leaks before you seal or paint the area. Take your time now, and your exhaust repair will stay quieter, stronger, and ready for the road.


