Pre-weld heat treatment is the controlled heating of base metal before welding to reduce thermal shock, drive off moisture, and slow cooling. You use it to limit hydrogen pickup, residual stress, and brittle microstructures that can cause cracking. It’s often needed on hardenable steels, low-alloy steels, and thick sections, with typical preheat ranges of 50°C to 250°C. The right method and hold time depend on the material, thickness, and weld procedure, as you’ll see below.
What Is Pre-Weld Heat Treatment?
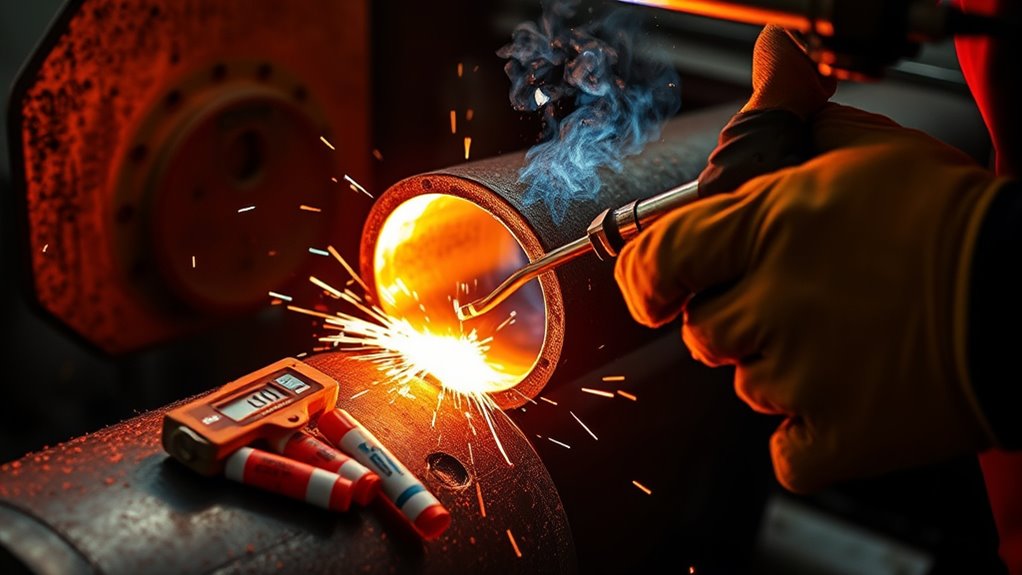
Pre-weld heat treatment is the controlled application of heat to the base metal and nearby heat-affected zones before welding to improve weld quality and integrity. You use this heat treatment to prepare the joint so your welding processes start from a stable thermal condition, not a cold, uneven one. By warming the material first, you drive off moisture, slow the cooling rate, and create a gradual temperature shift from ambient to welding temperatures. That matters because rapid cooling can trap brittle structures in thicker steels and weaken the weld. Preheating also helps you stay within accepted standards and protect the component from avoidable damage. The exact temperature depends on material type, thickness, and chemistry, and it often falls between 50°C and 250°C for steels. When you apply it correctly, you control the process, reduce risk, and keep your work technically sound and independent from failure. Additionally, preheating can help mitigate the effects of heavy rust that may compromise the integrity of the weld.
Why Preheating Prevents Weld Cracking
When you preheat the base metal before welding, you reduce thermal gradients and slow the cooling rate, which helps prevent cracking as the joint solidifies.
You give the weld pool and heat-affected zone time to cool more evenly, so residual stress doesn’t build up and split the joint. This controlled cooling also limits brittle microstructures, including martensite in HSLA steels, which can make the weld prone to failure.
Preheating also drives off surface moisture, lowering hydrogen pickup and reducing the chance of hydrogen-induced cracking. When you follow the specified preheat range for the material and thickness, you help protect weld quality and structural integrity. Skipping this step can leave you with welding imperfections that weaken the assembly and compromise performance.
In practice, preheating gives you more control, fewer defects, and a cleaner path to sound, durable welds. Additionally, understanding the importance of cleaning aluminum before welding can further enhance the quality of your welds.
When Preheating Is Needed for Steel
You need preheating for steel when the grade is hardenable, such as HSLA or low-alloy steel, or when thicker sections increase the risk of forming brittle microstructures.
Typical preheat ranges run from 50°C to 150°C for carbon steel and 100°C to 250°C for low-alloy steel, depending on composition and thickness. Additionally, it is crucial to size welds according to the thinner member in joints to prevent issues like cracking and ensure structural integrity.
You also need it to drive off moisture and reduce hydrogen cracking, so you should follow the applicable preheat guidelines closely.
Material Thickness And Grade
Thickness and alloying level largely determine whether steel needs preheating before welding. You should treat steel thickness as a primary control point: once sections exceed about 25 mm, preheat helps limit cracking and distortion.
With different alloy types, the required heat shifts because chemistry changes hardenability. Carbon steels often need 50–150°C, while low-alloy steels usually call for 100–250°C.
If you work with high-strength low-alloy steels, preheating is especially useful because it suppresses brittle microstructures in the heat-affected zone. For steels with high carbon equivalency, you need to be even more deliberate, since the weld area becomes more crack-prone.
Match soak time to the grade so heat spreads evenly and the joint is ready for sound, controlled welding.
Moisture And Crack Prevention
Beyond thickness and grade, moisture control is another major reason to preheat steel before welding.
You use pre-weld heat treatment to drive off surface and absorbed moisture, which helps prevent hydrogen cracking and steadies the weld pool. Good moisture management also lowers the cooling rate of the weld and base metal, so you reduce crack formation in high-strength low-alloy steels and other crack-sensitive grades.
Keep the preheat above the minimum required for the steel; carbon steels often need about 50 to 150°C, depending on thickness and chemistry. If you skip it, you can promote brittle martensite and weaken joint integrity.
Preheating gives you cleaner fusion, fewer defects, and a more reliable weld that won’t fail early.
Recommended Preheat Temperatures and Hold Times
You’ll typically preheat carbon steel to 50°C to 150°C and low-alloy steel to 100°C to 250°C, but you should verify the exact range against the material’s carbon equivalency and the applicable code.
You’ll also need to set hold time by grade and thickness, with thicker sections requiring longer soak times to reach uniform temperature.
During welding, you must keep the preheat within the specified minimum and maximum limits to reduce cracking, distortion, and harmful microstructure changes. Additionally, preheating is crucial for welding cast iron to prevent quench cracks and ensure a stronger weld.
Products Worth Considering
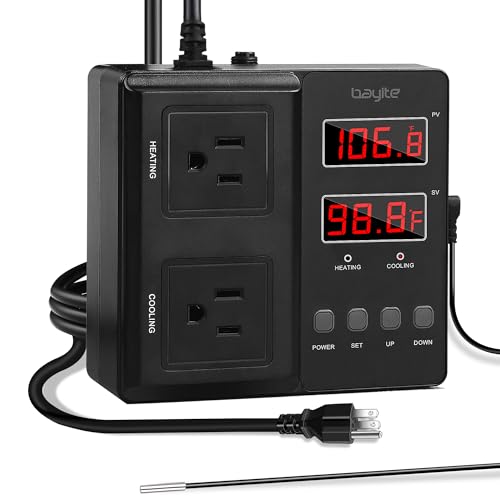
Simplified Design---Plug and play, easy to set. Support °C/°F display.

【Wide temperature range.】The range for KT8230 is -22~572℉/-30~300℃,This is a relay temperature controller, There is no voltage output directly, you need to connect additional power supply for the load, then it can be set by differential (1~80℃/1~120℉) to turn on/off the load, it is like a switch.

Comprehensive Welding Package: our package comes with 36 low temperature universal welding rods available to meet your welding requirements; Whether you are a novice or an experienced welder, this kit of welding rods ensures you have things you need for your welding projects; Material is relatively brittle, received with breakage is a normal phenomenon, does not affect the use
Recommended Temperature Ranges
Recommended preheat temperatures typically fall between 50°C and 150°C for carbon steel and 100°C to 250°C for low-alloy steel, with the exact range depending on the material grade, thickness, and carbon equivalency. You need tight temperature control and heat uniformity to reduce cracking risk and protect component integrity, especially in thicker sections and HSLA steels. Use the table below as a quick guide:
| Material | Range | Key concern |
|---|---|---|
| Carbon steel | 50-150°C | Crack resistance |
| Low-alloy steel | 100-250°C | Hardenability |
| HSLA steel | Spec-defined | Brittleness |
| Thick plate | Higher end | Through-heating |
| All grades | Standard-compliant | Consistency |
Check your material spec and welding standard before you set the torch. Hold only long enough for even soaking.
Material-Specific Hold Times
Hold times should match the material’s heat input needs: carbon steel often preheats at 50°C to 150°C, while low-alloy steel may need 100°C to 250°C, with thicker sections requiring longer soak to bring the full joint to an even temperature.
- Set soak time by grade and thickness.
- Keep HSLA within target preheat to limit brittle microstructures.
- Hold long enough to drive off moisture and cut hydrogen cracking risk.
- Follow carbon equivalency guidance from industry associations.
You’ll get the preheat benefits only when you maintain temperature long enough for the whole joint to stabilize. If you rush, outer surfaces warm while the core stays cold, and cracking can follow.
Use the recommended hold times as a practical control, not a guess. That discipline gives you cleaner welds, safer service, and more freedom from repair cycles.
How Preheating Removes Moisture and Hydrogen
Preheating drives off moisture from the base metal and heat-affected zone, reducing the hydrogen available to cause cracking during welding.
You use this moisture removal to lower absorbed water in the joint area, so hydrogen diffusion has less fuel to work with. When you raise the metal to the right temperature, you stabilize the weld pool and limit phase changes that can free hydrogen into the weld.
That matters because trapped moisture raises hydrogen levels, weakens grain boundaries, and threatens weld integrity. By holding the material at the correct preheat range, you help the weld fuse cleanly and cut the chance of porosity, cracking, and other defects.
Additionally, proper zinc removal ensures a cleaner weld environment, reducing the risk of contamination.
You should match preheating guidelines to the material type and thickness, because different steels release moisture and hydrogen at different rates.
Done correctly, preheating gives you tighter control, better soundness, and a weld that performs on your terms.
Common On-Site Preheating Methods
On-site preheating can be done with torches, induction units, resistance heaters, or infrared panels, and you should choose the method that best matches the joint size, material, and access conditions.
With torch heating, you can direct heat where you need it and adjust quickly, but you must move evenly to avoid hot spots.
- Induction benefits: You get rapid, uniform heating, especially on larger or alloy parts.
- Resistance heating: You use this cost-effective option for smaller jobs where electrical resistance heats the workpiece directly.
- Infrared panels: You apply non-contact heat, reducing overheating risk while improving uniformity.
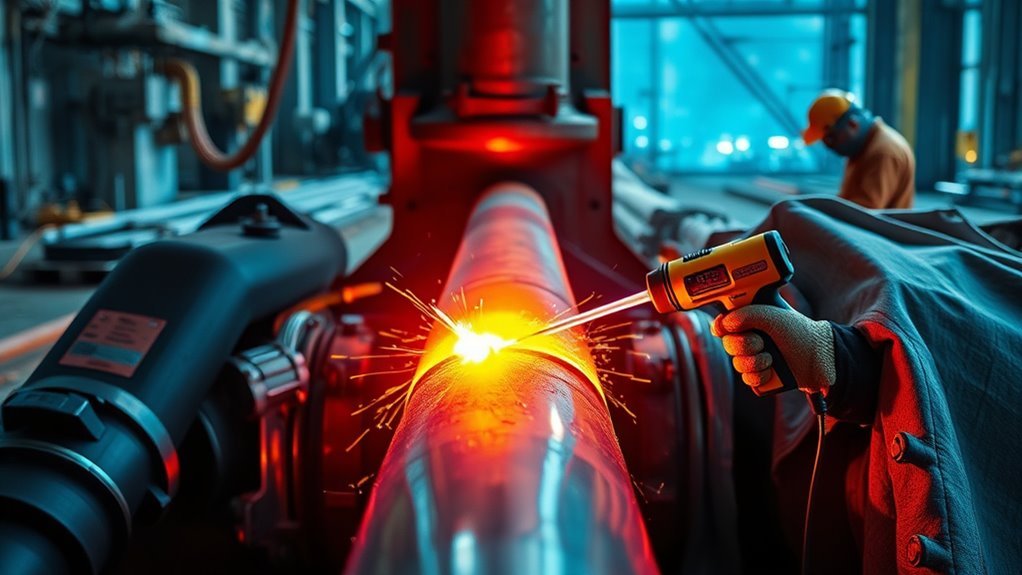
- Temperature monitoring: You verify preheat with thermocouples or infrared cameras so you stay within the specified range and limit cracking.
When you match the method to the job, you control the process, protect the joint, and keep your welding work precise and reliable. Additionally, using proper protective clothing during preheating activities minimizes risks associated with heat exposure and sparks.
Preheating vs. Post Weld Heat Treatment
You use preheating to slow cooling, limit brittle microstructures in thicker steels, and reduce moisture-driven hydrogen cracking; those are core preheat advantages. It’s especially important for HSLA steels and any joint where thickness or alloy content raises cracking risk. Additionally, understanding welding techniques can help ensure that preheating is applied effectively.
You apply PWHT after welding, usually around 600–700°C, to relax stresses, remove retained hydrogen, and boost toughness in the completed joint. Standards such as ASME Section VIII often govern PWHT benefits for safety and compliance.
In practice, you don’t treat them as interchangeable: preheating protects the weld while you make it, and PWHT stabilizes it after it’s formed.
Control temperature and soak time carefully, or you’ll trade freedom for failure.
When On-Site Heat Treatment Experts Help Most
When you need tight control over base-metal temperature before welding, on-site heat treatment experts help most by delivering uniform preheat that limits distortion, reduces cracking risk, and drives off moisture that can trigger hydrogen-induced cracking.
You get on-site expertise when the job demands exact temperatures, traceable records, and no guesswork. Their heat treatment keeps you aligned with ASME and AWS limits, even on complex joints and HSLA steels.
- Large weldments
- Thin sections
- Moisture-sensitive alloys
- Shutdown repairs
They monitor temperature with advanced wireless controls, so you can verify compliance in real time and avoid costly rework. Proper PPE setup is essential in ensuring safety during the heat treatment process.
Superheat’s tailored services show how skilled crews free you from temperature drift, uneven heating, and schedule risk.
When your weld integrity matters, expert preheat isn’t optional; it’s the practical path to reliable, standards-based results.
Frequently Asked Questions
What Is Pre-Weld Heat Treatment?
Pre-weld heat treatment is your controlled heating of base metal before welding, improving material properties and reducing cracking risk. You use preparation techniques to remove moisture, balance thermal stress, and stabilize fusion for stronger joints.
Do You Heat Treat Before or After Welding?
You heat treat before welding for pre weld benefits, like reduced cracking and distortion; after welding, you may apply PWHT. You’ll need careful temperature control, especially on HSLA steels, to prevent brittle microstructures and hydrogen cracking.
Conclusion
So, when you preheat before welding, you’re not just warming steel—you’re setting the stage for a sound, crack-resistant joint. You reduce moisture, slow cooling, and protect the weld from hydrogen damage. If your material is thick, hardenable, or exposed to cold conditions, you need it. Think of preheat as a small flame that prevents a big fracture. Use the right temperature, hold it properly, and you’ll weld with greater control and confidence.


