Like a good cattle dog, a cheap plasma cutter for farm use should be tough, easy to set up, and forgiving when you are repairing rusty gates, trailer brackets, implement parts, or worn steel. The machine matters, but dependable results come from the whole system: suitable power, clean dry air, correct consumables, a sound work connection, and disciplined hot-work safety.
Quick Answer
For most farm shops, the best low-cost choice is a dual-voltage pilot-arc cutter whose manufacturer rates it for clean cuts at your normal thickness on 240V. Confirm the circuit, compressor CFM, torch model, consumable supply, and warranty before buying. Treat maximum severance claims as emergency capacity, not everyday performance.
Key Takeaways
- Choose by the manufacturer’s recommended or clean-cut capacity, not amperage or maximum severance alone.
- Dual voltage adds flexibility, but most machines deliver less output on 120V than on 240V.
- Pilot arc helps with rusty, painted, expanded, and irregular metal, but the work clamp still needs clean electrical contact.
- Match the compressor’s delivered CFM and flowing pressure to the exact manual; clean, dry, oil-free air protects cut quality and consumables.
- Confirm the torch model and replacement-part supply before buying a low-cost cutter.
- Plasma cutting is hot work. Control sparks, fumes, electrical hazards, noise, and nearby fuel, dust, hay, hydraulic lines, wiring, and livestock.
At a Glance
| Best Budget Range | Usually a verified 50A to 65A dual-voltage class for general repair; the exact clean-cut rating matters more than the amp label. |
| Difficulty | Beginner to intermediate after the circuit, compressor, air treatment, and safety setup are verified. |
| Tools Needed | Compatible air compressor, regulator and filtration, correctly rated power connection, PPE, fire-control equipment, spare consumables, and clean work clamp. |
| Extra Setup Cost | Allow for air drying and filtration, consumables, PPE, fire protection, suitable cords or receptacles, and possibly a dedicated 240V circuit. |
Top Budget Plasma Cutters for Farm Use in 2026
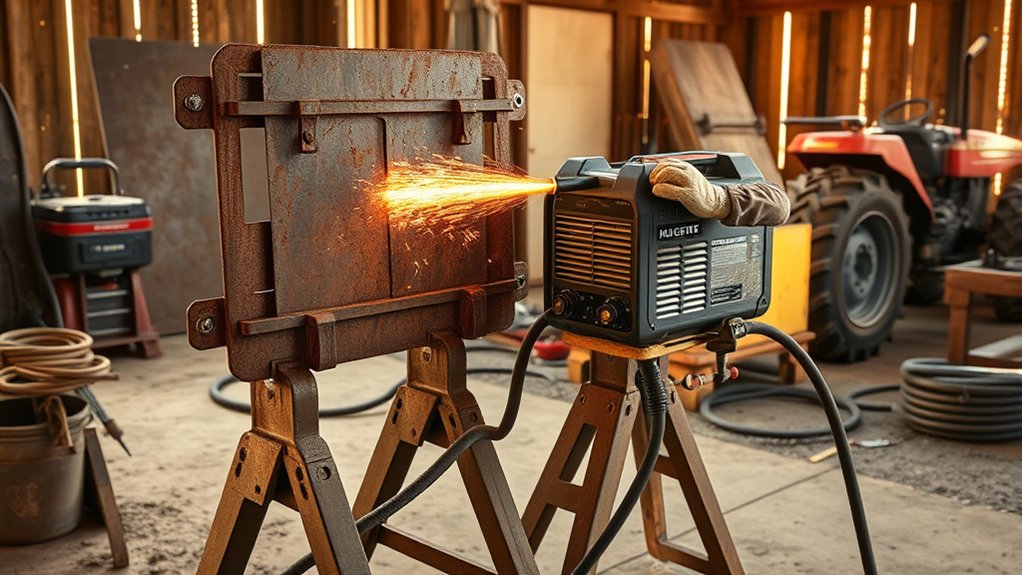
If you are outfitting a farm shop on a tight budget, do not buy by amperage alone. List the work you actually do: cutting rusty gates, trimming brackets, slicing 1/4-inch plate, repairing trailers, opening holes in tabs, or removing worn implement parts. Then compare each machine’s documented input power, recommended clean-cut capacity, air demand, duty cycle, torch, consumables, and warranty.
Note: The examples below are based on manufacturer information checked July 19, 2026, not a side-by-side laboratory test. Prices, bundles, ratings, model revisions, and stock can change. Confirm the current product page and manual before ordering.
| Current Example | Why It Fits Farm Work | Verified Details | Main Caution |
|---|---|---|---|
| PrimeWeld CUT60 | A support-focused 60A-class option for a shop that values warranty help and readily listed consumables. | Dual-voltage design, up to 60A output, manufacturer-listed three-year warranty, and dedicated replacement tips. | The product page’s maximum thickness language should not be treated as a guaranteed clean cut on every material or setup; verify the current manual and cut chart. |
| YesWelder CUT-65DS Plus | A stronger 65A-class choice for more 240V plate work, grating, gouging, and marking. | Manufacturer lists 20–45A on 110V, 20–65A on 220V, non-HF blow-back start, an IPT40 torch, and a 9/16-inch ideal clean cut on 220V. | It needs a stronger electrical and air setup than a light 50A cutter, and the current listing says the model is not intended for CNC-table control. |
| BestArc BTC500DP 8GEN | A lower-cost 50A pilot-arc category for gates, brackets, sheet, and moderate plate work. | Manufacturer lists dual voltage, a 1/2-inch clean cut on 220V, a 5/16-inch clean cut on 110V, and 5.3 CFM at 65 PSI. | This version uses high-frequency starting; keep it away from sensitive controls and confirm that the claimed air demand matches your compressor’s delivered output. |
A generic CUT50-style import is often the lowest-cost entry point. It can be useful for sheet metal, brackets, thin plate, and occasional repairs. The tradeoff is inconsistent documentation, quality control, support, and torch compatibility. Before buying one, identify the torch, find consumables from more than one seller, download the manual, and confirm the input-current and clean-cut specifications.
A 50A pilot-arc cutter is usually the strongest all-around budget category for rusty or painted farm steel. Pilot arc can establish the arc without dragging the nozzle across rough metal, but it does not cancel the need for clean work-clamp contact, correct standoff, suitable travel speed, and removal of heavy mud or scale.
A support-focused 50A to 60A machine makes sense when downtime costs more than the price difference. Clear manuals, responsive warranty service, and model-specific consumables can matter more than a slightly larger number on the front panel.
A 65A budget cutter earns its place when you regularly cut thicker stock on 240V. It does not guarantee better results on a weak circuit or undersized compressor. Compare the rated output available at each input voltage and the manufacturer’s clean-cut chart before stepping up.
A low-cost non-HF pilot-arc cutter with a digital air readout can make setup easier, but the display is only a convenience. Verify pressure while gas is flowing, and check current stock and replacement parts. For example, Tooliom’s TL-50C-NHF-PRO official page showed the model sold out when checked on July 19, 2026.
Note: Use named models as comparison points, not permanent rankings. Verify the exact listing, manual revision, clean-cut rating, duty cycle, torch model, warranty terms, air requirement, and consumable part numbers before buying.
Products Worth Considering
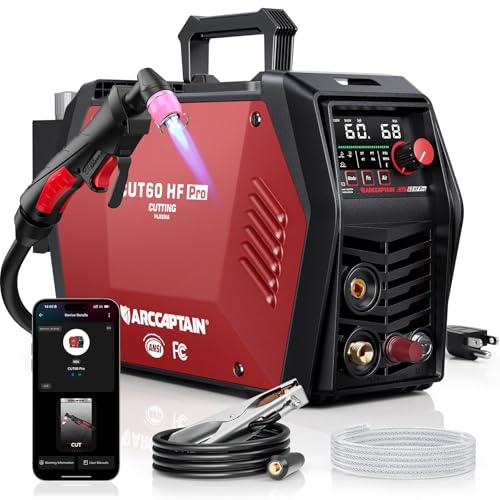
[ENHANCED CUTTING CAPACITY] - Equipped with a 3nd-Gen MCU, this plasma cutter delivers powerful output across both voltage options. On 120V, it supports a cutting range of 10–16 mm when the air pressure is kept above 55 PSI. Switching to 240V unlocks heavier performance, cutting 16–26 mm (up to 15/16" / 24 mm) with the recommended 55–75 PSI air pressure. The arc remains stable on stainless steel, carbon steel, aluminum, and copper, producing smooth edges with minimal slag and reducing follow-up grinding.

POWERFUL CUTTING THICKNESS: This plasma cutter handles 1/2" (12mm) steel at 120V/35A and 5/8" (16mm) at 240V/60A. Dual voltage auto-detection (10-35A@120V / 30-60A@240V) with PSI guidance (70-75 PSI / 0.48-0.52MPa). Optimized for quick, efficient cuts in automotive repairs and metal fabrication

POWERFUL CUTTING THICKNESS: This plasma cutter handles 1/2" (12mm) steel at 120V/35A and 5/8" (16mm) at 240V/60A. Dual voltage auto-detection (10-35A@120V / 30-60A@240V) with PSI guidance (70-75 PSI / 0.48-0.52MPa). Optimized for quick, efficient cuts in automotive repairs and metal fabrication
Best Farm-Use Buying Checklist
For farm repairs, the best cheap plasma cutter is the one that matches your material and keeps working after dust, rust, long leads, and seasonal storage test the setup. Use this checklist before you buy:
- Recommended cut capacity: Match the manufacturer’s recommended or clean-cut rating to the thickness you cut most.
- Dual voltage: 120/240V gives you more options, but compare the actual output available on each voltage.
- Pilot arc: Helpful for painted, rusty, expanded, or irregular conductive metal.
- Start type: Non-HF blow-back start generally creates less high-frequency interference around electronics than an HF-start design.
- Duty cycle: Check the duty cycle at the amperage and ambient temperature that matter to your work.
- Common consumables: Tips, electrodes, cups, shields, and swirl rings should be easy to identify and buy.
- Torch type: Verify the torch model and connector before ordering parts.
- Air requirement: Your compressor must deliver the listed CFM at the required flowing pressure, with reserve for hose and filter losses.
- Input requirements: Check breaker, receptacle, plug, conductor, phase, and generator guidance in the manual.
- Warranty and support: Read the actual warranty terms and look for a reachable parts or technical-support channel.
- Work lead and torch lead: Length and flexibility matter around trailers and equipment, but long leads can affect portability and replacement cost.
- Manual quality: A complete manual should cover wiring, duty cycle, air, consumables, cut charts, troubleshooting, and safety.
Match the Cutter to the Job
| Typical Farm Work | Practical Buying Target |
|---|---|
| Sheet metal, tabs, light brackets, expanded metal | A portable 30A to 50A-class machine may be enough; pilot or mesh mode helps with interrupted cuts. |
| Frequent 1/4-inch mild-steel repair plates | Choose a model whose manufacturer rates 1/4 inch within its recommended clean-cut range on your available power. |
| Regular 3/8-inch plate and longer cuts | Look for a verified 50A to 65A-class clean-cut rating on 240V, enough duty cycle, and a compressor with reserve capacity. |
| Thick plate, heavy structural repair, or production cutting | A budget handheld unit may be the wrong tool. Compare a higher-capacity system, oxy-fuel, a saw, or outsourced cutting based on material and job volume. |
What a Plasma Cutter Can and Cannot Cut
Air plasma cutters work on electrically conductive metals, including mild steel, stainless steel, aluminum, copper, and some cast iron. They do not cut wood, glass, masonry, or ordinary plastic by the plasma process. Conductive coatings, laminates, trapped fluids, and unknown metals can create additional fumes or fire hazards, so identify the material before cutting.
Key Features to Prioritize: Duty Cycle, Amperage, and Cut Capacity
Price gets attention, but duty cycle, output at the available voltage, and recommended cut capacity decide how useful the machine will be. A cutter that advertises high amperage but overheats quickly or loses output on 120V can slow down a gate, loader-bracket, or repair-plate job.
A 50A-class cutter is a practical starting point for many farms, but amperage alone does not prove that it will make clean 1/4- or 3/8-inch cuts. Compare the manufacturer’s chart for the exact voltage, material, torch, and consumable. Cut speed and edge quality usually fall as the material approaches the machine’s upper capacity.
Do not confuse recommended or clean cut with severance cut. Recommended capacity is the range intended for useful cut quality and speed. Severance capacity is the rough maximum thickness the machine can separate slowly. Use severance figures for occasional emergency work, not as the everyday sizing target.
Duty cycle tells you how long the machine can operate within a stated test period and condition before it must cool. A 60% duty cycle commonly means six minutes of rated cutting within a 10-minute period followed by four minutes of cooling, but the rating only applies at the listed output, input voltage, and ambient conditions. Read the data plate and manual rather than comparing percentages without context.
Products Worth Considering
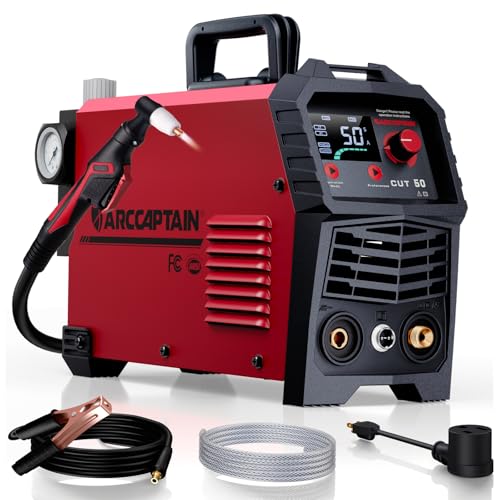
【Powerful Cutting Ability】Switch effortlessly between 110V and 220V for home or workshop use. Achieve professional 1/2" clean cuts on steel, aluminum, and copper with advanced LGBT technology. Perfect for DIY projects and heavy-duty tasks. Recommended maximum cutting thickness: 12mm @ 35A / 110V / 55 PSl; 18mm @ 50A / 220V / 75 PSI. Note: Requires compressed air (compressor sold separately).

[Powerful Cutting Ability] Dual voltage 110/220V good for home, workshop and hardware shop use. Professional performance 1/2" clean cuts on Iron, Steel aluminum and copper with Inverter IGBT Technology. Very powerful for DIY and heavy duty project. The Maximum cutting thickness is recommended to 1/2" @35A 110V 50PSI; 2/3" @50A 220V 65PSI. Dry and compressed air is required. Power breaker up to 60A@110V 35A; Up to 50A@220V 50A.

[POWERFUL CUTTING PERFORMANCE] : Get clean, efficient cuts with up to 3/10" clean cut at 110V and 1/2" at 220V, with a maximum cutting thickness of 1/2" at 110V and 2/3" at 220V. Designed for smooth and effective cutting across a variety of metalworking, repair and DIY applications.
Pilot Arc, HF Start, and Blow-Back Start
Pilot arc lets the torch establish an arc before the main cutting arc transfers to the workpiece. This helps on expanded metal, rusty surfaces, paint, and gaps. HF start uses high-frequency energy to initiate the arc and can create interference around sensitive electronics. Blow-back or non-HF start uses a mechanical electrode movement and is often the safer choice near CNC controls, vehicle modules, monitors, or communication equipment, although good cable routing and equipment separation still matter.
For farm use, judge a cutter by its documented clean cut on the steel you use, output on your available voltage, air demand, duty cycle, consumable cost, and support—not the biggest number on the box.
Portability and Power: 120/240V Dual-Voltage Considerations
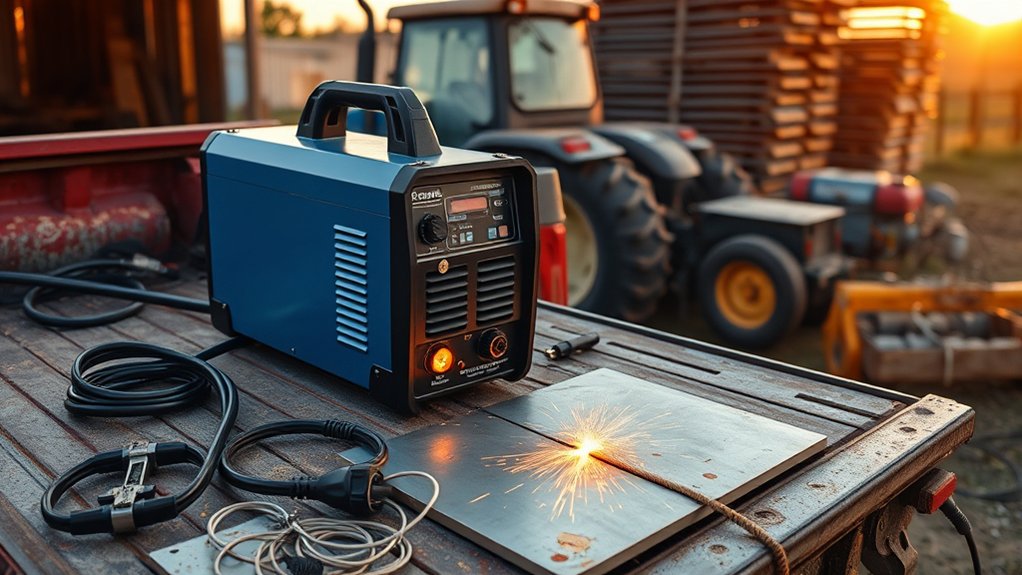
U.S. listings often say “110/220V,” while nominal utility service is commonly described as 120/240V. A dual-voltage cutter may run from either supply, but most budget units reduce their maximum output on 120V. Use 240V when the cut must be cleaner, longer, or faster, and use 120V only within the model’s documented limits.
Match the plug and receptacle, check the manual, confirm the breaker and conductor requirements, and power the cutter down before changing an input selector, plug, or adapter. Have a qualified electrician install or verify a circuit when the manual calls for hardwiring, a dedicated branch circuit, or a plug you do not already have.
Extension Cord Limits
Your extension cord can become the real power limit. Long or undersized cords cause voltage drop, weak starts, overheated connections, nuisance breaker trips, and reduced output. There is no safe universal statement that “12 AWG is enough” for every plasma cutter. Required conductor size depends on the machine’s input current, voltage, cord length, plug, duty cycle, and manufacturer instructions.
Use the shortest cord practical and follow the exact cord-size table in the cutter’s manual. The cord, plug, receptacle, and any adapter must all be rated for the circuit and machine. Keep connections dry, fully seated, protected from vehicle traffic, and away from mud, standing water, wet grass, manure, and sharp steel.
Switching Voltage Safely
Before moving a cutter between 120V and 240V, confirm the entire chain: breaker, receptacle, plug, adapter, cord, machine input rating, and automatic or manual voltage-selection method. Never assume an adapter changes the electrical capacity of the source. Follow the manual rather than guessing from plug shape.
Inspect cords and adapters for heat discoloration, cracked insulation, loose blades, damaged strain relief, splices, and missing ground pins. Do not run a high-output cutter from a questionable adapter, shared barn circuit, or receptacle that becomes warm under load.
Warning: Plasma cutting combines high voltage, hot metal, sparks, and compressed air. Do not cut in wet conditions, around flammable dust or vapors, or from damaged electrical equipment. Use a properly grounded circuit and follow the machine manual and applicable hot-work rules.
120V Vs. 240V Power
| Scenario | Practical Take |
|---|---|
| Thin sheet fixes near a common outlet | 120V may work when the model is approved for the circuit, the cord is correctly sized, and the air supply is steady. |
| 1/4- to 3/8-inch plate in the shop | 240V usually provides more available output and better performance, but use the exact model’s clean-cut chart. |
| Remote repairs | Dual voltage helps, but the generator, cord, grounding method, and compressor must all support the load at the same time. |
Generator Sizing for Field Repairs
Check the cutter manual for an engine-driven generator requirement in kW or kVA and for any limits on power quality. Add the compressor load if both machines will run from the same generator. Starting current, altitude, temperature, extension length, and generator regulation can reduce usable output. A generator that can run the cutter at low amperage may still be unable to support full output and the compressor together.
Air Supply, Filters, and Dryers: Protecting Your Investment
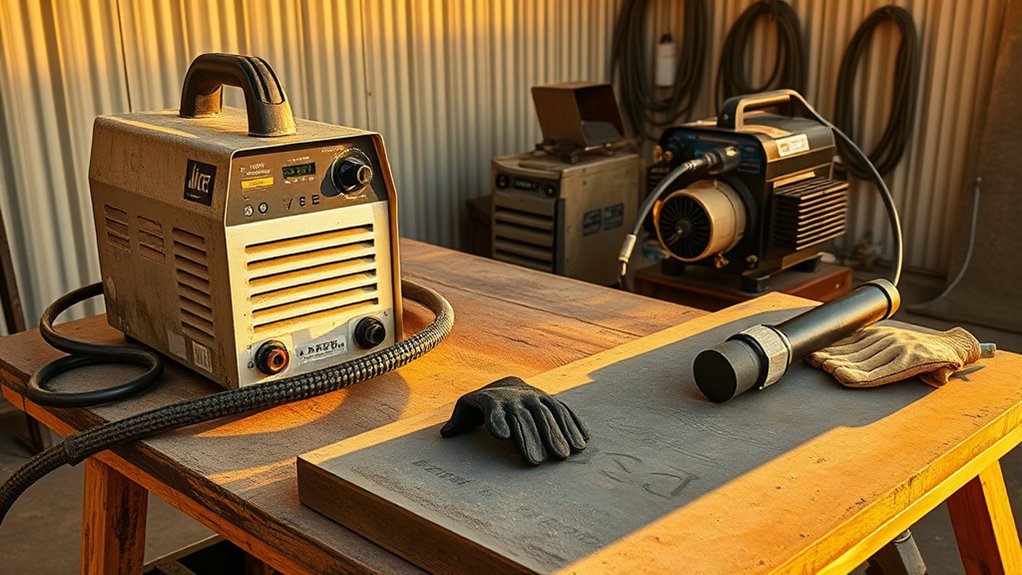
Two things keep a budget plasma cutter working well: clean, dry, oil-free air and the correct flowing pressure. Start with the compressor. It must deliver the cutter’s listed CFM at the required pressure during the cut, not merely build a high tank pressure while idle.
Use a regulator at or near the cutter when the machine does not manage pressure automatically. Set pressure while air is flowing in the machine’s gas-test mode or as directed by the manual. Do not copy a generic PSI setting from another cutter. Too little pressure can cause incomplete cuts, dross, wandering arcs, and rapid wear; excessive pressure can cause hard starting and shorten electrode life.
Add moisture and oil control appropriate to the farm’s climate and compressor. Drain the receiver tank, purge hoses, inspect the filter bowl, and replace elements or desiccant before restriction or saturation becomes severe. Humid shops, long hose runs, and oil-lubricated compressors may need staged filtration and a desiccant or refrigerated dryer.
Compressor Checklist
- Compare delivered CFM at the required PSI, not only tank size or peak horsepower.
- Leave reserve capacity so pressure does not collapse during long cuts.
- Use hose and fittings large enough for the required flow.
- Check pressure with gas flowing at the torch.
- Drain water and inspect for oil carryover.
- Place the final filter close enough to the cutter to catch moisture that condenses in the hose.
Moisture, oil, and dirt can make a capable plasma cutter start poorly, cut unevenly, and consume tips and electrodes faster. Air treatment is part of the machine, not an optional extra.
Consumables, Parts Availability, and Ongoing Costs
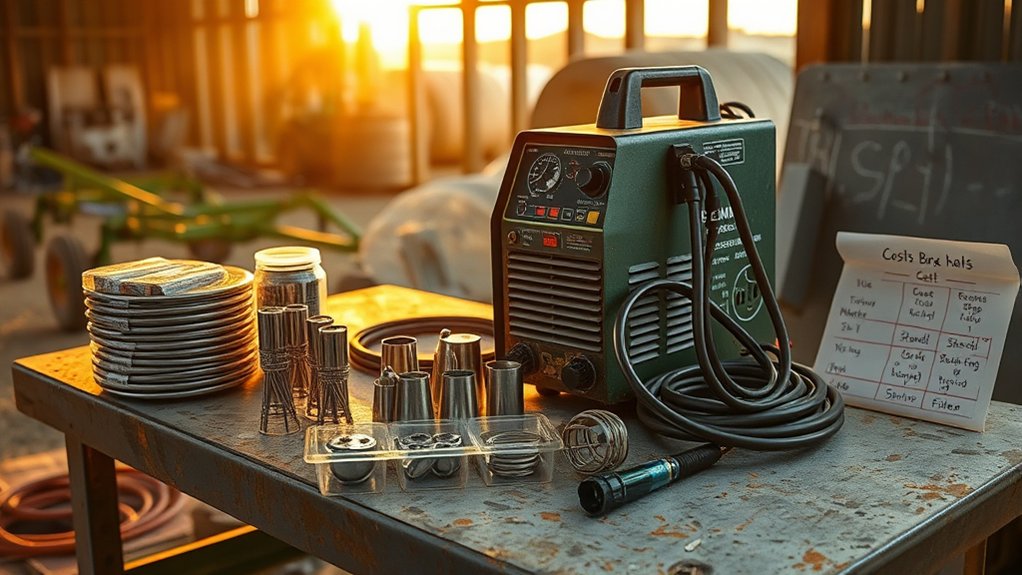
After power and air, your main recurring expense is consumables and wear parts. Nozzles, electrodes, shields or cups, and swirl rings control arc shape and starting. A low purchase price loses its appeal when the correct parts are hard to identify or unavailable during planting or harvest season.
Buy consumables by the exact torch model and part number, not the cutter brand alone. Similar-looking PT31, IPT40, IPT60, AG60, and other parts are not automatically interchangeable. Check the torch label, manual, connector, nozzle size, and current range before buying a bulk kit.
Inspect the nozzle orifice, electrode pit, shield, O-rings, and cup before a long job. Replace worn parts when the arc wanders, the orifice becomes oval, the electrode pit exceeds the manual’s limit, starts become unreliable, or dross suddenly increases with unchanged settings. Follow the manufacturer’s pairing rules; some systems call for replacing the nozzle and electrode together.
Paint, rust, mill scale, piercing, repeated restarts, incorrect standoff, and molten blowback can shorten part life. Keep the torch square, start thick cuts from an edge when possible, use the specified pierce technique, and match amperage and speed to the material.
Pro Tip: Tape a consumable card inside the cutter cart with the torch model, nozzle and electrode part numbers, O-ring lubricant instructions, air requirement, and tested settings for the mild-steel thicknesses you cut most.
Calculate the Real Ownership Cost
Compare more than the machine price. Include the correct plug or circuit work, air hose and fittings, filtration or drying, PPE, spare consumables, replacement torch cost, warranty shipping, and downtime. Before buying, place a small consumable order or at least confirm that parts are stocked by the manufacturer and another reliable seller.
Real-World Picks: Pros and Cons of Popular Models
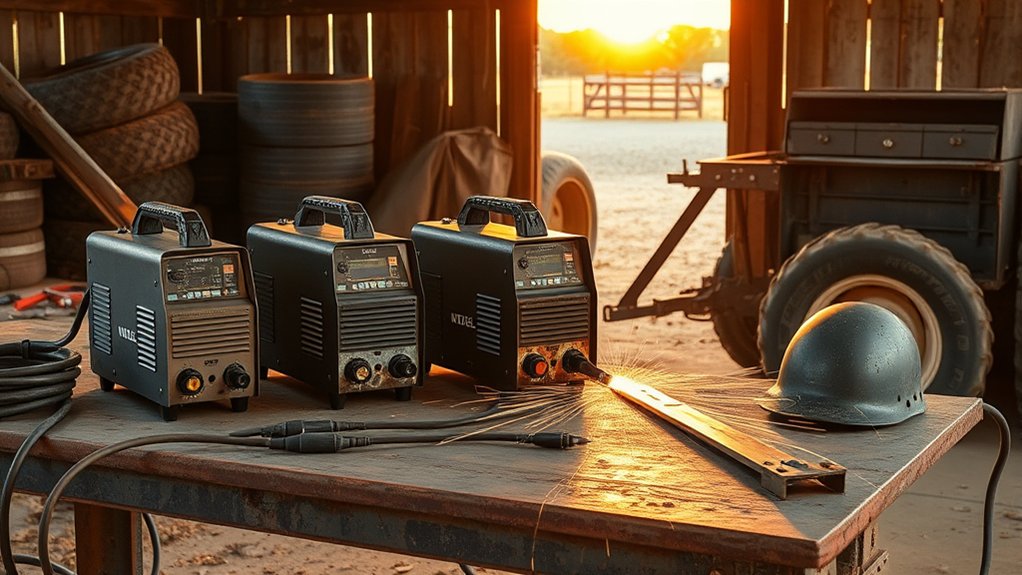
You are balancing low price against real farm work, so weigh pilot arc, start type, output at each voltage, consumables, air demand, and support against the material you cut most. The table below keeps the choices practical without pretending that every listing or model revision is identical.
| Budget Category | Best For | Watch For |
|---|---|---|
| Generic CUT50-style import | Lowest-cost occasional repairs, sheet, brackets, and light plate. | Incomplete manuals, unclear ratings, support, electrical certification, torch compatibility, and parts supply. |
| 50A pilot-arc budget cutter | Rusty gates, painted panels, expanded metal, and general repair. | HF interference on some models, consumable wear from repeated starts, and reduced output on 120V. |
| Support-focused 50A to 60A cutter | Shops that value a clear warranty, documentation, and model-specific parts. | Higher purchase price than the cheapest imports and possible shipping cost for warranty service. |
| 65A budget cutter | More 240V shop work, thicker plate, gouging, and longer cuts. | Stronger circuit and air demand, larger consumables, and overstated severance claims. |
| Cutter with digital air display | Fast checks and repeatable setup. | Static readings can mislead; regulator stability and flowing pressure still need verification. |
Budget Model Highlights
On a tight budget, choose the class that matches your work. A basic CUT50-style machine can be enough for occasional thin-stock repairs. A verified 50A pilot-arc unit is a stronger all-around choice for rusty and painted steel. A 60A to 65A machine makes sense when its 240V clean-cut capacity, circuit requirement, and compressor demand match the shop.
Do not overpay for features you will not use. CNC ports, phone apps, elaborate panels, and high severance figures matter less than stable output, common consumables, a readable manual, and a seller that supports the exact model revision.
Performance Trade-Offs
On 120V, expect reduced maximum output on most dual-voltage budget cutters. On 240V, the same model may cut faster or handle thicker stock because more input power is available. Kerf, bevel, and dross still depend on material, consumable condition, torch angle, standoff, air quality, and travel speed.
Pilot arc is useful, but heavy rust, thick paint, mud, grease, and poor work-clamp contact still cause problems. Clean a clamp spot, attach close to the cut on the part that will remain supported, and make a short test cut on scrap of the same material and thickness.
Price does not guarantee throughput. A more expensive machine can disappoint when it is starved for air, connected to a weak circuit, fitted with incorrect parts, or pushed beyond the manufacturer’s recommended capacity.
Reliability and Support
Before buying, check whether the seller publishes a complete manual, identifies replacement torches and consumables, states who pays warranty shipping, and provides a reachable support channel. Save the model, serial number, receipt, manual, and parts list in the farm’s equipment records.
- For occasional repairs: A basic machine can be enough if it is stored dry and supplied with clean air.
- For rough steel: Pilot arc is worth prioritizing for painted, rusty, or interrupted material.
- For frequent use: Put support, duty cycle, and parts availability ahead of the lowest price.
- For thicker plate: Step up only when the 240V circuit and compressor can support the higher output.
Inspect the Cutter Before the Return Window Closes
- Confirm the model, voltage label, plug, torch, work lead, regulator, and accessories match the order.
- Read the manual and verify the breaker, air, and consumable requirements before powering it.
- Check fittings, leads, insulation, strain relief, fan openings, and torch parts for damage.
- Make test cuts on clean mild steel at several thicknesses within the recommended range.
- Check for stable starts, correct pressure under flow, overheating, fault codes, air leaks, and abnormal connector heat.
- Order and test-fit the correct replacement consumables while returns and support are easy to access.
Troubleshooting Common Farm Cutting Problems
| Problem | Likely Checks |
|---|---|
| Pilot arc starts but will not transfer | Clean the clamp point, move the clamp closer, confirm the work is conductive, inspect the work lead, and check consumables and standoff. |
| Arc will not cut through | Check actual material thickness, input voltage, output setting, travel speed, torch angle, flowing pressure, compressor recovery, and worn parts. |
| Heavy dross or wide kerf | Correct speed, amperage, standoff, air pressure, torch angle, and consumable condition; test on clean scrap. |
| Breaker trips or plug gets hot | Stop using the setup. Check duty cycle, shared loads, circuit rating, conductor size, cord length, damaged contacts, and the manual’s input-current requirements. |
| Consumables fail quickly | Look for wet or oily air, excessive pressure, incorrect parts, piercing blowback, loose assembly, wrong standoff, and repeated pilot-arc firing without transfer. |
| Erratic cut on rusty or painted steel | Remove heavy contamination, clean the clamp area, use pilot arc correctly, keep a steady torch height, and slow down only enough to maintain full penetration. |
Safety, Setup, and Maintenance Tips for Longer Service Life
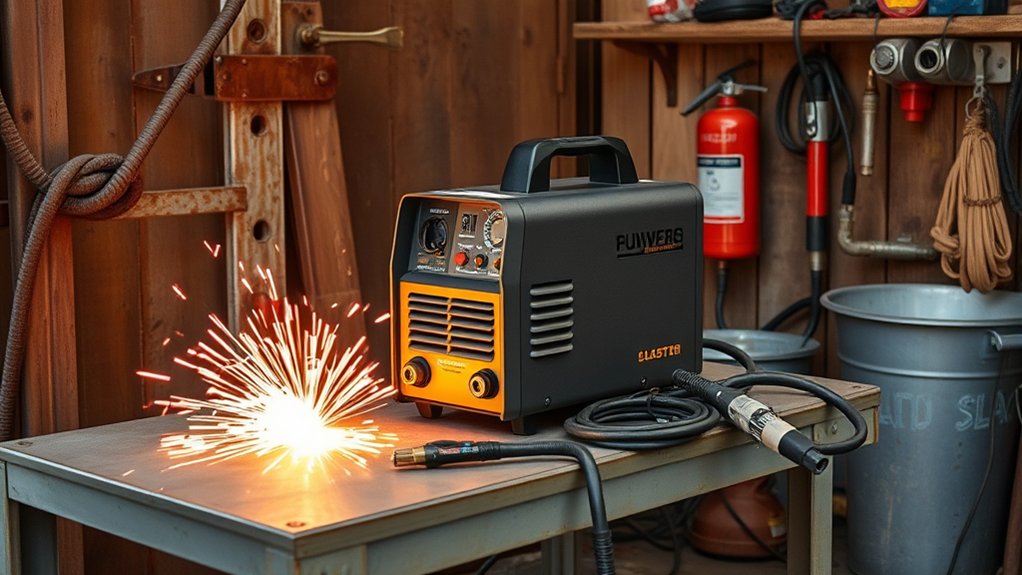
Plasma cutting brings fire, shock, eye, burn, fume, compressed-air, and noise hazards. Treat every cut as hot work. OSHA’s general welding and cutting requirements call for removing or shielding combustibles, keeping extinguishing equipment ready, and using a trained fire watch when conditions require one. Where a fire watch is required under that standard, it must continue for at least 30 minutes after cutting ends.
Clear hay, chaff, dry grass, cardboard, oily rags, wood scraps, fuel containers, solvent cans, pesticide containers, and combustible dust from the spark path. Check both sides of the work and look through floor, wall, and frame openings where sparks can travel. Do not cut where explosive vapors or dust may be present.
Never cut a used drum, barrel, tank, closed tube, pressure vessel, or hollow equipment part merely because it looks empty. OSHA requires used containers to be thoroughly cleaned of flammable or toxic residues, with connections disconnected or blanked, and hollow spaces vented before hot work. Farm fuel, oil, chemical, and pesticide containers require a formal safe procedure—not a casual rinse.
Wear eye and face protection that matches the process. OSHA’s filter-lens table lists shade 8 as the minimum for light plasma arc cutting below 300A. Use safety glasses with side protection under the helmet, suitable gloves, flame-resistant clothing, closed footwear, and hearing protection. Choose a helmet mode and shade that meet the machine manual and applicable rules.
Control fumes at the source. OSHA’s ventilation requirements for welding and cutting address enclosed spaces and metals or coatings that contain zinc, chromium, lead, cadmium, and other hazardous materials. Identify paint and plating before cutting. Outdoor work can reduce accumulation, but it does not make toxic coatings harmless or replace required respiratory protection and exposure controls.
Keep the work clamp clean and tight. Remove paint, rust, and scale at the clamp point. Inspect the torch lead, hose, fittings, power cord, plug, strain relief, and work lead before each job. Keep the torch and sparks away from batteries, wiring harnesses, electronic controls, hydraulic hoses, tires, bearings, seals, and pressurized lines. Follow the equipment manufacturer’s service procedure before cutting on a machine or vehicle.
The arc, compressor, and air blast can create hazardous noise. NIOSH’s recommended exposure limit is 85 dBA averaged over an eight-hour workday. Move livestock away from the work area when possible, avoid sudden cutting near confined animals, and use distance or barriers to reduce stress and exposure.
After use, let the machine complete its post-flow and cool. Disconnect power before inspection, drain the compressor tank, inspect the filter, coil leads loosely, and store the cutter and consumables in a clean, dry location above the floor. Do not blow high-pressure shop air into the cabinet unless the manufacturer’s maintenance instructions allow it.
Farm Cutting Setup That Actually Works
A reliable budget setup is more than the cutter. Build the system around the machine:
- Power: Use a circuit that matches the manual; choose 240V for higher-output work when the model supports it.
- Air: Match delivered compressor CFM and flowing pressure to the manual.
- Dryness: Drain the tank and use filtration or drying suitable for the compressor and climate.
- Material check: Identify the metal, coatings, trapped fluids, pressure, and nearby components before cutting.
- Work connection: Clamp to clean metal close to the cut on the supported portion of the work.
- Consumables: Install the exact parts in the correct order and keep a spare set in sealed storage.
- Fire control: Clear or shield combustibles, inspect hidden spark paths, keep extinguishing equipment ready, and assign a fire watch when required.
- PPE and ventilation: Protect eyes, skin, hearing, and breathing zone for the material and location.
- Test cut: Use scrap of the same material and thickness to set amperage, speed, and technique.
- Post-cut check: Mark hot metal, inspect both sides and hidden spaces for fire, and maintain the required fire watch.
Note: Do not plasma-cut unknown coatings or work near fuel systems, chemical containers, hay storage, combustible dust, or manure-gas areas. Identify the hazard and use the required ventilation, respiratory protection, isolation, cleaning, and hot-work controls first.
Ten-Minute Pre-Cut Check
- Read the work order and identify what is behind and below the cut.
- Disconnect or protect sensitive equipment as required by its service manual.
- Clear combustibles and confirm the extinguisher and fire-watch plan.
- Inspect the torch, leads, cord, plug, work clamp, hose, and fittings.
- Drain moisture and check the filter and flowing air pressure.
- Confirm the installed consumables match the torch, amperage, and process.
- Clamp to clean metal and support the drop so it cannot strike a hose, tire, person, or animal.
- Make a short test cut and adjust speed rather than forcing the torch through a poor setup.
Frequently Asked Questions
Can a plasma cutter run from a small generator in a remote field?
Possibly, but only when the generator meets the cutter manual’s kW or kVA requirement and provides suitable power quality. Include the compressor load if both run from the generator. Use correctly sized cords and test the complete setup under load before depending on it for a repair.
How does cold weather affect plasma cutter performance and storage?
Cold can stiffen hoses and increase condensation when equipment moves between temperatures. Store the cutter and consumables dry, drain the compressor, protect filters from freezing, and let the machine acclimate before use when the manual requires it. Follow the listed operating and storage temperature limits.
Are there farm-friendly cases or carts for rough terrain?
Yes. Use a low, stable cart with suitable tires, secure tie-downs, dry consumable storage, lead hooks, and protected air fittings. Keep the cutter above mud and water. Do not mount it where sparks, dust, rain, or a falling workpiece can enter the vents or damage the leads.
What insurance or liability issues arise when using a cutter on leased land?
Fire, injury, property damage, pollution, and equipment damage may create liability. Review the lease and insurance terms, follow site hot-work rules, document precautions, and obtain written authorization when required. Legal and insurance obligations vary, so ask the property owner and insurer before cutting near barns, crops, fuel, or shared equipment.
How noisy are budget plasma cutters, and can they affect livestock?
Noise comes from the arc, compressed-air jet, and compressor. Measure or assess exposure and use hearing protection when required. Keep cutting away from pens, move nervous animals when practical, and use distance or barriers to reduce sudden noise and spark exposure.
Is a 50A plasma cutter enough for farm repairs?
Often, yes, for sheet metal, tabs, brackets, gates, trailer work, and plate within the model’s documented clean-cut range. Do not assume every 50A machine performs the same. Compare its output on 120V and 240V, cut chart, duty cycle, and air requirement.
What is the biggest mistake with cheap plasma cutters?
The biggest mistake is judging the machine before verifying the setup. Wet or oily air, low voltage, an unsuitable cord, poor clamp contact, wrong consumables, bad standoff, and excessive travel speed can make a capable cutter perform badly.
Can an air plasma cutter cut aluminum and stainless steel?
Yes. Plasma can cut electrically conductive metals, including mild steel, stainless steel, aluminum, and copper. Edge quality, dross, fumes, gas choice, and capacity differ by material, so use the manufacturer’s cut chart and appropriate ventilation.
How large should the compressor be?
Size it from the cutter manual’s required CFM at the stated flowing pressure, then add reserve for hose, filter, duty cycle, and compressor recovery. Tank gallons alone do not show whether the compressor can sustain the cut.
Should a farm shop choose HF start or non-HF blow-back start?
Both can cut well, but non-HF blow-back start is generally easier to manage near sensitive electronics because it does not use high-frequency arc initiation. HF-start machines may cost less. Follow the manufacturer’s separation, grounding, and cable-routing guidance for either design.
Conclusion
A good cheap plasma cutter for farm use does not have to be fancy. Start with the material and thickness you cut most, then choose a model with a documented clean-cut rating, suitable output on your available voltage, manageable air demand, identifiable consumables, and support you can reach. Pilot arc is valuable on rough farm steel, while non-HF starting is attractive around sensitive electronics.
The best results come from the whole setup: correct power, clean dry air, a sound work connection, proper technique, fire control, ventilation, PPE, and regular inspection. Build those basics around the cutter, and a budget machine can handle many farm repairs without turning every job into a troubleshooting session.
Sources
- OSHA 29 CFR 1910.252, General Requirements for Welding, Cutting, and Brazing — fire prevention, fire-watch duration, containers, ventilation, and hot-work controls.
- OSHA 29 CFR 1910.133, Eye and Face Protection — minimum filter-shade guidance for plasma arc cutting.
- OSHA 29 CFR 1926.353, Ventilation and Protection in Welding, Cutting, and Heating — ventilation and controls for enclosed work and hazardous metals or coatings.
- NIOSH, About Occupational Hearing Loss — the 85 dBA eight-hour recommended exposure limit and hearing-loss prevention.
- Hypertherm, How to Buy a Plasma Cutter — power, clean-cut sizing, and clean, dry, oil-free air considerations.
- Hypertherm, Common Plasma Cutting Mistakes — consumable selection, gas pressure, contamination, and cut-quality troubleshooting.