As a DIYer, you can weld truck body panels, exhaust, brackets, and some chassis repairs with a MIG welder. Choose 110V for light work or 220V for heavier steel, and use solid wire with 75/25 argon-CO2 gas. Clean metal to bare steel, fit joints tightly, and test settings on scrap. Keep a short stickout, use the correct torch angle, and move steadily to avoid burnthrough. With a few basics, you’ll handle more repairs confidently next.
What You Can Weld on a Truck?
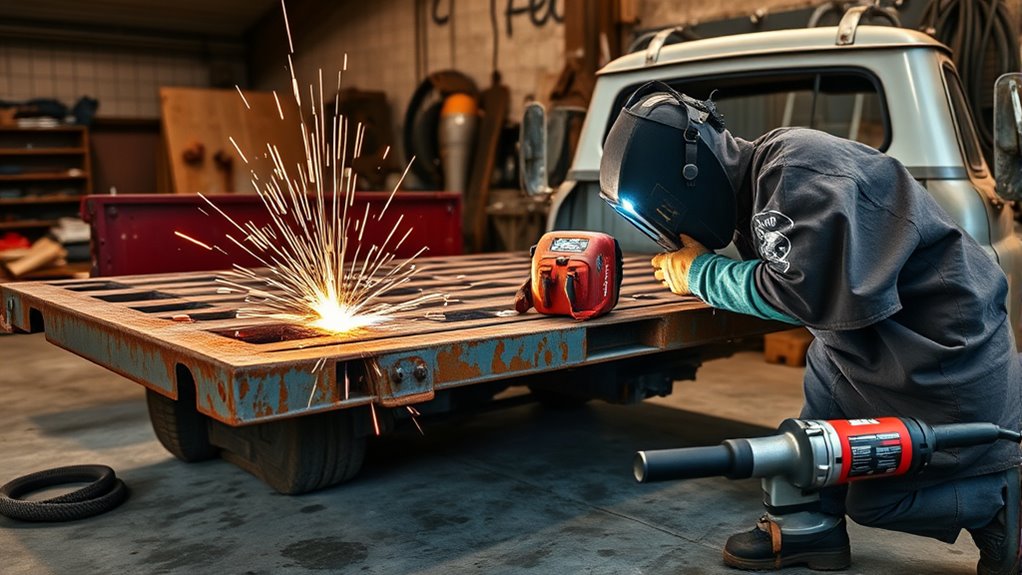
On a truck, you can weld several key components, but each one calls for the right process and material. You can handle auto-body panels in automotive repair with MIG welding, especially when you’re fixing dents, rust, or thin 24-gauge to 18-gauge steel.
Truck repairs need the right weld, especially for auto-body panels, dents, rust, and thin steel.
For frame and chassis work, you weld to restore structural integrity, and you must match the high-strength steel so the repair stays safe under load. You can also weld exhaust systems to seal leaks or replace damaged sections, often using stainless steel for corrosion resistance. MIG welding 304 stainless steel is a popular choice for this due to its excellent corrosion resistance.
Suspension parts like control arms and strut assemblies may need welding to keep them durable and functional during operation. When you work with aluminum body panels or engine parts, you need specialized MIG or TIG techniques because aluminum behaves differently from steel.
Choose the right method, control heat, and let your repair support real freedom on the road.
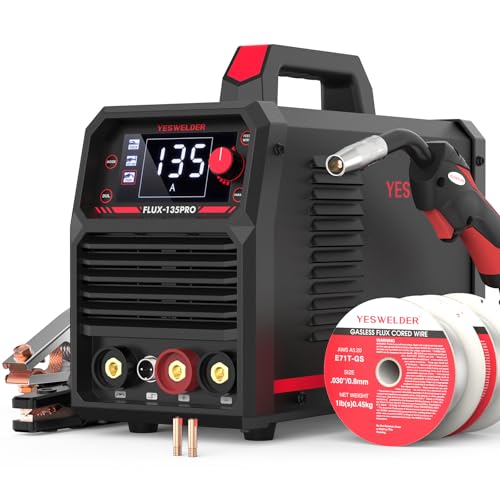
Choose the Right Welder for Auto Repair
Once you know what you can weld on a truck, the next step is picking a machine that matches the job. For most automotive applications, MIG welding is the practical choice because it’s versatile, fast, and easier to control on steel and aluminum.
Compare welder types before you buy: TIG gives finer precision on thin material, but it demands more skill and time. Check power requirements against your shop supply; 110V units suit lighter repair work, while 220V machines handle heavier fabrication.
Choose wire and gas selection carefully: solid wire with a 75% argon and 25% CO2 mix helps reduce spatter and improve bead quality. Learn the machine settings for voltage and wire feed speed, then start with the manufacturer’s recommended values. Additionally, understanding MIG transfer modes can help you select the best technique for your specific automotive welding needs.
If you want a simpler path, look for Auto-Set features. They can free you from guesswork and help you build clean, repeatable welds.
Products Worth Considering
![ARCCAPTAIN 165A MIG Welder 110V/220V [Large LED Display] 4 in 1 Gasless/Gas MIG/Lift TIG/Stick Welding Machine Multiprocess Welder Machine, IGBT Inverter Welder with Synergy, 2T/4T](https://m.media-amazon.com/images/I/51GW2TUAy1L._SL500_.jpg)
4-IN-1 MIG Welder: The welder machine offers GAS MIG/Flux Core MIG/Lift TIG/ MMA welding modes (Note: WP-17V TIG torch must be purchased separately). It can easily handle welding stainless steel, carbon steel, and even thicker steel materials, meeting diverse welding requirements.

MULTIFUNCTIONAL: A 4-in-1 welder, capable of Flux Core MIG/Gas MIG/ Stick/Lift TIG (need to purchase extra tig lift torch). This unit caters to a wide range of welding applications and meets your various welding needs.
MULTI PROCESS: Experience the convenience of a high-quality, budget-friendly 3-in-1 welding machine that masterfully handles Gasless Flux Core MIG/Stick/Lift TIG(additional 10-25 lift TIG torch required). This unit caters to a wide range of welding applications and meets your various welding needs.
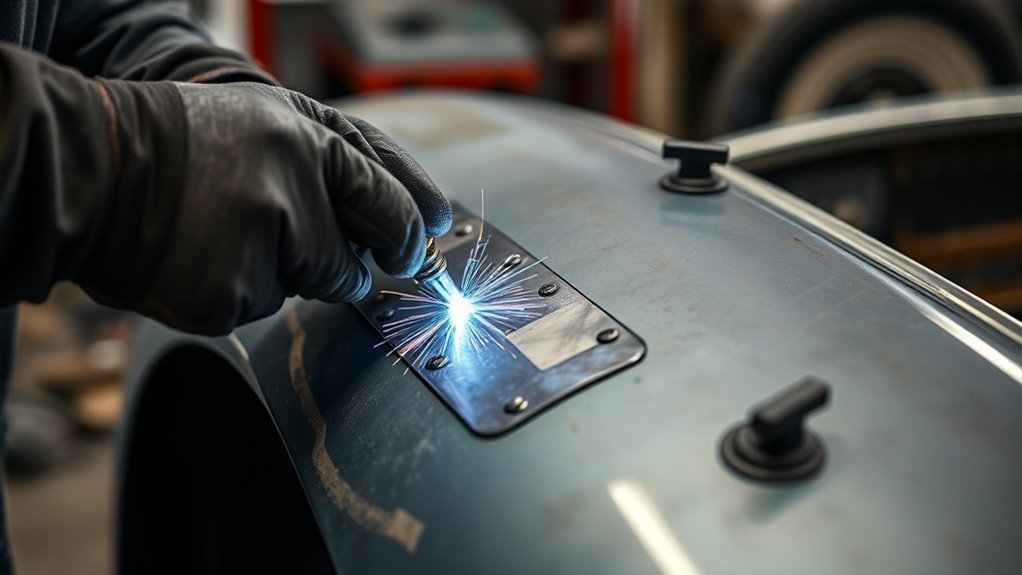
MIG Welding Basics for Auto Body Work
For auto body work, MIG welding gives you the speed and control you need on thin steel, from 24-gauge sheet metal up to about 1/4-inch material. You can repair panels and brackets with less distortion when you respect the joint and the metal.
| Check | Target | Why it matters |
|---|---|---|
| Wire selection | Solid wire | Supports clean MIG welding |
| Stickout | 1/4–3/8 in. | Helps weld quality |
| Prep | Clean, bevel base material | Improves penetration |
Use proper wire selection for automotive metals: solid wire with 75% argon and 25% CO2. Keep your wire stickout at 1/4 to 3/8 inch from the contact tip. On thin materials, push the puddle; on thicker sections, pull it for stronger penetration. Clean the base material and bevel joints as needed before you strike an arc. That discipline protects weld quality and gives you the confidence to build and repair on your own terms. Additionally, ensuring correct polarity is crucial for achieving optimal welds.
Products Worth Considering

Do Your Best Work ... Color all your clients impressed with the precision and arc control of the ER70S-6 solid MIG welder wire. You'll love the low splatter whether you're performing single or multi-pass welds. Great for T-joints, butt welds & lap welds.

Lincoln ED030584 .035", NR-211, LB Spool, Inner Shield Flux-Core Welding Wire

ER4043 WELDING WIRE: A premium 5% silicon aluminum (AlSi5) filler metal designed for the MIG welding process. This composition delivers excellent fluidity and wetting characteristics, making it ideal for welding a wide range of aluminum alloys. It features a melting range of 1065°F to 1170°F, a density of 0.097 lbs/in³, and produces a consistent gray finish after anodizing.
Set Wire, Gas, and Power Settings
Dial in your MIG setup before you touch the panel: choose solid wire in the 0.023 to 0.035 inch range to match the steel thickness, then load 75% argon and 25% CO2 for stable arc performance and low spatter.
Match wire size to the job, then set power settings from a chart and verify voltage and feed rate for your gauge; for 18-gauge steel, start near 17-21 volts. Use amperage control to suit material thickness, aiming near 1 amp per 0.001 inch as a practical guide.
Keep your travel speed steady so the bead stays even and the arc doesn’t wander.
- Confirm shielding gas flow before striking an arc.
- Make test welds on scrap that matches the panel.
- Tune settings until fusion is clean and distortion stays low.
That discipline gives you control, cleaner welds, and the freedom to build without guesswork. Additionally, using E71T-GS welding wire can enhance your setup by offering minimal spatter and superior slag coverage.
Prep Metal Before You Weld
Clean metal is nonnegotiable before you strike an arc, because rust, paint, oil, and dirt will contaminate the weld and weaken the joint. You need strict cleanliness, so use the right tools: wire brushes, grinders, and chemical cleaners. Remove every trace of contamination, then wipe the surface dry.
Check the fit-up next; your parts should meet tightly, with no excessive gaps. Match the joint configuration to the repair, and bevel the edges when metal thickness exceeds 1/8 inch so weld penetration improves. For thinner sheet, keep the joint flat and precise.
After cleaning, let the metal cool to room temperature and dry completely; moisture can flash to steam and trap defects. When you prep carefully, you take control of the weld and build stronger, safer repairs. Good prep isn’t busywork—it frees your weld from preventable failure and lets the arc do its job. Additionally, ensure you’ve removed mill scale as it can significantly hinder proper weld penetration.
Practice Automotive Welding on Scrap
Practice on scrap metal that matches the gauge and composition of your project parts so you can replicate real welds without risking good panels.
Start with clean thin-sheet butt and T-joints, then adjust your MIG settings, wire size, and gas mix until the bead profile and penetration are consistent. Remember to ensure thorough oxide cleaning to avoid porosity in your welds.
Keep a fire extinguisher nearby and inspect each test weld between passes so you can correct defects early.
Scrap Metal Practice
When you’re learning automotive welding, scrap metal gives you a low-risk way to build skill before you touch a vehicle panel. Choose scrap metal near the gauge you’ll use in your project, then make practice welds on clean, rust-free surfaces.
Include thin sheet metal and thicker offcuts so you can test welding techniques, voltage, and wire speed without guesswork. Change welding position from flat to vertical to see how angle affects penetration and bead shape.
Keep your torch steady, and adjust travel speed only one variable at a time.
- Clean each piece before you strike an arc.
- Record settings, results, and defects in a log.
- Compare welds to tighten control and refine skill.
Replicate Real Welds
To replicate real automotive welds, start with scrap metal that matches the thickness and type of the panels you’ll actually repair. Then run MIG practice passes on clean, rust-free pieces.
Set your wire stickout to 1/4 to 3/8 inch, then tune voltage and wire speed for the scrap thickness. MIG welding gives you the control you need for thin metals and most automotive repairs.
Practice flat, horizontal, and vertical weld positions so you can adapt your hands and torch angle without hesitation. Keep your workspace clean, and wipe every joint before you strike an arc.
This discipline sharpens welding techniques, reveals gaps in technique, and lets you build skill with no fear of damaging your vehicle. Your scrap metal becomes freedom through precision, not guesswork.
Use the Right Torch Angle and Stickout
Hold the MIG torch at about a 45-degree angle from horizontal, with a slight 15-degree tilt back from the travel direction to improve gas coverage, control, and bead quality. Keep your stickout between 1/4 and 3/8 inch from the contact tip so you maintain a stable arc and consistent weld. For thin material, push the puddle; for thicker sections, you can pull when needed. Additionally, ensure proper shielding gas is used to prevent issues like porosity and achieve cleaner welds.
Torch Angle Basics
Set your MIG torch at about a 45-degree angle from horizontal, then tilt it roughly 15 degrees back from the direction of travel to help stabilize the arc and improve weld control.
In MIG welding, this torch angle gives you dependable penetration and cleaner bead shape during the welding process. Keep wire stickout at 1/4 to 3/8 inch so feed stays steady and the arc remains consistent.
- Use a push technique on thin materials for better fusion and less spatter.
- Match travel speed to an even sizzling sound.
- Slow down only enough to avoid excess heat and discoloration.
When you hold position, guide the puddle, and keep your motion deliberate, you keep control in your hands and build welds that serve your freedom.
Stickout Distance Control
With your torch already held at about a 45-degree angle and tilted slightly back, keep the wire stickout between 1/4 and 3/8 inch from the contact tip. This stickout distance supports arc stability, protects gas coverage, and helps you drive clean weld penetration.
If you extend it too far, the arc can wander, the puddle can get unstable, and weld quality drops. If you shorten it too much, penetration suffers and joints can turn weak.
Match voltage and wire feed speed to the stickout you’re using so the arc stays consistent and you avoid burn-through. Keep your torch angle steady, then practice the same setup on scrap until your hands learn the feel.
That repetition gives you control, confidence, and real welding freedom.
Push vs Pull
When you’re choosing between push and pull, keep your MIG torch about 45 degrees to the work and tilted roughly 15 degrees back from the travel direction on a push so you get a flatter bead, deeper penetration, and good control on flat or horizontal joints.
Use the push technique on thinner metals when you want cleaner weld quality and faster travel speed.
Use the pull technique when you need to drag the puddle, slow down, and control heat on thicker sections or vertical work.
- Keep stickout at 1/4 to 3/8 inch.
- Match travel speed to heat input.
- Pick MIG or TIG based on joint position.
Your hands set the arc, but your judgment sets the result.
Weld Thin Sheet Metal Without Burnthrough
To weld thin sheet metal without burnthrough, you need to keep heat input low and control the puddle closely: use a 1/4- to 3/8-inch wire stickout, drop voltage to about 15 to 18 volts, and travel steadily at roughly 4 to 6 inches per minute on 24-gauge material so the weld can cool as you move.
In MIG welding, keep a shallow travel angle and use the push technique to spread heat and stabilize the arc. Choose 0.023-inch wire when you can; it melts with less energy and gives you tighter control on thin welding materials.
Before you run the full seam, add small tack welds along the edge to lock alignment and share heat. Then connect the tacks with short, deliberate welds, pausing only as needed to avoid burnthrough.
Watch the puddle, not the bead, and let precision, not force, free your repair. Additionally, ensure the metal is thoroughly cleaned to prevent poor weld quality and achieve better results.
Handle Vertical and Overhead Welds
For vertical welds, you’ll control the puddle best with a slight 0 to 15 degree work angle, a push technique, and voltage and amperage reduced by about 10 to 15 percent. For overhead welds, you should move faster and lower your settings by 10 to 15 percent to limit heat buildup and keep the weld stable. Practicing both positions on scrap first will allow you to refine travel speed, puddle control, and safety before working on the vehicle. Additionally, ensure you understand the importance of heat input control to prevent burn-through when welding thin metal.
Vertical Weld Control
Vertical welds demand tighter control than flat welds, so cut voltage and amperage by 10 to 15% to improve visibility, limit heat buildup, and reduce warping.
In vertical welding, you control the molten pool with steady travel speed and a slight 15-degree backward angle. Clean the base metal first so contamination won’t compromise the weld joint.
- Use a weave pattern to spread heat evenly.
- Keep your arc tight for better penetration and fusion.
- Adjust travel speed to match pool size and position.
Watch the puddle, not the arc alone. If it grows too large, move faster; if it stiffens, slow down slightly.
This disciplined technique helps you build strong, clean vertical welds with less distortion and more freedom to shape the metal on your terms.
Overhead Weld Safety
When you’re welding overhead, cut voltage and amperage by 10 to 15% to keep spatter down and maintain control of the weld pool.
Set your body so you can grip the torch steadily and work without strain; stable posture improves accuracy in overhead welding.
Use a push technique, not a pull, to direct molten metal and preserve penetration.
Hold a consistent travel speed: too slow overheats the joint and distorts panels, while too fast leaves a weak bead.
Wear full safety gear, including a welding helmet with auto-darkening lens, gloves, and protective clothing rated for fire resistance.
This protects you from sparks, UV radiation, and falling slag so you can work with confidence and autonomy.
Make Your First Truck Welds Safely
Before you strike your first arc, suit up with a welding helmet that has auto-darkening, gloves, and fire-resistant clothing. Then clean the truck metal back to bare steel by removing rust, paint, and any contamination. You need this prep to make sound welds and protect your safety.
Set your machine for the metal thickness, then check voltage and wire feed speed before you start MIG welding. Use welding gloves that fit well and keep your hands protected while you maintain control.
- Practice on scrap steel with the same gauge as your truck.
- Hold a 45-degree torch angle and keep a steady travel speed.
- Watch the puddle and stop before you overheat or warp the panel.
You’ll build skill fast when you practice deliberately. Keep your bead short, inspect it, then adjust and repeat. That discipline gives you freedom: fewer mistakes, stronger repairs, and a truck that’s ready to roll. Additionally, proper settings can significantly enhance the quality and integrity of your welds.
Frequently Asked Questions
Do I Need a Welding Certification for Home Auto Repairs?
No, you usually don’t need certification for home auto repairs, but you should learn welding techniques, use DIY tools safely, plan your project, follow welding tips, weigh cost considerations, and avoid common mistakes.
Which Metals Are Hardest to Weld on Older Vehicles?
High-carbon steel, galvanized steel, and rust-thinned sheet metal’re hardest for you to weld on older vehicles. You’ll need proper welding techniques, metal types, vehicle age, common challenges, repair methods, and tool selection.
How Do I Know if a Panel Is Too Rusted to Repair?
A panel’s too rusted when rust assessment techniques reveal holes, flaking seams, and structural loss; use tools for inspection at common rust locations. Consider panel replacement options over cost effective repairs, then apply rust prevention methods.
Can I Weld Near the Truck’s Electrical System Safely?
You can weld near the truck’s electrical system safely if you disconnect power, isolate modules, and use welding equipment safety. Apply electrical system precautions, respect welding proximity concerns, prioritize grounding techniques importance, use spark protection methods and insulation materials usage.
What Safety Gear Is Essential for Beginner Automotive Welding?
You’ll need welding helmets, fire resistant clothing, welding gloves, respirator masks, safety glasses, and ear protection. Wear them every session; they’ll protect you from arc flash, fumes, sparks, spatter, noise, and debris.
Conclusion
Getting started with automotive welding means matching your welder, settings, and technique to the metal you’re joining. You’ll get better results when you clean the surface, control stickout, and keep heat low on thin sheet. For added perspective, note this: a properly tuned MIG setup can cut rework time by up to 50% compared with guesswork. Practice on scrap first, then make your first truck welds safely and with confidence.


