

To avoid warping thin panels during welding, keep the weld area small, control heat input, and let the panel cool between short welds. Thin sheet metal moves fast because it heats quickly and shrinks as it cools. Use tight fit-up, steady clamping, tack welds, stitch welding, and the lowest settings that still give clean fusion.
Quick Answer
Prevent thin-panel warping by cleaning the metal, fitting the seam tightly, clamping it firmly, placing tack welds across the joint, and welding in short stitches while skipping around the panel. Let each area cool before adding more weld. Avoid long continuous beads, high amperage, wide gaps, and aggressive quenching.
Key Takeaways
- Warping happens when heat expansion and cooling shrinkage pull thin metal out of shape.
- Short tack welds and stitch welds control heat better than one long bead.
- Tight fit-up matters because gaps force you to add more filler metal and more heat.
- Use heat sinks, backing bars, and cooling pauses before reaching for compressed air.
- Paint, zinc coating, undercoating, seam sealer, and oil must be removed before welding.
At a Glance
| Time Required | 30 minutes to several hours, depending on seam length, cooling time, and repair size |
| Difficulty | Moderate, because heat control and patience matter more than bead size |
| Tools Needed | Welder, clamps, backing bar, copper or aluminum heat sink, grinder, wire brush, PPE, fire extinguisher, and scrap test pieces |
| Cost | Low if you already own welding equipment; extra cost is usually clamps, abrasives, backing bars, and safety gear |
Warning: Welding creates arc radiation, fumes, sparks, and fire hazards. Wear proper eye, face, hand, skin, and respiratory protection, remove nearby combustibles, and keep suitable fire-extinguishing equipment ready. OSHA covers welding, cutting, and brazing hazards and fire-prevention requirements at OSHA Welding, Cutting, and Brazing and OSHA 1910.252.
What Causes Warping in Thin Panels During Welding
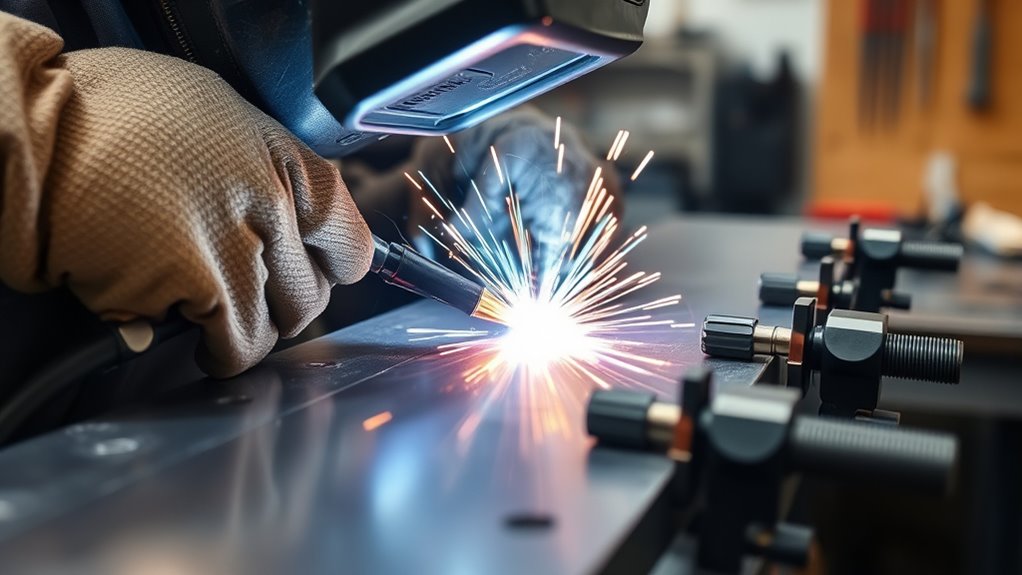
Warping happens when part of a thin panel gets hot, expands, and then shrinks as it cools. The hotter and wider that area gets, the more the metal tries to pull itself out of shape.
Thin metals are more sensitive than thick plate because they have less mass to absorb heat. A long bead, high amperage, slow travel speed, or wide gap can put too much heat into a small area. That heat creates a larger heat-affected zone and more shrinkage.
The goal is not to make the prettiest long bead. The goal is to make enough clean welds to join the panel while keeping the surrounding metal cool and stable.
Poor clamping also causes warping. If the panel can move while you weld, each tack or stitch can pull the joint slightly out of alignment. Gaps make the problem worse because you need more filler metal and more arc time to bridge them.
Material type matters too. Mild steel, stainless steel, galvanized steel, and aluminum do not move the same way. Before welding coated metal, remove coatings from the weld zone and nearby heat zone. If you are working with zinc-coated steel, review safe coating-removal practices before striking an arc, because zinc fumes are hazardous.
Good heat input management lets you predict these problems before they ruin the panel.
How Heat Input Affects Thin Panel Welding
Heat input is controlled by your machine settings, travel speed, arc length, and weld length. Higher current, higher voltage, slower movement, and long continuous welds all add more heat to the panel. Welding parameters can also change the properties in and around the weld zone, especially when heat input, filler metal, and bead order vary, as discussed in this weld integrity and heat-input research paper.
For thin panels, aim for a small puddle that wets into both edges without blowing through. If the puddle grows wide, the panel turns blue far from the seam, or the metal starts to sink, stop and let it cool.
Use the lowest practical amperage or wire-feed setting that still gives fusion. Keep your travel speed steady. Do not slow down to “build up” a weak spot unless you are intentionally filling a gap with controlled tacks.
Pulse welding can help when your machine has it, especially with TIG or advanced MIG modes. Pulse alternates between a higher peak current and a lower background current, which can help you control puddle size. It is not a cure for poor fit-up, but it can make thin-panel work easier.
Note: Do not chase penetration with heat alone. On thin sheet, better fit-up, cleaner metal, smaller wire, shorter welds, and a better tack pattern usually solve the problem with less distortion.
Safety Setup Before Welding Thin Panels
Before welding thin panels, set up the work area so you are not fighting fumes, fire risk, or hidden coatings.
- Remove flammable materials: Clear rags, solvents, paper, fuel vapors, upholstery, insulation, seam sealer, and undercoating away from the weld zone.
- Wear proper PPE: Use a welding helmet with the correct shade, safety glasses, gloves, flame-resistant clothing, and hearing protection when grinding. CCOHS outlines welding PPE categories in its welding PPE guidance.
- Control fumes: Use ventilation that pulls fumes away from your breathing zone. CCOHS notes that local exhaust ventilation is the preferred method for removing welding fumes and gases in many cases in its welding ventilation guidance.
- Clean both sides when possible: Paint, rust, oil, adhesive, zinc coating, and undercoating can contaminate the weld and create harmful fumes.
- Keep fire watch: Thin automotive panels can hide hot sparks behind trim, insulation, or seam sealer. Check the back side during and after welding.
Techniques to Prevent Warping and Minimize Distortion
To prevent warping, use several small heat-control habits together. One technique helps, but the full system works better.
- Use stitch welding: Make short welds instead of one continuous bead. For many thin panels, a 1/2-inch to 1-inch stitch is enough before moving away.
- Skip around the seam: Do not place every weld beside the last one. Jump to a cooler area so heat spreads out over time.
- Use tack welds first: Tacks lock the panel in position before you add more weld.
- Use backing bars: Copper or aluminum backing bars support the puddle and absorb heat. They are especially helpful near edges and small gaps.
- Keep gaps tight: A tight butt joint needs less filler and less heat than a wide gap.
- Let the panel cool naturally: Wait until the metal is comfortable to touch near the weld area before adding more welds nearby.
When joining different thicknesses, size the weld for the thinner piece. Oversized welds add heat without adding useful strength and can lead to melt-back. For more on weld sizing, see this guide to maximum fillet weld size.
Products Worth Considering

Enough Quantity: with each package, you get 2 pieces of copper flat bar, an ideal quantity for a wide range of your creative and practical projects, offering nice ductility and are easy to cut and weld, ensuring you can easily adapt them for a variety of applications and project needs

Copper Flat Bar Size: The package comes with 1PCS of copper bar stock in following. Size: Length 102mm/4.01-inch; Width 50mm/1.97-inch; Thickness 10mm/0.39-inch. Dimensions are hand-cut, so slight variations are normal. The tolerance is +0.5 to 1 mm.
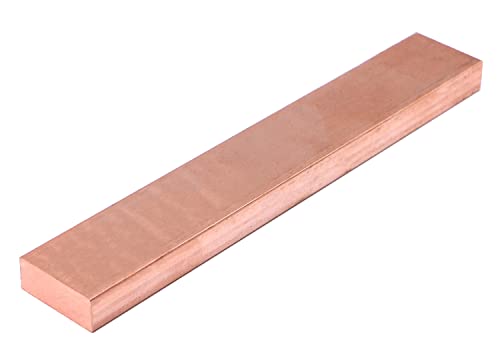
Material:Copper Flat BAR
Preparing Materials for Welding
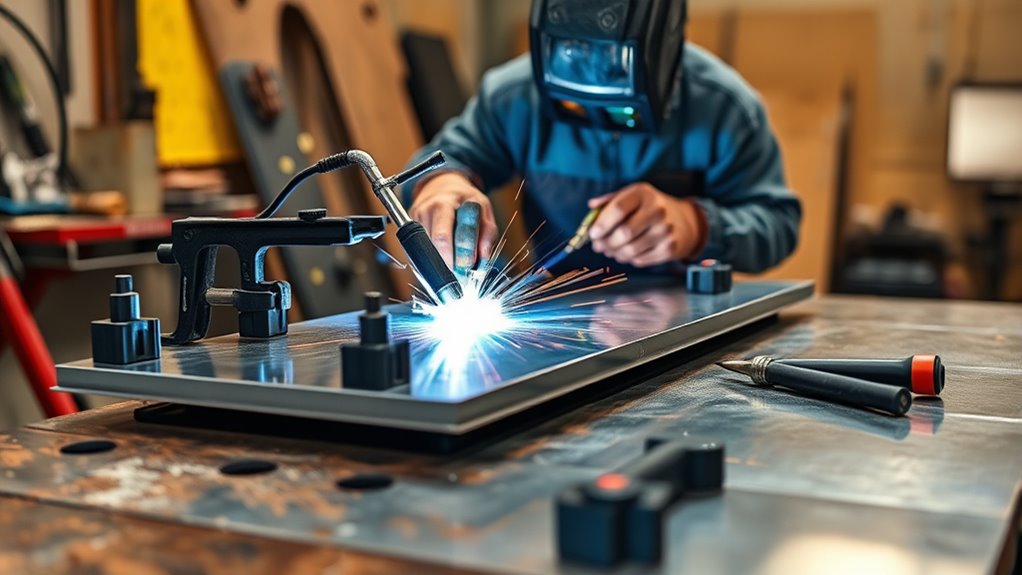
Good preparation prevents many distortion problems before they start. The cleaner and tighter the joint is, the less time you need to spend with the arc on the panel.
Start by grinding or sanding the weld zone to bright metal. Clean at least 1/2 inch to 1 inch on both sides of the seam, and clean the back side when you can reach it. Remove paint, rust, oil, seam sealer, adhesive, primer, galvanizing near the weld zone, and undercoating. For beginner cleanup basics, review these flux-core welding tips.
Next, test fit the pieces. The panels should sit flush with as little gap as possible. If one edge sits higher than the other, the weld will pull unevenly as it shrinks.
Use clamps, magnets, panel-holding clips, or temporary screws to hold the seam. When welding corners, aluminum angle brackets or copper backing can help keep the joint straight while also pulling heat away from the weld.
Light preheating is not a universal requirement for thin sheet metal. In a cold shop or with certain materials, gentle and even warming can reduce a sharp temperature difference. Do not use a fixed 100°F to 200°F rule for every panel. Follow the material procedure when one exists, and avoid adding unnecessary heat to thin auto body panels.
Step-by-Step Welding Sequence for Thin Panels
Use this sequence when welding thin steel or auto body panels. Adjust the details for your metal, welder, and joint type.
- Practice on scrap first: Use scrap from the same thickness and material. Dial in your settings before touching the real panel.
- Clean and fit the joint: Remove coatings and close gaps. Fix fit-up problems before welding.
- Clamp the panel: Support the seam so it cannot lift, slide, or twist.
- Place the first tacks: Tack the ends first, then the center, then split the spaces between tacks.
- Spread the tacks: Place small tacks every 1 to 2 inches on long seams. For very thin sheet, use more tacks and less weld length.
- Check alignment: Stop and inspect. If the panel has shifted, fix it before adding more weld.
- Add short stitches: Weld short sections between tacks, then move to a cool area.
- Cool between stitches: Let heat fade before welding near the same spot again.
- Fill the remaining gaps: Keep skipping around until the seam is complete.
- Grind lightly: Do not overheat the panel while grinding. Use short passes and let the area cool.
Pro Tip: Keep one bare hand near, not on, the weld area to feel panel temperature between stitches. If the surrounding metal is too hot to touch comfortably, wait before welding near that area again.
Implement Cooling Strategies to Prevent Warping
Cooling strategy matters because sudden contraction can pull a panel just as much as the welding heat can. The best cooling method is usually controlled patience.
- Use heat sinks: Place copper or aluminum behind the weld area when possible. This absorbs heat and supports the puddle.
- Pause between welds: Give the panel time to cool naturally before adding heat nearby.
- Skip around: Move from one end of the panel to the other instead of stacking heat in one spot.
- Use compressed air carefully: Light air movement can help between stitches, but do not blast one hot spot until it shocks cold.
- Watch the panel shape: Stop if the panel begins to crown, sink, or oil-can.
If you are welding galvanized material, remove zinc coating from the weld area and manage fumes carefully. See this guide on how to remove zinc coating from galvanized steel before welding.
How to Use Tacks and Stitch Welding for Better Control
Tack welds and stitch welds are your main tools for controlling distortion. A tack locks the panel in place. A stitch adds strength without the heat load of a full bead.
For MIG welding thin panels, short-circuit transfer is commonly used because it works at lower heat than spray transfer. If you are learning thin metal MIG setup, see this guide on how to MIG weld thin metal without burning through.
Effective Tack Placement Strategies
Place tacks in a pattern that spreads shrinkage across the panel instead of pulling from one end to the other.
- Start with anchor tacks: Tack each end of the seam, then tack the center.
- Split the distance: Add more tacks halfway between existing tacks until the seam is stable.
- Keep tacks small: A tack should fuse the joint without creating a tall lump that needs heavy grinding.
- Let tacks cool: Do not keep tacking right beside a fresh hot tack.
- Correct movement early: If the panel shifts, cut or grind the tack and realign it before continuing.
Benefits of Stitch Welding
Stitch welding reduces heat concentration by breaking the seam into short welds. It also gives you more chances to check the panel before distortion becomes permanent.
| Technique | Benefit |
|---|---|
| Short tacks | Lock the panel with minimal heat |
| 1/2-inch to 1-inch stitches | Build the seam without a long hot bead |
| Skip pattern | Spreads shrinkage across the joint |
| Cooling pauses | Keeps the heat-affected area smaller |
After each stitch, pause long enough for the panel to cool near that area. If you keep welding while the panel is already hot, the next stitch will move the metal more than the last one.
Choosing the Right Equipment and Settings for Welding
The right welding setup makes thin-panel control easier. You want stable starts, a small puddle, and enough fusion without burn-through.
- MIG welder: Use small wire, often 0.023-inch solid wire for thin mild steel, with shielding gas suited to your wire and metal.
- TIG welder: Use a sharp tungsten, short arc length, controlled amperage, and pulse if it helps you keep a small puddle.
- Flux-core welder: Flux-core can weld thin metal, but it often runs hotter and creates more cleanup. Test carefully on scrap first.
- Spot or plug welds: For automotive-style flanges, plug welds or resistance spot welds may reduce visible seam distortion when they match the repair procedure.
Set voltage, wire speed, and travel speed so the weld wets in quickly without sitting in one place. For MIG setup help, use a wire speed and voltage chart as a starting point, then fine-tune on scrap.
Check the ground clamp too. A poor ground can cause arc instability, spatter, and inconsistent heat. If the wire feeds but the arc is unstable, inspect your ground clamp connection and contact tip before blaming the panel.
Products Worth Considering
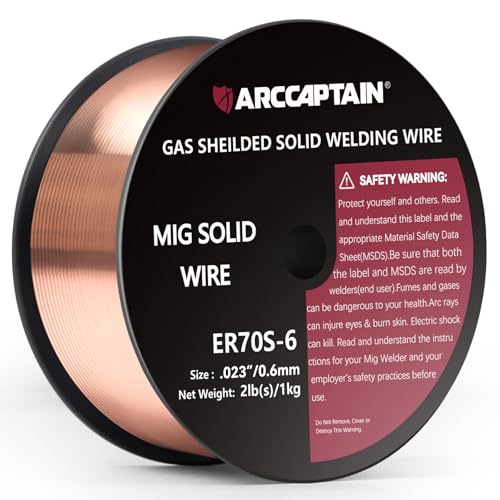
High-quality: ARCCAPTAIN's ER70S-6 mig welding wire .023" meets industry standards(Net Weight: 2lbs), ensuring consistent performance, superior strength. With its smooth feeding and stable welding parameters, you can achieve optimal penetration, high deposition rates, and exceptional overall welding performance.

ER70S-6 PERFORMANCE: This .023 MIG welding wire supports precise arc control and low spatter for single-pass and multi-pass welding.

ER70S-6 MIG WIRE: It's the most common wire of the copper-coated mild steel GMAW (MIG) wires for single or multiple pass welding.
Common Mistakes to Avoid When Welding Thin Panels
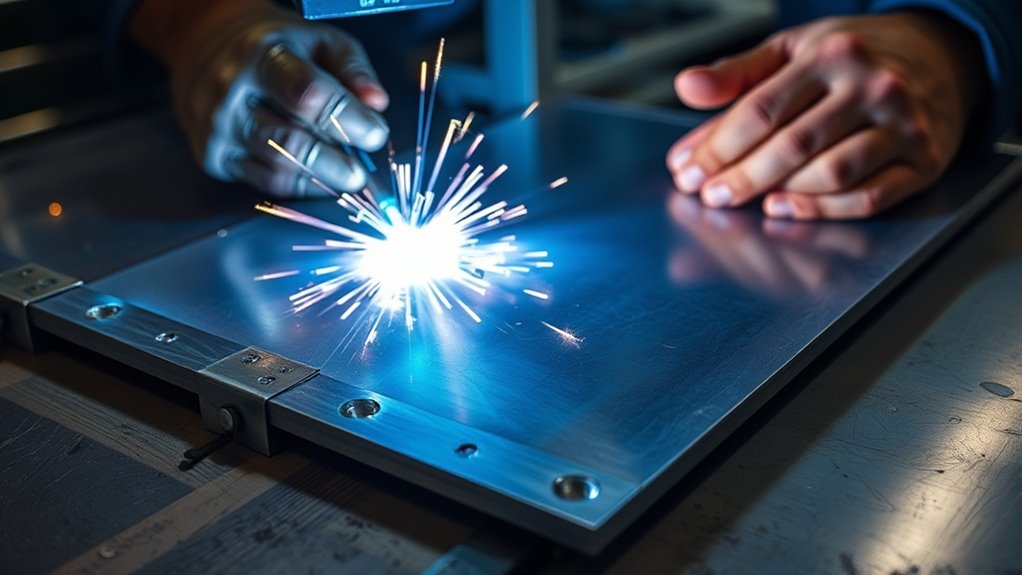
Most thin-panel warping comes from a few repeat mistakes: too much heat, poor fit-up, weak clamping, and rushing the cooling time.
Improper Heat Control
- Running long beads: Long continuous welds concentrate heat and shrinkage.
- Moving too slowly: Slow travel makes the puddle wider and hotter.
- Using oversized wire or high settings: More filler and more current can overload the panel.
- Grinding too aggressively: Grinding can warp panels too. Use light passes and avoid heating one spot.
- Ignoring test pieces: Scrap testing saves the real panel from burn-through and distortion.
For basic heat-control habits, review these essential welding tips for beginners.
Inconsistent Clamping Techniques
Inconsistent clamping lets the panel move while the weld shrinks. Use multiple clamps along the seam and support the panel close to the weld line. If the panel has a natural curve, support that shape instead of forcing it flat on the bench.
Check the panel after the first few tacks. If the joint has shifted, do not keep welding and hope it pulls back. Correct the fit early.
Troubleshooting Warping, Burn-Through, and Panel Movement
If the panel starts to move, stop welding and diagnose the cause before adding more heat.
| Problem | Likely Cause | Fix |
|---|---|---|
| Panel crowns or oil-cans | Too much heat in one area | Stop, cool naturally, use shorter stitches, and skip farther apart |
| Burn-through | Settings too hot, gap too wide, or travel too slow | Lower heat, tighten the gap, use backing copper, and fill with small tacks |
| Tacks crack loose | Dirty metal, poor fusion, or panel stress | Clean deeper, improve fit-up, and retack with better fusion |
| Seam pulls out of line | Tacks placed in a one-direction pattern | Use end-center-split tack placement and stagger the stitch pattern |
Building on Your Welding Skills: Continuous Improvement Tips
The fastest way to improve thin-panel welding is to study what the panel does after each tack and stitch. Do not judge only the bead. Judge the shape of the panel.
- Practice different stitch lengths: Compare 1/2-inch, 3/4-inch, and 1-inch stitches on scrap.
- Track your settings: Write down wire speed, voltage, amperage, gas, wire size, and panel thickness.
- Watch the heat mark: If discoloration spreads far from the weld, reduce heat or increase cooling time.
- Try different backing: Compare no backing, copper backing, and aluminum backing.
- Inspect both sides: A weld that looks good on top may show burn-through or contamination on the back.
Keep notes from real projects. Over time, you will learn how much heat each panel can take before it starts to move.
Frequently Asked Questions
How do you weld thin sheet metal without warping?
Clean the metal, make the fit-up tight, clamp the joint, tack it in a spaced pattern, and weld short stitches while skipping around the panel. Let the metal cool between welds. Avoid long beads, high amperage, slow travel, and heavy grinding in one area.
How do you stop panel warping when welding?
Stop adding heat as soon as the panel starts to move. Let it cool, check the clamping, and continue with shorter welds spaced farther apart. A copper or aluminum backing bar can help pull heat away and support the weld puddle.
How do you weld body panels without warping?
For body panels, remove paint, primer, undercoating, seam sealer, and rust near the weld. Use small wire, low settings, tight gaps, many small tacks, and a skip-welding pattern. Keep checking the panel shape and let it cool before welding nearby.
What is the Rule of 33 in TIG welding?
Do not rely on the “Rule of 33” as a universal TIG standard. TIG travel speed depends on material, thickness, amperage, joint fit-up, filler use, shielding gas, and puddle size. For thin panels, test on scrap and use the lowest heat that still gives clean fusion.
Is MIG or TIG better for thin panels?
TIG gives excellent heat control, but it is slower and takes more skill. MIG is faster and common for auto body work when set up with small wire and controlled short-circuit transfer. Either process can warp thin panels if the fit-up is poor or the welds are too long.
Conclusion
Preventing warping in thin panels is mostly about patience and heat control. Clean the metal, close the gaps, clamp the panel, tack it in a balanced pattern, and weld in short stitches instead of long beads. Let each area cool before adding more heat nearby.
Think of the panel as a shape you are protecting, not just a seam you are filling. When you control heat, shrinkage, clamping, and cooling, your welds stay cleaner and the panel stays much closer to its original shape.
Sources
- OSHA Welding, Cutting, and Brazing — welding hazard and regulatory overview.
- OSHA 1910.252 General Requirements — fire-prevention requirements for welding and cutting work.
- CCOHS Welding Ventilation — ventilation guidance for welding fumes and gases.
- CCOHS Welding PPE — eye, face, skin, respiratory, hearing, hand, and foot protection guidance.
- Wijnen, Parker, Gagliano, and Martínez-Pañeda, 2024 — research discussing how welding parameters, including heat input, affect weld properties.




