How to Clean and Replace a MIG Gun Liner
What’s in This Article
- Why Your MIG Gun Liner Matters
- Before You Begin
- Tools and Parts You’ll Need
- How to Remove the Old Liner
- How to Install a New Liner
- How to Trim the Liner Correctly
- How to Clean a MIG Gun Liner
- MIG Gun Liner Problems That Affect Feeding
- When to Replace the Liner, Tip, and Nozzle
- Frequently Asked Questions
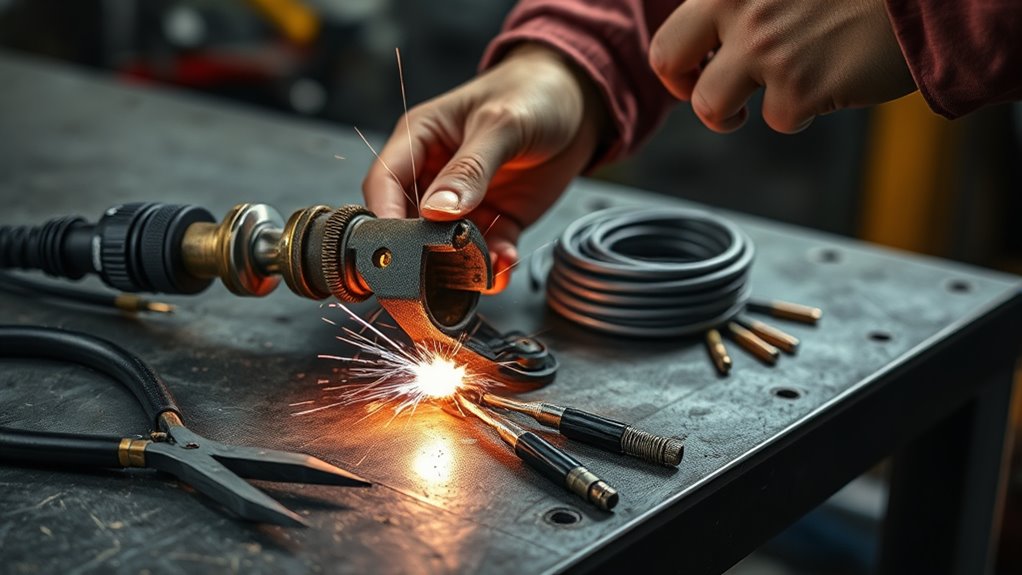
A dirty or damaged MIG gun liner can turn a smooth weld into a feed problem fast. Shut off the welder, remove the nozzle, contact tip, and gas diffuser, then disconnect the gun from the feeder. Loosen the liner with the correct tool, pull it out, and inspect the bore for burrs, slag, or wire debris. Clean the channel with a tubular wire brush, then slide in the matching replacement liner without kinking it. Trim it to the proper stickout, deburr the end, and reassemble the gun before you test wire feed.
Quick Answer
To clean or replace a MIG gun liner, power down the welder, remove the front-end parts, disconnect the gun, and pull out the liner. Brush light debris from the liner path, inspect for kinks or burrs, and install a liner that matches your wire size and type. Trim the liner to the correct stickout, deburr the cut end, and reassemble the gun before you test wire feed.
Key Takeaways
- Match the MIG gun liner to your wire size and wire type before you install it.
- Shut off power and disconnect the gun before you remove any front-end parts.
- Clean light debris with a properly sized tubular wire brush and controlled pressure.
- Replace the liner when you find kinks, heavy drag, burrs, or birdnesting.
- Trim and deburr the liner carefully so wire can feed without snagging.
Why Your MIG Gun Liner Matters
The MIG gun liner guides welding wire from the drive rolls to the contact tip. Its condition affects wire feed smoothness, arc stability, and weld quality. When you keep the liner clean and correctly sized, you reduce drag and protect internal parts.
A liner that’s too long, too short, or worn can create extra friction. That friction can weaken support and cause wire folding or birdnesting. Those problems lead to downtime, defects, and higher maintenance costs.
If you notice burrs, debris, or unstable arc behavior, pull the liner back and check for blockage or damage. A sound liner helps you maintain steady arc stability and less spatter. Regular MIG welder maintenance also helps you reduce feeding issues.
Treat the liner as a critical consumable, not an afterthought. Your weld quality depends on a clean and smooth wire path.
Before You Begin
Estimated total time: 15 to 30 minutes for most basic liner cleaning or replacement jobs.
Work only after you shut off the welder and disconnect the gun from the feeder. Keep the gun cable as straight as you can, since tight bends can make the liner bind during removal or installation.
Warning: Never remove MIG gun parts while the welder stays powered, because accidental wire feed can injure you.
Tools and Parts You’ll Need
Before you start, gather the right tools and parts so you can clean or replace the MIG gun liner without interruption. You may need a 5/64 inch Allen wrench for set screws, a 10-mm wrench for thread-in liner styles, and pliers for gripping the conduit liner.
Keep a replacement liner matched to your wire size and wire type. Use a Liner Gauge when your gun style requires accurate trimming. Add cleaning tools such as tubular wire brushes for the liner path, nozzle, and other passages.
- Wear gloves and goggles before you handle sharp liner ends.
- Use a clean bench so dirt does not enter the gun.
- Keep the contact tip nearby so you can inspect it during reassembly.
- Use high-quality welding wire to reduce feeding problems.
With the right kit, you cut downtime, prevent birdnesting, and keep wire feeding steady.
Products Worth Considering

Zippered Compact Padded Case: Keeps everything neatly organized and holds all the necessary cleaning kits. Case sized: 6.5" x 3.6 ",16 Pieces handgun gun maintenance system in a high performance zippered organized pouch bag.

【Lint - Free】 Gun Patches made of natural cotton, tightly knitted. These gun cloth will not spread when used, very little threads or fibers after use, the essential cleaning supplies of any gun cleaning kit

COMPLETE KIT: Comprehensive cleaning set includes multiple spray bottles, cleaning brushes of various sizes, and specialized cleaning tools for thorough maintenance
How to Remove the Old Liner
With your tools laid out, shut off the power supply and remove the MIG gun from the feeder. Detach the nozzle, contact tip, and gas diffuser so you can expose the liner channel.
| Step | Action |
|---|---|
| 1 | Verify the gun has no power |
| 2 | Remove front-end consumables |
| 3 | Identify the liner retention style |
| 4 | Loosen or release the liner |
| 5 | Inspect the bore |
- Shut off the welder and disconnect the MIG gun from the feeder.
- Remove the nozzle, contact tip, and gas diffuser from the front end.
- Check whether your gun uses a set screw, collet, or thread-in liner style.
- Loosen the retainer with the correct wrench or Allen key.
- Pull the liner straight out without forcing sharp bends into the gun cable.
- Inspect the bore for burrs, slag, wire debris, or blocked spots.
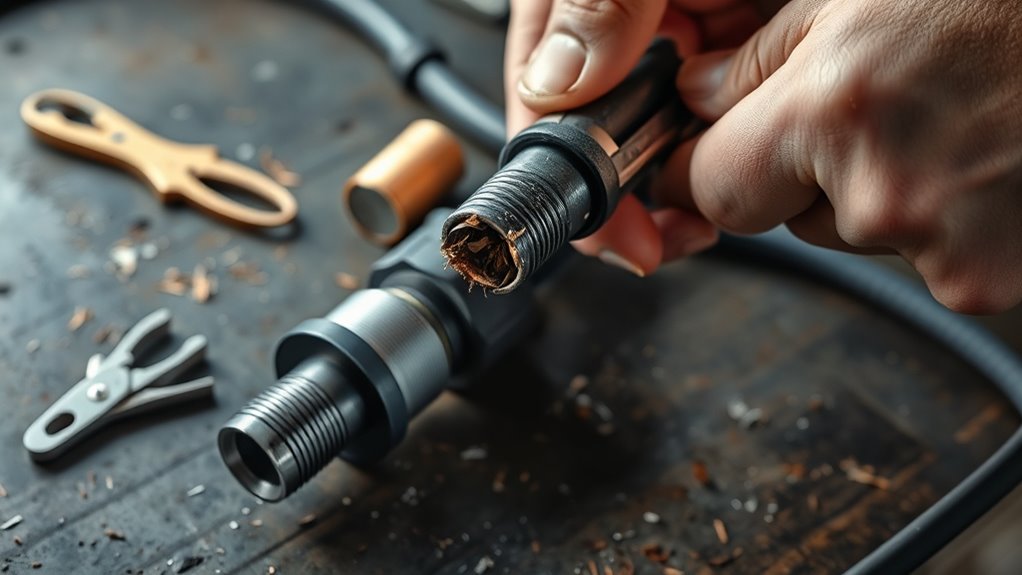
If your gun uses a set screw, insert a 5/64 inch Allen wrench and loosen it just enough to free the liner. If it uses a thread-in style, use a 10-mm wrench to turn the collet counterclockwise. Then grip the liner with pliers and pull it straight out.
Do not twist the liner more than needed. Careful removal protects the bore and the future wire path. After the liner comes free, clear anything that could disrupt wire feed, because a clean liner helps prevent wire feed problems.
Products Worth Considering

The blades cut away the built up spatter helping prolong the nozzle life, and reduces the chances of wire sticking.

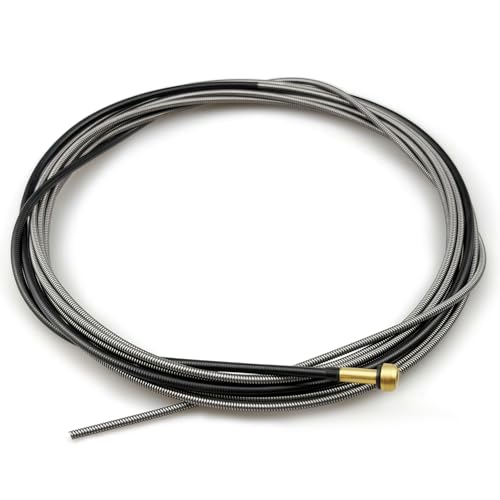
【Precise Fit for Lincoln Welding Guns】Specifically designed for Lincoln MIG guns, compatible for Magnum 100L, for Magnum PRO 100L/175L. Mig liner Directly replaces OEM part KP35-40-15, Mig liner kp1937-3 easy to install without extra modification
How to Install a New Liner
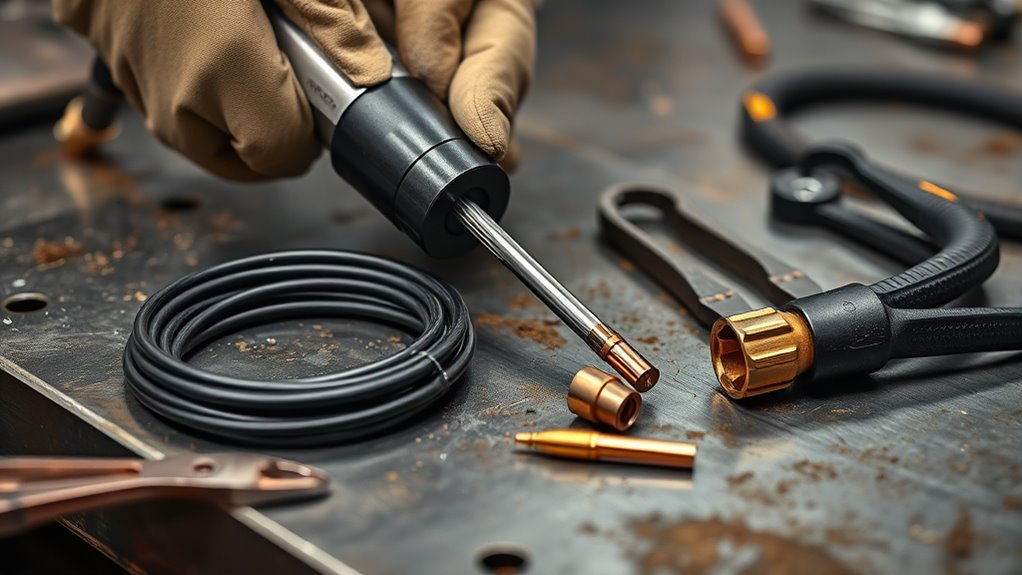
Slide the replacement liner into the gun channel with the power off and the gun removed from the feeder. Feed it with short strokes so you keep control and avoid kinks. If the liner binds, twist it clockwise and advance again until it seats fully.
- Match the liner to your wire diameter and wire type.
- Straighten the gun cable before you feed the liner through it.
- Advance the liner slowly with short, controlled strokes.
- Seat the liner fully inside the gun body.
- Secure the retainer without crushing the liner.
- Use the set screw only until it holds firm; don’t crush the liner.
- On thread-in models, tighten the collet clockwise into the power pin with a 10-mm wrench.
- Keep the liner centered so the wire can move freely through the gun.
After installation, use a Liner Gauge to confirm the correct stickout: 3/4 inch for standard heads, or 1/2 inch for 154 or 454-1 retaining heads. Check the gun setup again if you notice weak weld penetration during operation.
Use a Liner Gauge to verify stickout: 3/4 inch for standard heads, or 1/2 inch for 154 or 454-1 retaining heads.
Trim only when you’re ready, then deburr the cut end before you reattach the nozzle, contact tip, and gas diffuser. This final check helps you finish the setup cleanly and safely.
How to Trim the Liner Correctly
Use a Liner Gauge to set the conduit liner to the correct stickout before you trim it. Use 3/4 inch (20 mm) for standard applications, or 1/2 inch (13 mm) for 154 or 454-1 retaining heads.
With MIG guns, exact liner length helps protect feed consistency and performance. Push the liner back into the gun and hold it firmly at the measured position while you trim.
Make sure the liner seats fully before you cut it. Any misalignment can hurt wire delivery and reduce your control. Trim cleanly, then inspect the cut end and remove every burr.
Even a small edge can snag wire and create feeding issues. After trimming, recheck the liner length against the gauge. Inspecting for signs of wear also helps you prevent sudden welding disruptions.
Pro tip: Deburr the liner end after each cut so the wire does not scrape or snag.
During routine maintenance, verify liner length again so you catch wear early. This habit keeps your welding setup reliable and ready for precise work.
How to Clean a MIG Gun Liner
Use the correct liner tool for your setup, then remove the liner with the power off so you can clean it safely. You can clean light debris, but you should replace the liner if you find deep scoring, kinks, or heavy buildup.
Run a tubular wire brush through the liner to clear debris and spatter without damaging the bore. Use controlled pressure, and stop if the brush catches or feels forced.
Inspect the liner for wear, kinks, or sharp edges before you reinstall it. Keep the liner free of moisture-related issues so wire can feed more smoothly.
Liner Cleaning Tools
When you’re cleaning a MIG gun liner, choose a tubular wire brush made for liner maintenance. The right brush removes spatter and debris without scoring the liner’s interior.
Match the brush diameter to the liner, then work it through the full length with steady, controlled passes. This keeps wire feed smooth and helps you avoid friction that can fold wire or stall production.
Inspect as you clean for burrs or sharp edges that could disrupt movement and shorten liner life.
- Use a brush sized for your liner.
- Clean on a routine tied to use.
- Replace damaged tools immediately.
Clearing Wire Debris
Before you clear wire debris from a MIG gun liner, shut off the power supply and remove the gun from the feeder. This step helps prevent accidental feed or shock.
Use a tubular wire brush made for nozzles and liner passages. Run it through the liner with controlled pressure. Keep the brush centered so you don’t score the interior or drive debris deeper.
After brushing, loosen the drive rolls and perform a wire liner pull test by hand. The wire should move freely. Any drag, snag, or gritty resistance means buildup remains.
If you find burrs, sharp edges, or a stubborn obstruction, stop and replace the liner. Replacement keeps your wire feed clean, consistent, and under control.
Checking Liner Wear
Inspect your MIG gun liner regularly for kinks, sharp edges, and heavy buildup that can restrict wire movement. When you check liner wear, loosen the drive rolls and pull the wire by hand.
The wire should move with minimal resistance. Extra drag points to damage, contamination, or poor liner fit.
- Feel for rough spots that can snag wire.
- Look for spatter or debris inside the liner.
- Check whether the liner length matches your gun style.
Use a tubular wire brush to clean the bore without scratching it. If the liner looks worn, oversized, or kinked, replace it immediately. A damaged liner can cause wire folding, birdnesting, and costly downtime.
MIG Gun Liner Problems That Affect Feeding
Even a clean MIG gun liner can feed poorly if its length, condition, or size is wrong. If the liner is too long or too short, it can create excess friction and misalignment that fights wire feed.
Inspect the bore for sharp edges, burrs, or damage. These problems snag the wire, cause birdnesting, and make feed speed erratic. An oversized liner can also let the wire fold inside the path.
Do not ignore rising drag or tension at the gun, because those signs can point to liner failure. Run a wire liner pull test to check resistance and confirm smooth wire movement.
When feed becomes inconsistent, act fast and replace the liner before it damages other MIG gun components. You can also improve results by understanding key welding parameters that affect MIG performance.
When to Replace the Liner, Tip, and Nozzle
You should replace the liner when you see kinks, burrs, or any loss of smooth wire feed. Check the contact tip for a non-round orifice, since an oval opening can cause wire whip and poor weld accuracy. Replace the nozzle if it overheats, loses shape, or fills with spatter.
Inspect all three parts on a regular routine, not only when the weld starts to fail. Good equipment care supports better welding performance and helps you prevent common feed issues.
Liner Wear Indicators
A worn liner often shows up first as stiff, uneven wire feed. That symptom tells you to check the whole wire path before the problem gets worse.
Inspect for kinks, fraying, or burrs inside the liner, since each can snag wire and create drag. Verify that the contact tip orifice stays round. If it turns oval, replace the tip promptly.
Also check the nozzle for spatter and excess heat damage, because overheating can speed up liner wear. Keep liner length correct, since an improper cut can cause wire folding or birdnesting.
- Stiff or uneven wire feed
- Visible liner damage
- Heat or spatter marks
- Birdnesting near the drive rolls
Tip and Nozzle Wear
Not all feeding problems point to the liner. Inspect the contact tip and nozzle whenever wire drag, burnback, or erratic arc starts appear.
Replace the tip when the orifice turns non-round or when wire whip starts hurting weld accuracy. Check the nozzle for heavy spatter, overheating, or dents from impact. Each problem can disturb shielding gas and invite weld defects.
During each inspection, look for wear that causes arcing or burnbacks. These faults waste time and consumables. If wire still resists after tip and nozzle changes, replace the liner too, especially when you see bending or birdnesting.
Do not follow a fixed schedule alone. Change parts based on observed wear so you control cost, performance, and feed quality.
Common Mistakes to Avoid
Many MIG liner problems start during removal, trimming, or reassembly. Avoiding a few common mistakes can save you from repeat feed issues.
- Do not install a liner that does not match your wire size.
- Do not overtighten the set screw and crush the liner.
- Do not cut the liner before it seats fully in the gun.
- Do not skip deburring after trimming the liner end.
- Do not reuse a kinked liner if wire feed already feels rough.
Note: If cleaning does not restore smooth wire feed, replacement usually gives you the safer fix.
Frequently Asked Questions
Can You Clean a MIG Gun Liner?
Yes, you can clean light debris from a MIG gun liner with a properly sized tubular wire brush. Replace the liner if you find kinks, heavy buildup, deep wear, or a rough bore that keeps snagging wire.
How Often Should I Replace My MIG Liner?
You should replace your MIG liner when inspection shows wear, not just on a fixed schedule. Check for kinks, friction, birdnesting, burrs, and rough wire pulls during routine maintenance.
How Do You Change a MIG Gun Liner?
Shut off power, remove the gun, loosen the liner retainer, and pull out the old liner. Feed in the new liner, seat it fully, trim it to the correct stickout, deburr the end, and reassemble the gun.
How Can You Tell if a MIG Liner Is Bad?
Your MIG liner may be bad if wire jams, birdnesting, rough pulls, kinks, dirt, cracks, or holes appear. Wrong liner length or sharp cut edges can also hinder feeding and reduce weld quality.
Can a Wrong Liner Size Cause Birdnesting?
Yes, a liner that does not fit your wire size can cause poor support inside the gun. That weak support can let the wire fold, slip, or birdnest near the drive rolls.
Conclusion
A clean, correctly trimmed MIG gun liner helps your wire feed smoothly and reduces burnback, birdnesting, and erratic arc starts. Inspect the liner, contact tip, and nozzle whenever feed feels rough or your arc becomes unstable. Replace worn parts before they turn into downtime. With a clean wire path, your MIG gun can feed better and help you make more consistent welds.


