Practicing automotive welding at home starts with a safe workspace, clean scrap steel, and a MIG welder set up for thin sheet metal. Use .023-inch solid wire with 75/25 argon/CO2 shielding gas for most mild-steel body-panel practice, then make short tacks and stitch welds instead of long beads. Test every setting on scrap before you touch a real panel.
Quick Answer
To practice automotive welding at home, set up a ventilated fire-safe area, clean 18- to 20-gauge scrap steel, use a MIG welder with .023-inch solid wire and 75/25 gas, then practice butt joints, lap joints, plug welds, and short tack welds until you can control heat without warping the panel.
Key Takeaways
- Use scrap metal that matches real auto body panels, usually 18- to 20-gauge mild steel.
- Clean the metal to bare steel before welding, including paint, rust, undercoating, seam sealer, and zinc coating near the weld area.
- Start with .023-inch solid wire, 75/25 shielding gas, short stickout, and your welder’s door-chart settings.
- Control heat with tack welds, stitch welding, cooling pauses, and copper backing when possible.
- Inspect and test practice coupons before moving to visible or structural parts of a vehicle.
At a Glance
| Time Required | 1-2 hours per practice session |
| Difficulty | Beginner to intermediate |
| Tools Needed | MIG welder, .023-inch wire, 75/25 gas, helmet, gloves, respirator, clamps, grinder, wire brush, scrap steel, fire extinguisher |
| Cost | About $50-$150 for practice metal, wire, gas refill, discs, and basic consumables if you already own a welder |
What You Need for Automotive Welding Practice
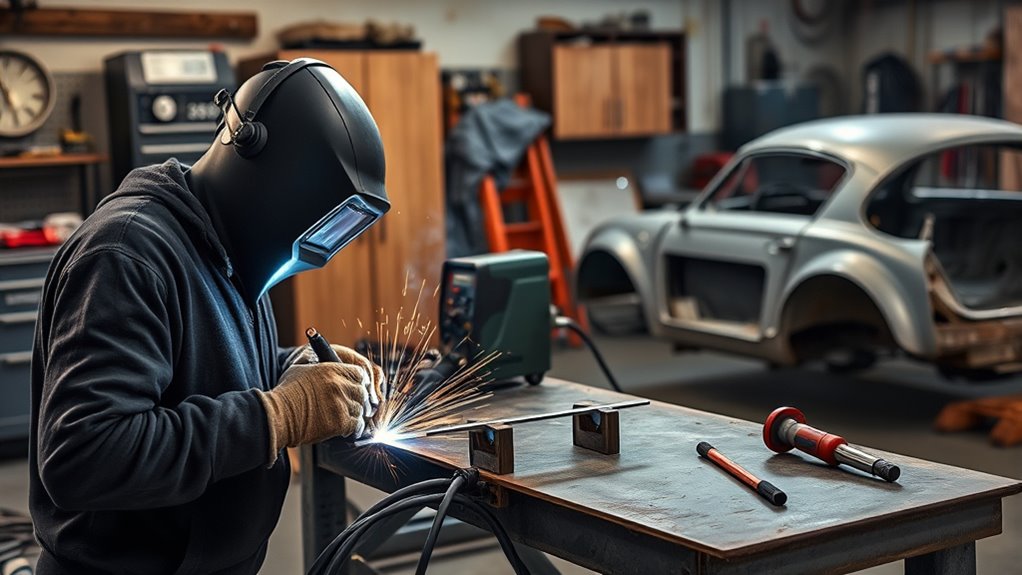
To build real skill in automotive welding, start with a practice setup that matches the way car panels behave. Thin body steel heats fast, moves fast, and burns through easily, so your practice metal matters as much as your welder.
For most mild-steel body-panel practice, use a MIG welder with .023-inch solid ER70S-6 wire and a 75% argon/25% CO2 shielding gas mix. Gas metal arc welding uses a continuously fed wire and shielding gas to protect the weld pool, which is why it is a common choice for clean sheet-metal practice. You can review general process safety and requirements through OSHA’s welding, cutting, and brazing overview.
Use scrap that matches the repair. A perfect bead on thick plate does not prove you can weld a thin quarter panel without warping it.
Gather scrap metal such as 18- and 20-gauge mild steel from old panels, clean appliance skins, or a local metal supplier. Avoid rusty, painted, galvanized, oily, or undercoated pieces until you know how to clean them properly. Coatings can contaminate welds and create harmful fumes.
You also need a welding helmet, safety glasses, leather gloves, cotton or leather protective clothing, hearing protection, and a properly fitted respirator when fumes cannot be controlled by ventilation alone. Add preparation tools such as an angle grinder, flap discs, wire brush, vise grips, panel clamps, magnets, and copper backing. A welder with Arc Force Control can be useful for stick practice, but thin auto body MIG work depends more on wire size, gas coverage, travel speed, and heat control.
Set Up Your Welding Area Safely
Once your practice materials are ready, set up the welding area with safety as the priority. Welding is hot work, so sparks, heat, fumes, ultraviolet light, and electrical shock all need to be controlled before you strike an arc.
Warning: Do not weld fuel tanks, sealed containers, unknown coated metal, battery areas, airbag areas, or structural crash parts as beginner practice. Used tanks and containers can hold flammable vapor even when they look empty. For real vehicle repairs, follow the vehicle maker’s repair procedure or get help from a qualified technician.
Open doors and windows, and use local exhaust or a fume extractor when possible. OSHA warns that welding can produce hazardous fumes and gases, and ventilation depends on the space, number of welders, and materials involved. You can read the detailed ventilation requirements in OSHA 29 CFR 1910.252.
Place your welding equipment on a non-flammable surface, such as a welding table or fireproof mat. Move paper, cardboard, rags, fuel cans, aerosols, sawdust, and solvents away from the area. Keep welding cables out of walkways so you do not trip or pull the torch while welding.
- Ventilate the area before welding.
- Clear combustibles from the work zone.
- Protect nearby surfaces with welding blankets or metal shields.
- Keep a suitable ABC-rated fire extinguisher nearby for typical garage fires.
- Use a Class D extinguisher only when combustible metals such as magnesium, titanium, or metal dust are a real hazard.
- Keep a first aid kit nearby and check the area again after welding for smoldering material.
Wear proper safety equipment before every arc: helmet, safety glasses, gloves, protective clothing, closed-toe leather shoes, and respiratory protection when needed. For more PPE basics around sparks and heat, this PPE setup checklist is also useful.
Before You Strike an Arc: Prep Checklist
Good welds start before the machine turns on. A clean, tight joint is easier to weld and much less likely to blow through.
- Clean to bare metal: Remove paint, primer, rust, undercoating, seam sealer, oil, and zinc coating near the weld zone.
- Fit the joint tightly: Large gaps make thin sheet metal burn away fast.
- Clamp the panel: Use butt-weld clamps, vise grips, or panel clips to keep the joint from moving.
- Attach the ground clamp to clean metal: Poor grounding causes unstable arc starts and extra spatter.
- Check wire and gas: Use the right contact tip, correct drive-roll tension, and enough gas flow for your workspace.
- Make a test coupon: Weld a scrap joint that matches the real repair before touching the vehicle.
Note: Galvanized, painted, and undercoated panels can create hazardous fumes. Clean the coating back from the weld area and use strong ventilation. NIOSH notes that welding fumes can contain metals, including manganese, and confined spaces can increase exposure risk.
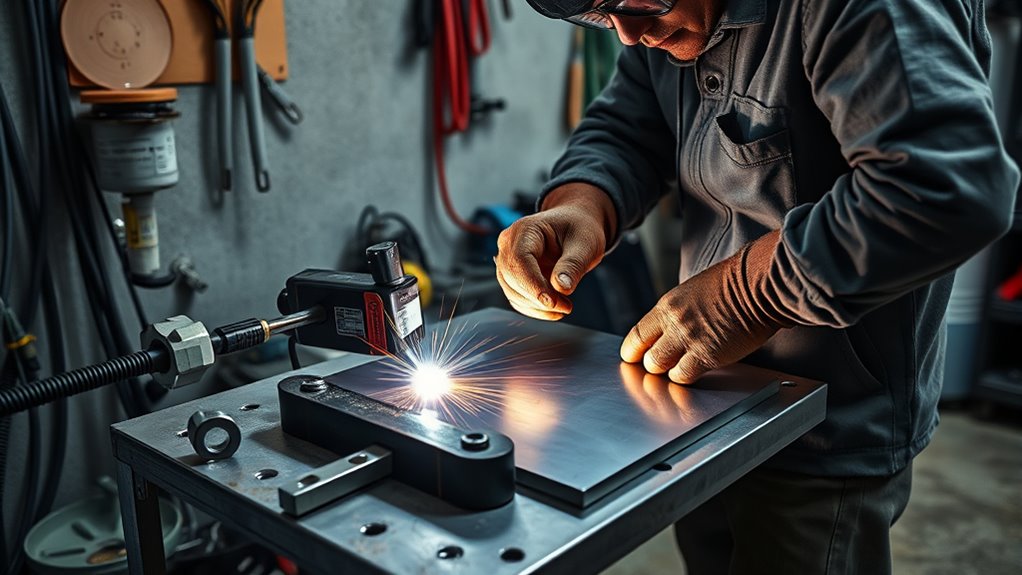
Practice Automotive Welding on Scrap Steel
Choose scrap steel that matches your car panels as closely as possible, such as 18- or 20-gauge sheet from junkyards, appliances, or metal suppliers. If you are brand new, you can start on slightly thicker 16-gauge steel for a few beads, but move to real panel thickness quickly. Thick plate practice does not teach heat control on body panels.
Use .023-inch solid wire with shielding gas for MIG practice. Start with simple butt and lap joints, then tack weld in short bursts so you can control heat, reduce warping, and improve fitment on real repairs.
After each test weld, clean up the bead and surrounding metal safely so you can inspect penetration, edge quality, porosity, and distortion before you move on. If you also practice flux-core welding, remember that fumes and cleanup differ, and proper ventilation becomes even more important.
Choose Similar Scrap Steel
When you’re practicing automotive welding, use scrap steel that closely matches the thickness and type of metal you’ll repair on the vehicle. For body panels, that usually means thin mild steel, not 1/4-inch plate.
- Pull clean old panels from junkyards when possible.
- Cut practice coupons into small strips so every joint is repeatable.
- Remove rust, paint, seam sealer, and coatings before welding.
- Label each coupon by thickness so you know what settings worked.
- Repeat tack and stitch welds until the panel stays flat.
This focused setup frees you from guesswork. You’ll read metal behavior faster, set parameters more accurately, and approach every repair with confidence.
Start With Simple Joints
With your scrap steel selected, start practicing on simple joints like butt joints, lap joints, and plug welds. These are the joints beginners most often meet during patch-panel and small bracket repairs.
Use clean 18-gauge steel for thin material practice, since it matches many automotive repair panels. In MIG welding, keep your wire stickout between 1/4 and 3/8 inch to hold a steady arc and avoid adding extra heat.
Make short tack welds first, then connect them with small stitches. Do not run one long bead on a thin body panel. Long beads pour heat into the sheet and pull the panel out of shape.
Focus on steady travel speed, consistent bead width, clean starts, and tight fit-up before moving to harder positions.
Practice Safe Weld Cleanup
Before you move from practice welds to real repairs, clean up your beads safely on scrap steel so you can learn the finishing process without damaging a good panel.
Wear gloves, a welding helmet or face shield, safety glasses, hearing protection, and protective clothing before any practice cleanup. Use an angle grinder with a flap disc to level the weld slowly. Keep the grinder moving and stop often so the panel does not overheat.
- Start on 18-gauge scrap.
- Move to 20-gauge steel when your control improves.
- Grind only until the bead blends with the panel.
- Stop before thinning the base metal.
- Inspect both sides of the coupon when possible.
This discipline builds control and confidence, letting you finish welds safely and precisely.
Set MIG Settings for Thin Auto Steel
Dial in your MIG settings carefully for thin automotive steel. As a broad starting point, many small MIG welders land near 16 to 18 volts with moderate wire feed speed for 18- to 20-gauge steel, but your exact setting depends on the machine, wire, gas, extension cord, joint fit, and travel speed.
Use your welder’s door chart first. Choose the row for mild steel, solid wire, shielding gas, and the metal thickness you are practicing on. Then make a short test weld on scrap and adjust one thing at a time.
- Wire: .023-inch solid wire is easier to control on thin steel than larger wire.
- Gas: 75% argon/25% CO2 is a common mild-steel MIG blend.
- Polarity: Follow the wire label and welder manual. Solid-wire MIG with gas commonly uses DCEP, while many self-shielded flux-core wires use DCEN.
- Stickout: Keep the contact tip about 1/4 to 3/8 inch from the work.
- Gas flow: Use enough flow for coverage, but avoid blasting the puddle with too much gas.
- Travel speed: Move steadily. Pausing too long causes burn-through.
If the panel is especially thin, back off the voltage and wire feed slightly, tighten the joint gap, and use more cooling time between tacks. If you are learning other wire processes later, this flux-core MIG welding settings chart can help you compare polarity and setup differences.
Pro Tip: Change only one setting at a time. If you adjust voltage, wire speed, stickout, and travel speed together, you will not know which change fixed the weld.
Use Tack Welds to Prevent Warping
Tack welds hold the panels in alignment while you work, so the joint doesn’t shift and the thin metal stays under control. In automotive welding, tack welding gives you a way to lock parts in place before you fill the seam. This matters most on thinner material, where heat can pull the panel out of shape fast.
Tack welds lock panels in place, keeping thin metal aligned and distortion under control.
Use these steps:
- Place the first tacks at corners and key alignment points.
- Space additional tacks about 1 to 3 inches apart.
- Move around the panel instead of welding in one area.
- Let each tack cool before adding the next one nearby.
- Connect the tacks with short stitch welds only after the panel stays aligned.
This method helps you control distortion, especially when you’re working on body panels at home. You’re not fighting the metal; you’re guiding it. For heavier joints, knowing maximum fillet weld size can also help you avoid overwelding.
After the weld is complete, you can blend the tacks into the joint for a cleaner result. The goal is not one giant bead. The goal is a flat panel with enough fusion and as little heat damage as possible.
Follow a Basic Practice Plan
A simple practice plan keeps you from wasting time. Work through these drills in order and do not move on until the welds are consistent.
- Bead control: Run short beads on 16-gauge scrap until your sound, travel speed, and stickout feel steady.
- Thin tacks: Move to 18- or 20-gauge steel and make single tacks without blowing holes.
- Butt joints: Fit two coupon edges tightly and tack them from end to end.
- Lap joints: Overlap two pieces and practice short stitch welds.
- Plug welds: Drill or punch holes in the top coupon and fill them to join the lower coupon.
- Patch simulation: Cut a square hole in scrap, fit a patch, and weld it without warping the sheet.
- Finish practice: Grind the bead flush without thinning the surrounding metal.
Keep your best and worst coupons. Write the settings on them with a marker. Over time, those coupons become your own settings chart.
Clean Welds Without Damaging Metal
You’ll clean the weld with a flap disc using light, even pressure and steady passes. Hold the grinder at a shallow angle and keep it moving. Let the disc cut slowly instead of forcing it into the panel.
On solid-wire MIG welds, you are mainly removing excess bead height, spatter, soot, and surface oxidation. You are not chipping heavy slag like you would with stick welding or some flux-core welds.
Let the weld cool enough to handle safely, then work in short grinding passes. Avoid overheating the area so you don’t warp the panel. Also check that the flap disc’s RPM rating matches your grinder’s speed.
Proper Grinder Pressure
Use light, even pressure when grinding welds so you remove material without overheating the base metal and causing warp or burn-through. You control the grinder, pressure, and finish, so stay deliberate.
Keep the grinder at a slight angle to the weld, and move in smooth sweeping strokes. Do not dig the edge of the disc into the panel.
- Start with 40-60 grit only if the bead is tall.
- Switch to 80-120 grit to smooth the surface.
- Check heat often; if the metal feels hot, stop and let it cool.
- Use a sanding block or body file for final checking.
- Stop when the weld blends, not when the panel is thin.
When you press too hard, you dig into the metal and ruin the weld profile. Light contact gives you cleaner results and better control.
Preventing Heat Warping
A clean grind is only part of the job. Controlling heat during welding keeps that work from getting ruined by warped panels or burn-through. You can prevent heat warping by spacing welds evenly and letting the metal cool between passes.
Tack panels in several places first, then finish the seam in short sections. Keep your welding torch moving at a steady pace so you don’t park heat in one spot. Use a copper heat sink behind thin sheet when the back side is accessible. Copper can support the edge and help pull heat away, and weld metal usually will not fuse to it.
For thin metal, choose tack-and-stitch welding instead of long beads. Thicker material can take more heat, but it still needs controlled timing.
Inspect and Test Your Practice Welds
Do not judge a practice weld by appearance alone. A smooth bead can still be cold, porous, or weak.
- Look at the front: The bead should be even, not tall and rope-like.
- Look at the back: You want signs of fusion without huge burn-through.
- Check for pinholes: Pinholes often point to dirt, poor gas coverage, or bad technique.
- Hammer test coupons: Bend or hammer a scrap lap joint to see whether the weld or base metal fails.
- Cut and inspect: Slice a practice weld and look for gaps, lack of fusion, or trapped porosity.
If the weld breaks with almost no force, do not move to a real panel yet. Clean better, tighten the fit, adjust settings, and repeat the coupon.
Fix Common Beginner Welding Problems
Most beginner weld problems come from dirty metal, poor fit-up, wrong settings, bad ground, or too much heat. Use this troubleshooting list before blaming the welder.
- Burn-through: Lower heat slightly, shorten each tack, close the gap, use copper backing, and allow more cooling time.
- Warping: Spread tacks around the panel, avoid long beads, and cool between welds.
- Porosity: Clean the metal, check gas flow, block drafts, trim contaminated wire, and make sure the nozzle is not clogged.
- Wire stubbing: Increase voltage slightly or reduce wire feed speed, then test again.
- Excess spatter: Check polarity, gas coverage, stickout, and dirty metal.
- Tall cold bead: Increase heat slightly, slow enough to wet the edges, and improve fit-up.
- Undercut: Reduce heat, adjust travel speed, and avoid holding the arc on the edge too long.
Note: If you keep getting the same defect, make three coupons and change one variable per coupon. That is faster than guessing.
Practice on Thicker Auto Steel First
Start with slightly thicker auto steel, such as 16-gauge mild steel, so you can build confidence and learn sound welding technique before moving to thinner body panels. If you jump straight into rusty 20-gauge sheet with gaps, you will fight burn-through before you learn arc control.
For thicker practice pieces, your welder may call for .030-inch solid wire and the same 75% argon/25% CO2 shielding gas mix. On thicker steel, you’ll see a stable arc, better penetration, and less risk of burn-through. This practice also helps you understand the importance of surface preparation for achieving strong welds.
- Tack joints first to lock in alignment.
- Watch heat input so puddles stay predictable.
- Test flat, vertical, and awkward positions.
- Repeat welds until your beads look consistent and clean.
- Move back down to 18- and 20-gauge steel before practicing patch panels.
This practice teaches you how metal responds, how quickly heat moves, and how settings change results. Once you can manage thicker material, you’ll approach automotive sheet metal with more precision.
When to Practice on a Real Car Panel
Move from scrap to a real vehicle panel only when your test coupons are consistent. You should be able to tack a tight butt joint, fill a small gap, make a plug weld, and grind a bead flush without thinning the panel.
Start on hidden or non-structural areas only. Good beginner projects include scrap doors, old fenders, or practice patches on removed panels. Avoid frame rails, suspension mounts, seatbelt mounts, rocker structures, crush zones, and anything near fuel, batteries, airbags, or wiring unless you have the proper training and repair information.
Before welding on a vehicle, disconnect or protect sensitive electronics according to the service manual, remove nearby trim and insulation, and check both sides of the weld area. Sparks can travel farther than you expect.
Frequently Asked Questions
Can I practice welding at home?
Yes, you can practice welding at home if you have a safe, ventilated workspace, proper PPE, a suitable fire extinguisher, clean scrap metal, and a welder that matches the material. Do not weld near fuel, solvents, batteries, airbags, or sealed containers.
What is the best welder for beginner automotive practice?
A small MIG welder with shielding gas is usually the easiest choice for mild-steel body-panel practice. Look for adjustable voltage and wire feed, support for .023-inch solid wire, and enough low-end control for 18- to 20-gauge sheet steel.
What thickness metal should I practice on for car body welding?
Practice mostly on 18- to 20-gauge mild steel because it behaves like many automotive body panels. You can start on 16-gauge steel for basic arc control, but move to thinner sheet as soon as your beads are steady.
Why do my practice welds keep burning holes?
Burn-through usually comes from too much heat, large gaps, slow travel, dirty metal, or staying in one spot too long. Tighten the joint, use shorter tacks, lower heat slightly, add cooling time, and try copper backing behind the joint.
How long does it take to get good at automotive welding?
You can learn basic tacks and lap joints in a few focused sessions, but clean patch-panel welding takes repeated practice. Plan on many scrap coupons before welding a visible car panel. Consistent heat control matters more than speed.
Conclusion
By practicing automotive welding at home, you can build real skill without risking your project car. Start on scrap steel, clean every joint to bare metal, dial in your MIG settings on coupons, and use tack welds to control heat and warping. Good technique comes from repetition, not from rushing onto a real panel. Clean each weld, test your settings, inspect your coupons, and move from thicker steel to thinner panels as your confidence grows.
Sources
- OSHA Welding, Cutting, and Brazing — general welding safety and hazard overview.
- OSHA 29 CFR 1910.252 General Requirements — fire prevention, PPE, ventilation, and hot-work safety requirements.
- NIOSH Welding Fumes and Manganese — welding fume exposure, manganese risk, and confined-space concerns.
- Gas Metal Arc Welding Overview — GMAW process basics, shielding gas role, and process variables.


