How to Stretch Sheet Metal in Auto Body Repair
What’s in This Article
- How Sheet Metal Stretching Changes Panel Shape
- Before You Begin: Tools and Safety
- Tools for Stretching Auto Body Panels
- How to Mark the Panel Shape
- Steps to Stretch Sheet Metal
- Keep Shrinks in Check as You Work
- Fit the Panel to Your Buck
- Trim the Edge and Check the Fit
- Fix Oil Canning and Low Spots
- Finish High-Crown Panel Adjustments
- Frequently Asked Questions
A flat repair panel can fight every curve on the car if you stretch it too fast. One hard hit can thin the metal, trap a low spot, or create a ripple you then have to chase. To stretch sheet metal in auto body repair, use controlled hammer blows, a beater bag, and an English wheel to lengthen the panel and form smooth curves. This guide shows you how to mark, stretch, fit, trim, and refine the panel without losing control.
Quick Answer
Stretch sheet metal by supporting it on a beater bag, striking it with light hammer blows, and smoothing the shape with an English wheel. Work in small passes, check the fit often, and stop before the metal thins or warps. Use shrinking and gathering only where the panel develops extra metal or high spots.
Key Takeaways
- Mark the panel before you stretch so each pass follows the target shape.
- Use light hammer blows over a beater bag to build shape without deep marks.
- Use an English wheel after rough stretching to smooth the crown and refine the curve.
- Check the panel against the buck often so you catch low spots, gathers, and edge drift early.
- Trim slightly oversize first, then remove small amounts until the edge fits cleanly.
How Sheet Metal Stretching Changes Panel Shape
When you stretch sheet metal, you lengthen its fibers so the panel can take on a curve or crown. The surface gains area, so the metal moves toward the shape you want instead of springing back flat.
You control that change by adding pressure in small steps. Even shaping helps prevent gathers, which form when one part of the panel moves faster than the area around it.
If you over-stretch the panel, you can thin the metal, warp the surface, and weaken the repair area. Read the surface, correct the high spots, and check the panel often. This steady cycle lets you shape the panel while keeping its strength. Understanding maximum fillet weld size can also help you keep welded joints strong during related repair work.
Before You Begin: Tools and Safety
Estimated total time: Plan on 1 to 3 hours for a small repair panel. A larger or high-crown panel can take longer because you need more test fitting and fine shaping.
Clean the metal before you start so dirt, scale, or coating does not hide marks or affect later welding. Wear eye protection, hearing protection, and gloves that still let you feel the panel.
- Smooth-faced body hammer
- Beater bag filled with sand or shot
- English wheel with the right lower anvil profile
- Flexible shape pattern, buck, or template
- Magic marker and cordless electric shear
- Optional shrinking hammer or gathering tool for local correction
Warning: Do not heat or grind coated metal until you identify the coating and control fumes, dust, and fire risk.
Tools for Stretching Auto Body Panels
You can use a beater bag to support the panel while you stretch it with controlled hammer blows. A shrinking hammer lets you correct local excess metal when the surface starts to distort. The English wheel then refines the stretched panel and smooths it to the needed curve. Check the panel often as you work so you can catch wheel marks early and adjust before the shape drifts. Clean the metal first to help prevent problems during the stretching process and later welding work.
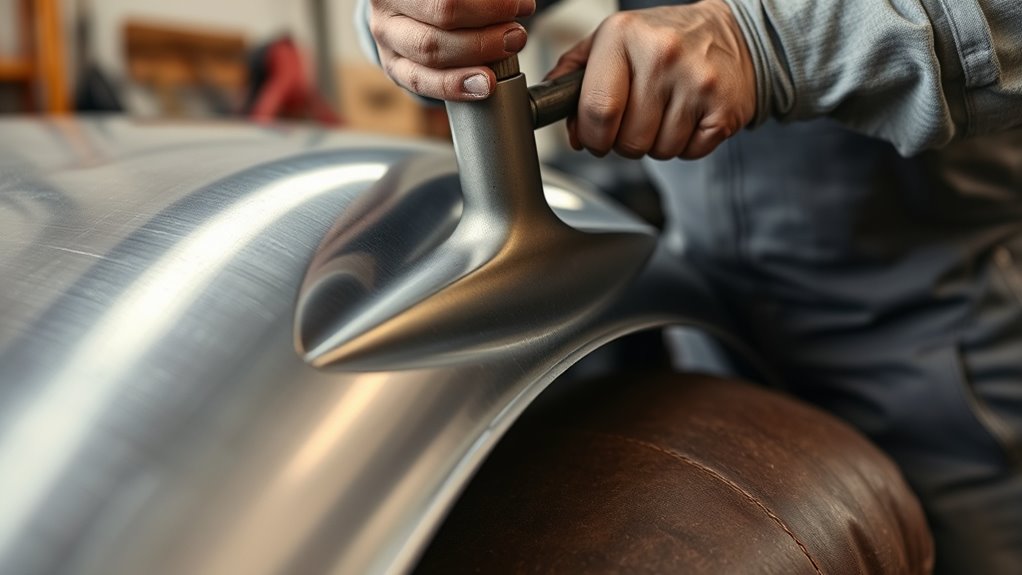
Beater Bags
Beater bags give you a controlled surface for stretching auto body panels without deep marks. You pack them with sand or shot so they conform to the panel and absorb hammer blows while you work. This support lets you place force exactly where the metal needs movement.
| Use | Benefit |
|---|---|
| Light hammering | Forms gentle curves |
| Localized blows | Stretches tight areas |
Set the bag under the work, strike with intent, and check the fit against the buck. Alternate stretching and inspection so you do not over-stretch the panel. With good control, a beater bag helps you shape clean contours without wasting material.
English Wheel
The English wheel uses two rollers to stretch and smooth a panel in gradual passes. You feed a flat or partly shaped piece through the wheels, then adjust pressure until the metal moves without rough marks.
- Choose a lower anvil that matches the panel curve.
- Set pressure just high enough to move the metal.
- Feed the panel with a steady motion to avoid waves.
- Change wheel sizes and profiles as the shape develops.
Use different anvils to tune the result and inspect the rollers often. Lubricate moving parts and keep the machine clean so it stays precise and reliable.
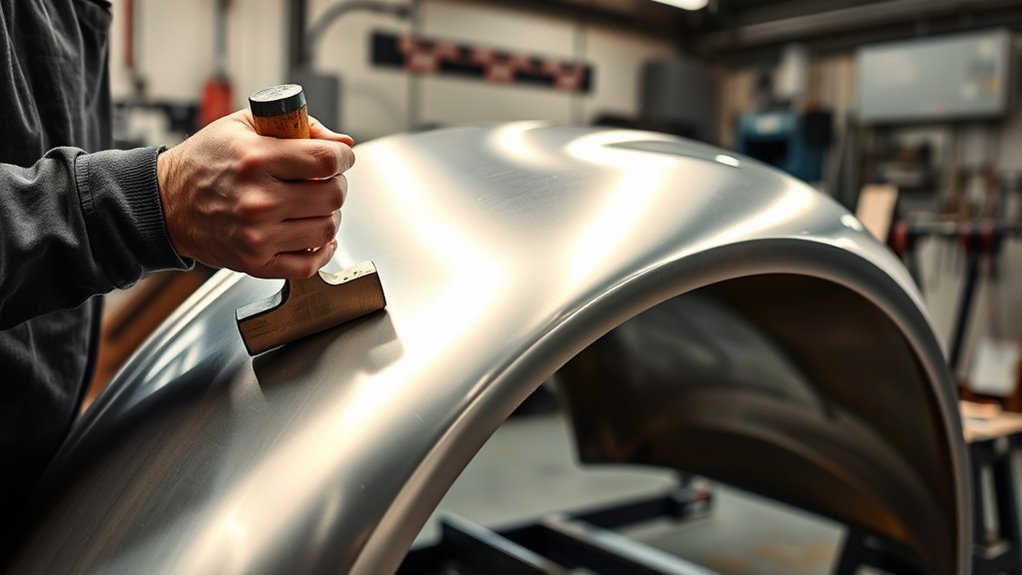
Shrinking Hammer
A shrinking hammer helps you tighten raised areas after stretching creates too much surface area in one spot. Strike the crown with care so the metal compresses and pulls the shape closer to the curve you need.
Use the smooth face for broad correction. Use the peened face only when you need texture and more bite, because it can leave marks you must later smooth.
| Face | Use |
|---|---|
| Smooth | General shaping |
| Peened | Textured correction |
Pair the hammer with light English wheel passes after each correction. That cycle lets you refine the panel and keep the finish clean.
How to Mark the Panel Shape
Lay the panel out with a flexible shape pattern, such as Tyvek, and use magnets to hold it in place while you trace the perimeter with a magic marker. This gives you a clear roadmap for panel alignment and helps you avoid guesswork.
Check the outline against a buck or reference shape before you cut. Use these steps to keep the layout accurate:
- Trace the full edge clearly.
- Recheck symmetry from both sides.
- Mark trim zones with short dashes.
- Confirm curvature against the reference.
After marking, trim excess metal with a cordless electric shear so you can move from layout to fitment. Keep the pattern secured, keep your line visible, and keep comparing the panel to the target shape. Using specialized aluminum flux wire can also improve certain aluminum repair welds when the base metal and filler match.
Steps to Stretch Sheet Metal
Products Worth Considering

Machine provides outstanding performance on small jobs like motorcycle tanks, tank covers, seat cowls and aircraft fillets. Engineered for easy operation with a quick-release lower anvil for efficient wheel changes. The upper wheel features rounded edges to prevent marring, delivering scratch-free, professional results on your metalwork.

Form Metal Faster and Have More Control of Your English Wheel

Material Capacity: Designed to form up to 16 gauge (1.5mm) mild steel with precision and reliability
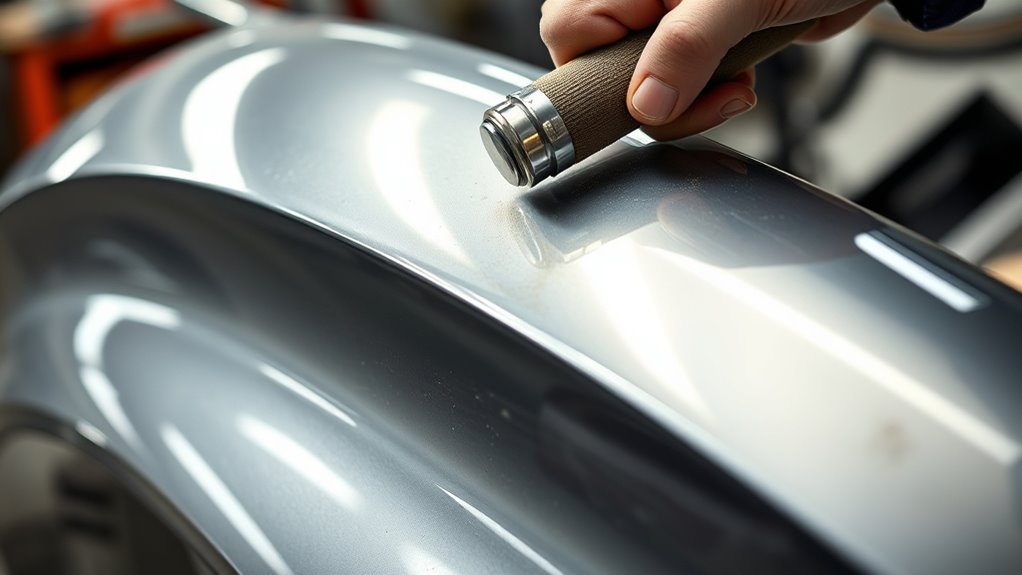
Step 1: Support the Panel on a Beater Bag
Place the marked panel in a beater bag and support the full work area. The bag absorbs each blow and lets you stretch the crown without tearing or gouging the surface.
Step 2: Stretch With Light Hammer Blows
Use a smooth-faced hammer and strike only the spots that need movement. Keep your blows even and local because targeted stretching gives you more control than broad hits across the whole panel.
Watch the panel closely as the metal responds. If it starts to dish, ripple, or move too fast, reduce force and reset the panel on the bag.
Step 3: Check the Panel Against the Template
After several passes, compare the panel to your template, buck, or flexible shape pattern. Mark low spots, high spots, and areas that need more crown.
You shape the sheet instead of punishing it. Make small corrections until the shape matches your marks and the metal holds the form you want. You should also understand the risks of zinc contamination before welding galvanized steel because fumes and weld defects can create serious problems.
Step 4: Smooth the Shape With an English Wheel
An English wheel helps you fine-tune the panel after the first stretching passes. The fixed upper wheel and adjustable lower anvil form smooth curves while you control pressure and direction.
Use these metal flow techniques:
- Set light pressure, then increase it only as needed.
- Keep a steady feed speed so the panel moves evenly.
- Make small wheel adjustments to change the gap and refine the contour.
- Watch for wheel marks, then correct them before they deepen.
With practice, you will read the panel faster and make cleaner corrections to small flaws. This method supports precise surface finishing and helps you form bodywork that follows your intent. Flux core welding can also support some repair work when you choose the right wire, setup, and joint prep.
Pro tip: Make fewer heavy passes and more light passes so you can stop before the panel moves too far.
Keep Shrinks in Check as You Work
As you stretch the panel, watch for spontaneous shrinks before they lock into the shape. These gathers often appear in areas that still need more crown or support.
Check the surface often and mark progress so you can spot trouble early. Apply pressure in small steps because gradual force lets you correct the metal without creating new distortion.
If the panel starts to gather unevenly, use a gathering tool to manage the extra material and keep the stretch balanced. Compression stretching can also help you hold the form while you guide metal movement.
Stay patient. Small adjustments now save you from harder repairs later. Check your equipment calibration so grinders and shaping tools do not overheat or damage the panel.
Fit the Panel to Your Buck
Secure the flexible shape pattern to your buck with magnets so it cannot shift while you work. That locked position lets you align the panel without chasing movement or distortion.
Trace the panel perimeter with a magic marker, then use that line as your control boundary for shaping. Build the fit through direct feedback from the buck instead of guesswork.
- Secure the flexible pattern firmly to the buck.
- Mark the perimeter clearly for accurate reference.
- Use stretching, shrinking, and the English wheel to tune curvature.
- Check the panel often and make small adjustments as the fit changes.
You may need firm pressure at times, but do not force the panel into false alignment. Work the surface, return to the buck, and read the contact points. Good MIG welding techniques can also improve the durability of related stainless steel repairs.
Trim the Edge and Check the Fit
Mark the trim line with a flexible pattern, then cut the sheet slightly oversize with a cordless electric shear. Extra material gives you room to tune the edge without losing the final panel dimensions.
Set the panel on the buck and check for gaps, alignment, and areas that need correction. Clean the surface before any welding so contaminants do not reduce welding quality during the repair.
Mark the Trim Line
With the flexible shape pattern positioned on the panel, trace the trim line with a magic marker. This step gives you a clear cutting guide and protects trim accuracy while the metal still has room to move.
- Place the pattern flat and verify the edges.
- Mark the line with a steady hand.
- Trim the excess with a cordless electric shear.
- Check the fit against the buck, then refine gaps or gathers over a beater bag.
Guide the panel toward the final shape instead of forcing it. Keep the geometry honest, adjust only what needs work, and repeat until the contour fits cleanly.
Cut Slightly Oversize
Cut the panel slightly oversize so you have room to fine-tune the fit. Use a flexible shape pattern to trace the perimeter, then trim the excess with a cordless electric shear for clean and controlled cuts.
Do not chase the final line on the first pass. Leave material for panel adjustments as you refine the edge.
Oversize metal gives you freedom to shrink, stretch, and tune the panel without wasting the part. Remove a little, check the shape, and correct high spots before they lock in.
Test Fit Against Buck
After you cut the panel oversize, set it against the buck and start trimming the edge into true. Use a cordless electric shear for clean cuts, then recheck contact at every reveal line.
Use strict panel alignment habits because the buck shows you where distortion starts. Follow this process:
- Clamp or hold the panel steady with magnets.
- Mark gaps and high spots with a flexible pattern.
- Adjust the pattern and trim in small steps.
- Refit the panel, then strike small gathers over a beater bag.
Keep firm pressure on the form while you trim, but do not force misalignment. Test fit again after each pass. A snug fit, even curvature, and true edges mean you can move forward.
Fix Oil Canning and Low Spots
Oil canning happens when a flat or low-crown area lacks enough tension, so the metal pops under pressure. To correct it, find the low spot and adjust the surrounding metal with controlled stretching or shrinking.
Work around the low spot in small increments. Use careful hammer work, a stretching tool, or an English wheel so you raise the metal without creating new distortion.
If the panel still pops, use controlled shrinking around the affected area to pull the surface tight. Check your progress against a flexible shape pattern often because accuracy matters more than force. Dedicated welding tools can also help prevent contamination in related stainless steel work.
Finish High-Crown Panel Adjustments
After you correct low spots, finish the high-crown panel by controlling the remaining stretch in targeted areas.
Finish the high-crown panel by controlling the remaining stretch where the curve needs it most.
Read the curve before you push harder. Mark the perimeter with a magic marker so you can see where trimming and adjustment belong.
Then work the metal with these shaping methods:
- Use a gathering tool to tame spontaneous shrinks and keep the stretch local.
- Support the panel on a beater bag while you manage gathers.
- Run the English wheel in light passes to stretch gradually and preserve a smooth finish.
- Watch wheel marks during each cycle because they show where you need more or less pressure.
High-crown work rewards control, not force. When you track the marks, guide the curve, and trim only what needs work, the panel can match the form without a fight. Techniques like flux core welding can also support the repair process when you need strong welds in the right setting.
Frequently Asked Questions
What Is the 4T Rule in Sheet Metal?
The 4T rule gives you a rough limit for how far you should stretch sheet metal before strength and thickness become concerns. Treat it as a guideline, not a guarantee, because alloy, thickness, work hardening, and panel shape all affect safe stretch.
What Is the Process of Sheet Metal Stretching?
You stretch sheet metal by gradually lengthening it with controlled pressure. Use a hammer and beater bag for rough shape, then use an English wheel to smooth and refine the curve.
What Gauge Sheet Metal Is Normally Used in Car Body Repair?
Many auto body repair panels use 20-gauge sheet metal, which measures about 0.032 inches thick. Some repairs may call for 19-gauge or 22-gauge metal, so match the original panel thickness when you can.
What Are the Disadvantages of Stretch Forming?
Stretch forming can thin the metal, distort the panel, and leave stress in the surface if you overwork it. It also takes practice because small pressure changes can move the shape more than you expect.
Can You Undo Over-Stretched Sheet Metal?
You can often improve over-stretched sheet metal with careful shrinking, planishing, and test fitting. Severe thinning or cracking may require a patch or a replacement panel because the metal has lost too much strength.
Conclusion
Good sheet metal stretching comes down to control: mark the shape, move the metal slowly, and check the fit often. Start with light hammer work over a beater bag, then refine the panel with the English wheel. Trim only small amounts once the curve matches the buck. When you take your time, the finished panel fits cleanly and holds the shape you built.


