To use a flap disc for grinding automotive welds, first choose the right grit—start with 40 or 60 grit for rough areas. Secure the part, maintaining a 5- to 10-degree angle against the weld. Use steady strokes for an even finish, switching to higher grit discs (80-120) for polishing. Always wear safety gear like goggles and gloves, and make certain your workspace is clean and well-ventilated. You’ll discover more techniques to enhance your results and maintain your tools.
Understanding Flap Discs and Their Benefits
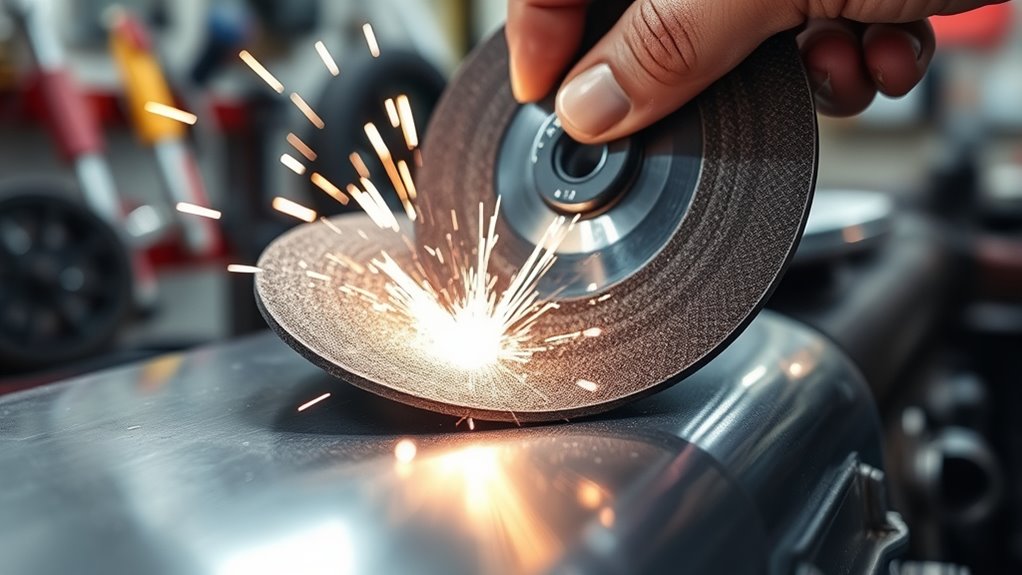
Flap discs are essential tools in the world of metalworking, offering a blend of efficiency and versatility. Designed for grinding welds and blending metal surfaces, these discs feature overlapping abrasive flaps made from durable materials like zirconia or aluminum oxide. This design guarantees consistent abrasion, delivering a superior surface finish compared to traditional grinding wheels.
When you need to tackle heavy stock removal, lower grit flap discs are your go-to option, providing aggressive material removal. Conversely, higher grit options allow for finer finishes, making them ideal for smoothing out imperfections.
Their compatibility with various materials—mild steel, stainless steel, and aluminum—makes flap discs invaluable for automotive repair tasks. Additionally, using flap discs minimizes heat buildup during grinding, considerably reducing the risk of warping delicate automotive bodywork. By choosing flap discs for your projects, you gain precision and control, liberating your craftsmanship.
Flap discs are essential for automotive repair, seamlessly working with mild steel, stainless steel, and aluminum.
Selecting the appropriate grit size for your flap disc is crucial for achieving the desired finish and efficiency in your work.
Choosing the Right Grit Size for Automotive Welding
Choosing the right grit size is essential for achieving ideal results in automotive welding. Start with a 40-grit flap disc to effectively remove rough welds and heavy slag without damaging surrounding metal.
If you’re prepping surfaces for paint, a 60-grit flap disc offers an excellent balance between material removal and surface finish.
For thin sheet metal, begin with an 80-grit flap disc to avoid warping while still achieving a polished look.
When working with stainless steel components, opt for zirconia flap discs to prevent contamination and maintain the integrity of the material.
Remember, the grit size you choose directly affects the surface finish; lower grit numbers (24-40) are aggressive, while higher numbers (80-120) are more suited for fine finishing. Proper technique ensures effective shaping and preparation for welding.
Selecting the right grit size guarantees a smooth, professional finish that meets your automotive welding needs.
Products Worth Considering

PREMIUM QUALITY: These angled flap discs, also known as cut off wheels 4 1/2 inch, are constructed with industrial grade premium zirconia abrasive for strength, durability, and extended disc life as it holds up to high temperatures and pressure.

PREMIUM QUALITY: These angled flap discs, also known as cut off wheels 4 1/2 inch, are constructed with industrial grade premium zirconia abrasive for strength, durability, and extended disc life as it holds up to high temperatures and pressure.

STRONGEST FIBER BACKING THAN OTHER PRODUCTS:4 1/2 grinding wheels made for TOP-LEVEL Hard zirconia.Good material for griding wheel. This Flap Disc is constructed of industrial grade high density premium zirconia material, increased durability than standard flap discs, built for a more robust and economical grinding wheel
Preparing Your Workspace for Safe Grinding
Before you start grinding, clear your workspace of any flammable materials and clutter to guarantee safety.
Secure your workpiece with clamps or a vice to prevent movement during the process.
Don’t forget to gather your safety gear, including gloves, goggles, and a mask, to protect yourself from sparks and debris. Additionally, ensure proper ventilation in your workspace to reduce dust and fume exposure.
Clear Work Area
A clean and organized workspace is essential for safe grinding operations. Start by confirming your work area is well-ventilated to minimize inhalation of dust and fumes produced while using the angle grinder.
Remove any flammable materials, tools, and debris to reduce fire hazards and create a clear work area. Inspect the floor for obstacles that could cause slips or trips, and keep safety gear—like gloves, goggles, and masks—within easy reach; wear them at all times.
Securely hold the metal workpiece with clamps or vices to prevent movement and guarantee stability while you grind. This preparation not only protects you but also enhances your efficiency as you remove the weld with precision.
2. Secure Workpiece Properly
Once you’ve confirmed your workspace is clear and organized, the next step is to secure the workpiece properly. Use clamps or vices to hold the workpiece firmly, preventing movement that could lead to uneven surfaces or accidents. Position the workpiece at a comfortable height, guaranteeing better control of the angle grinder during grinding. Always inspect for potential hazards, such as flammable materials or electrical cords, to maintain a safe environment.
Here’s a quick reference table for securing your workpiece:
| Task | Tools Needed | Safety Tips |
|---|---|---|
| Secure Workpiece | Clamps, Vices | Check for stability |
| Position Height | Adjustable Stand | Maintain proper posture |
| Inspect Hazards | Visual Inspection | Remove flammable items |
| Wear Safety Gear | Gloves, Goggles | Always protect yourself |
| Check Grinding Wheels | Visual Inspection | Confirm no damage |
3. Gather Safety Gear
Gathering the right safety gear is essential for a safe grinding experience. Equip yourself properly to protect against hazards while grinding automotive welds. Here’s what you need:
- Safety Goggles: Always wear these to shield your eyes from flying debris and sparks.
- Dust Mask: Use a dust mask or respirator to avoid inhaling harmful metal particles and dust.
- Heavy-Duty Gloves: Protect your hands from sharp edges and heat generated by the flap disc.
Additionally, verify your workspace has good ventilation to minimize exposure to harmful fumes.
Clear away any flammable materials and secure your workpiece with clamps to prevent movement.
Prioritizing safety gear empowers you to work confidently and effectively.
Essential Safety Gear for Flap Disc Grinding?

Before you start flap disc grinding, guarantee you have the right safety gear.
Always wear safety goggles to shield your eyes from flying debris, and use a dust mask or respirator to protect against harmful particles.
Don’t forget heavy-duty gloves and ear protection to keep your hands and ears safe during the process. Additionally, ensure you are wearing flame-retardant clothing to minimize burn risks from sparks generated during grinding.
Essential Safety Gear Checklist
When you’re preparing to use a flap disc for grinding, having the right safety gear is essential to guarantee your protection. Here’s a quick checklist to confirm you’re fully equipped:
- Safety Goggles: Protect your eyes from flying debris and sparks.
- Dust Mask: Use this to prevent inhalation of harmful dust and particles.
- Heavy-Duty Gloves: Shield your hands from sharp edges and heat.
Additionally, don’t forget to wear hearing protection like earplugs or earmuffs to guard against the loud noise, and choose appropriate work clothing.
Confirm your garments fit snugly and your shoes have non-slip soles for stability.
Prioritizing your safety gear will empower you to work confidently and effectively.
Proper Eye Protection Needed
While grinding with a flap disc, wearing proper eye protection is vital for your safety. Always use safety goggles with side shields to shield your eyes from flying debris and sparks.
For added security, consider a face shield, as it provides extra protection against larger particles and heat.
Remember, a dust mask or respirator is essential to prevent inhaling harmful dust particles released during the grinding process.
Make sure your safety gear fits properly and is comfortable; this encourages consistent use.
Adhering to industry safety standards and guidelines for personal protective equipment (PPE) minimizes risks associated with flap disc grinding.
Don’t compromise on safety—invest in the right eye protection to guarantee a secure working environment.
Respiratory Protection Importance
Respiratory protection is essential during flap disc grinding, as fine metal particles and dust can pose significant health risks.
To safeguard your respiratory system, consider these key points:
- Choose the Right Respirator: An N95 or P100 respirator effectively filters out airborne particles, ensuring adequate protection.
- Prioritize Ventilation: Maintain a well-ventilated workspace to minimize dust accumulation, but don’t rely solely on this—personal respiratory gear is vital.
- Follow Safety Regulations: Adhering to OSHA guidelines emphasizes the necessity of wearing respiratory protection in environments with airborne contaminants.
Step-by-Step Guide for Grinding Welds
Start by selecting a coarser grit flap disc, like 40 or 60 grit, to efficiently tackle excess weld material. This approach minimizes damage to the surrounding metal while providing a solid foundation for your grind. Additionally, ensure you are using the flap disc at the appropriate grit size for the best results.
Next, secure the automotive part to a stable workbench with clamps to prevent movement during grinding. Position the flap disc at a 5- to 10-degree angle against the weld. Use steady, even strokes to achieve a uniform finish without over-grinding.
Regularly check your progress to confirm the weld is smoothed to your desired finish quality without removing too much base material. After grinding, inspect the surface for smoothness.
If a polished finish is required, switch to a finer grit flap disc (80 or 120 grit).
| Step | Action |
|---|---|
| 1. Select Grit | Choose 40 or 60 grit flap disc |
| 2. Secure Part | Clamp the automotive part securely |
| 3. Angle Position | Maintain 5- to 10-degree angle |
| 4. Check Progress | Inspect regularly for desired smoothness |
Products Worth Considering

Zirconia grit enables 3x faster material removal than fiber resin metal sanding discs

HIGH-DENSITY JUMBO DESIGN: Type 29 flap discs with a high-density jumbo layout support surface blending, beveling, grinding, deburring, and edge chamfering. Curved profile aids finishing, stock removal, and rust cleanup for pros and DIY enthusiasts.

【 Premium Durability 】 Industrial-grade hard zirconia abrasive layer delivers longer service life compared to standard aluminum oxide discs, maintaining consistent cutting power even under heavy use and offering stronger resistance to pressure and better heat dissipation
Achieve a Smooth Finish With These Techniques
Achieving a smooth finish after grinding welds requires careful attention to detail and the right techniques. Follow these steps to guarantee ideal results:
- Start with a coarse grit flap disc (40-60 grit) for initial grinding. This quickly removes excess material and smooths rough edges.
- Maintain a consistent angle of 5-10 degrees while grinding. This helps blend the weld with the surrounding metal without over-grinding.
- Use smooth, even strokes to achieve a uniform finish. Regularly check your progress to avoid removing too much material.
Once the initial grinding is complete, shift to higher grit flap discs (80-120 grit) for final finishing. This step polishes and enhances the appearance of the weld. Additionally, using flap discs can minimize discoloration on stainless steel, ensuring a cleaner finish.
Remember to clean your work area frequently to eliminate metal shavings and debris, guaranteeing a safe and efficient grinding process.
Common Mistakes in Flap Disc Grinding to Avoid
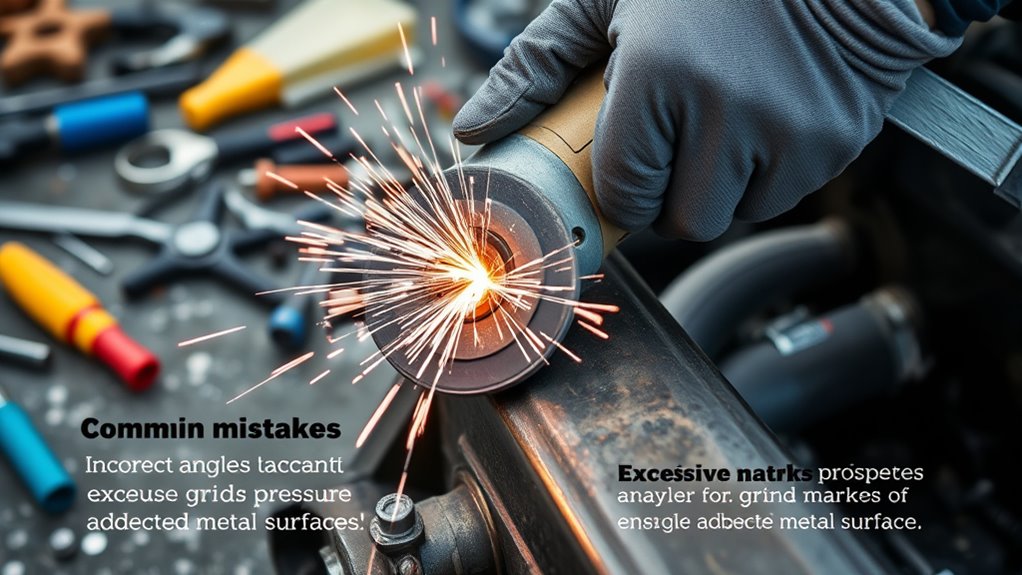
When using a flap disc for grinding, avoiding common mistakes can greatly enhance your results and safety.
First, be cautious about grit size; starting with a grit that’s too coarse can remove too much material, damaging the base metal. Use 40 or 60 grit for weld blending.
Next, maintain a proper angle; holding the flap disc at more than 10 degrees can lead to uneven grinding and excessive wear. Aim for a consistent 5- to 10-degree angle.
Also, don’t over-pressurize the disc; applying too much pressure can clog it, so let the disc do the work with light, even pressure.
Always prioritize safety precautions by wearing goggles and gloves to protect against debris.
Finally, inspect for wear before each use. Check for fraying or cracks to guarantee safe operation, as neglecting this can lead to accidents. Additionally, using the appropriate grit size is crucial for achieving desired results and reducing time fixing scratches.
Maintenance Tips for Flap Discs and Tools
To keep your flap discs and tools in top shape, regular maintenance is essential. Neglecting this can lead to inefficiency and safety hazards. Here are three key maintenance tips:
- Inspection: Regularly check your flap discs for signs of wear or damage. Replace them when they show significant deterioration to maintain grinding efficiency.
- Cleaning: After each use, clean the flap disc surface to remove metal shavings and debris. This guarantees peak performance during future grinding tasks.
- Installation: Always verify proper installation of flap discs on the grinder, following manufacturer guidelines. This prevents accidents and tool damage.
Additionally, store flap discs in a dry, cool environment and periodically maintain your angle grinder for smooth operation. Regularly checking the RPM rating of your flap discs ensures safe usage and compliance with safety standards.
Frequently Asked Questions
What Grit Flap Disc for Grinding Welds?
For grinding welds, start with a 40-grit flap disc for excess material, then use 60-grit for blending. Confirm you’re using zirconia or aluminum oxide discs, and always wear safety gear for protection.
Can You Grind With a Flap Disc?
Absolutely, you can grind with a flap disc! It offers metal preparation and surface finishing benefits. Mastering welding techniques means prioritizing tool maintenance, ensuring your flap disc performs effectively for efficient, precise results.
What RPM Is Safe for a Flapper Disc?
For ideal speed, verify your flap disc’s RPM rating matches your grinder’s max. Prioritize safety precautions; exceeding this can shorten disc lifespan and affect grinding techniques. Always consult manufacturer specifications for best results.
Which Way Should a Grinding Disc Face?
Face the grinding disc away from the workpiece. This flap disc orientation enhances efficiency and safety. Remember, proper grinding technique tips, weld preparation methods, and disc lifespan factors are essential for peak performance and safety.
Conclusion
In the world of automotive welding, a flap disc is like a skilled artist’s brush, shaping and refining your work. By mastering its use, you transform rough welds into smooth, polished seams, enhancing both appearance and strength. Remember, preparation and technique are your allies; neglect them, and your masterpiece may falter. With proper care and attention, you’ll not only achieve excellence but also extend the life of your tools, ensuring that every project shines with precision.


