How to Weld Quarter Panels
Rusty quarter panels can ruin a vehicle’s look and weaken the repair area if you rush the job. You need clean metal, careful fitting, short welds, and strong rust protection to make the repair last. This guide shows you how to assess damage, remove the old panel, fit the new panel, weld it safely, and seal it against future corrosion.
What’s in This Article
- How to Weld Quarter Panels: Understanding the Basics
- How to Identify and Assess Rust Damage in Quarter Panels
- Essential Tools for Welding Quarter Panels
- Before You Begin: Quarter Panel Welding Safety Checks
- Removing the Old Panel: A Step-by-Step Guide
- Preparing the New Panel for Installation
- Accurate Welding Techniques for Quarter Panels
- Sealing and Undercoating: Ensuring Longevity of Welds
- Common Welding Issues and Fixes for Quarter Panels
- Tips for Maintaining Your Welded Panels
- Frequently Asked Questions
Quick Answer
To weld quarter panels, inspect the rust first, remove the damaged panel, clean the metal, test-fit the new panel, and weld it with short tack or plug welds. Let the metal cool between welds so you don’t warp the sheet metal. Finish the repair with seam sealer, primer, and undercoating to help block moisture and rust.
Key Takeaways
- Check behind the quarter panel before you cut, especially near fuel lines and wiring.
- Clean all weld areas to bright metal so the weld can bond well.
- Use short welds and cooling time to reduce heat warping.
- Test-fit the repair panel before you make final cuts or welds.
- Seal and undercoat the repair area to help prevent future rust.
Estimated time: Plan for 6 to 12 hours for a basic patch repair, or more time for heavy rust and full panel replacement.
How to Weld Quarter Panels: Understanding the Basics
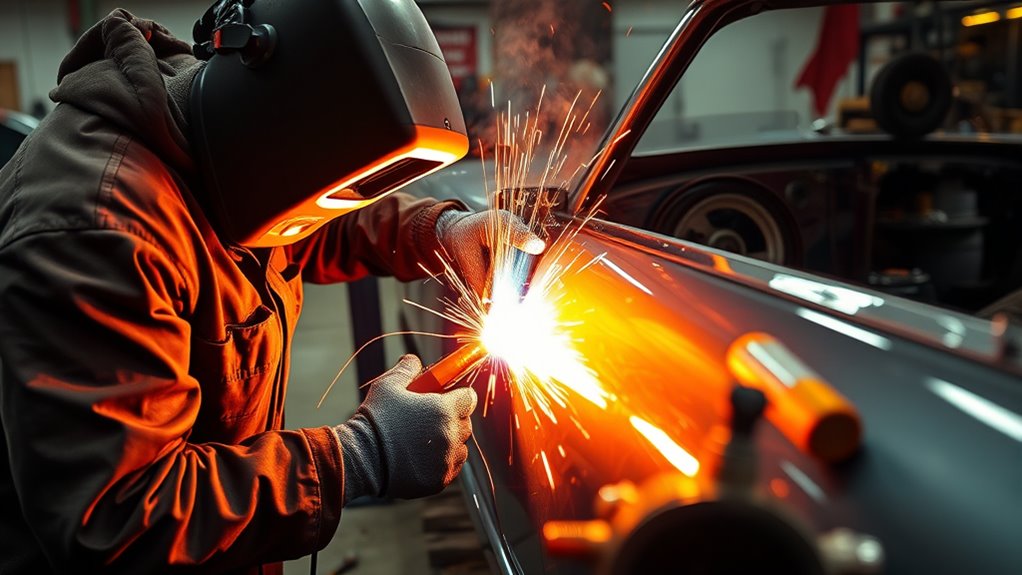
Welding quarter panels takes planning because you cut damaged metal, fit a repair panel, and weld thin sheet metal. A rushed cut or long weld bead can cause poor fit, burn-through, or panel warping.
Start by checking what sits behind the panel. Fuel lines, wiring, trim clips, and inner structures can sit close to the repair area. Move or shield those parts before you cut.
Use an air chisel, spot weld cutter, or drill to remove factory spot welds. A hole punch tool can help you prepare clean plug weld holes in the replacement panel.
Leave enough material for flanging where the repair design needs it. Good alignment gives the panel strength and helps the body line look right.
Warning: Disconnect the battery before welding, and keep fuel, trim, and flammable materials away from the work area.
Clean the weld area before you strike an arc. Grind rust, paint, coating, and contamination down to bright metal because clean metal improves fusion strength of the weld.
After welding, seal the seams and apply undercoating. This helps keep water out and reduces the chance of rust returning.
Products Worth Considering

✅【Complete Pro Welding Kit: 36 Plugs in 3 Precision Sizes】:This all-in-one 38-piece professional kit is engineered for ultimate versatility. It includes 12 plugs of 0.75", 12 of 1.00", and 12 of 1.375" diameter, covering the most common hole sizes in auto and metal work. Paired with a high-speed drill bit and a strong square magnetic holder, it delivers a complete, ready-to-use solution for permanent repairs.

Versatile Hole-Filling Solution: This kit of 14-gauge welding discs is specifically designed to fill holes left from body trim shaving, firewall smoothing, or rust spots in body panels, providing a versatile solution for various applications.

【Material】: Crafted from premium stainless steel, this repair mesh boasts exceptional tensile strength to withstand intense pulling forces. Its inherent rust-proof and corrosion-resistant qualities guarantee reliable performance over extended periods, maintaining integrity without succumbing to deterioration or wear.
How to Identify and Assess Rust Damage in Quarter Panels
Before you weld, inspect the quarter panel and the metal around it. The repair only works well if you remove all weak metal and weld to solid steel.
Look for bubbling paint, flaking paint, soft metal, pinholes, and dark staining near seams. Rust often starts where dirt and water stay trapped.
Use a magnet to check for heavy body filler. A weak pull can point to filler, rust, or previous repairs under the paint.
Probe rusty spots with a screwdriver. If the tool pushes through easily, cut that area out and plan for a larger patch or panel replacement. Rust and other common contaminants can weaken weld quality if you don’t remove them before repairs.
Inspecting Visible Rust Areas
Start with the lower quarter panel, wheel opening, seams, and the area behind the bumper. These spots often collect dirt, salt, and moisture.
Check for bubbling paint, cracks, discoloration, and rough edges. These signs often show rust below the surface.
Use a magnet to check for thick filler. Then tap the panel lightly and listen for weak, dull areas.
Poke badly rusted areas with a screwdriver. If the metal crumbles, you likely need to replace that section instead of patching over it.
Checking Structural Integrity
Check the panel’s strength before you choose your repair method. A small outer rust spot may hide damage in the inner panel.
Tap the panel with a small hammer. A solid sound usually points to stronger metal, while a dull sound can point to rust or filler.
Remove trim when needed so you can inspect the inner panel. Check mounting points, seams, and nearby brackets for rust spread.
Look for signs of water intrusion or packed debris. These issues can keep moisture against the metal and cause new rust after the repair.
Evaluating Underlying Damage
Use a flashlight to inspect behind the quarter panel where you can access it. Focus on seams, wheel wells, and hidden edges.
Check the inner panel before you weld a new outer panel over it. A strong outer patch won’t fix a weak inner structure.
Mark the full damaged area before cutting. Give yourself enough space to weld to clean, strong metal.
Check the mounting points and nearby body structure. This helps your butt weld or plug weld connect to a stable repair area.
Essential Tools for Welding Quarter Panels
You need the right tools to cut cleanly, fit the panel, weld thin metal, and protect the repair. Gather everything before you start so you don’t rush the job.
A MIG welder works well for many quarter panel repairs because it gives you good control on thin automotive sheet metal. You also need safety gear, cutting tools, clamps, and finishing supplies. If you use a flux-core setup, choose your wire and settings carefully because flux core wire can add more heat and cleanup on thin metal.
Products Worth Considering
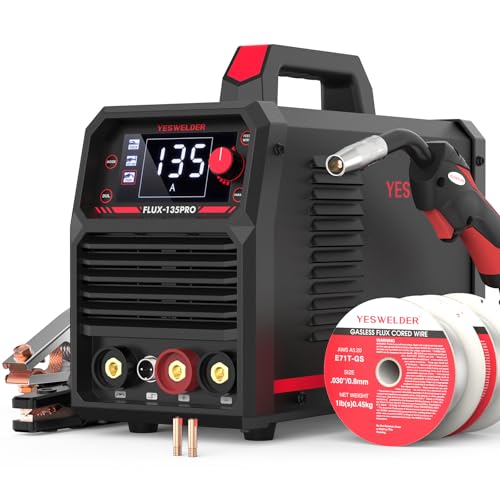
MULTI PROCESS: Experience the convenience of a high-quality, budget-friendly 3-in-1 welding machine that masterfully handles Gasless Flux Core MIG/Stick/Lift TIG(additional 10-25 lift TIG torch required). This unit caters to a wide range of welding applications and meets your various welding needs.

Generous Packaging: each package of ours includes 4 pieces of metal sheets, providing a sufficient quantity to meet your varying needs; Whether for a large project or for multiple smaller tasks, our generous pack ensures you have just what you need, when you need it; Products shipped by sea may have slight rust on the surface due to moisture, which is a normal oxidation phenomenon

Automotive Bodywork and Rust Repair
Essential Tools Overview
Use this basic tool list for most quarter panel welding jobs:
- MIG welder: Welds the repair panel to the vehicle body.
- Spot weld cutter or drill: Removes factory spot welds with more control.
- Air chisel: Helps separate old panel sections after you loosen welds.
- Grinder: Cleans metal and smooths finished welds.
- Hole punch tool: Makes clean holes for plug welds.
- Clamps and magnets: Hold the panel in place during test fitting.
- Seam sealer and undercoating: Protect the finished repair from moisture.
Test each tool before you start cutting. A dull cutter or poor ground clamp can make the job harder and increase damage risk.
Safety Equipment Necessities
Safety matters as much as fit and weld quality. Welding throws sparks, heat, light, and fumes into a tight work area.
Wear a welding helmet with the right shade for your process. Use leather gloves to protect your hands from heat and sharp metal.
Wear a fire-resistant jacket or coveralls. Use steel-toed, slip-resistant boots to protect your feet from tools and cut metal.
Keep a fire extinguisher nearby. Clear the work area of fuel, paper, trim, solvents, and other flammable items.
Before You Begin: Quarter Panel Welding Safety Checks
Before you cut or weld, complete a short safety check. It helps you avoid fire, electrical damage, and poor weld quality.
- Disconnect the battery to reduce the risk of electrical damage.
- Move flammable parts such as carpet, trim, fuel lines, and wiring away from sparks.
- Clean the repair area so paint, rust, seam sealer, and dirt don’t contaminate the weld.
- Check both sides of the panel before each cut so you don’t hit hidden parts.
- Set your welder on scrap metal with similar thickness before welding the vehicle.
Good preparation saves time later. It also helps you spot problems before the panel gets welded in place.
Removing the Old Panel: A Step-by-Step Guide
Start by stripping the area so you can access the lower quarter panel. Take your time during removal because the surrounding metal must stay usable.
- Remove nearby components: Take off the tail light, bumper, tailgate, fender flare, and trim that block the panel.
- Mark the cut area: Mark the damaged metal and leave enough room to weld to clean steel.
- Check behind the panel: Confirm that the fuel filler hose, wiring, and other parts stay clear of the cutting zone.
- Cut or drill factory spot welds: Use a spot weld cutter, drill, or air chisel with care.
- Remove the damaged panel section: Work slowly so you don’t bend or tear the surrounding metal.
- Assess the inner panel: Patch weak inner metal before you install the new outer panel.
- Remove zinc coating where needed: Before welding the new panel, remove coating from the weld area to reduce contamination during welding.
After removal, clean the edges and check the fit area. Any rust left behind can spread under the new panel.
Preparing the New Panel for Installation
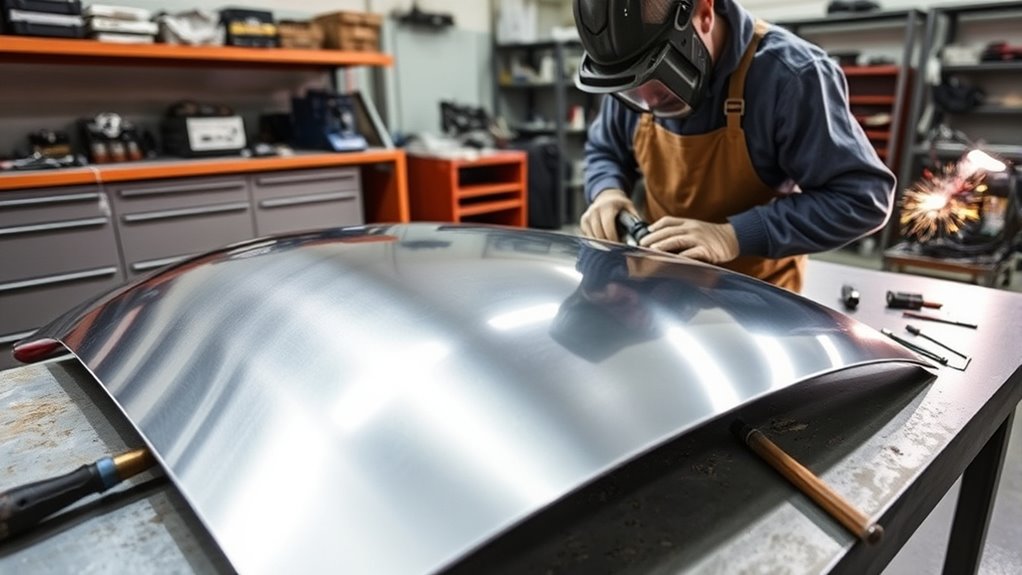
Trim the new quarter panel carefully so it fits below the body line. Leave about half an inch where the repair method needs a flange or overlap.
Before you cut more, verify what sits behind the panel. Check that the fuel filler hose, wiring, and other parts stay clear of the cutting area.
Always check what’s behind the panel to ensure no components, like the fuel filler hose, are in the cutting area.
Use an air chisel or spot weld cutter to remove the old panel’s spot welds. Keep the surrounding metal as straight as possible.
Test-fit the new panel several times. Check the body line, wheel opening, door gap, and bumper area before you weld.
Patch any rusted areas behind the new panel first. Then prepare base metal by grinding the weld area to bright metal for better results.
Once the panel fits well, clamp it in place and prepare the weld points. Good fit reduces stress on the welds and helps the repair look clean.
Accurate Welding Techniques for Quarter Panels
Use short, controlled welds when you attach the new quarter panel. Thin sheet metal can warp fast when you put too much heat into one area.
- Set the panel in place and clamp it so the body line and gaps stay even.
- Create plug weld holes with a hole puncher where the repair design calls for spot-style welds.
- Tack the panel first at spaced points so the panel does not move.
- Weld in short sections and move around the panel to spread heat.
- Let each weld cool before adding more heat near the same area.
- Grind welds carefully so you smooth the surface without thinning the panel.
Trim the new repair panel to fit below the body line, leaving about half an inch for flanging where needed. This can improve strength and help support a proper plug weld.
Always disconnect the vehicle’s battery before you weld. Good welding processes and preparation help you protect the vehicle and keep the repair clean.
Pro tip: Practice your settings on scrap metal with the same thickness before you weld the vehicle.
These techniques help you create a durable repair and a cleaner finish. They also lower the risk of burn-through and panel distortion.
Sealing and Undercoating: Ensuring Longevity of Welds
After welding, seal and protect the repair area. Bare welds and seams can collect moisture if you leave them exposed.
Start by applying seam sealer to all joints after proper surface preparation. This creates a moisture barrier and helps protect the repair from future rust.
Next, use primer and undercoating over the repaired area when the product instructions allow it. Make sure the undercoating works with the existing material and your paint system.
Keep the workspace clear of flammable materials while you perform these tasks.
| Step | Action |
|---|---|
| Apply Seam Sealer | Seal all joints for moisture protection |
| Choose Undercoating | Select compatible product |
| Apply Evenly | Ensure uniform coverage |
| Inspect Regularly | Check for wear and damage |
Allow enough drying and curing time before you expose the area to water or road grime. Regular inspections help you catch chips, cracks, or new rust early.
Common Welding Issues and Fixes for Quarter Panels
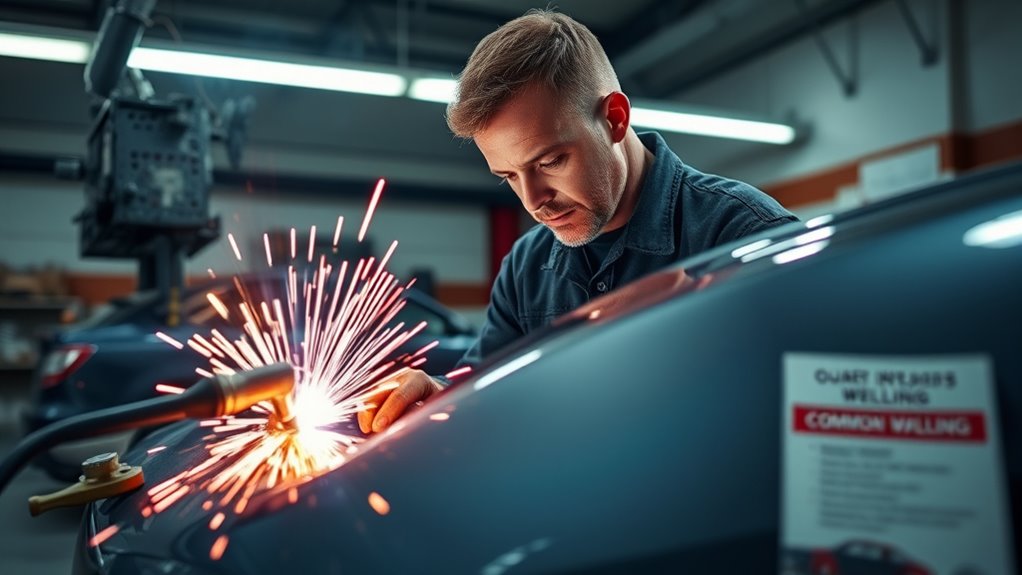
Quarter panel welding can create problems if the metal gets too hot or the surface stays dirty. Use these fixes to improve your repair quality.
- Prevent warping: Use short welds, move around the panel, and allow cooling time between welds.
- Remove spot welds cleanly: Use an air chisel or spot weld cutter so you don’t damage nearby metal.
- Clean the welding area: Remove rust, dirt, paint, and debris before welding.
- Protect vehicle electronics: Disconnect the battery before welding near the body.
- Check weld size: Use the right weld size so the repair holds without excess heat. Proper weld sizing helps the repair maintain strength and reduce distortion.
Tips for Maintaining Your Welded Panels
Maintaining welded quarter panels helps protect the repair and the vehicle structure. Start by keeping the repaired area clean and dry.
After welding, apply seam sealer, primer, and undercoating to protect joints from moisture and road debris. Inspect the area often, especially after rain, winter driving, or off-road use.
Use a corrosion-resistant primer on exposed welds before final coating. This adds another layer of protection against moisture.
Watch for bubbling paint, cracked seam sealer, or small rust spots. Treat small problems early with proper cleaning and rust converters before they turn into a larger repair.
Frequently Asked Questions
Can you weld a quarter panel with a MIG welder?
Yes, you can weld many quarter panel repairs with a MIG welder. Use the right wire, low heat settings, short welds, and cooling time to avoid burn-through and warping.
Should you butt weld or overlap a quarter panel patch?
Both methods can work, but the best choice depends on the repair area and your skill level. A butt weld can create a cleaner finish, while an overlap or flanged joint can give a beginner more support.
How do you stop a quarter panel from warping while welding?
Use short tack welds and move around the panel instead of welding one long bead. Let the metal cool between welds and avoid grinding too aggressively in one spot.
Do you need to remove rust before welding a quarter panel?
Yes, you need to remove rust, paint, coating, and dirt from the weld area. Welds need clean, solid metal to bond well and hold over time.
Is a quarter panel welded?
Yes, many quarter panels use spot welds, plug welds, or seam welds depending on the vehicle and repair type. You should match the repair method to the panel design and the damaged area.
Conclusion
A strong quarter panel repair starts with clean metal, careful fitting, short welds, and good rust protection. Check behind the panel before every cut, then test-fit the repair panel before you weld. Seal the seams and undercoat the repair so moisture can’t reach the bare metal. Take your time with each step, and your finished panel will look cleaner and last longer.


