
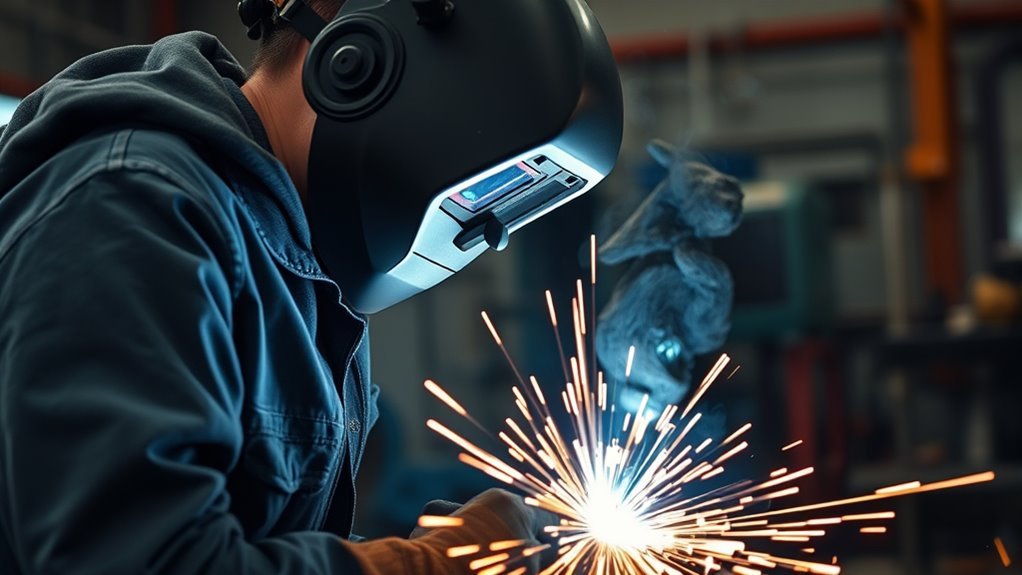
Plasma cutting is one of the fastest ways to cut conductive sheet metal, brackets, patch panels, and fabrication parts in an auto body shop. It can make controlled straight or curved cuts, but it also creates intense light, sparks, molten metal, heat, and hazardous fumes. Before cutting a vehicle, confirm that the exact repair and cutting location are permitted by the manufacturer.
Quick Answer
Plasma cutting can work well for approved body-panel cuts, removable brackets, and patch fabrication. Verify the OEM repair procedure first, isolate fuel, electrical, high-voltage, coolant, refrigerant, and SRS hazards, then use clean dry air, correct consumables, a secure work clamp, and settings from the cutter manual.
Key Takeaways
- Plasma cutters work on electrically conductive metals, including mild steel, stainless steel, aluminum, copper, and brass.
- Do not cut a structural, reinforced, or unknown vehicle panel until the VIN- and model-year-specific OEM body-repair procedure permits the cut.
- Clean, dry, oil-free compressed air, adequate CFM, correct consumables, and a solid work-clamp connection are essential for a stable arc.
- Paint, galvanized coatings, undercoating, seam sealer, adhesives, fuel, wiring, batteries, coolant, and refrigerant can create serious hazards.
- After the cut, inspect both sides for heat or fire, clean the edge, and restore corrosion protection and sealers as required by the OEM procedure.
At a Glance
| Time Required | About 10 to 30 minutes for inspection and setup, followed by seconds to minutes per cut and additional fire-watch and cleanup time |
| Difficulty | Beginner to intermediate on loose fabrication parts; advanced training may be required for vehicle structures, SRS areas, EVs, and hybrids |
| Tools Needed | Plasma cutter, suitable power circuit, compressor with adequate CFM, air dryer or filter, correct consumables, work clamp, guide, PPE, ventilation, fire extinguisher, and inspection lighting |
| Cost | Varies by cutter, compressor, electrical supply, ventilation, PPE, and consumables; ongoing costs include electrodes, nozzles, shields, filters, and corrosion-protection materials |
What Is Plasma Cutting and How Does It Work?
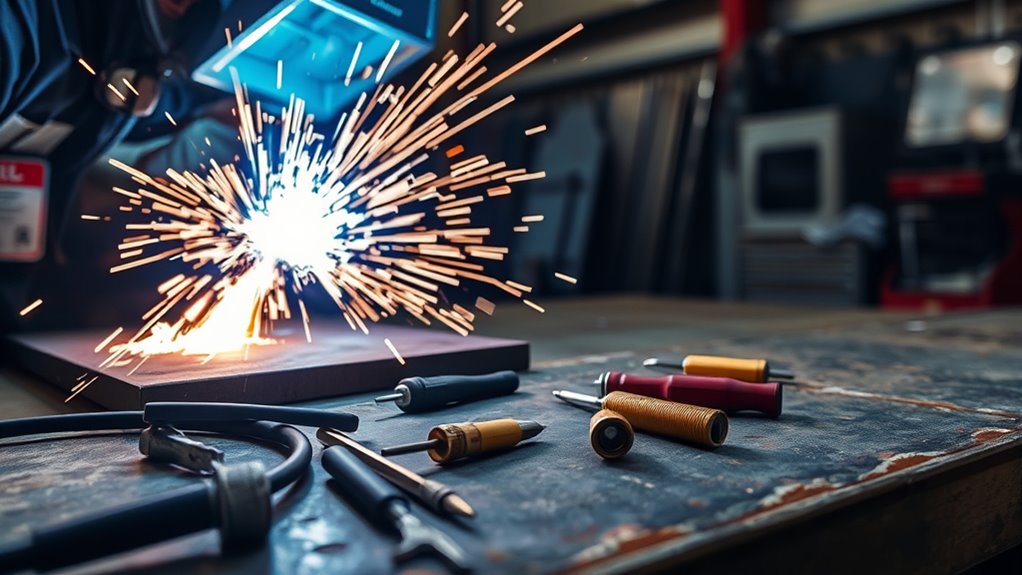
Plasma cutting is a thermal cutting process that uses a high-velocity jet of ionized gas to cut electrically conductive metal. According to Hypertherm’s explanation of plasma cutting, an electric arc ionizes gas such as compressed air, nitrogen, or argon and creates a focused plasma stream.
The stream transfers heat to the workpiece, melts a narrow path through the metal, and blows molten material out of the cut. The opening left by the process is called the kerf. A properly set machine can produce a narrow, controlled kerf, but edge bevel and dross still depend on torch height, consumable condition, amperage, air flow, and travel speed.
Plasma arcs can approach 40,000°F, or about 22,200°C, although the temperature at a specific point varies with the system and process. That concentrated heat is why plasma cuts quickly and why nearby coatings, wiring, adhesives, fuel, trim, or hidden material can ignite or release fumes.
The work clamp completes the cutting-current circuit through the metal. It should grip clean, bare metal close to the cutting area. A loose clamp or one attached over paint, rust, seam sealer, or filler can cause poor arc transfer, sputtering, or failure to start.
Note: The work clamp is the cutting-current return connection. It is not a replacement for the plasma cutter’s protective earth ground or a properly grounded electrical circuit.
Plasma cutters can cut mild steel, stainless steel, aluminum, copper, brass, and other conductive alloys. They do not cut wood, plastic, glass, rubber, body filler, or other nonconductive material. Understanding your machine’s duty cycle and thickness capacity helps prevent overheating during long or repeated cuts.
When Should You Use a Plasma Cutter for Auto Body Work?
A plasma cutter is most useful when speed, curves, access, or complex profiles make a mechanical cutting tool inefficient. It can be effective for loose patch material, nonstructural brackets, approved outer-panel cuts, exhaust fabrication, and other conductive shop parts.
It is not automatically the best tool for every vehicle cut. A drill or spot-weld cutter may be better for factory welds. An air saw, nibbler, shear, or cut-off wheel may create less heat in a sensitive area. A reciprocating saw may be safer where fumes or electrical arc exposure cannot be controlled.
| Job | Plasma Cutter Fit | Possible Alternative |
|---|---|---|
| Fabricating a loose patch panel | Good when the material is conductive and edge cleanup is acceptable | Shear, nibbler, jigsaw, or cut-off wheel |
| Cutting a removable steel bracket | Good after nearby wiring, fuel, coatings, and trim are removed or shielded | Band saw, reciprocating saw, or cut-off wheel |
| Separating factory spot welds | Usually not the first choice because it can damage the lower panel | Spot-weld drill, belt sander, or OEM-approved separation method |
| Sectioning a structural rail, pillar, or reinforcement | Only when the exact OEM repair procedure permits the location and method | Complete-part replacement or the OEM-specified cutting method |
| Working beside a battery, fuel system, refrigerant line, or hidden cavity | Do not cut until the hazard has been properly isolated or removed | Remove the part or use a cold-cutting method after OEM review |
Vehicle bodies may combine mild steel, high-strength steel, ultra-high-strength steel, aluminum, adhesives, and multi-layer reinforcements. Material and sectioning rules vary by model, year, body location, and replacement-part design. Honda’s body-repair guidance, for example, limits sectioning in reinforced and high-strength-steel areas and directs technicians to model-specific repair information.
Warning: Do not plasma cut a frame rail, rocker reinforcement, pillar reinforcement, roof rail, suspension mounting area, battery enclosure, or other structural part unless the VIN- and model-year-specific OEM body-repair procedure expressly permits the cut and identifies the approved location.
Plasma Cutting Safety for Auto Body Work
Plasma cutting is hot work. The main risks include burns, fire, ultraviolet and infrared radiation, flying molten metal, electric shock, compressed-air hazards, excessive noise, and inhalation of metal or coating fumes.
Wear flame-resistant clothing, leather gloves, hearing protection, safety glasses with side shields, and an arc-rated helmet or face shield. OSHA requires suitable eye and face protection for arc cutting. Its eye and face protection table lists shade 8 as the minimum for light plasma arc cutting below 300 amps when the arc is clearly visible. Follow the cutter manufacturer’s recommendation and use a darker shade when needed for comfortable viewing.
Make the area fire safe before striking an arc. OSHA’s welding and cutting requirements call for moving combustibles at least 35 feet away where practicable or protecting them when they cannot be moved. Check above, below, behind, and on the opposite side of the cut because sparks and conducted heat can reach hidden material.
A fire watch may be required when a significant fire could develop, when combustibles are within the hazard area, or when sparks can reach concealed spaces. Keep an appropriate extinguisher ready, and continue checking the area after the cut until no heat, smoke, odor, or smoldering material remains.
Warning: Never cut near a fuel tank, fuel or vapor line, battery, orange high-voltage cable, battery enclosure, airbag or pretensioner, wiring harness, brake line, coolant or battery-cooling line, A/C refrigerant line, sealed rocker, closed container, or hidden cavity until the exact area has been inspected, isolated, and made safe.
Electric and hybrid vehicles require additional controls. Disconnecting the 12-volt battery does not by itself prove that the high-voltage system is safe. Follow the exact OEM depowering and verification procedure, including any required wait time, lockout, service disconnect, insulated PPE, and absence-of-voltage test. The National Highway Traffic Safety Administration advises that technicians working on EV or HEV high-voltage systems need specialized training and proper test equipment.
Do not pierce or heat an A/C refrigerant line. If the repair requires opening or moving the motor-vehicle air-conditioning circuit, have the refrigerant recovered with approved equipment by a properly qualified technician. The U.S. Environmental Protection Agency’s MVAC guidance explains the certification and equipment requirements for paid motor-vehicle air-conditioning service.
Ventilation is equally important. Plasma cutting melts metal and creates airborne fume. Paint, galvanized coatings, weld-through primer, undercoating, seam sealer, adhesives, solvent residue, stainless steel, and plated parts can increase the hazard. OSHA’s welding-fume fact sheet recommends cleaning coatings from the work area, keeping your head out of the plume, and using ventilation or local exhaust to control exposure.
Inspect the cutter before every use. Look for cracked leads, damaged insulation, a loose torch head, incorrect or worn consumables, leaking fittings, a contaminated air-filter bowl, and damaged work-clamp jaws. Keep the floor dry and route leads and hoses away from traffic and sharp edges.
Note: This guide does not replace the plasma-cutter manual, the vehicle manufacturer’s body-repair procedure, a shop hot-work permit, high-voltage training, or applicable workplace and environmental rules.
Top Benefits of Plasma Cutters for Auto Body Professionals
For auto body professionals, a plasma cutter can save time on approved panel removal, patch fabrication, bracket trimming, repair preparation, and custom metalwork. Its main advantage is speed, but it can also create controlled lines, curves, and openings with less physical effort than many mechanical methods.
| Benefit | What It Means | Auto Body Impact |
|---|---|---|
| Fast cutting | Cuts sheet metal and brackets quickly when the machine is set correctly | Can shorten fabrication and approved removal work |
| Controlled profiles | Follows straightedges, templates, curves, and marked openings | Useful for patch panels, holes, and custom brackets |
| No normal preheating step | The cut begins after the arc transfers and stabilizes | Reduces setup time compared with some flame-cutting work |
| Narrow kerf | Removes a relatively small strip of material at the correct speed and height | Helps preserve metal around an approved repair line |
| Material versatility | Cuts conductive steel, stainless steel, aluminum, copper, and brass | Supports many shop-fabrication tasks with one cutting process |
Plasma cutting is not a finish-free process. You may still need to remove dross, dress an edge, correct bevel, or prepare the metal for welding. On thin sheet metal, maintaining a suitable travel speed helps limit heat input and reduce warping.
Choosing the Right Equipment for Plasma Cutting
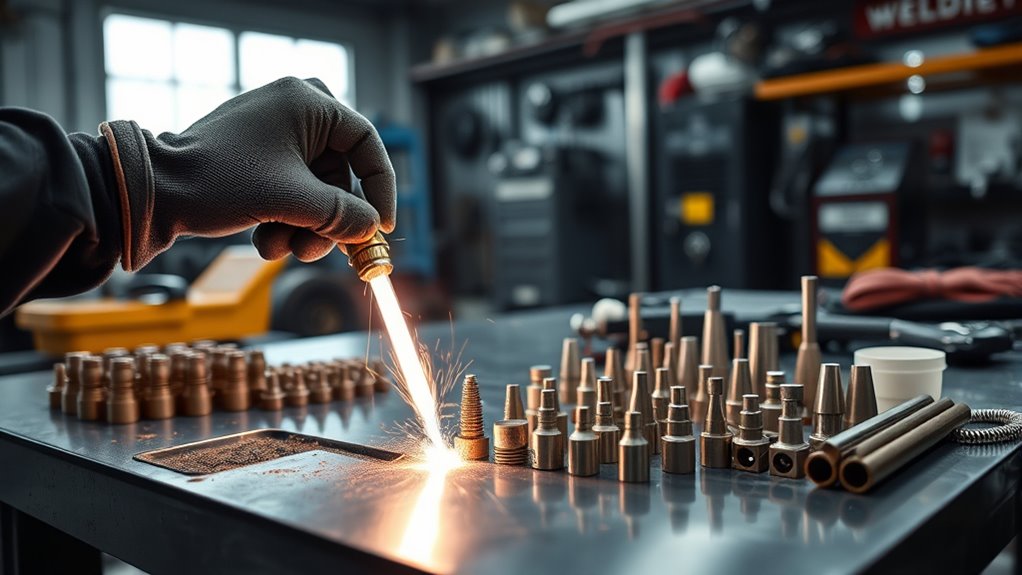
Choose a plasma cutter by the material and thickness you cut most often, not by the largest severance number on the box. A recommended or rated cut describes material the machine can cut at a useful speed and quality. A severance rating describes a slow maximum cut that usually leaves more bevel and dross.
Thin auto body metal needs stable low-amperage control, suitable fine-cut consumables, steady torch height, and fast movement. Thicker brackets and fabrication plate need more output. Use the manufacturer’s cut chart because amperage, material, consumables, torch height, air flow, and speed work as a system.
Duty cycle matters during long or repeated cuts. A 60% rating generally means six minutes of arc-on time during a ten-minute test period at the listed output and ambient temperature. Input voltage can change the rating, so compare machines at equivalent test conditions rather than comparing amperage alone. Reviewing your machine’s input-power and duty-cycle requirements can help prevent nuisance breaker trips and thermal shutdowns.
Check the required input voltage, breaker size, phase, plug, conductor size, and extension-cord limits. A long or undersized extension cord can reduce voltage and performance. A generator must meet the manufacturer’s continuous power and surge requirements, not only its advertised peak wattage.
Compressed-air capacity is just as important as pressure. Confirm both the required CFM and the specified inlet pressure while air is flowing. A small compressor may reach the desired pressure at rest but drop below the machine’s requirement during a long cut.
Air should be clean, dry, and oil-free. Hypertherm notes that incoming air quality directly affects cut quality, system performance, and consumable life. Its air-filtration guidance recommends controlling compressor moisture and adding filtration when conditions require it. Drain the receiver tank, inspect filter bowls, and keep lubricated air-tool lines separate from the plasma supply when possible.
Consumable availability also matters. Electrodes, nozzles, shields, swirl rings, retaining caps, drag tips, and cartridges are wear items. Confirm that the exact parts for low-amperage sheet-metal cutting are readily available before buying a machine.
A pilot arc can help initiate cutting on painted, rusty, or expanded metal, but it does not remove the need to clean the clamp location or protect vehicle electronics. Use only the start mode, consumables, and torch-to-work method allowed by the machine manual.
Pro Tip: For auto body sheet metal, prioritize smooth low-amp control, fine-cut consumables, a reliable pilot arc, easy parts availability, and a properly sized dry-air system over the highest advertised thickness rating.
Products Worth Considering

Drag-Cut Control (HVAC/Thin Sheet/Art): Glide the torch directly on the workpiece for straight templates and smooth freehand lines; use LOTOS DC6309 drag consumables (sold separately) for best edges.

Drag-Cut Control & Faster Speed (HVAC/Art): Smooth touch-and-go tracking on thin sheet metal enables straighter lines and cleaner curves for custom ducts, stencils, and signmaking. Cuts up to 20% faster to maximize workshop productivity.

【Industrial Performance】The air drying system features two rugged 3/4“ NPT air ports and 1/4” NPT gauge ports to handle high-pressure environments (up to 240 PSI) for a variety of industrial applications. Note: To prevent air leakage, please wrap the sealing tape around the threads appropriately before connecting the screws.
How to Set Up a Plasma Cutter for Auto Body Work
A clean and safe cut begins before the torch is switched on. Use this sequence for vehicle panels, brackets, and repair sections.
- Identify the vehicle and repair procedure. Use the VIN, model year, trim, powertrain, and OEM body-repair information to confirm the panel material, internal reinforcements, sectioning location, and approved cutting method.
- Remove the part when practical. Cutting a loose part on a metal table is usually safer than cutting it on the vehicle because both sides can be inspected and protected.
- Inspect both sides of the cut. Check for wiring, sensors, glass, trim, airbags, pretensioners, fuel and vapor lines, brake lines, coolant lines, refrigerant lines, sound deadener, adhesives, seam sealer, and closed cavities.
- Depower the vehicle correctly. Follow the OEM procedure for ignition state, key control, 12-volt battery disconnection, SRS waiting time, memory preservation, high-voltage shutdown, lockout, and verification. EV and hybrid high-voltage work requires qualified personnel.
- Recover or drain affected systems. If the repair could open an A/C line or coolant circuit, recover refrigerant and drain coolant using the required equipment and procedure before cutting.
- Clean the cut zone. Remove paint, rust scale, grease, undercoating, seam sealer, adhesives, solvent residue, and hazardous coatings from both sides where possible. Do not grind blindly into an unknown panel stack.
- Establish hot-work controls. Move or shield combustibles, provide ventilation, assign a fire watch when required, keep an extinguisher ready, and protect openings that could carry sparks into another area.
- Secure and mark the work. Clamp loose panels or brackets, mark the final line clearly, and use a straightedge, template, or standoff guide when appropriate.
- Inspect the cutter and air supply. Check torch parts, cables, fittings, filters, compressor capacity, flowing pressure, and the electrical circuit.
- Install the correct consumables. Use the nozzle, electrode, shield, cartridge, and cutting mode specified for the material, amperage, and torch method.
- Attach the work clamp. Clamp to clean, bare metal on the same part or conductive structure and as close to the cut as practical without placing the lead in the spark path.
- Set amperage and air by the manual. Adjust manual pressure while air is flowing if required. Do not rely on an idle gauge reading or a universal PSI number.
- Test on matching scrap. Use material of similar type and thickness to confirm arc transfer, speed, kerf, bevel, and dross before touching the repair part.
- Inspect after cutting. Check the front, back, nearby cavities, floor, and opposite side for heat or fire. Clean the edge and restore coatings, primer, sealer, and cavity protection according to the repair procedure.
Products Worth Considering

Plasma Cutting Consumables type:Auto CNC Plasma Cutting Torch Body; This Plasma Cutting Auto CNC Torch Body is made by Thermal Dynamics, original parts

Industrial-Grade Cutting Capacity: SSimder 50 Amp CUT-50Pro plasma cutter cuts up to 1/2" Clean, 3/4" Severance on Mild Steel. Easily handles 1/4" Stainless Steel & 16GA Aluminum (common metal fabrication materials). Engineered for tough jobs like auto body repair (sheet metal) & structural steel modification (steel beams).

1pcs plasma cutting torch handle
Tips for Mastering Plasma Cutting Techniques
Clean plasma cutting depends on repeatable movement. Hold the torch square to the surface unless the procedure calls for a bevel. Brace your hand or use a guide so the torch does not wander into the finished side of the part.
Watch the sparks below the work. During a good through-cut, sparks should exit the bottom of the kerf. If they trail sharply backward, travel may be too fast. If they spray widely or large deposits collect underneath, travel may be too slow, the amperage may be wrong, or the consumables may be worn.
Use a drag shield only if the torch and installed consumables allow drag cutting. Dragging an unshielded nozzle on the metal can damage the nozzle and cause double arcing. If the torch requires a standoff, maintain the distance listed in the cut chart.
Start from an open edge whenever possible. For a pierce, begin at the manufacturer’s recommended pierce height and angle the torch slightly so molten metal blows away from the nozzle. Straighten the torch after the arc passes through the material. Do not attempt to pierce material thicker than the torch’s rated pierce capacity.
On thin panels, use the lowest amperage that produces a complete, stable cut with the correct consumables. Move steadily and avoid pausing in corners. When the repair design allows it, make shorter separated cuts and allow natural cooling between them. Do not quench a structural vehicle panel unless the OEM procedure specifically permits it.
Plasma-gas swirl can make one side of the kerf squarer than the other. Follow the machine manual for travel direction and place the best-quality side on the finished workpiece. The correct amperage and travel-speed relationship is crucial for edge quality.
Practice straight lines, curves, holes, and edge starts on scrap before cutting a visible panel. Check the top and bottom edges after each test and adjust one variable at a time.
The best cut on thin auto body metal rarely comes from maximum amperage. Stable low-amp output, clean air, correct torch height, and steady movement usually matter more.
What Should You Do After Plasma Cutting?
Treat the cut part, slag, guide, and nearby metal as hot until they have cooled. Do not place hot scrap in a trash container or near rags, masking paper, solvents, upholstery, or plastic trim.
- Continue the fire watch. Inspect above, below, behind, inside cavities, and on the opposite side for smoke, odor, glowing material, or conducted heat.
- Remove dross carefully. Use a suitable scraper, file, or abrasive without thinning the panel edge beyond the repair specification.
- Check fit and kerf allowance. Confirm that the replacement part or patch still has the required gap, overlap, flange, or factory-seam alignment.
- Inspect nearby systems. Look for melted insulation, damaged clips, heat marks, pinched hoses, sensor damage, or contamination.
- Restore corrosion protection. Apply the OEM-specified primer, coating, seam sealer, cavity wax, adhesive, and paint system after welding and metal finishing are complete.
- Complete electronic procedures. Reconnect and initialize systems, scan for faults, and perform required calibrations according to the OEM repair information.
Common Plasma Cutting Problems and Fixes
Most plasma-cutting problems come from contaminated air, a poor work-clamp connection, worn or incorrectly assembled consumables, inadequate compressor flow, incorrect settings, or inconsistent movement.
| Problem | Likely Cause | Fix |
|---|---|---|
| Heavy dross on the bottom | Travel too slow, amperage or height incorrect, or worn nozzle | Increase speed gradually, verify the cut chart, and inspect consumables |
| Dross or spatter on top | Torch too high, travel too fast, weak arc transfer, or poor pierce technique | Correct the standoff, slow slightly, clean the clamp area, and use the proper pierce height |
| Metal is not fully penetrated | Travel too fast, current too low, air flow dropping, worn parts, or material beyond rated capacity | Reduce speed, verify current and flowing pressure, inspect parts, and confirm rated capacity |
| Arc sputters or goes out | Moist or oily air, poor work-clamp contact, low flow, loose consumables, or dirty metal | Dry the air, clean and move the clamp, check flowing pressure, and reinstall the correct parts |
| Pilot arc starts but will not transfer | Poor clamp connection, nonconductive coating, excessive standoff, or an open work-lead circuit | Expose bare metal, reposition the clamp, correct torch height, and inspect the work lead |
| Cut edge is beveled | Torch not square, incorrect height, worn nozzle, or wrong travel direction for the finished side | Hold the torch upright, correct the height, replace the nozzle, and follow the manual’s direction guidance |
| Excess warping on sheet metal | Too much current, slow travel, long pauses, or repeated heat in one area | Use suitable low-amp consumables, move steadily, and divide approved cuts into shorter passes |
| Consumables wear quickly | Moisture, oil, incorrect assembly, excessive piercing, wrong pierce height, or dragging an unsupported nozzle | Improve filtration, confirm part numbers and assembly, edge-start when possible, and follow pierce limits |
Frequently Asked Questions
What PSI should I run my plasma cutter at?
Use the inlet pressure and flow listed in the exact plasma-cutter manual. There is no universal PSI setting. Check pressure while air is flowing when the machine requires manual adjustment, and confirm that the compressor can maintain the specified CFM throughout the cut.
What is a common issue when plasma cutting?
Moisture or oil in the compressed-air supply is a common problem. Contaminated air can destabilize the arc, roughen the edge, and shorten electrode and nozzle life. Poor work-clamp contact, low air flow, worn consumables, and incorrect travel speed are also frequent causes.
What is 2T and 4T in plasma cutting?
On machines that use these labels, 2T normally keeps the arc on only while the trigger is held. In 4T mode, the operator presses and releases to start, then presses and releases again to stop. Check the manual because trigger logic and available modes vary by machine.
Is a plasma table difficult to learn?
A basic plasma table is manageable to learn, but consistent results require practice with file preparation, material settings, pierce height, cut height, travel speed, kerf compensation, consumable inspection, and fume control. Start with simple shapes and scrap before cutting customer parts.
Can plasma cutting car sheet metal cause warping?
Yes. Plasma cutting is fast, but it still concentrates heat in the panel. Thin metal can warp when amperage is excessive, travel is slow, or the torch pauses. Use suitable low-amp consumables, practice on matching scrap, and follow any OEM limits on heat and sectioning.
Is plasma cutting better than using an angle grinder?
Plasma cutting is often faster for curves, holes, long cuts, and irregular profiles. An angle grinder can be better for small trimming, surface preparation, or locations where arc cutting, fumes, or molten sparks cannot be controlled. Many repair jobs use both tools.
Can I plasma cut a vehicle with the battery connected?
Do not assume that leaving the battery connected is safe. Follow the exact OEM procedure for the vehicle, which may require ignition control, key removal, 12-volt disconnection, SRS waiting time, high-voltage shutdown, and other steps. EV and hybrid high-voltage systems require trained personnel and verification.
Can I plasma cut painted or galvanized metal?
A plasma cutter may pass through conductive coated metal, but paint, zinc, primers, undercoating, adhesives, and contamination can create hazardous fumes and poor clamp contact. Remove the coating from the cut and clamp zones where permitted, identify the material, and use effective ventilation or local exhaust.
Can a plasma cutter cut an aluminum body panel?
Yes, aluminum is conductive and can be plasma cut. However, vehicle aluminum panels may require model-specific repair methods, dedicated tools, contamination control, special fasteners, or complete replacement. Confirm the OEM procedure before cutting an aluminum vehicle part.
Can I plasma cut a frame rail or reinforced rocker panel?
Only when the exact OEM body-repair procedure permits sectioning at that location and identifies the approved method. Structural rails, pillars, rockers, and reinforcements may contain high-strength or multi-layer steel that must be replaced as a complete assembly rather than cut at an arbitrary point.
Conclusion
Mastering plasma cutting for auto body work requires more than choosing an amperage and following a line. The repair must first be allowed by the vehicle manufacturer, and every hidden fuel, electrical, high-voltage, SRS, coolant, refrigerant, coating, and fire hazard must be controlled. With clean dry air, correct consumables, a solid work-clamp connection, proper ventilation, steady technique, and careful post-cut inspection, a plasma cutter can be a fast and precise shop tool.
Sources
- OSHA 1910.252, General Requirements for Welding, Cutting, and Brazing — supports hot-work authorization, combustible clearance, fire-watch conditions, cavity precautions, and personnel protection.
- OSHA Fact Sheet 3647, Controlling Hazardous Fume and Gases During Welding — supports plasma-cutting fume, coating-removal, ventilation, and exposure-control guidance.
- Hypertherm Plasma Technology — supports how plasma cutting works, conductive-material limits, and plasma-arc temperature.
- NHTSA Electric and Hybrid Vehicle Safety — supports the requirement for qualified high-voltage service and vehicle-specific precautions.
- U.S. EPA Motor Vehicle Air-Conditioning System Servicing — supports refrigerant recovery, technician certification, and approved equipment requirements.
- Honda Body Repair Information and Sectioning Guidelines — demonstrates OEM limits on sectioning, high-strength steel, reinforced areas, and model-specific repair procedures.



