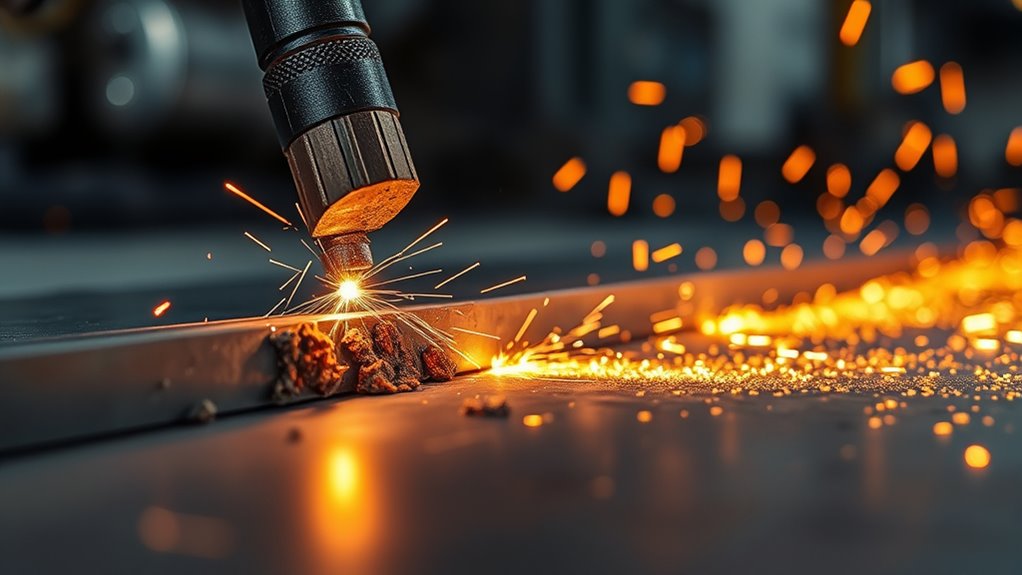
You can tell your plasma cutter tip is worn out when cuts turn rough, jagged, or uneven, and dross starts building up along the cut line. Watch for excess spatter, swirl marks, flickering arc brightness, or orange and purple color shifts, since those point to arc instability. Check the nozzle for a rounded or oblong orifice and inspect the electrode for a crater or hafnium pit over 1 mm. Keep going to see how to confirm it sooner.
What Are the First Signs of a Worn Plasma Cutter Tip?

One of the first signs that your plasma cutter tip is wearing out is an enlarged or oblong orifice, which can quickly affect cut quality.
When you inspect the nozzle, look for rounded edges instead of the crisp profile you’d expect on a new part. A dull or cloudy surface can hide wear, so don’t trust appearance alone; check it closely under good light.
You may also notice more dross buildup during cutting, which often tells you the consumable isn’t directing the arc efficiently. If the arc shifts to orange or purple, stop and replace the tip immediately, because that can signal contamination or a failing tip. Additionally, excess amperage can significantly accelerate wear, making it crucial to monitor your machine settings.
Poor Cut Quality and Rough Edges
Poor cut quality often shows up as jagged, uneven edges, and that usually means your plasma cutter tip is worn. When you see rough edges, check the nozzle orifice; if it’s enlarged, you’re losing cut precision. That’s a clear sign consumables are worn and need attention before you waste more material.
- Watch for dross building up along the cut line.
- Inspect edge uniformity after every pass.
- Replace the tip if the cut starts dragging.
- Compare the arc color for visible changes.
If your cut produces excessive spatter, the tip may not be seating the arc correctly. A shift in arc color, such as orange or purple, also tells you performance is dropping. Operating near maximum amperage can significantly reduce tip lifespan, so monitor your settings closely.
You don’t have to accept sloppy results. Replace worn parts promptly, restore control, and keep your workflow clean, efficient, and free from avoidable loss.
Swirl Marks, Spatter, and Arc Instability
Swirl marks on the workpiece are a strong warning that your plasma cutter tip isn’t shaping the arc correctly anymore. When you see these circular indentations, inspect the nozzle and electrode right away.
A worn tip can’t control gas flow cleanly, so the plasma wanders and leaves swirl marks instead of a tight, efficient cut. You may also notice excessive spatter, which means the arc is hitting the material unevenly. That usually points to a degraded nozzle or electrode with rounded edges or an enlarged orifice.
Watch the arc itself, too: arc instability shows up as flickering brightness or shifting color, and it tells you the tip has lost precision. Don’t accept sloppy results as normal.
Replacing worn parts promptly can help maintain cut quality, verify alignment, and keep your setup tuned so the torch works with you, not against you.
Dross Buildup on Thicker Material
Dross buildup on thicker material is another clear sign your plasma cutter tip may be wearing out, especially when the nozzle can’t maintain a clean, focused arc. When the nozzle and electrode degrade, the cut stream loses concentration and slag sticks to the edge instead of ejecting cleanly.
You can spot the problem fast:
- Heavy dross on the underside of thick plate
- An enlarged or oblong nozzle orifice
- Rough, uneven cut edges
- Visible wear on the nozzle and electrode
Check your standoff first; keep the torch about 1.5 to 2 times the material thickness away from the work.
Then inspect consumables and replace worn parts before quality slips further. If you’ve already tuned your settings, adjust amperage and cutting speed based on what worked before, but don’t ignore worn tips. Regular maintenance on air supply issues can also enhance overall cutting performance.
With sharp consumables and correct setup, you keep control, cut cleaner, and waste less material.
Slow Cutting Speed and Lost Precision
When your plasma cutter tip wears out, you’ll usually see cutting speed drop first, and you may need multiple passes to reach full depth. That slow cutting speed isn’t just inconvenient; it signals the arc isn’t transferring energy efficiently, so you waste time and consumables.
As wear enlarges the nozzle orifice, precision starts slipping. You’ll see jagged edges, uneven kerfs, and cuts that drift off line even when you guide the torch steadily. A less stable arc can also make the cut path feel erratic, which reduces your control and forces rework. Dross often increases at the same time, confirming that the cut quality is falling.
If you want to stay productive and keep your process free from avoidable friction, inspect wear regularly and replace the tip before performance degrades further. Timely replacement restores speed, protects precision, and helps you cut cleanly with less effort. Additionally, maintaining a consistent standoff distance is crucial to stabilizing arc energy and reducing defects.
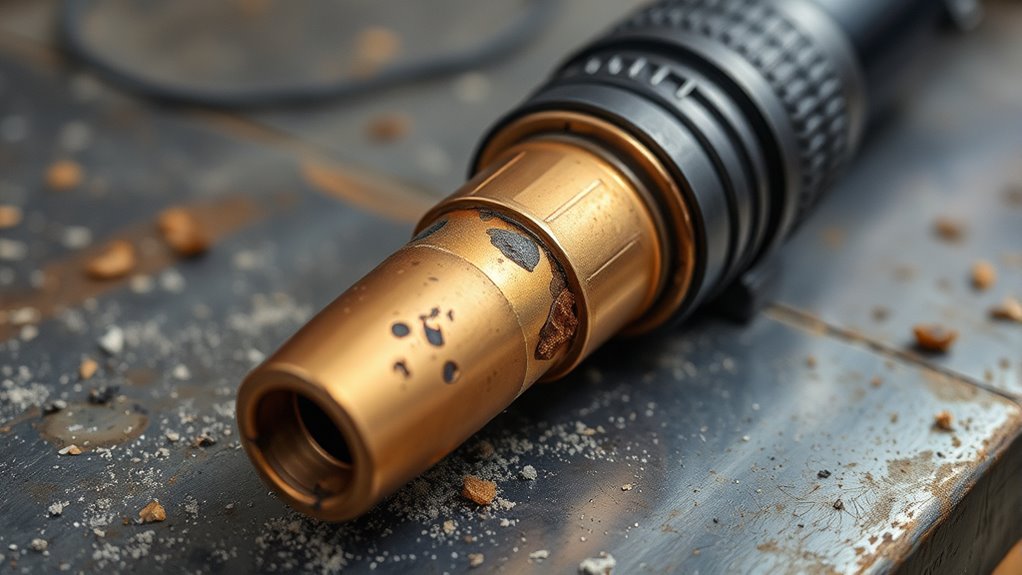
How to Inspect the Nozzle and Electrode
Inspect the nozzle closely for wear, but don’t rely on a quick glance alone, because cloudiness can hide damage. When you inspect the nozzle, check the orifice for shape and edge condition. A healthy nozzle has a sharp, uniform opening; wear can make it oblong and round the edges, which enlarges the cut path and weakens performance.
- Verify the nozzle is clean and fully seated.
- Look for a round, crisp orifice, not distortion.
- Inspect the electrode’s hafnium pit depth; over 1 mm means replace it now.
- Confirm all plasma consumables maintain solid electrical contact.
Use a bright light and rotate the parts slowly so you catch subtle defects. If contamination appears, clean the torch components before reuse. Regular inspection helps ensure nozzle compatibility and keeps your setup free from premature failure. You’re protecting cut quality and keeping your setup free from premature failure. Routine inspection gives you control, reduces waste, and helps you stay independent on every cut.
Products Worth Considering

Fit for : AG-60 AG-60P SG-55 WSD-60 Plasma cutter torch head

The tip kit is compatible with Harbor Freight Titanium Plasma 45 TI-PC45 IPT-45 56255 56811/ 65 Torch TI-PC65 iPT-65 58895 only. (Please verify the model number before purchasing).

[Achieve Precise Cuts] PT31 Plasma Cutting Consumables – Your Essential Tool for Efficient Cutting! Whether you're working with sheet metal, steel, or any other material, superior cutting performance ensure clean, accurate, and smooth cuts.
Nozzle Wear Signs to Check For
A worn plasma cutter nozzle usually shows up in the orifice first: you’ll see an oblong opening instead of a clean round one, and the edges lose their sharp profile as the nozzle ages. That shape change tells you nozzle wear is advancing, and it can hurt cut quality fast.
Compare the nozzle to a new one: fresh tips have crisp edges, while worn tips round off, enlarge the orifice, and let the arc wander. Don’t trust a quick glance alone; cloudiness on the surface can hide damage. Instead, rotate the tip under light and check for brown or black discoloration, which points to overheating and excess wear.
Keep monitoring it on a regular schedule, because a degraded nozzle is a leading cause of dross. Additionally, ensuring proper cutting speed parameters can significantly reduce wear and prolong the life of your consumables. When you catch these signs early, you protect performance, reduce waste, and keep your cutting process sharp and self-directed.
Electrode Wear Signs to Look For
You should first watch for arc color changes, especially blue or black discoloration on the copper electrode, because that usually means the electrode’s wear is advanced and replacement’s due. Check the hafnium insert for pit depth; if it’s over 1 mm, you’re seeing significant wear that can lead to torch failure. Also inspect the torch tip for crater widening, since an enlarged crater often indicates electrode damage and improper cutting performance. Additionally, ensure to regularly inspect for ovality and spatter bridging, as these issues can also indicate the need for replacement.
Arc Color Changes
One of the quickest ways to spot electrode wear is by watching the plasma arc color during operation: a healthy arc should look bright white to light blue, which signals proper gas flow and good electrode condition.
When you track arc color, you can act before damage limits your work and freedom.
- Orange or purple: inspect for contamination or wrong settings.
- Green: the tip’s burnt; replace it now.
- Fading or unstable color: check consumables and gas delivery.
- Record each change so you can spot patterns fast.
Consistent monitoring helps you catch wear early, protect cut quality, and keep the torch running reliably.
Don’t wait for failure; use the arc as your live diagnostic tool and stay in control.
Hafnium Pit Depth
Hafnium pit depth is one of the most reliable wear indicators on a plasma cutter electrode: once the pit exceeds 1 mm, the electrode’s performance is no longer dependable and torch failure becomes more likely.
You should inspect the hafnium pit depth often, because deeper erosion tells you the electrode’s life is running out. When you see a blue or black discoloration on the copper, treat it as a clear warning that you need to replace the tip immediately.
Track the pit’s shape and size during routine checks so you can judge remaining cutting capability and avoid quality problems. Consistent inspection keeps your plasma cutter working safely, preserves cut consistency, and lets you act before worn parts limit your autonomy and productivity.
Crater Widening Signs
A widening crater at the torch tip is a clear sign of electrode wear, and it usually means the tip’s cutting performance is starting to drop. When you see crater widening, inspect the electrode now, because wear can push your arc out of spec and make the torch fail without warning.
- Check for a crater that keeps expanding.
- Measure the hafnium pit; over 1 mm means replacement.
- Look for blue or black discoloration from overheating.
- Watch for orange or purple arc color shifts.
You can catch this early by inspecting the tip before every job. That keeps your cuts sharp, your setup stable, and your work free from costly breakdowns.
Replace the electrode as soon as you confirm wear, and keep cutting with control.
When to Replace the Nozzle or Electrode
You should replace the nozzle when the orifice turns oblong or the edges round off, because that wear degrades cut quality. Check the electrode’s hafnium pit depth; if it exceeds 1 mm, you’re past its service limit and risk torch failure. If your cuts start to degrade, replace the worn component before performance drops further. Regularly monitor tip orifice size to ensure optimal cutting efficiency and prevent premature wear.
Products Worth Considering

EXEMPLARY BUILD: Cutting Torch Nozzles Tips are made of superior materials to ensure increased toughness and enduring reliability

20pcs Plasma Tips Nozzle Extended Ref No: 18866L

Complete Consumables Kit: Includes electrodes, nozzles, shield cups, and spacer guides to meet daily replacement and maintenance needs for plasma cutting.
Spotting Nozzle Wear
Spotting nozzle wear starts with a close look at the orifice: if it turns oblong, the nozzle has worn enough to replace, since that shape will degrade cut quality. You also need to watch for rounded edges, a larger opening, and cloudiness that can hide damage.
- Check the nozzle under bright light.
- Compare the edge profile to a new tip.
- Replace any nozzle with an oversized orifice.
- Repeat inspections consistently to catch wear early.
A sharp nozzle keeps the arc focused and your cuts clean. Don’t rely on a single glance; worn tips can look acceptable while quietly lowering precision.
When you inspect often and act fast, you keep the torch working for you, not against you.
Electrode Pit Depth
The electrode’s hafnium insert tells you when the torch is reaching its limit: if the pit depth exceeds 1 mm, replace the electrode, since deeper erosion can lead to torch failure and poor cut quality.
Check electrode pit depth during routine inspections, and don’t wait for failure to act. A burnt or heavily eroded tip means the electrode can’t sustain stable arc transfer, so swap it out immediately.
Keep torch height consistent and verify the nozzle at the same time, because wear on either part can weaken performance and shorten service life.
You free your cutter from preventable downtime when you replace worn parts early. Use a gauge or visual reference, track wear trends, and maintain tight control over consumables so your system keeps cutting with precision.
Replace Based On Cut Quality
When cut quality starts slipping, replace the nozzle or electrode before the torch does more damage. You’ll see the warning signs in the cut itself: jagged edges, excess dross, and spatter all point to worn consumables.
Inspect the nozzle opening; if it’s oblong or the edge has rounded, your arc won’t stay tight, and cut quality drops fast. Check the electrode too. A deep hafnium pit over 1 mm or a burnt tip means you should replace it immediately.
- Uneven kerf
- Heavy dross buildup
- Rounded nozzle edges
- Excessive spatter
Don’t wait for failure. When these symptoms show up, replace the part, restore arc control, and keep your cutting process clean, efficient, and free from avoidable waste.
How to Make Plasma Tips Last Longer
To make plasma tips last longer, you need to control heat, height, and cleanliness during every cut. Set torch height at 1.5 to 2 times the cut thickness, and match amperage to about 95% of the nozzle rating. That reduces overheating and prevents excessive wear without slowing your cutting speed. Keep consumables clean; wipe dirt and grease off before assembly so contamination can’t trigger premature failure. Inspect tips often for rounded edges or an enlarged orifice, then replace them before cut quality drops. Tracking average tip life in your shop can help you plan replacements and avoid downtime. Additionally, maintaining consistent standoff distance ensures optimal cutting performance and prolongs tip lifespan.
| Control | Target | Result |
|---|---|---|
| Torch height | 1.5–2x thickness | Less tip wear |
| Amperage | ~95% rating | Lower heat stress |
| Clean assembly | No dirt/grease | Fewer failures |
When you treat consumables like tools of freedom, not disposable afterthoughts, you cut cleaner, waste less, and keep your system ready.
Frequently Asked Questions
How Long Do Plasma Cutter Tips Last?
You’ll typically get 2–5 hours of arc-on time from plasma cutter tips, depending on use. To protect cutting performance, monitor wear, adjust settings, and follow maintenance tips that match your material and cut height.
What Are the Signs of a Worn Out Cutting Tip?
You’ll spot it fast: a worn cutting tip shows an enlarged, oblong orifice, rounded edges, cloudy discoloration, and rough dross. These cut your cutting performance; follow maintenance tips and replace it promptly.
When to Change Plasma Cutter Tips?
Change your plasma cutter tip when cut quality drops, the orifice turns oblong, or edges round off. Replace it during plasma tip maintenance if dross increases, discoloration appears, or the crater widens.
What Is the Lifespan of a Plasma Cutter?
You’ll get roughly 2–5 hours from a plasma cutter’s consumables, depending on cutting technology, cut height, speed, and material. Use maintenance tips: inspect regularly, track usage, and replace worn tips before quality drops.
Conclusion
So, when your cut starts drifting, spatter climbs, or the arc feels less crisp, don’t ignore it—you’re likely seeing the first signs of tip wear. If you catch the damage early, you can replace the nozzle or electrode before it ruins your work or your torch. Keep checking the tip closely, because the next cut may tell you everything. And if you want cleaner cuts longer, your plasma cutter still has one more lesson to show you.


