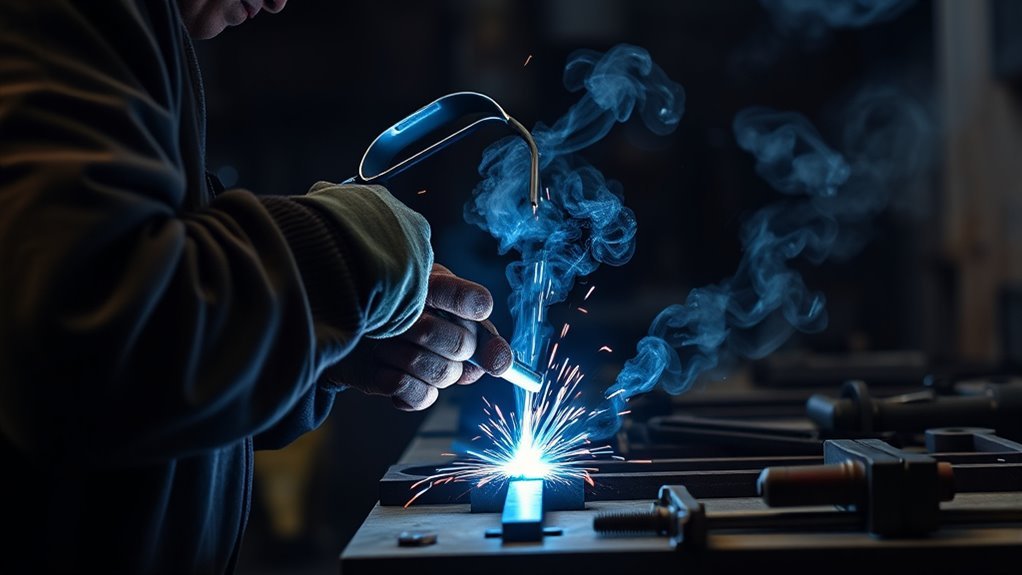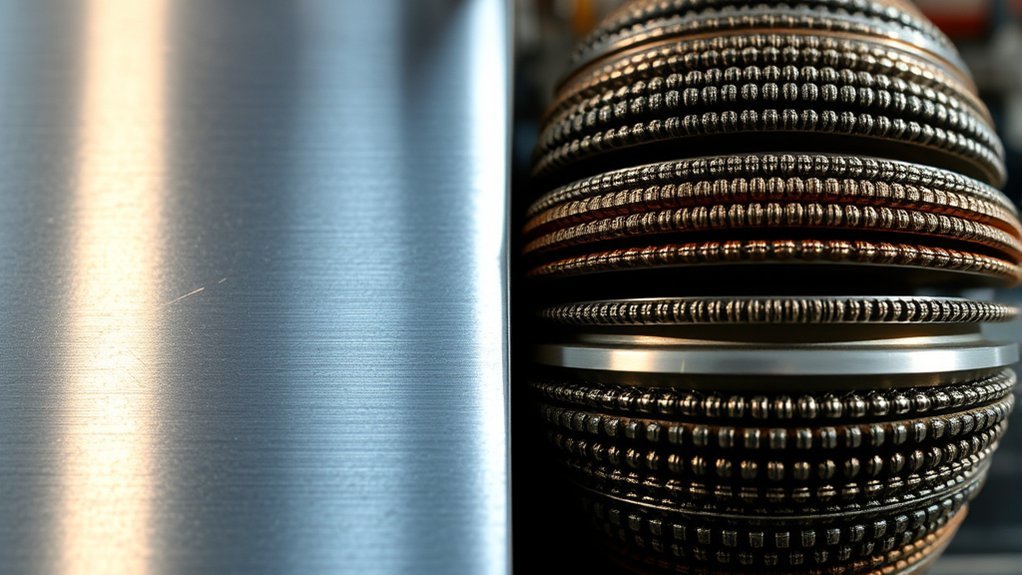
Choosing between single-pass welding and multi-pass welding takes more than checking the base-metal thickness. You also need to consider the required weld size, joint design, root access, welding process, position, filler metal, heat input, inspection level, and any welding procedure that governs the job. A single pass can save time on a suitable joint, while several controlled passes are often needed to fill a large groove or produce a reliable critical weld.
Quick Answer
Use single-pass welding when one properly sized bead can achieve the required fusion, penetration, and weld dimensions without excessive heat. Use multi-pass welding when the joint is too large or deep for one bead, requires root, fill, and cap layers, or is governed by a procedure that specifies several passes.
Key Takeaways
- Single-pass welding works when one bead can produce the required weld size and full fusion without burn-through, unacceptable distortion, or an oversized weld.
- Multi-pass welding is commonly used for large fillets, prepared grooves, thick plate, pipe, structural work, and joints that need separate root, fill, and cap passes.
- There is no universal metal-thickness cutoff. Process capability, position, joint geometry, filler size, transfer mode, and the governing procedure all matter.
- Clean and inspect each pass before covering it. Do not bury cracks, trapped slag, incomplete fusion, or other unacceptable defects.
- For pressure, lifting, structural, roll-cage, vehicle-frame, pipeline, or other life-safety work, follow the approved drawings, code, WPS, and inspection plan.
At a Glance
| Best For | Single-pass: joints that reach the required weld size and fusion in one bead. Multi-pass: large fillets, deep grooves, open roots, pipe, and critical joints. |
| Difficulty | Single-pass work is quicker when the joint is suitable. Multi-pass work requires consistent bead placement, cleaning, temperature control, sequencing, and inspection. |
| Tools Needed | Suitable welder and filler metal, clamps, grinder, wire brush, inspection light, PPE, and temperature-indicating tools when preheat or interpass limits apply. |
| Main Risk | Single-pass welds can miss the root or sidewalls when the joint is too large. Multi-pass welds can trap slag, porosity, or incomplete fusion between layers. |
Note: A weld bead is one deposit of weld metal. A pass is one progression of the arc along the joint. A layer may contain one bead or several side-by-side beads. A multi-pass weld is often multi-layer, but the terms are not always interchangeable.
What You Need to Know About Single-Pass Welding
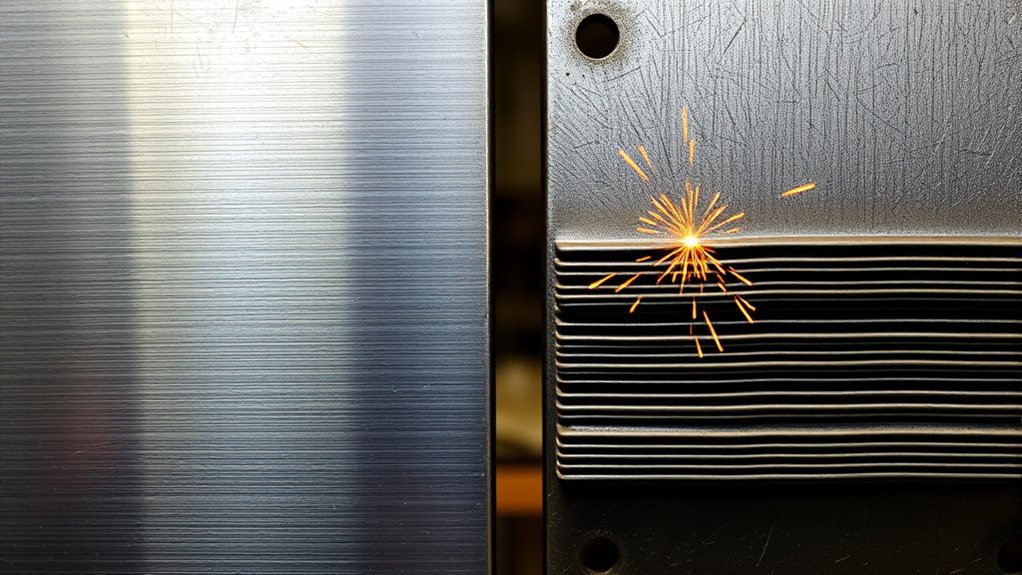
Single-pass welding means the required weld is completed during one progression along the joint. It is common on sheet metal, small fillet welds, tack welds, light fabrication, and other joints where one properly sized bead can fuse the required surfaces.
There is no universal base-metal thickness that separates single-pass from multi-pass welding. A small fillet on a thick plate may be completed in one pass, while a thinner full-penetration groove may need joint preparation and several passes. The practical limit depends on the process, transfer mode, electrode or wire diameter, machine output, welding position, travel speed, joint geometry, root opening, and required weld dimensions.
For a sound single-pass weld, clean the joint, establish consistent fit-up, and maintain a stable puddle. Paint, oil, heavy mill scale, rust, moisture, poor shielding, and an unstable work connection can contribute to porosity, incomplete fusion, spatter, or an uneven bead. The base metal should be cleaned thoroughly before you strike an arc.
Do not assume that “single-pass” always means running one long bead without stopping. Thin automotive sheet is often joined with spaced tacks, short stitches, plug welds, or a planned sequence that limits heat buildup. The finished joint may still use one weld layer even though the welder does not hold the arc continuously from one end to the other.
Pro Tip: Do not judge a single-pass weld by surface appearance alone. A smooth cap can still hide incomplete root penetration, cold lap, trapped contamination, or inadequate throat size. Practice on matching scrap and cut or bend a test coupon when the joint matters.
How Multi-Pass Welding Gives You More Control
Multi-pass welding uses two or more passes to produce the required weld. Instead of trying to place one oversized bead into a deep groove or large fillet, you build the weld in controlled deposits. This can improve access to the root and sidewalls while making bead shape, heat input, and defect removal easier to manage.
Multi-pass welding is common on thick plate, pipe, heavy brackets, pressure-containing components, structural members, large fillets, and other demanding joints. It also works well with flux-core welding when a joint needs a high deposition rate, outdoor capability, or several layers of fill.
A multi-pass weld is not automatically stronger because it contains more beads. It is reliable only when the weld has the required effective size and each pass is fused, cleaned, placed, and inspected correctly. Poor bead placement can trap slag, leave valleys between beads, create incomplete sidewall fusion, or concentrate excessive heat in one area.
| Factor | Single-Pass Welding | Multi-Pass Welding |
|---|---|---|
| Weld deposits | One pass produces the required weld | Two or more passes build the required weld |
| Best use | Small welds and joints within the process’s one-pass capability | Large fillets, deep grooves, open roots, and critical joints |
| Quality checks | Fit-up, settings, in-process control, and final inspection | Fit-up, root inspection, between-pass checks, and final inspection |
| Common risk | Inadequate penetration, fusion, or weld size | Slag inclusion, porosity, incomplete fusion, or excess heat between passes |
Single-Pass vs Multi-Pass Welding: Key Differences
The main difference is the number of passes needed to produce the weld shown on the drawing or required by the joint design. A single-pass weld is usually faster because the welder deposits, cleans, and inspects one completed bead. Multi-pass welding takes longer but allows a larger joint to be filled in stages.
On a suitable thin joint, one controlled pass may limit the total arc time. On thin sheet, however, a long continuous bead can still cause burn-through or distortion, so short welds and a balanced sequence may be needed. On a large groove, one oversized pass may fail to reach the root, roll over cold sidewalls, or create an unacceptable bead profile.
For code-governed work, pass selection is normally based on more than personal preference. The applicable welding code, contract documents, drawings, welding procedure specification, and inspection plan may control the process, joint detail, filler metal, position, preheat, interpass temperature, technique, essential variables, and acceptance criteria.
How to Decide How Many Welding Passes to Use
Use this decision sequence before choosing one pass or several:
- Identify the required weld. Check the drawing, weld symbol, repair instruction, or joint design for the required fillet size, groove depth, penetration, and finished profile.
- Check root and sidewall access. If the arc cannot reach the root or both sidewalls in one controlled bead, the joint may need a bevel, root opening, backing, back gouging, or multiple passes.
- Confirm process capability. Review the machine output, duty cycle, filler-metal data, transfer mode, polarity, gas, electrode size, and recommended parameter range.
- Account for position and heat. A bead that is manageable in the flat position may become too fluid or too large in vertical or overhead welding. Thin or distortion-sensitive parts may need a low-heat sequence.
- Follow governing documents. If a WPS, code, drawing, engineer, manufacturer repair procedure, or inspector specifies the pass sequence, do not substitute a different method without approval.
Note: Required weld size is often more useful than base-metal thickness when choosing the number of passes. A small fillet on heavy plate and a complete-joint-penetration groove in lighter plate can require very different pass strategies.
How the Welding Process Changes Pass Selection
MIG and GMAW
MIG welding can make fast single-pass fillets and lap welds when the wire, gas, transfer mode, position, and joint size are suitable. Larger grooves may require a short-circuit or controlled root pass followed by spray, pulsed-spray, or another approved process for the fill and cap. A machine’s advertised material capacity does not prove that every joint of that thickness can be completed in one pass.
Flux-Core and FCAW
Flux-core welding offers high deposition rates and is widely used for multi-pass structural and field welding. Slag-producing wires require thorough cleaning between passes. When placing side-by-side beads, adjust the work angle so each bead ties into the previous bead and joint sidewall. A controlled weave may help fill some joints, but the filler-metal data sheet and WPS may limit weave width or technique.
Stick and SMAW
Stick welding is often used for root, hot, fill, and cap sequences on pipe and heavy fabrication. Electrode classification, diameter, polarity, storage, exposure limits, position, and progression direction all matter. Remove slag and inspect each pass before depositing the next electrode.
TIG and GTAW
TIG gives precise control over the arc and filler addition, which makes it useful for open roots, thin sections, stainless steel, aluminum, and high-quality pipe work. TIG produces no flux slag, but the weld can still collect oxides, soot, tungsten contamination, or other surface contamination that must be removed. Thick TIG joints may require many passes because deposition is slower than most wire processes.
Submerged Arc Welding
Submerged arc welding can deposit far more weld metal than common hand-held processes. Some large welds may be completed in fewer passes, while deep joints may use automated multi-wire or multi-layer sequences. Its high deposition capability is one reason a universal thickness rule for single-pass welding does not work.
How Material Thickness Affects Pass Selection
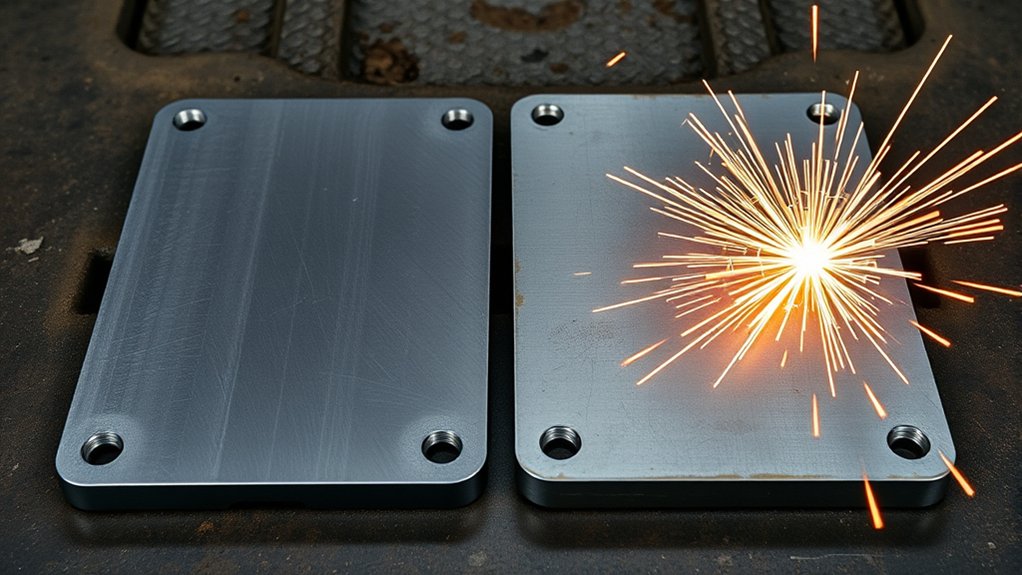
Material thickness matters because a larger joint may require more weld metal and because thick sections can draw heat away from the arc. Thickness can also affect required preheat, restraint, cooling rate, and hydrogen-cracking risk. However, it does not determine the pass count by itself.
- Thin sheet and light fabrication: One weld layer is common, but use tacks, short stitches, pulse settings, backing, or a balanced sequence when needed to prevent burn-through and distortion.
- Small fillets and lap joints: One pass may be suitable when it produces the required leg size, throat, toe fusion, and profile.
- Medium-size plate joints: A square groove may work only within the process’s penetration range. A bevel, root opening, backing, or several passes may be needed for deeper fusion.
- Thick plate and pipe: Prepared grooves commonly use root, fill, and cap passes, but the exact sequence must follow the joint detail and procedure.
- Dissimilar thicknesses: Direct more heat toward the thicker member and use a procedure that prevents melting away the thin edge.
For stainless steel, alloy steels, pipe, or critical fabrication, do not rely on a simple thickness shortcut. Follow the applicable procedure and manage interpass temperature when excess heat could affect corrosion resistance, toughness, hardness, distortion, or the heat-affected zone.
Why Joint Design and Fit-Up Matter
A joint with consistent preparation is easier to weld than one with changing gaps, mismatched edges, or uneven bevels. Poor fit-up can force the welder to add excess filler, slow down, or make repair passes even when the base metal is not especially thick.
Check these details before welding:
- Root opening: A gap that is too tight can restrict penetration. A gap that is too wide can cause burn-through, excess reinforcement, or high filler use.
- Bevel angle: The groove must give the arc access to the root and sidewalls without creating unnecessary weld volume.
- Land or root face: A heavy root face can restrict penetration. A very thin root face can melt away before the puddle is controlled.
- Alignment: Excessive high-low or mismatch can reduce effective wall thickness and complicate the root pass.
- Fit-up and restraint: Clamping can hold alignment, but heavy restraint may also increase residual stress and cracking risk.
- Cleanliness: Remove coatings, scale, oil, moisture, and contaminants as required for the base metal and process.
Good fit-up reduces the temptation to “fix it with weld.” It also helps control weld volume, heat input, shrinkage, and final distortion.
How Position and Bead Technique Affect the Number of Passes
Gravity changes puddle behavior. A large bead that is stable in the flat position may sag, roll, or trap slag when welded vertically or overhead.
- Flat position: Usually allows the highest deposition rate and the largest manageable bead.
- Horizontal position: The upper toe may undercut while weld metal rolls toward the lower toe. Smaller beads or split layers may improve control.
- Vertical position: Progression direction, electrode type, process, and procedure affect penetration and deposition. Vertical-up welding often uses controlled shelves or small weaves.
- Overhead position: Smaller puddles and stringer beads are often easier to control than a wide weave.
A stringer bead travels mostly straight along the joint. A weave bead moves from side to side. Stringers can reduce the amount of molten metal being controlled at one time, while a weave can fill a wider space. Do not assume a wide weave is always faster. Excessive weaving can increase heat input, hide slag along the toes, and exceed the limits of a procedure or filler-metal recommendation.
How to Manage Heat Input and Interpass Temperature
Heat input affects penetration, puddle fluidity, distortion, hardness, residual stress, cooling rate, and the heat-affected zone. Too little heat can cause incomplete fusion. Too much can cause burn-through, undercut, excessive reinforcement, grain growth, loss of corrosion performance, or unwanted changes in mechanical properties.
In single-pass welding, use enough energy to fuse the joint without overheating the part. In multi-pass welding, also control the temperature before starting each new pass. Some steels need a minimum preheat to slow cooling and reduce hydrogen-cracking risk. Stainless steels and other alloys may have maximum interpass limits to prevent excess heat exposure.
For procedure-controlled work, use the WPS and approved measurement method. Preheat and interpass monitoring may be required to keep the base metal within a specified range. Temperature-indicating crayons and contact thermometers are common options.
An infrared thermometer can be useful, but it can misread bare or shiny metal because of low emissivity, reflected heat, smoke, distance, and spot size. Follow the instrument instructions and account for the surface emissivity before relying on a non-contact reading. Choosing the right multi-pass strategies helps maintain fusion while reducing unnecessary heat buildup.
The correct pass strategy produces the required weld size and fusion with controlled heat, acceptable workmanship, and the inspection quality the job requires.
Root, Hot, Fill, and Cap Passes Explained
Multi-pass groove welds often use a root pass, one or more fill passes, and a cap. Some pipe procedures also include a hot pass. Each deposit has a specific job.
- Root pass: The first pass at the bottom of the joint. It establishes root fusion and penetration and is critical on pipe and complete-joint-penetration groove welds.
- Hot pass: A follow-up pass used in some pipe procedures to reinforce and smooth a sound root and help remove light slag lines or irregularities after cleaning. It is not a substitute for removing cracks, incomplete fusion, unacceptable porosity, or other rejectable root defects.
- Fill passes: Deposits that build the groove to near the surface of the base metal. Wide joints may use several beads in each layer.
- Cap pass: The final visible layer. It should tie into both sides, cover the groove, and meet the permitted profile without excessive reinforcement, overlap, or undercut.
Do not rush the root. Clean it and inspect it under good lighting. If it contains an unacceptable defect, stop and repair the defect by the approved method before adding more metal. Additional passes can hide a bad root, but they do not make it sound.
Backing, Back Gouging, and Double-Sided Welds
The number of passes also depends on how the root is supported and accessed.
- Backing: Steel, ceramic, copper, or another approved backing method may support the molten root and help produce the specified penetration. Backing type and removal requirements must match the procedure.
- Open root: The root is welded without permanent backing. Root opening, land, torch or electrode angle, and puddle control become especially important.
- Back gouging: Weld metal and base metal are removed from the reverse side until sound metal is reached, followed by cleaning, inspection, and back welding.
- Double-sided groove: Welding from both sides can reduce the weld volume compared with a deep single-sided groove, but sequencing is needed to control distortion.
Do not improvise backing or back-gouging details on a code weld. These choices can affect root quality, effective weld size, procedure qualification, and inspection access.
Common Applications for Each Method
Matching the pass strategy to the application helps prevent over-welding, under-welding, wasted filler, and unnecessary repair.
- Single-pass welding is commonly used for:
- Thin sheet, light-gauge fabrication, and small shop projects.
- Small brackets, lap joints, tack welds, plug welds, and modest fillet welds.
- Automotive body panels when heat is controlled with tacks, stitches, or an approved repair sequence.
- Production joints specifically designed and qualified for one-pass welding.
- Multi-pass welding is commonly used for:
- Large fillet welds, thick plate, prepared grooves, pipe joints, and heavy brackets.
- Structural, pressure, shipbuilding, pipeline, equipment-repair, and heavy-fabrication work.
- Open-root joints and joints that require separate root, fill, and cap operations.
- Complex assemblies where bead sequence is used to control distortion or residual stress.
Warning: Do not use a general thickness chart or online article to design or repair a pressure vessel, lifting lug, trailer tongue, roll cage, vehicle frame, steering component, bridge member, pipeline, or other life-safety joint. Use the approved engineering detail, manufacturer procedure, applicable code, qualified WPS, and required inspection.
If your weld will carry a major load, hold pressure, support a vehicle structure, or affect public safety, use an approved procedure instead of guessing. Understanding lack of penetration can also help you recognize when one pass is not enough.
Equipment for Single-Pass and Multi-Pass Welding
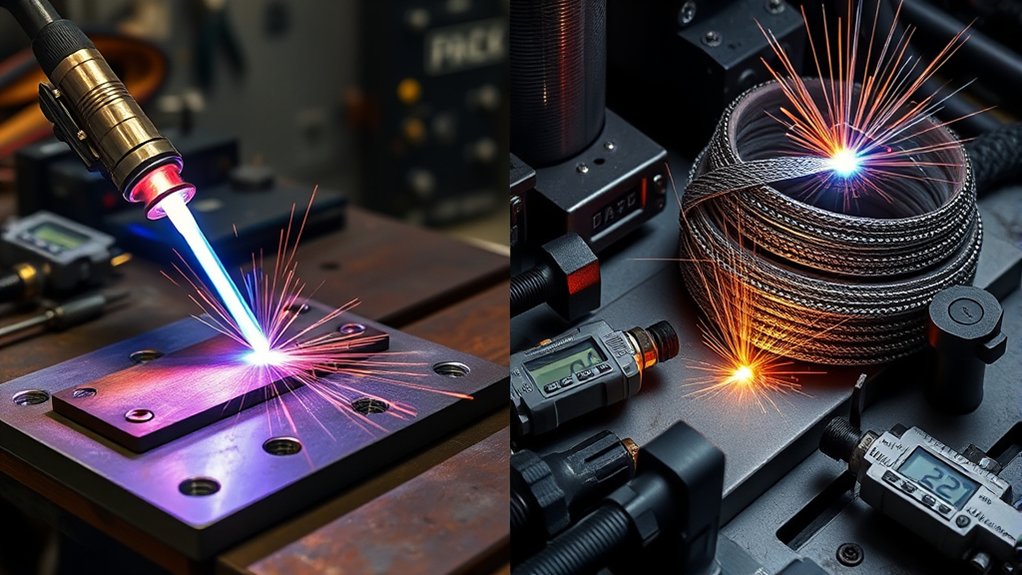
Your machine does not need to match a random amperage number. It must match the process, input power, material, filler metal, duty cycle, joint design, position, and required weld size. A small machine can produce excellent welds within its operating range, while a powerful machine can still make a defective weld when the joint or technique is wrong.
| Equipment or Setup | Single-Pass Focus | Multi-Pass Focus |
|---|---|---|
| Welder capacity | Stable output in the parameter range needed for one controlled bead | Adequate output and duty cycle for repeated passes |
| Filler metal | Correct classification and size for the joint and process | Correct classification, hydrogen control, storage, gas, and procedure limits |
| Cleaning tools | Dedicated brush, grinder, scraper, and approved cleaner as needed | Brush, chipping hammer, grinder, burr, inspection light, and approved defect-removal tools |
| Temperature control | Prevent overheating or excessive cooling as required | Measure preheat and interpass temperature using the approved method |
| Inspection tools | Good lighting, fillet gauge, straightedge, and magnification where useful | Lighting, gauges, mirrors, temperature tools, and specified NDT equipment or services |
For both methods, proper surface preparation is one of the biggest factors in weld quality. Use dedicated stainless brushes and abrasives when cross-contamination could damage the finished material.
Products Worth Considering

The blades cut away the built up spatter helping prolong the nozzle life, and reduces the chances of wire sticking.

· Made of excellent material ☞ made of stainless steel, with a smooth surface through wire drawing process, thickened design, sufficient materials, not easy to rust, not easy to bend or deform, and long service life.
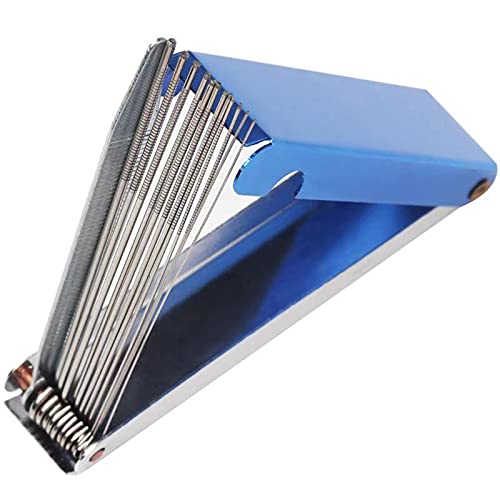
1.High-quality materials: The carbohydrate cleaning tool is made of high-quality stainless steel, and is equipped with a lightweight and stable high-quality aluminum box, it is a good tool to carry and use
Safety Practices for Both Techniques
Single-pass and multi-pass welding both create intense light, hot metal, sparks, fumes, fire hazards, and electric-shock risks. Multi-pass work can keep the joint and nearby fixtures hot for a long time, increasing the chance of burns or delayed ignition.
Warning: Never weld or cut a used tank, drum, barrel, pipe, or closed container unless it has been properly identified, cleaned, isolated, vented, purged, tested, and approved for hot work. Flammable residue or vapor can explode even when the container appears empty.
- Wear proper PPE: Use safety glasses, a welding helmet or hand shield with the correct filter shade, flame-resistant clothing, welding gloves, suitable footwear, and hearing protection as needed.
- Control fumes: Keep your head out of the plume. Use suitable general ventilation, local exhaust, or respiratory protection based on the material, coating, process, and workspace.
- Remove coatings safely: Identify paint, plating, cleaners, and residues before heating them. Galvanized, stainless, painted, and coated materials can require additional controls.
- Control fire hazards: Move combustibles away or protect them with fire-resistant covers. Check hidden spaces, opposite sides of walls, and areas where sparks can travel.
- Keep fire protection ready: Have the correct extinguisher nearby and use a trained fire watch when required.
- Protect against shock: Inspect leads and electrode holders, keep gloves dry, avoid wet work areas, and disconnect power before servicing equipment.
- Mark hot metal: Use a soapstone warning or designated cooling area so another person does not grab a recently welded part.
OSHA’s welding requirements address hot-work fire prevention, ventilation, personal protection, and container precautions. CDC/NIOSH guidance explains that welding fumes contain metals and may include manganese, which can harm the lungs and nervous system when inhaled.
Cleaning and Inspection Between Passes
Stop after each pass and check the surface before adding more weld metal. The next bead should begin on a sound, accessible surface rather than covering contamination or an unacceptable discontinuity.
- Remove slag completely from stick and slag-producing flux-core welds.
- Wire-brush or grind oxides, soot, silicon deposits, irregular high spots, and trapped contamination as required.
- Check the weld toes for undercut, overlap, valleys, and poor tie-in.
- Check craters and restarts for cracks, pinholes, or incomplete fill.
- Confirm that each bead fuses into the previous bead and the joint sidewall.
- Verify the bead sequence and interpass temperature before continuing.
- Remove or repair unacceptable defects using the method permitted by the procedure.
This step matters because a later layer can hide a discontinuity deep inside the joint. Once a defective pass is buried, locating and removing it becomes more difficult and expensive.
Inspection Methods and Acceptance Criteria
Visual inspection is the starting point for most welds, but appearance alone cannot confirm internal fusion or penetration. The required inspection method depends on the joint, code, service, material, and project documents.
- Visual testing: Checks weld size, profile, cracks, overlap, undercut, arc strikes, surface porosity, and workmanship.
- Dimensional inspection: Uses fillet gauges, bridge-cam gauges, straightedges, or other tools to check leg size, throat, reinforcement, alignment, and distortion.
- Liquid penetrant testing: Finds surface-breaking discontinuities in suitable nonporous materials.
- Magnetic-particle testing: Finds surface and near-surface discontinuities in ferromagnetic materials.
- Ultrasonic testing: Can locate certain internal discontinuities and evaluate weld volume when the procedure and geometry permit.
- Radiographic testing: Produces an image of internal weld conditions and is often used for selected pipe, vessel, and critical groove welds.
The presence of a discontinuity does not automatically tell you whether a weld passes or fails. Acceptance criteria come from the applicable code, standard, drawing, contract, or repair specification. A qualified inspector should interpret those requirements for critical work.
Troubleshooting Multi-Pass Welding Problems
Most multi-pass problems come from incomplete cleaning, poor bead placement, unsuitable parameters, inconsistent joint preparation, or uncontrolled heat. Correct the cause before depositing another layer.
| Problem | Likely Cause | Fix |
|---|---|---|
| Slag inclusion | Slag left between passes, a narrow valley, poor angle, or bead overlap | Remove slag, grind tight valleys, correct the work angle, and use a bead sequence that leaves accessible toes |
| Incomplete fusion | Low energy, fast travel, dirty metal, oversized puddle, or poor sidewall aim | Correct preparation and settings within procedure limits, reduce puddle size, and direct the arc at the fusion face |
| Undercut | Excess current or voltage, long arc, poor angle, or travel that does not fill the toe | Adjust the parameters and angle, maintain a controlled arc length, and pause only as needed at the toes |
| Distortion | Excess weld metal, high heat input, poor sequence, or unbalanced shrinkage | Use the specified weld size, balanced sequencing, preset or restraint where approved, skip welding, and controlled interpass temperature |
| Porosity | Contamination, moisture, damaged gas equipment, drafts, long arc, or incorrect gas flow | Clean and dry the joint, protect the shielding zone, inspect hoses and connections, and set gas flow correctly |
| Cracking | Hydrogen, high restraint, unsuitable filler, rapid cooling, poor crater fill, or wrong procedure | Stop welding, determine the cause, remove the crack completely, and use an approved repair procedure |
Understanding heat input control is crucial to limiting distortion and producing consistent welds.
Products Worth Considering

2-in-1 Welding Chipping Hammer & Wire Brush – This multi-functional tool combines a welding slag hammer with a built-in steel wire brush, allowing you to efficiently chip away welding slag and clean up debris in one step, saving time and effort.
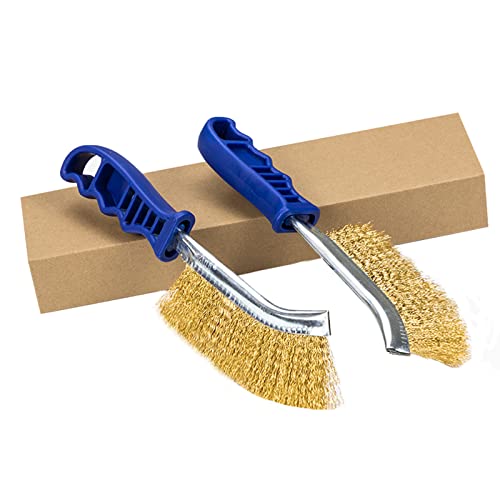
【Practical】:Carbon steel&stainless steel bristles for heavy duty jobs,remove rust and paint quickly with this wire welding brush set, wire brushes are ideal for removing paint stains, welding slag,solder,scale,rust, great for remove corrosion and more from parts, equipment, machinery and other surfaces. Also great for cleaning threads, grills or tile(Different from other similar products, this product has more bristles and thicker bristles)

PRACTICAL: Wire brushes are ideal for removing paint stains, rust, welding slag,solder,scale, Great for remove corrosion and more from parts, equipment, machinery and other surfaces. Also great for cleaning threads, grills or tile.
How to Test Your Pass Strategy on Practice Coupons
For non-code practice, use scrap that matches the planned base metal, thickness, joint, position, and surface condition. Record the process, polarity, wire or electrode, gas, settings, travel technique, and number of passes.
- Prepare and fit the coupon as you would the real joint.
- Make the planned single-pass or multi-pass weld.
- Inspect the surface and measure the weld profile.
- Cut a cross-section through the weld using safe cutting and grinding methods.
- Polish or etch the cross-section when appropriate so you can examine fusion and penetration.
- Use bend or break tests only with suitable equipment, guarding, and training.
A successful-looking practice bead does not qualify a code procedure. Procedure qualification requires the tests, documentation, ranges, and approvals specified by the governing standard.
Automation and New Multi-Pass Welding Technology
Modern equipment can improve repeatability, but it does not remove the need for correct joint design and qualified parameters. Current systems can record voltage, current, wire feed speed, travel speed, heat input, and pass history for quality control.
- Mechanized root-to-cap welding: Track-mounted and orbital systems can repeat programmed paths around pipe or along long seams.
- Seam tracking: Sensors help the torch follow changing joint locations and maintain a more consistent electrode position.
- Adaptive bead sequencing: New systems can respond to groove-width or fit-up variation and adjust where later beads are placed.
- Digital procedure control: Connected power sources can restrict parameter ranges and store weld records for traceability.
- Real-time monitoring: Software can flag changes in arc behavior, travel, or heat input that may indicate an unstable process.
Portable tools with IGBT inverter technology can give hobbyists and field welders stable, adjustable output. However, an inverter label does not establish weld quality or code compliance. Critical welds still require correct preparation, qualified variables, trained personnel, and the specified inspection.
Frequently Asked Questions
What is the difference between single-pass and multi-pass welding?
Single-pass welding completes the required weld in one pass. Multi-pass welding uses two or more passes to build the required weld size or fill a prepared joint. Pass count should be based on the joint, process, position, required fusion, and governing procedure rather than thickness alone.
Is a multi-pass weld always stronger?
No. Strength comes from the correct joint design, effective weld size, suitable filler metal, sound fusion, controlled heat, and acceptable workmanship. Extra passes can add weld metal, but they can also trap slag or create incomplete fusion when placed poorly.
How many welding passes should I use?
Use enough passes to produce the specified weld size and achieve fusion at the root, sidewalls, and previous beads without exceeding procedure limits. The exact number depends on groove volume, process, filler size, position, parameters, and bead technique.
What is the Rule of 33 in TIG welding?
The so-called Rule of 33 is an informal pulse-TIG starting shortcut that some welders use, often referring to settings near 33% background current and 33% peak time. It is not an AWS rule or a universal setup. Pulse frequency, peak time, background current, amperage, material, thickness, and joint design must be adjusted for the actual weld and machine.
Can you make $100,000 a year welding?
Some welders earn $100,000 or more in specialized, union, pipeline, shutdown, aerospace, supervisory, or overtime-heavy work. It is not the typical wage for every welder. The U.S. Bureau of Labor Statistics reports a May 2024 median annual wage of $51,000 for welders, cutters, solderers, and brazers.
When should you use single-pass welding?
Use single-pass welding when one properly sized bead can achieve the required weld dimensions, fusion, and penetration without excessive heat or an unacceptable profile. It is common for small fillets, lap joints, tack welds, sheet-metal work, and joints designed for one-pass production.
When should you use multi-pass welding?
Use multi-pass welding when the required fillet or groove is too large for one controlled bead, when root and sidewall access require separate deposits, or when a procedure specifies root, fill, and cap passes. It is common on pipe, prepared grooves, structural work, and heavy repairs.
Do you need to clean between multi-pass welds?
Yes. Remove slag, oxides, soot, contamination, and unacceptable defects before welding over a pass. Stick and slag-producing flux-core welds need complete slag removal. TIG and MIG do not leave flux slag, but they may still require brushing or grinding before the next bead.
Can MIG weld thick steel in one pass?
Some high-output MIG processes can deposit a large single-pass weld, but base-metal thickness alone does not answer the question. Joint geometry, transfer mode, wire size, position, machine output, required penetration, and the qualified procedure determine whether one pass is acceptable.
Should you use stringer beads or weave beads for multi-pass welding?
Use the bead technique permitted by the procedure and suitable for the process, position, and joint. Stringers keep the puddle smaller and are often easier to control. A limited weave can fill a wider area, but excessive weaving can increase heat input and trap slag along the toes.
Conclusion
Single-pass welding is the efficient choice when one controlled bead can produce the required weld size, fusion, penetration, and profile. Multi-pass welding is the correct choice when a joint is too large or deep for one pass, requires separate root and fill deposits, or is governed by a procedure that specifies a pass sequence.
Do not choose by metal thickness alone. Check the joint design, weld symbol, process capability, filler metal, position, heat input, fit-up, root access, inspection requirements, and governing documents. Clean and examine every pass before covering it. When a weld affects pressure containment, lifting, vehicle structure, or public safety, use a qualified procedure and competent welding and inspection personnel.
Sources
- OSHA 1910.252 General Requirements for Welding, Cutting, and Brazing — hot-work fire prevention, ventilation, personal protection, and container precautions.
- OSHA Welding, Cutting, and Brazing Safety Topic — workplace welding standards, hazards, and control resources.
- CDC/NIOSH Welding Fumes and Manganese — welding-fume composition and manganese exposure risks.
- U.S. Bureau of Labor Statistics: Welders, Cutters, Solderers, and Brazers — national occupational wage and employment data.
- AWS D1.1/D1.1M:2025 Structural Welding Code—Steel — current structural-steel welding requirements covering WPSs, qualification, fabrication, and inspection.
- Computational Framework to Predict Weld Integrity and Microstructural Heterogeneity — supplementary research on how heat input, filler composition, and weld-bead order can affect local weld properties in hydrogen-pipeline analyses.