Weld-through primer helps protect bare mating surfaces that may be sealed inside a joint after welding. It can also increase resistance, spatter, fumes, or weld contamination when the wrong product, film thickness, or welding method is used. The safest approach is to follow the exact product data sheet and, for vehicle repairs, the make-, model-, model-year-, and VIN-specific body repair procedure.
Quick Answer
Weld-through primer is a metal-rich coating used on prepared mating surfaces that will be inaccessible after welding. Use it only where the product data sheet and, for vehicle work, the exact OEM repair procedure allow it. Keep plug or butt weld sites bare when required, apply the specified film, and control fumes.
Key Takeaways
- Do not choose weld-through primer by color or metal content alone; verify the welding process, substrate, product TDS, and OEM repair instructions.
- Zinc-rich primer is commonly specified for steel mating surfaces joined by squeeze-type resistance spot welding, but requirements differ by manufacturer.
- For GMAW, MAG, or MIG plug and butt welds, remove the coating from the direct weld site whenever the product or repair procedure requires clean metal.
- Preparation grit, coat count, spray distance, flash time, and weld time vary substantially between products.
- Use source extraction and adequate ventilation. Zinc, copper, solvents, base metal, and welding consumables can all contribute to hazardous fumes.
- Restore the complete corrosion-protection system after welding with the specified primer, seam sealer, topcoat, and cavity protection.
At a Glance
| Time Required | About 20–45 minutes for preparation and drying, plus welding, inspection, and post-weld corrosion protection |
| Difficulty | Moderate; structural vehicle repairs require the correct training, equipment, and OEM procedure |
| Tools Needed | Approved primer, TDS and SDS, cleaner, specified abrasive, lint-free wipes, masking materials, test coupons, ventilation, welding PPE, and the correct welder |
| Cost | Varies by product and region; allow for one aerosol can plus cleaner, abrasives, masking supplies, ventilation, and PPE |
What’s in This Article
- What Is Weld-Through Primer?
- When to Use Weld-Through Primer
- Weld-Through Primer for MIG Welding
- Weld-Through Primer for Spot Welds
- How to Choose the Right Primer
- How to Apply Weld-Through Primer
- Weld-Through Primer Safety
- Mistakes and Troubleshooting
- Product Examples and Label Differences
- Frequently Asked Questions
- Conclusion
- Sources
What Is Weld-Through Primer?
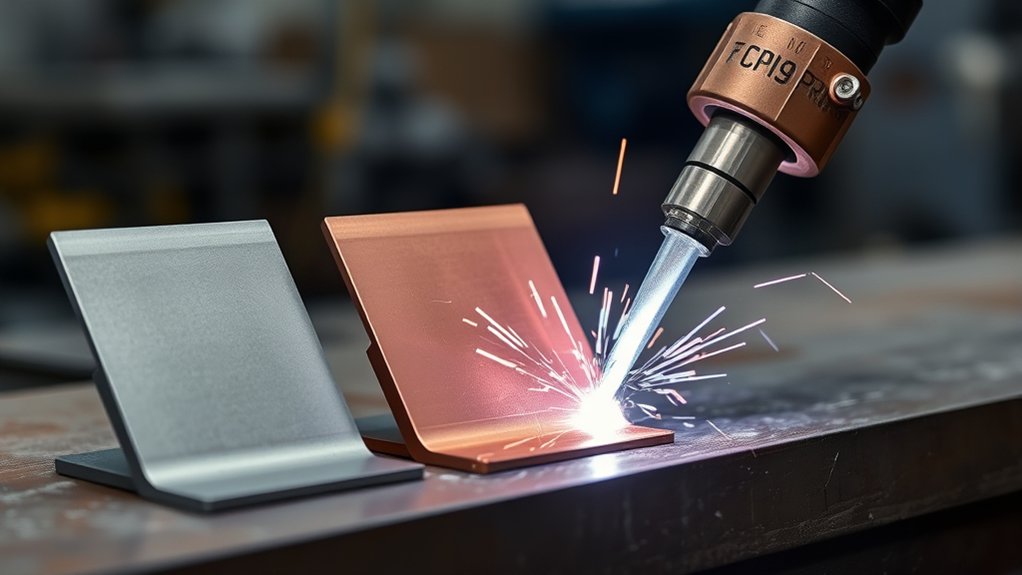
Weld-through primer is a conductive, corrosion-resistant coating made for selected metal surfaces that will be welded together. It is most useful on lap joints, flanges, panel overlaps, blind joints, and other mating surfaces that will be difficult to reach after assembly.
Many weld-through primers are zinc-rich or copper-rich. Zinc can provide sacrificial corrosion protection to nearby steel. Copper-rich products may provide useful conductivity, but that does not automatically make every copper product suitable for every MIG, MAG, TIG, or resistance-welding job.
The primer must be applied to a suitably prepared substrate. Oil, wax, dust, old paint, loose corrosion, oxide, and excess coating can reduce adhesion or interfere with the welding process.
Weld-through primer is not a replacement for the rest of the corrosion-protection system. After welding, the repair may still require epoxy primer, seam sealer, paint, undercoating, and cavity wax in the locations specified by the repair plan.
Use proper flame-resistant clothing and protect exposed skin from sparks, hot metal, ultraviolet radiation, and spatter.
The OEM repair procedure decides where weld-through primer belongs; the product data sheet decides how the surface is prepared, how much coating is applied, and how long it must dry.
When to Use Weld-Through Primer—and When Not to Use It
Use weld-through primer only on a joint and substrate covered by the product instructions. For collision repair, also confirm that the vehicle manufacturer permits or requires it for the exact attachment method.
Weld-through primer is commonly considered for:
- Bare-steel mating flanges joined by squeeze-type resistance spot welding
- Lap joints or enclosed seams that cannot be coated normally after assembly
- MIG, MAG, or TIG applications specifically listed by the coating manufacturer
- Repairing corrosion protection at selected weld flanges when an OEM procedure requires it
Do not assume that weld-through primer belongs on every weld. It may be prohibited or require removal when:
- The direct fusion area must be clean for a GMAW, MAG, MIG, or TIG weld
- The vehicle manufacturer specifies epoxy primer, weldable seam sealer, adhesive, or another corrosion treatment instead
- The product is an ordinary zinc coating, cold-galvanizing spray, etching primer, epoxy primer, or paint that is not labeled for weld-through use
- The substrate or finishing system is not listed as compatible
- The metal is still rusty, oily, wet, or coated with unidentified material
Warning: Some OEM restrictions are stricter than the primer label. Honda, for example, specifies zinc-rich weld-through primer for designated squeeze-type resistance spot welds but says it should not be used for its MAG plug welds, MAG butt welds, or MIG-brazed joints. Always follow the vehicle-specific body repair manual.
Before starting a vehicle repair, verify the manufacturer, model, model year, VIN, steel or aluminum grade, attachment method, weld location, approved consumables, corrosion-protection steps, and any battery, restraint-system, or high-voltage depowering instructions.
Weld-Through Primer for MIG Welding
For MIG welding, sometimes described as GMAW or MAG welding depending on the shielding gas, weld-through primer may protect concealed surfaces around the joint. However, the direct weld site often needs clean metal to prevent porosity, erratic arc behavior, excess spatter, or incomplete fusion.
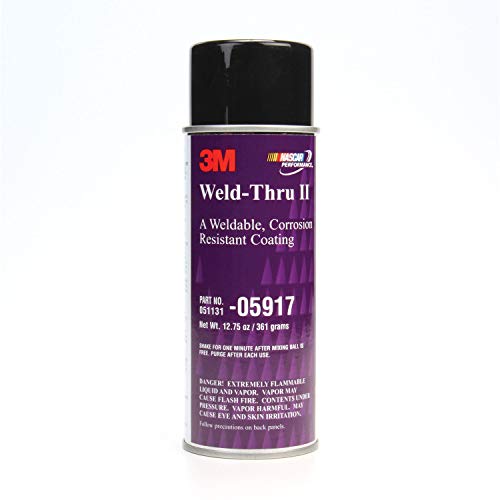
Product instructions differ. The 3M 05917 technical sheet says to remove the coating from a MIG or MAG plug-weld site before welding. SEM Zincweld similarly directs users to remove or scratch the coating from MIG plug-weld areas. U-POL instructs users to abrade the coating as required for the weld.
A copper-rich product such as U-POL UP0768 may be labeled for MIG, TIG, and resistance spot welding, while its zinc-rich UP0789 version is labeled for the same general processes. That means conductivity and product compatibility matter more than a simple “copper for MIG” rule.
MIG Plug and Butt Weld Preparation
- Prepare the concealed mating surfaces according to the permitted corrosion-protection procedure.
- Keep or restore clean bare metal at the direct plug, butt, or fusion site when required.
- Assemble and clamp the panels with the specified fit-up and gap.
- Make a test weld on representative metal with the same coating, thickness, layers, and access.
- Confirm the welder settings and inspect or destructively test the coupon according to the approved procedure.
- Complete the repair without changing the qualified setup unless a new test is performed.
Warning: If the weld spits, pops, tunnels, produces visible pores, or will not wet into clean metal, stop. Do not cover the defect with another pass. Remove the contaminated material, correct the preparation or setup, and repeat the approved test process.
Primer cannot compensate for poor fit-up, the wrong wire, incorrect shielding gas, damaged equipment, or improper fillet weld sizing.
Weld-Through Primer for Spot Welds
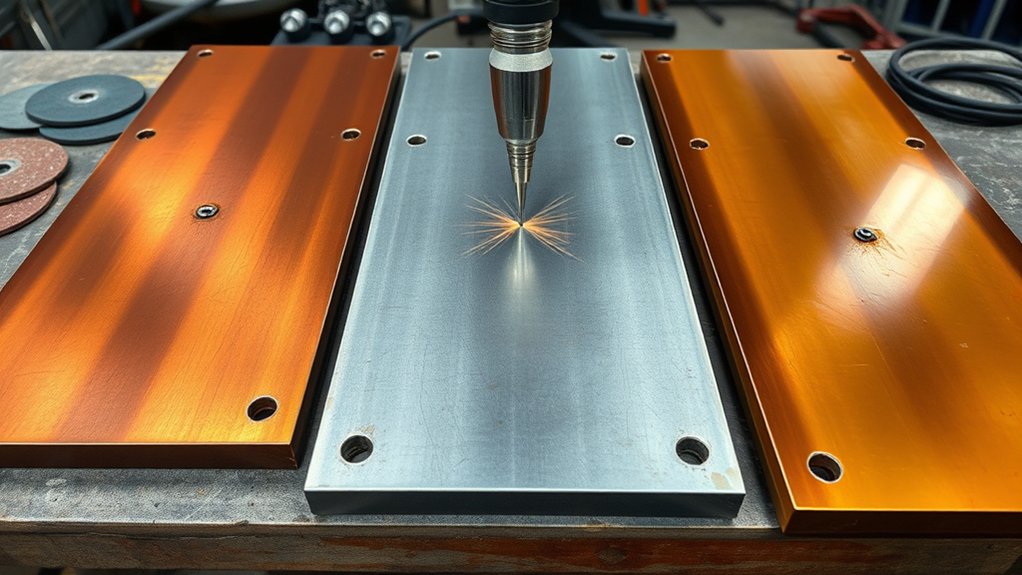
A zinc-rich weld-through primer is commonly specified for bare-steel mating surfaces joined by squeeze-type resistance spot welding. The coating remains between the panels, where conventional painting may be impossible after the flanges are closed.
Apply only the amount required by the product data sheet and wipe away excess when the OEM or coating instructions call for it. Too much material increases electrical resistance and can cause excess heat, spatter, inconsistent nugget formation, or poor clamping.
Do not confuse the coated mating interface with the outer electrode contact surfaces. The electrode tips must be clean, aligned, dressed, and able to clamp the outer panel surfaces correctly. A product such as 3M 05917 does not require coating removal from the spot-weld location when it is used according to its technical sheet.
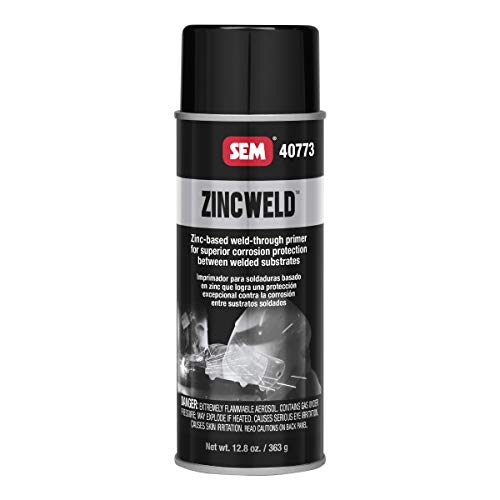
SEM Zincweld 40773 is labeled for MIG and squeeze-type resistance spot welding. U-POL WELD#2 is labeled for resistance spot, MIG, and TIG welding. Permission for a specific vehicle joint still comes from the applicable OEM procedure.
Pro Tip: Reproduce the actual repair stack-up on the test coupon. Use the same panel thicknesses, coating, number of layers, flange condition, tip condition, clamping force, and approved welder program.
Good surface preparation also supports nearby sealers and adhesives, but welding requirements and adhesive adhesion strength must be evaluated separately.
Products Worth Considering
Weld thru primer

ETCHES AND PRIMES IN ONE STEP: Self-etching formula chemically bites into bare steel and aluminum, no separate acid etch or sanding primer needed

How to Choose the Right Primer
Start with the repair procedure, not the can color. Use this order:
- Confirm the attachment method. Determine whether the joint uses resistance spot welding, GMAW or MAG plug welding, butt welding, MIG brazing, TIG welding, adhesive bonding, riveting, or a combination.
- Read the OEM procedure. For vehicle repairs, verify the exact make, model, model year, VIN, material, joint location, and corrosion-protection requirement.
- Check the product TDS. Confirm the substrate, welding-process compatibility, preparation grit, coat count, flash time, dry time, and finishing restrictions.
- Read the SDS. Identify flammability, ventilation, skin, eye, inhalation, storage, and disposal requirements.
- Confirm finish compatibility. Determine whether excess coating must be removed before epoxy primer, filler, paint, adhesive, or seam sealer.
- Check local requirements. Product availability and VOC rules can differ by state, locality, and country.
| Coating Type | Useful Characteristics | Important Limitation |
|---|---|---|
| Zinc-rich weld-through primer | Sacrificial corrosion protection for steel; commonly specified on selected resistance-spot-welded mating surfaces | Not automatically permitted for every GMAW, TIG, brazed, aluminum, or vehicle joint |
| Copper-rich weld-through primer | Conductive metal-rich film; some products are labeled for resistance spot, MIG, and TIG processes | Do not use unless the exact product and repair procedure permit it |
| Ordinary zinc, etching, epoxy, or paint primer | May serve other corrosion or refinishing purposes | Must not be treated as weld-through primer unless the manufacturer expressly labels it for that use |
For grinding, spraying, and welding, use a complete PPE setup suited to the identified hazards.
How to Apply Weld-Through Primer
Estimated time: A small preparation job may take about 20–45 minutes before welding. The actual time depends on cleaning, abrasion, masking, product temperature, coat count, flash time, joint assembly, and the manufacturer’s instructions.
What You’ll Need
- The approved weld-through primer
- The current technical data sheet and safety data sheet
- The vehicle-specific body repair procedure when applicable
- A compatible bare-metal cleaner or degreaser
- Lint-free wipes
- The abrasive grade specified by the coating manufacturer
- Masking tape, plugs, or templates for weld sites that must remain bare
- Representative test coupons
- Local exhaust or another suitable fume-control system
- Gloves, safety glasses, face and skin protection, welding helmet, hearing protection, and appropriate respiratory equipment where required
- Flame-resistant welding clothing
- The correct welder, tips, wire, shielding gas, clamps, and inspection tools
Surface Prep Steps
- Identify the substrate. Confirm whether the joint is bare steel, galvanized steel, aluminum, factory-coated metal, or another material.
- Remove corrosion. Do not coat over loose rust, scale, blistered paint, or unidentified residue. Guidance for removing loose rust does not replace the primer manufacturer’s preparation instructions.
- Clean before sanding. Remove oil, wax, silicone, and other contaminants with a compatible cleaner so they are not ground into the surface.
- Abrade as specified. Use the exact abrasive range in the TDS. Depending on the product, that may be P80, P80–P240, P180–P220, or another specified preparation.
- Remove dust and reclean. Use clean, lint-free materials and allow the surface to dry fully.
- Mask the direct fusion area when required. Keep plug holes, butt-weld edges, ground-clamp locations, or other specified areas free of coating.
- Inspect under good light. The metal should be dry, uniformly prepared, and free of residue before spraying.
Note: Do not substitute a remembered grit number for the current label or TDS. SEM Zincweld specifies P80, while current U-POL guidance permits a broader P80–P240 range.
Spray and Flash Time
Move ignition sources away from the spray area before opening the can. Provide ventilation, wear the required PPE, and bring the aerosol to the permitted application temperature.
- Shake the can for the time stated on the label. Some products require two minutes; others require one minute after the mixing ball begins to move.
- Test the spray pattern away from the work.
- Hold the can at the specified distance and apply the required coat count.
- Keep each pass uniform. Do not build extra film in corners, holes, or flange edges.
- Allow the specified flash time between coats.
- Allow the final coat to dry for the full time stated in the TDS before assembly or welding.
For example, current U-POL WELD#2 guidance specifies one or two coats from 15–25 cm away, a 5–10-minute intermediate flash at 20°C, and 10–20 minutes of drying before welding. These values should not be applied automatically to another brand.
Pro Tip: If the dried coating looks heavy, wet, rough, puddled, or uneven, do not assume the weld will burn through it. Correct the film according to the product instructions before assembling the joint.
Welding and Recoat Timing
- Confirm that the final coat has reached the required drying time.
- Assemble and clamp the joint without scraping coating away from protected mating surfaces unless the procedure requires removal.
- Expose clean metal at direct MIG, MAG, GMAW, or TIG fusion sites where required.
- Complete and evaluate a representative test weld.
- Weld the repair using the approved settings and sequence.
- Inspect each weld for location, size, penetration, porosity, burn-through, cracks, and surrounding damage.
- Perform the required destructive test on the separate coupon rather than guessing from surface appearance alone.
Do not overcoat the surrounding material until you have checked the product’s finishing restrictions. U-POL permits specified etching or 2K primer after thorough cleaning but requires complete removal before certain amine-cured epoxy systems. SEM requires excess exposed Zincweld to be removed before filler, primer, or paint. 3M describes 05917 as a weld coating rather than a paint primer and instructs users to remove surrounding overspray after welding.
Restore Corrosion Protection After Welding
Once the weld has passed inspection:
- Dress welds only as permitted without thinning or weakening the repaired panels.
- Remove exposed overspray or residue where the product instructions require it.
- Clean the repair and coat exposed steel with the approved epoxy or refinishing primer.
- Restore seam sealer in the original locations and profile.
- Apply the specified paint, undercoating, stone protection, or sound-deadening material.
- Apply cavity wax to enclosed areas where required, using the correct access wand and coverage pattern.
- Inspect drains and openings so corrosion materials do not block them.
Weld-through primer protects selected hidden interfaces; it does not complete the corrosion repair by itself.
Weld-Through Primer Safety
Welding fumes may contain material from the electrode, filler wire, shielding process, base metal, galvanized coating, and primer. Zinc-containing coatings can produce zinc oxide fume, while copper-rich products and their solvents introduce additional exposure concerns.
Warning: Weld-through primer aerosols may be extremely flammable. Do not spray near an arc, flame, hot surface, spark, cigarette, heater, or other ignition source. Allow the coating to complete its required flash and drying period before welding.
OSHA’s welding-fume guidance recommends controlling fumes at the source, positioning workers away from the plume, and using adequate general and local exhaust ventilation. Welding outdoors or in an open doorway does not automatically guarantee safe exposure levels.
- Keep a local-exhaust hood, extraction nozzle, or fume-extraction gun close enough to capture the plume without disrupting shielding gas.
- Do not weld in an unventilated confined or enclosed space.
- Review the primer SDS, base-metal coating, welding wire, and other products in the work area.
- Use respiratory equipment selected for the actual hazard. In a workplace, required respirator use must be supported by the applicable respiratory-protection program, medical evaluation, fit testing, training, and cartridge or filter schedule.
- Keep bystanders away from spray mist, fumes, ultraviolet radiation, and sparks.
- Remove combustibles and provide suitable fire protection.
- Do not use oxygen for ventilation or dust removal.
- Wash exposed skin and avoid eating, drinking, or smoking in contaminated work areas.
For vehicle work, follow the OEM procedure for disconnecting the battery, protecting electronic modules, disabling supplemental-restraint systems, and depowering hybrid or electric high-voltage systems. Never guess at a high-voltage disable sequence or safe welding location.
Products Worth Considering

High quality, fast drying surface
PREVENTS COSTLY COMEBACKS: Protects bare metal panels and parts from corrosion after welding

✅ Combines weld-thru primer protection with self-etching primer performance
Common Weld-Through Primer Mistakes
Poor Surface Prep
Primer cannot bond reliably to oil, wax, loose rust, moisture, sanding residue, old paint, or an unidentified coating. Clean before and after abrasion, and use the grit range specified for the exact product.
Wrong Primer Choice
Do not substitute ordinary enamel, cold-galvanizing spray, etching primer, epoxy primer, or general-purpose zinc coating for a product labeled as weld-through primer. Confirm the substrate, welding process, finishing system, local VOC rules, and OEM instructions.
Different metals also require different repair methods. A procedure appropriate for thin automotive steel does not automatically apply to aluminum, stainless steel, or materials affected by issues such as cast iron’s brittleness.
Using Too Much Primer
A heavy film can trap solvent, increase electrical resistance, raise heat, create spatter, and contaminate a fusion weld. Apply the specified film rather than adding extra coats for reassurance.
Skipping a Test Weld
A setting that worked on uncoated metal may not produce the same result through a coated, multilayer flange. Test representative coupons after preparing them with the same coating and assembly conditions as the repair.
Failing to Finish the Corrosion Repair
Rust can return when exposed welds, ground areas, seams, and cavities are left without the required epoxy primer, seam sealer, topcoat, or cavity wax. Restore every removed factory corrosion-protection layer that the repair procedure identifies.
Troubleshooting Weld-Through Primer Problems
| Problem | Likely Causes | Corrective Action |
|---|---|---|
| Porosity, popping, or an unstable arc | Coating or solvent in the direct fusion area, contamination, poor shielding gas, or an incorrect setup | Stop, remove the defective weld and contamination, verify gas and equipment, restore clean metal where required, and repeat the test coupon |
| Excess spatter or heat during spot welding | Excess coating, poor flange fit, dirty or misaligned tips, or an unqualified program | Correct the film and fit-up, service the tips, confirm clamping, and qualify the setup on representative coupons |
| Weak or inconsistent spot-weld nugget | High resistance, excess layers, incorrect tip force, wrong program, or an unapproved primer | Return to the approved stack-up, primer, tip condition, welder program, and destructive-test procedure |
| Primer, filler, or paint lifts later | Exposed weld-through coating was not removed or cleaned as required, or the finishing products are incompatible | Remove the affected coating, prepare the surface again, and rebuild it with the approved compatible refinishing system |
| Rust returns at the seam | Incomplete coverage, damaged hidden coating, open seam sealer, blocked drainage, or missing cavity wax | Inspect the complete corrosion system and restore every required primer, sealer, topcoat, cavity, and drainage treatment |
Weld-Through Primer Product Examples and Label Differences
The following products illustrate why one preparation sequence should not be applied to every can. These are examples rather than an overall ranking.
| Product | Base and Stated Uses | Preparation and Timing | Critical Label Note |
|---|---|---|---|
| U-POL WELD#2 UP0768 / UP0789 | Copper-rich UP0768 or zinc-rich UP0789; labeled for resistance spot, MIG, and TIG welding | Current guidance: clean and degrease, abrade P80–P240, apply 1–2 coats from 15–25 cm, flash 5–10 minutes, and air-dry 10–20 minutes before welding | Abrade as required for the weld; clean thoroughly before compatible primer; remove completely before an amine-cured epoxy system |
| 3M Weld-Thru II 05917 | Zinc-rich coating for spot and MIG/MAG welding on welded steel panels | Abrasive-clean the flange, clean with a compliant surface cleaner, shake one minute after the ball loosens, apply two light coats, flash five minutes, and dry 10–15 minutes before assembly | Remove coating from a MIG/MAG plug-weld site; removal is not required for the specified spot-weld site; remove exposed overspray after welding |
| SEM Zincweld 40773 | Zinc-based product labeled for MIG and squeeze-type resistance spot welding on bare metal | Clean, sand with P80, reclean, shake one minute after the ball rattles, apply two medium-wet coats to both surfaces, flash 3–5 minutes, and wait 20 minutes before welding | Remove or scratch it from MIG plug-weld areas; remove exposed excess before filler, primer, or paint to prevent lifting |
| SprayMax 1K UNI ZINC 3680601 | Zinc coating for damaged zinc surfaces, selected inner panel edges, spot welding, and manufacturer-stated MIG/TIG compatibility | Remove all rust, clean and sand the metal, shake two minutes, spray from 15–20 cm, apply two coats, and allow the manufacturer’s stated flash and drying periods | Check compatibility before applying another paint system and follow the SDS and professional-use restrictions |
Product compatibility does not override an OEM restriction. A coating labeled for MIG or TIG may still be prohibited on a specific vehicle joint or material.
When working with oxy-fuel equipment on another approved fabrication job, correct setup and a balanced flame remain essential, but the primer must still be approved for the heat and joining process.
Frequently Asked Questions
What Is a Good Weld-Through Primer?
A good weld-through primer is one that is approved for the exact substrate and welding process, provides the required corrosion protection, and is permitted by the applicable OEM procedure. It should also have a current TDS and SDS with clear preparation, film, drying, safety, and finishing instructions.
Should You Remove Weld-Through Primer Before Welding?
Remove it from the direct fusion area when the product data sheet or repair procedure requires clean metal. This commonly applies to MIG or MAG plug-weld sites. A permitted resistance spot-weld coating may remain between the mating flanges, although excess should be removed when instructed.
Can You Use Weld-Through Primer on Rust?
No. Remove rust, scale, failed paint, grease, dust, and moisture before application. Weld-through primer is intended for properly prepared metal, not for stabilizing active corrosion.
What Are the Three Types of Primers?
There is no universal list of only three metal primers. In collision repair, common categories include epoxy primer, self-etching primer, and weld-through primer. Weld-through products may be zinc-rich or copper-rich, and they are not interchangeable with ordinary refinishing primers.
Can You Paint Over Weld-Through Primer?
It depends on the product. U-POL permits specified primers after thorough cleaning but has an epoxy restriction. SEM requires exposed excess to be removed before filler, primer, or paint. 3M says its exposed weld coating is not primer or paint and should be removed from surrounding outer surfaces.
Is Weld-Through Primer Required for Every Weld?
No. It is used only where the coating manufacturer and, for vehicle repairs, the OEM procedure permit or require it. Some joints instead require clean bare metal, epoxy primer after welding, adhesive, weldable seam sealer, or another corrosion-protection method.
Is Zinc or Copper Weld-Through Primer Better?
Neither is universally better. Zinc-rich products are commonly specified for corrosion protection on selected steel spot-weld flanges. Copper-rich products may provide useful conductivity. The correct choice is the one approved for the substrate, joining method, finishing system, and OEM repair.
Can You Weld Through Primer Before It Dries?
No. Follow the full flash and weld-time instructions. Wet solvent can increase fire risk, fumes, spatter, contamination, and coating failure. Drying times vary by product, temperature, film thickness, and shop conditions.
Does Weld-Through Primer Replace Epoxy Primer or Seam Sealer?
No. Weld-through primer protects selected mating surfaces before welding. Epoxy primer, seam sealer, paint, undercoating, and cavity wax serve other parts of the corrosion-protection system and should be restored where the repair procedure requires them.
Conclusion
The right weld-through primer can protect concealed metal without sacrificing weld quality, but only when the coating, substrate, joining process, film thickness, and repair procedure agree.
Start with the exact OEM instructions for vehicle repairs, then follow the current product TDS and SDS. Prepare clean metal, apply the specified film, let it dry fully, clear direct fusion sites where required, and qualify the weld on a representative coupon.
After welding, inspect the joint and rebuild the complete corrosion system. Primer selection is only the first step; epoxy, seam sealer, paint, cavity wax, ventilation, and safe work practices determine whether the finished repair remains strong and protected.
Sources
- OSHA — Controlling Hazardous Fume and Gases During Welding — welding-fume hazards, ventilation, local exhaust, confined spaces, and respiratory controls
- Honda — Body Repair Manual Welding and Sectioning Guideline Revisions — zinc-rich primer use for STRSW and restrictions for MAG and MIG-brazed joints
- U-POL — WELD#2 Technical Data Sheet — current preparation, coat, flash, welding, PPE, and overcoating instructions
- 3M — Weld-Thru II Coating 05917 Technical Data Sheet — spot-weld and MIG/MAG plug-weld preparation, application, and cleanup
- SEM — Zincweld 40773 Technical Data Sheet — P80 preparation, coat and flash instructions, MIG plug-weld cleanup, and finishing restrictions
- SprayMax — 1K UNI ZINC 3680601 Technical Data Sheet — substrate preparation, coating use, drying, PPE, and paint-compatibility guidance


