Welding near an electric vehicle battery is not a normal “disconnect the battery and weld” job. You are working around the 12-volt system, high-voltage cables, control modules, stored energy, and often ADAS sensors that may need scanning or calibration after the repair. Before any hot work starts, use the VIN-specific OEM repair procedure, isolate the vehicle, verify zero voltage, set up fire controls, and document each safety step.
Quick Answer
Before welding near an EV high-voltage battery, a qualified technician must follow the OEM disable procedure, isolate the 12-volt and high-voltage systems, wait the specified discharge time, and verify zero voltage with a properly rated meter. Then protect HV cables and electronics, control fire risk, and complete required scans or ADAS calibrations.
Key Takeaways
- Never weld near an EV battery until the OEM high-voltage disable procedure has been confirmed for that exact vehicle.
- The 12-volt system still matters because it can wake modules, control contactors, and keep safety systems active.
- Zero voltage must be verified with the right PPE, a properly rated meter, and OEM-specified test points.
- Damaged EV batteries need isolation, monitoring, and trained support because they can remain electrically or thermally unstable.
- ADAS scans, calibrations, weld-test records, and repair documentation help prove the vehicle is safe before release.
At a Glance
| Time Required | 30 minutes to several hours before welding, depending on OEM disable steps, capacitor discharge time, scan requirements, and calibration needs. |
| Difficulty | Advanced. High-voltage EV training and OEM repair information are required. |
| Tools Needed | OEM service information, scan tool, CAT-rated meter or OEM-approved tester, insulated gloves, face protection, lockout/tagout supplies, insulated tools, ventilation, fire extinguisher, and welding equipment approved for the repair. |
| Cost | Varies by shop setup, OEM information access, scan/calibration needs, and required high-voltage PPE. Do not skip safety steps to reduce cost. |
Warning: If you are not trained and equipped for high-voltage EV service, stop before welding and hand the job to a qualified technician. High-voltage systems can retain dangerous energy even after the vehicle is turned off.
What Must You Do Before Welding EVs?
Before you weld on or near an EV, you must make the vehicle electrically safe. Start by opening the exact OEM repair procedure for the VIN, because battery layout, service-disconnect design, capacitor discharge time, and zero-voltage test points vary by make, model, and year.
In practical terms, your pre-weld sequence should include:
- Confirm that a qualified EV technician is assigned to the high-voltage disable work.
- Run a pre-repair scan before structural work or welding begins.
- Inspect the vehicle for battery-case damage, crushed high-voltage cables, coolant leaks, smoke, abnormal heat, or warning messages.
- Follow the OEM sequence for shutting down the vehicle, isolating the 12-volt system, and disabling the high-voltage battery.
- Remove and secure only the service disconnects, fuses, relays, or plugs named in the OEM procedure.
- Apply lockout/tagout control so no one can restore power during the repair.
- Wait the full OEM-specified discharge time before testing.
- Verify zero voltage at the OEM-specified points with the right PPE and a properly rated meter.
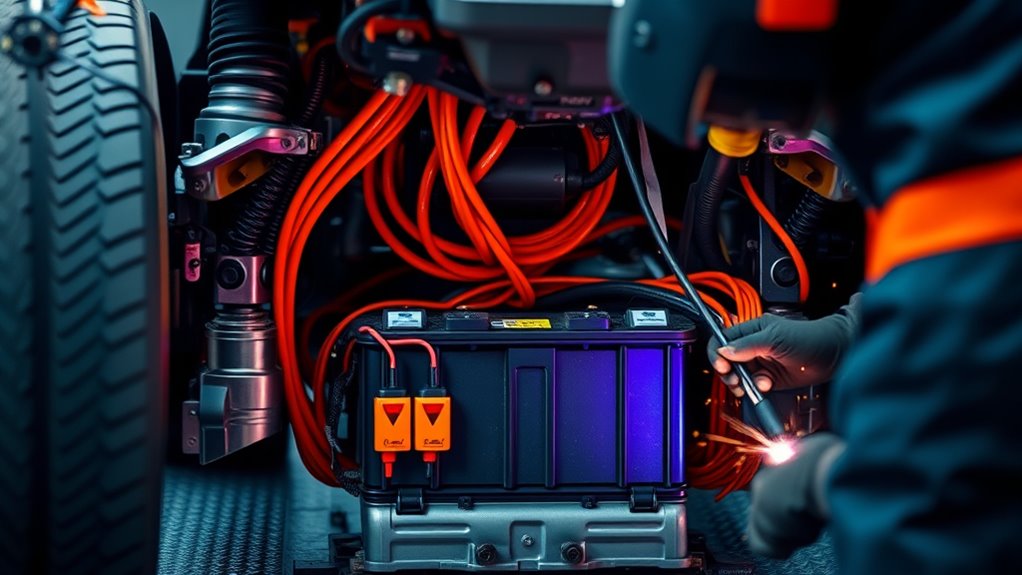
- Place the welding current return clamp close to the weld area so current does not travel through battery cables, modules, bearings, or sensitive electronics.
Welding current, heat input, and joint design still matter after the vehicle is disabled. Use the OEM weld procedure for the panel and material, then confirm your settings with test welds. A general welding amperage reference can help with basic process understanding, but it does not replace the OEM repair procedure for an EV.
OSHA’s control-of-hazardous-energy rules explain why lockout/tagout matters during service work where unexpected energization or stored energy could injure a worker. Review the rule here: OSHA 29 CFR 1910.147.
How Do You Disable the High-Voltage Battery?
You disable the high-voltage battery by following the OEM repair procedure for that exact vehicle. Do not assume that one EV brand, model year, or hybrid platform uses the same shutdown sequence as another.
The general workflow is to prepare the vehicle, shut it down, isolate the 12-volt system when directed, disable the high-voltage system, wait the required time, and verify zero voltage before welding. The details come from the manufacturer, not from guesswork.
Disable Service Disconnect
The high-voltage service disconnect, service plug, fuse, relay, or manual service disconnect is often the preferred isolation point, but it is not universal. Use the repair information to find the correct component and the correct order of removal.
Once a required disconnect or fuse is removed, secure it in a controlled location. Many shops keep removed service plugs with the technician or in a lockout box. The point is simple: no one should be able to reinstall the part and re-energize the system while welding is underway.
Disconnect the 12-volt battery only when the OEM procedure tells you to do so and in the order it gives. On many EVs, the 12-volt system controls high-voltage contactors, control modules, locks, alarms, and safety systems. Pulling it at the wrong time can create new faults or interrupt the correct shutdown sequence.
Follow OEM Procedures
OEM repair information is the rulebook for EV welding preparation. It defines the disable sequence, wait time, PPE, test points, module protection, weld locations, and post-repair steps.
| Check | Action |
|---|---|
| Vehicle identification | Use VIN-based OEM service information when available. |
| 12-volt system | Isolate it in the OEM-specified order. |
| High-voltage disconnect | Remove only the component named by the procedure. |
| Stored energy | Wait the full capacitor discharge time. |
| Lockout/tagout | Control removed parts so the system cannot be restored. |
| Verification | Confirm zero voltage before welding. |
Verify Zero Voltage Before Welding
Zero-voltage verification is the step that confirms the disable procedure worked. Wear the PPE required by the OEM procedure and use a properly rated meter or OEM-approved tester. Prove the meter on a known live source before testing, test the vehicle at the specified high-voltage points, then prove the meter again after testing.
This test-before and test-after habit helps protect you from a false zero reading caused by a dead meter, wrong setting, bad lead, or poor contact point. OSHA electrical safety rules also make clear that electrical work practices must protect workers who are near exposed energized parts. You can review those requirements here: OSHA 29 CFR 1910.333.
Note: Do not shorten the OEM wait time after disabling the high-voltage system. Capacitors and other components may need time to discharge before zero voltage can be verified.
Why Does the 12-Volt System Still Matter?
Even in an EV, the 12-volt system still powers key low-voltage loads such as lighting, locks, infotainment, control modules, communication networks, and some safety systems. It can also wake modules and support contactor-control logic that connects or disconnects the high-voltage battery.
If you begin welding with the 12-volt system active when the OEM procedure requires it to be isolated, modules may wake up, relays may operate, faults may set, or circuits may be damaged. That is why the 12-volt circuit should be treated as part of the safety system, not as a minor accessory battery.
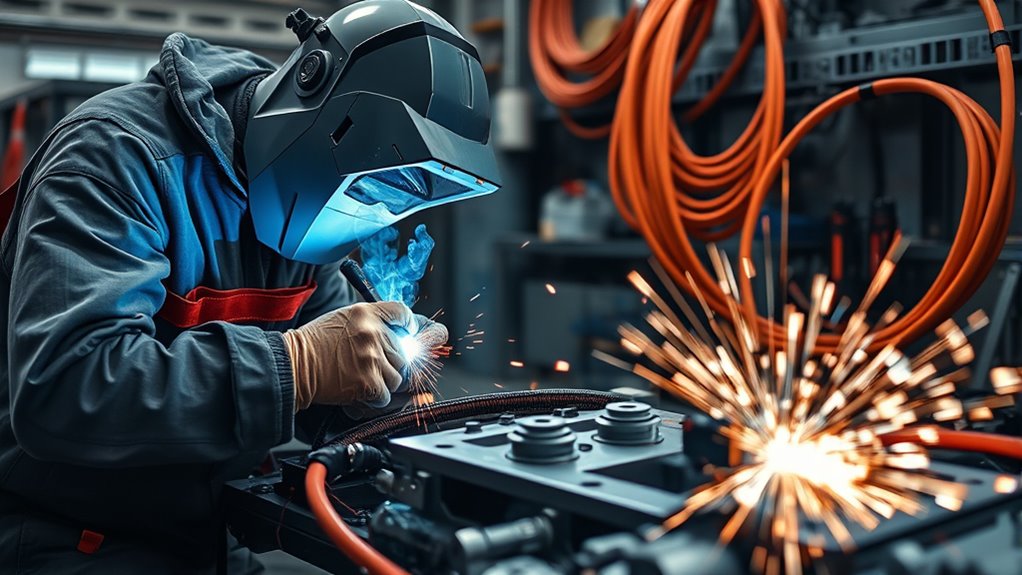
Use proper protective clothing for arc welding whenever hot work is performed. EV safety adds another layer, but it does not remove the normal welding hazards of heat, sparks, fumes, ultraviolet radiation, and fire.
How Do You Handle a Damaged EV Battery Safely?
When an EV battery is damaged or suspected to be damaged, treat it as unstable until a qualified person proves otherwise. Do not probe orange cables, open the battery case, weld on the pack, drill near the enclosure, or move the vehicle into a normal work bay without a plan.
Warning signs can include crushed battery structure, electrolyte leakage, coolant loss near the pack, smoke, vapor, hissing, popping, a sweet or solvent-like odor, abnormal heat, repeated warning messages, or a vehicle that was submerged or exposed to fire. If any of these signs are present, isolate the vehicle according to the OEM emergency guidance, the shop emergency plan, and local authority instructions.
A damaged EV battery can remain electrically dangerous or thermally unstable even when the vehicle appears shut down.
- Move people away from the vehicle and keep nonessential staff out of the area.
- Do not charge the vehicle or connect booster equipment.
- Keep combustibles away and use the standoff distance required by the OEM, emergency guide, or responding authority.
- Call trained high-voltage personnel when the pack condition is uncertain.
- Document visible damage with photos before disturbing nearby parts.
Use the right safety gear and fire controls around any hot-work process. For broader emergency context, the National Highway Traffic Safety Administration provides first-responder guidance for electric-drive vehicles here: NHTSA Interim Guidance for Electric and Hybrid-Electric Vehicles.
What Welding Methods Work for EV Repairs?
For EV collision repairs, the right joining method depends on the OEM procedure, material type, panel location, access, corrosion protection, and heat sensitivity. Do not choose a welding method just because it works on a conventional vehicle.
There is also an important difference between body repair welding and battery pack or cell joining. Collision shops may use squeeze-type resistance spot welding, GMAW/MIG plug welds, MIG brazing, rivets, bonding adhesives, or other OEM-approved joining methods. Battery manufacturing may use resistance welding, laser welding, ultrasonic welding, or wire bonding for tabs and busbars, but those are not general field repair instructions for damaged EV packs.
| Method | Best use | Critical caution |
|---|---|---|
| Squeeze-type resistance spot welding | Replacing OEM spot welds on approved panels | Requires access, correct squeeze force, and test welds. |
| GMAW/MIG plug welding | Areas where OEM allows plug weld replacement | Control heat and place the current return clamp close to the weld. |
| MIG brazing | Some coated steel or low-heat OEM repairs | Use only where the manufacturer allows it. |
| Laser, ultrasonic, resistance tab welding, or wire bonding | Battery tabs, busbars, and fine electrical connections in controlled production or authorized remanufacturing | Not a normal collision-shop repair for a damaged high-voltage pack. |
Match the process to the joint, the material, and the OEM procedure. If the repair involves structural weld size, joint strength, or fillet geometry, review the manufacturer instructions first and use general resources such as a fillet weld size guide only as background knowledge.
Pro Tip: Put the welding current return clamp as close to the weld as practical on clean metal. This helps keep welding current out of high-voltage cables, battery structures, control modules, bearings, and sensor circuits.
When Do You Need ADAS Scans and Calibrations?
You need a pre-repair scan before welding or structural work so you can capture stored faults, active faults, and module status before repairs disturb sensors or wiring. You also need a post-repair scan after the work is complete so hidden faults are not missed before delivery.
ADAS systems can use cameras, radar, lidar, ultrasonic sensors, steering-angle data, ride-height inputs, and control modules. A bumper cover, radar bracket, windshield, suspension part, wheel alignment, structural pull, or camera mount can change sensor aim even when the vehicle looks visually repaired. The Insurance Institute for Highway Safety explains how advanced driver assistance systems monitor the vehicle and environment here: IIHS-HLDI Advanced Driver Assistance.
Pre-Repair Scan Needs
A pre-repair scan creates a baseline. It helps you avoid blaming the welding repair for a fault that existed when the vehicle arrived, and it helps you plan the repair without guessing.
- Scan before welding, measuring, pulling, or removing ADAS-related parts.
- Record active and stored faults.
- Check OEM position statements for scan and calibration rules.
- Inspect sensor brackets, harnesses, grounds, and connectors near the repair area.
- Use the scan results to decide which calibrations may be required after repair.
Post-Repair ADAS Calibration
After repairs, perform the post-repair scan and any OEM-required static or dynamic calibration. Calibration may be required after sensor removal, bumper replacement, windshield replacement, suspension work, alignment changes, structural repairs, ride-height changes, or radar/camera bracket repair.
Follow the OEM setup exactly. Tire pressure, fuel or state-of-charge level, cargo load, target placement, floor level, lighting, and road-test conditions can all matter. Do not release the vehicle until scan results, calibration reports, and warning lights support the repair.
This is especially important as front crash prevention and related driver-assistance systems become more common across new vehicles. Treat ADAS verification as a safety step, not an optional upsell.
Where Do You Find OEM Repair Procedures?
OEM repair procedures are usually found in manufacturer service portals. Use them to confirm high-voltage disable steps, welding methods, sectioning locations, corrosion protection, calibration rules, scan requirements, and special tool requirements.
- Use VIN-based OEM service information whenever possible.
- Check the collision repair manual before cutting, welding, measuring, or pulling.
- Review the emergency response guide when the battery or high-voltage cable damage is uncertain.
- Check OEM updates because EV procedures can change.
- Save the procedure reference, date, and revision in the repair file.
If the OEM portal is not clear, pause and cross-check the latest service information before welding near the battery. Verified repair information gives you control. Guessing around high-voltage systems does not.
What Can I-CAR Disable Tools Show You?
I-CAR repairability resources can help you locate high-voltage disable information faster, especially when you are trying to identify the correct OEM source for a hybrid or EV. These tools may point you toward service-disconnect locations, 12-volt battery locations, high-voltage component maps, and the manufacturer repair information you still need to follow.
Use I-CAR guidance as a navigation aid, not as a replacement for the OEM repair procedure. Some OEM documents may require a subscription, and some procedures may be updated after a training document or search tool is published.
The safe workflow is simple: use I-CAR to find the right path, use the OEM procedure to perform the work, and document the exact steps used.
How Do You Create a Safe Work Zone?
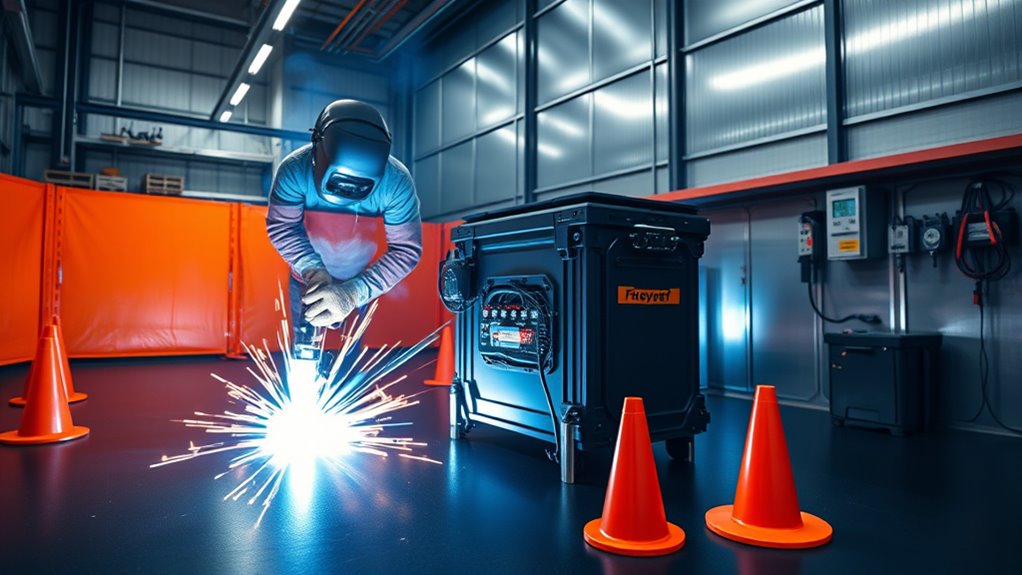
To create a safe work zone, start by controlling electrical energy, fire risk, ventilation, access, and ignition sources. The work area should make it obvious that EV high-voltage service and welding are in progress.
- Block access with cones, tape, signs, or barriers.
- Keep keys, fobs, chargers, and unauthorized scan tools away from the vehicle.
- Remove flammables or shield them from sparks and heat.
- Keep a suitable fire extinguisher within reach and assign fire watch when the job requires it.
- Provide ventilation so welding fumes move away from the breathing zone.
- Keep the floor dry and remove loose conductive tools.
- Protect high-voltage cables, orange connectors, battery enclosures, and nearby modules from sparks, heat, and spatter.
- Confirm cylinders are stored and labeled correctly before hot work begins; this oxygen cylinder storage guide explains why labeling and separation matter.
Also review general welding and cutting rules from OSHA’s welding standard: OSHA 29 CFR 1910.252.
How Does Welding Training Protect Technicians?
Proper welding and EV training protects technicians by turning a high-risk job into a controlled process. Training teaches you how to read OEM repair procedures, identify high-voltage components, select PPE, verify zero voltage, place the welding current return clamp, protect modules, and respond to a damaged pack.
Training also helps you avoid common repair errors, such as welding too close to a battery enclosure, allowing current to travel through electronics, overheating advanced steel, disturbing ADAS brackets without calibration, or releasing a vehicle without scan documentation.
EV work does not remove normal welding hazards. You still need eye protection, flame-resistant clothing, fume control, and clean metal preparation. If coated metal is involved, understand the hazards of coatings and contamination; this guide explains zinc contamination and galvanized steel preparation.
What Should You Document Before Releasing the Vehicle?
Documentation protects the technician, the shop, and the vehicle owner. It also proves that the repair was based on verified procedures instead of memory or assumptions.
- OEM procedure source, date, and revision used for the repair.
- Pre-repair scan report.
- High-voltage disable steps completed.
- Zero-voltage verification record.
- Photos of battery, cable, and repair-area condition before and after welding.
- Weld test results and joining method used.
- Post-repair scan report.
- ADAS calibration report when required.
- Notes on damaged-battery isolation or escalation if the pack was compromised.
If a warning light remains, a calibration fails, or the battery condition is uncertain, do not release the vehicle as complete.
Frequently Asked Questions
When working around high-voltage batteries, what precautions should be followed?
Use the OEM repair procedure, isolate the 12-volt and high-voltage systems, apply lockout/tagout control, wait the required discharge time, verify zero voltage, wear the required PPE, keep flammables away, and stop if the battery is damaged or unstable.
Do I need to disconnect my car battery before welding?
On a conventional vehicle, disconnecting the 12-volt battery is a common protection step. On an EV, do not stop there. You must follow the OEM sequence for both the 12-volt and high-voltage systems, then verify zero voltage before welding near HV components.
What safety precautions must welders take when working with high-voltage equipment?
Welders must keep unqualified people away, use trained high-voltage personnel, wear insulated and arc-rated PPE where required, use insulated tools, control stored energy, verify zero voltage, place the current return clamp correctly, and follow emergency procedures for damaged batteries.
Can you weld on electric cars?
Yes, qualified technicians can weld on electric cars when the OEM repair procedure allows it. The vehicle must be disabled, verified safe, protected from welding current paths, and inspected or scanned after repair. Do not weld on or open a high-voltage battery pack unless the OEM specifically authorizes that repair and you have the correct training and equipment.
Can I weld directly on an EV battery pack?
In normal collision repair, no. A high-voltage battery pack should not be welded, drilled, opened, or probed unless the OEM has a specific approved repair and the work is done by trained personnel with the required equipment. A damaged pack usually needs isolation, inspection, replacement, or authorized service.
Do I need ADAS calibration after welding?
You may need it if welding or related repairs affect sensor position, bumper structure, camera brackets, radar mounts, windshield position, suspension geometry, wheel alignment, or ride height. Always follow the OEM scan and calibration requirements for the vehicle.
Conclusion
Before welding near an EV high-voltage battery, use the OEM procedure, isolate both the 12-volt and high-voltage systems, verify zero voltage, control the work zone, and document the repair. Damaged battery packs need extra caution and trained support. After welding, scans, calibrations, and proof of proper repair matter just as much as the weld itself. Safe EV repair is not one step; it is a verified process from intake to release.
Sources
- OSHA 29 CFR 1910.147 — control of hazardous energy and lockout/tagout principles.
- OSHA 29 CFR 1910.333 — electrical safety work practices near energized parts.
- OSHA 29 CFR 1910.252 — general welding, cutting, and brazing safety requirements.
- NHTSA Interim Guidance for Electric and Hybrid-Electric Vehicles — emergency-response context for electric-drive vehicles.
- NFPA Emergency Response Guides — EV emergency-response guide access and first-responder reference material.
- IIHS-HLDI Advanced Driver Assistance — ADAS sensor and crash-prevention context.


