Best Welding Method for Classic Cars
What’s in This Article
- Best Welding Method for Classic Cars
- Set Up a Safe Welding Workspace
- Prep Rusted Metal Before Welding
- Choose MIG, TIG, Stick, or Gas
- Prevent Burn-Through on Thin Sheet Metal
- Repair Floor Pans, Rockers, and Patches
- Weld Thin Panels Without Warping
- Match Factory Spot Welds
- Protect Welds From Rust
- Avoid Common Classic Car Welding Mistakes
- Frequently Asked Questions
Classic car welding can save original metal, but one wrong setting can warp a panel in seconds. You need the right process, clean metal, tight fit-up, and safe heat control before you strike an arc. This guide shows you how to choose a welding method, prepare rusted metal, prevent burn-through, and protect finished welds from corrosion.
Quick Answer
For classic car restoration, you’ll usually get the best results with MIG welding for body panels, TIG welding for thin visible seams, and spot welding for factory-style joints. Work in a well-ventilated, fire-safe area, then clean rust, paint, oil, and grease down to bare metal. Use low heat, short stitch welds, and test pieces to reduce burn-through and warping.
Key Takeaways
- Use MIG welding for most classic car body panels because it’s easier to control.
- Use TIG welding when thin seams or visible repairs need a cleaner finish.
- Clean all metal to bare steel before welding to reduce weak welds and rust return.
- Use short stitch welds and cooling breaks to protect thin panels from warping.
- Seal finished welds with primer, rust inhibitor, and seam sealer before paint work.
Best Welding Method for Classic Cars
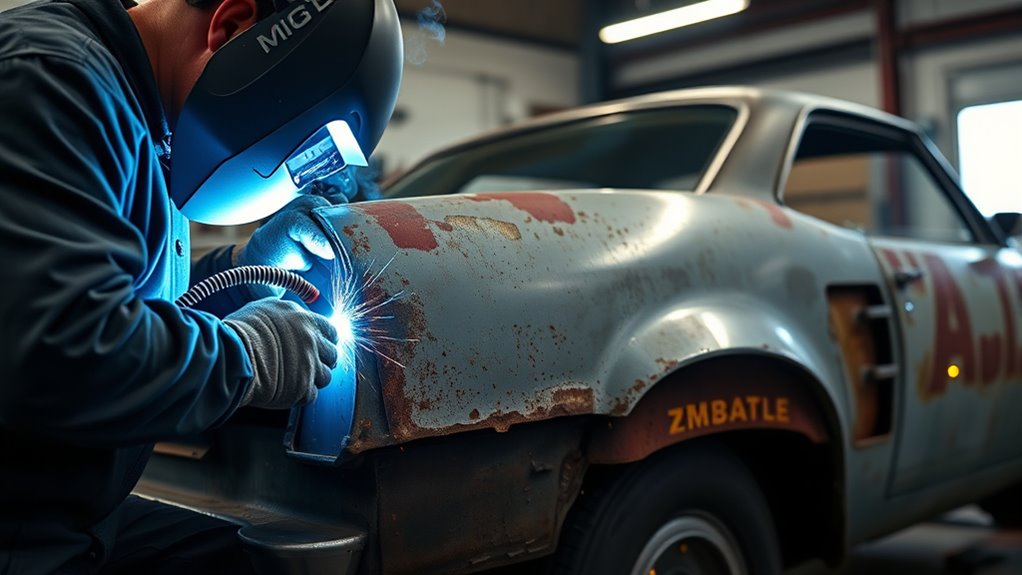
When you restore a classic car, the best welding method depends on the repair area, metal thickness, and finish you want. MIG welding is usually the go-to choice because you can control it well and make clean, strong welds on body panels and frame repairs.
MIG also helps you move at a steady pace, limit distortion, and keep the restoration moving without losing accuracy.
For thin metal, detailed seams, or visible areas, TIG welding gives you finer control and a smoother finish. That control helps you preserve the car’s lines and craftsmanship.
If you need factory-style construction, spot welding helps you join overlapping sheet metal panels with authentic-looking welds.
For period-correct work, oxy-acetylene welding can shape metal and repair parts without electricity. That can help when you work away from normal shop power.
Your best choice comes down to metal thickness, repair type, and the finish you want. Flux core welding can also help on thicker materials or outdoor repairs where shielding gas may not work well.
Pick the method that serves the car’s structure, not just the method you know best.
Products Worth Considering

Leading Manufacturer Of High-Quality Products

MULTIFUNCTIONAL: A 4-in-1 welder, capable of Flux Core MIG/Gas MIG/ Stick/Lift TIG (need to purchase extra tig lift torch). This unit caters to a wide range of welding applications and meets your various welding needs.
Set Up a Safe Welding Workspace
Before you strike an arc, set up a workspace that keeps fumes, fire, and gear under control. Open doors, run fans, or use fume extraction so your welding workspace stays well-ventilated.
Clear gasoline, oil, cardboard, rags, and anything else flammable from the area before you start. Lay a fire-resistant blanket or tarp around the car to shield paint, glass, and nearby surfaces from sparks.
Position the welder, cables, and gas cylinders so they stay stable, upright, and out of walkways. You need free movement without trip hazards.
Keep your fire extinguisher within arm’s reach, not across the shop, and confirm it’s charged and ready. Remember to wear appropriate protective clothing to reduce the risk of burns and injuries.
Warning: Never weld near fuel lines, open fuel tanks, oily rags, or hidden trim that can catch fire.
Learn the PASS method before you need it: pull the pin, aim at the base, squeeze the handle, and sweep side to side. A clean, organized setup gives you more control, protects your project, and helps you work with confidence.
Prep Rusted Metal Before Welding
With your workspace ready, inspect the rusted metal itself. Use a wire brush, grinder, or pick tool so you can see how deep the damage runs.
In classic car restoration, you need to strip away every trace of rust, paint, grease, and scale until the surface is bare and dependable for welding.
If corrosion has eaten through the panel, cut out the weak section with a cutting wheel or plasma cutter. Shape the opening so a replacement patch can fit tightly.
Clean the exposed edges carefully, then apply weld-through primer to fresh mating surfaces where the joint will close. This helps protect hidden areas that you can’t reach after welding.
Fit replacement panels tightly against the existing metal because large gaps invite weak joints and let moisture return.
When you prep rusted metal this way, you do more than repair a car. You build a stronger base for a longer-lasting restoration.
Clean metal also supports proper penetration and bonding, which helps you make higher-quality welds.
Choose MIG, TIG, Stick, or Gas
Choose MIG for body panels and frame patches because it’s easy to control and works on different metal thicknesses. MIG welding can also help with reducing spatter when you set the machine correctly.
Use TIG when you need precise, low-distortion welds on thin metal or visible parts that have to look clean.
Reach for stick welding on rusty, thicker steel only when the repair calls for deep penetration and appearance matters less. Use gas welding when you want period-correct work, heating, or metal-shaping flexibility without electricity.
Products Worth Considering
![ARCCAPTAIN 165A MIG Welder 110V/220V [Large LED Display] 4 in 1 Gasless/Gas MIG/Lift TIG/Stick Welding Machine Multiprocess Welder Machine, IGBT Inverter Welder with Synergy, 2T/4T](https://m.media-amazon.com/images/I/51GW2TUAy1L._SL500_.jpg)
4-IN-1 MIG Welder: The welder machine offers GAS MIG/Flux Core MIG/Lift TIG/ MMA welding modes (Note: WP-17V TIG torch must be purchased separately). It can easily handle welding stainless steel, carbon steel, and even thicker steel materials, meeting diverse welding requirements.
MIG For Body Panels
MIG is usually the best choice for classic car body panels because it’s easy to control and can make clean, strong welds with less risk of overheating thin sheet metal.
You can move faster across large repairs with MIG welding because the wire feeds continuously and keeps your bead steady. Set your voltage and wire speed carefully so you get enough penetration without burning through lightweight panels.
Use shielding gas, such as argon or a proper gas mix, to help keep contamination out and leave a smoother finish.
Because MIG handles different metal thicknesses well, you can repair body panels and still tackle heavier sections when needed. That flexibility helps you restore the car with fewer mistakes and less grinding.
TIG For Precision Work
When the repair needs tighter control than body-panel MIG work can give, TIG can be the better tool. TIG welding uses a tungsten electrode, so you can control heat, reduce distortion, and protect thin classic-car metal.
| Benefit | Why It Helps | Best Use |
|---|---|---|
| Tight heat control | Less warping | Fenders and patches |
| Shielding gas | Cleaner welds | Visible seams |
| Manual filler rod | Better accuracy | Intricate repairs |
| Alloy range | More versatility | Aluminum and stainless steel |
You feed the rod by hand, so you can place metal exactly where you need it. Use clean gas coverage to keep the bead bright and strong.
With practice, steady hands, and patience, you can get crisp results that preserve the car’s lines and avoid rough repairs.
Stick And Gas Options
Under the hood, the right process depends on the metal and the repair. If you’re tackling thick, rusty sections, stick welding gives you strong penetration and holds up on heavy-duty fixes, but it creates more spatter.
For body panels and frame repairs, MIG usually reduces frustration. It’s easier to learn, runs cleanly, and lets you move fast with less cleanup.
When you need exact control on thin metal or aluminum, TIG delivers the finest welds, but it demands steady hands.
Gas welding stays useful because it doesn’t need electricity, and you can cut, heat, and shape with one setup.
Choose the method that matches the job, your skill, and the finish you want.
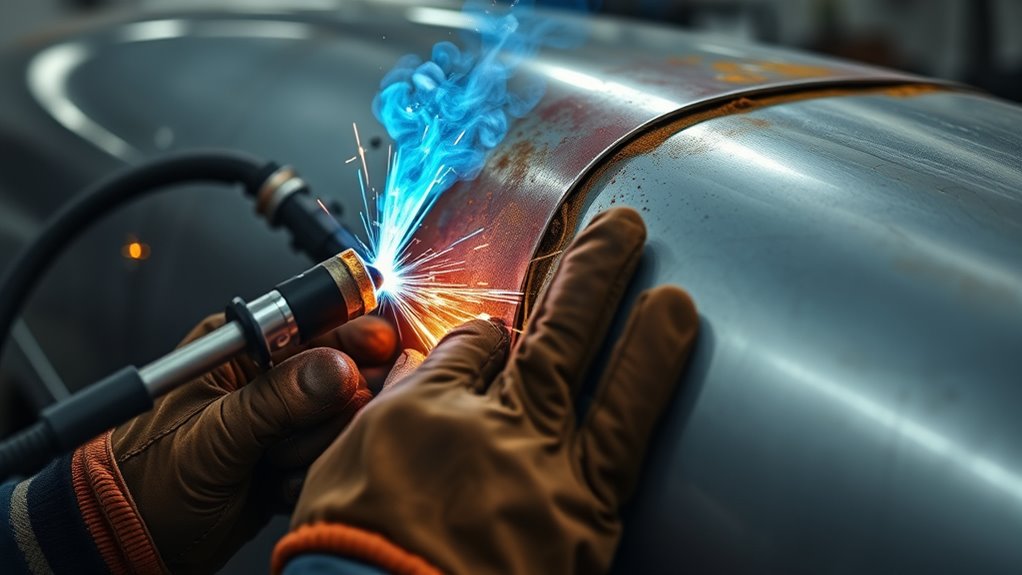
Prevent Burn-Through on Thin Sheet Metal
To keep thin sheet metal from burning through, use low heat settings and match your wire feed speed to a controlled travel speed. Use short stitch welds instead of long beads so you keep heat buildup down and control the weld pool.
Before you start, make sure the panels fit cleanly and tightly, because gaps make burn-through much more likely. Stitch welding techniques can help you manage heat and reduce warping.
Low Heat Settings
Thin sheet metal needs a low heat setting if you want to avoid burn-through and preserve the panel’s strength. Test your welder on scrap metal from the same panel or the same gauge before you touch the car.
Use the lowest setting that still forms a clean bond. Watch the puddle closely and stop before the edge overheats.
- Test first on scrap metal of the same thickness.
- Set the lowest power that still creates a clean bond.
- Watch the puddle closely and stop before the edge overheats.
This approach keeps thin sheet metal stable, limits extra grinding, and reduces rework.
When you tune heat precisely, you protect the car’s original shape and move toward a cleaner restoration.
Short Stitch Welds
Use short stitch welds to keep heat under control and avoid burn-through on thin sheet metal.
With short stitch welds, you place short beads, then pause and let the panel cool before the next one. This gives you better control, reduces distortion, and helps the metal hold its shape.
Set your welder to lower power, so you can manage the puddle without overpowering the panel. Keep your travel speed steady to spread heat evenly and create clean welds.
You should also clean both sides of the joint first because contamination can make you add more heat than the panel can handle.
Work patiently, stitch by stitch, and you’ll protect the panel while building solid repairs on classic car bodywork.
Clean, Tight Fit
A clean, tight fit between panels is one of the best ways to stop burn-through on thin sheet metal. When you reduce gaps, you control heat and keep your weld where it belongs.
Clean every edge with a grinder or wire brush, then clamp or magnet the pieces so they can’t shift.
- Check the joint for a clean, tight fit before you strike an arc.
- Remove rust, paint, and contamination from both sides.
- Set your welder low and stitch weld in short bursts.
That approach cuts heat input, reduces warping, and protects delicate steel. You’re not fighting the metal; you’re guiding it with precision.
In classic car restoration, that control helps you build strong repairs without sacrificing original panels.
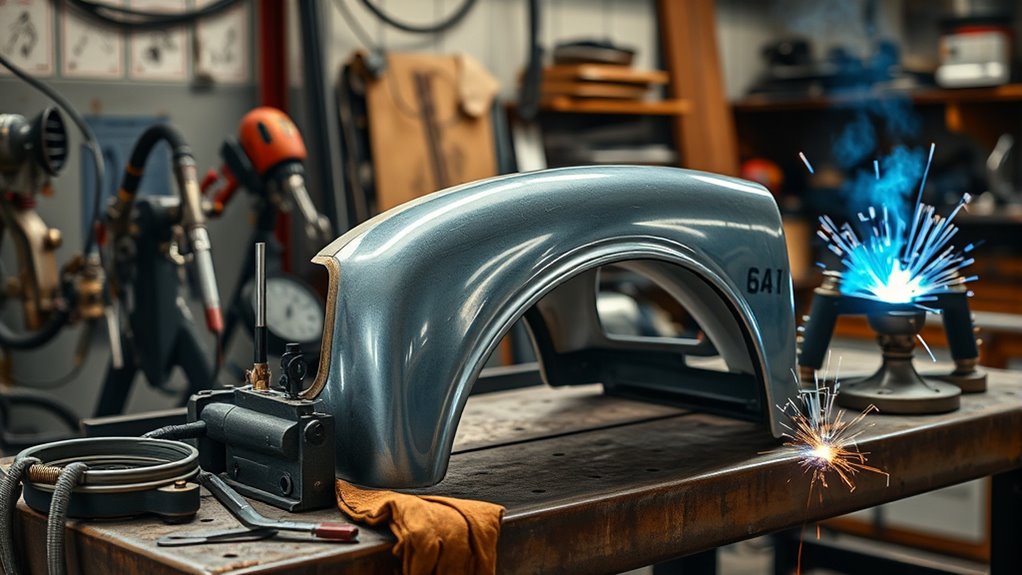
Repair Floor Pans, Rockers, and Patches
Start by cutting back every rusted or weakened section of the floor pan or rocker until you reach solid metal. Then fit a replacement patch made from steel that matches the original panel as closely as possible.
Before you strike an arc, clean both patch edges and the surrounding metal to bare steel so your joint bonds fully and rust can’t return. On the back side, brush on weld-through primer, especially where moisture can hide.
When you fit the patch, aim for a close, even joint so the weld can penetrate without burning through thin sheet. For rockers, cut out the damaged section, shape the new piece to match the original structure, and MIG weld it in place for a clean, strong repair.
Control heat input through short welds, cooling breaks, and test pieces before the final repair.
Done carefully, this process frees the car from decay and restores its body to usable strength.
Weld Thin Panels Without Warping
Thin sheet metal can move fast under heat, so keep your welder on a low power setting. Make short stitch welds instead of long seams.
On thin panels, TIG welding gives you tighter control, but you still need to move with discipline. Clean both sides first because paint, oil, and rust can force you to add heat you don’t want.
- Tack a few spots, then stop.
- Weld one short section, then let it cool.
- Use a backing bar or block behind the joint to absorb heat and help hold shape.
You’re not trying to flood the panel. You’re guiding it into place with small, deliberate hits.
Let each area cool before you return, and avoid chasing a full bead in one pass. That steady rhythm keeps distortion down and preserves the clean lines your classic deserves.
When you MIG weld, using short-circuit transfer mode can help reduce heat input, which can lower the risk of warping.
Pro tip: Move around the panel instead of welding one area from start to finish.
Match Factory Spot Welds
Factory spot welds matter because they hold overlapping panels tight while leaving the clean, original look you want on a classic body. When you match them, you preserve the car’s original style and avoid rough-looking repairs.
Use spot welding on sheet metal seams, not long beads, and work in short runs to keep heat in check. Proper surface preparation helps you avoid porosity and create stronger joints.
| Step | Action |
|---|---|
| Mark | Transfer weld points to both panels |
| Set | Dial the welder for correct voltage and pressure |
| Test | Check fit before committing |
| Weld | Make spaced, even spots |
That layout helps you copy the original spacing and strength. Each spot should fuse the layers with heat and pressure, without burning through or distorting the metal.
A weld-through primer on contact areas supports the repair while you weld. Keep your marks aligned, clamp the panels firmly, and confirm each weld lands where the factory placed it.
Precision here keeps your restoration honest.
Protect Welds From Rust
Before you move on to paint, protect every weld from moisture and corrosion. Clean the area thoroughly, apply weld-through primer before welding where needed, and remove dirt, oil, or rust that could weaken the joint.
In classic car welding, rust wins when you leave steel exposed. Build your defense early and keep it consistent.
- Clean all mating surfaces until they’re bare, dry, and contaminant-free.
- Coat hidden joints with weld-through primer so the weld bonds and stays guarded.
- After welding, grind excess material, then apply a rust inhibitor to every exposed edge.
Seal finished seams with automotive seam sealer after the weld area is ready for coatings. This helps block air and water before final paint work.
Then inspect welded areas regularly, especially on cars that stay outdoors or drive on wet roads.
When you control corrosion, you keep your project durable and ready for the miles ahead. If you use stick welding during restoration, store low hydrogen electrodes in a controlled environment to reduce moisture absorption.
Avoid Common Classic Car Welding Mistakes
Classic car welding can go wrong fast when you skip the basics, so start by avoiding the mistakes that weaken repairs.
Clean every panel to bare metal before you strike an arc. Rust, paint, and oil contaminate the joint and invite corrosion.
Set amperage to match the material. Too much heat can burn through thin sheet, while too little heat can leave weak welds on thicker steel.
Check joint design and fit-up closely so gaps don’t open under stress.
Wear proper gloves, eye protection, and a welding jacket. Keep your workspace clear of fuel, rags, and clutter.
After welding, grind down excess metal, inspect the bead, and apply rust inhibitor. Regularly inspect and clean the wire feeding mechanism so the wire feeds smoothly.
This disciplined process keeps classic cars solid. It also gives you better control when you refuse shortcuts and demand clean, durable repairs.
Frequently Asked Questions
What Is the Best Type of Welding for Car Restoration?
MIG welding is usually your best choice for car restoration because you get clean, strong welds with less fuss. For factory-style repairs, use spot welding, and don’t skip metal preparation before you weld.
What Are Common Car Restoration Mistakes?
Common car restoration mistakes include poor rust removal, weak panel alignment, rushed heat control, and missing photos during disassembly. You should document parts, prep metal well, choose the right weld, and finish surfaces thoroughly.
What Is the Golden Rule in Welding?
You should start with clean, bare metal; that’s the golden rule in welding. Good joint preparation, proper settings, and welding safety help you get strong, clean welds while reducing contamination, defects, and rework.
Is TIG or MIG Better for Car Restoration?
TIG is better for precision, but MIG is better for most car restoration work because it’s faster and easier. You’ll get TIG advantages on thin, visible panels and MIG versatility on larger repairs.
Can You Weld Over Rust on a Classic Car?
You should not weld over rust on a classic car. Rust weakens the joint, contaminates the weld, and can return under paint if you trap it inside the repair.
How Do You Stop Classic Car Panels From Warping?
Use low heat, short welds, cooling breaks, and tight panel fit-up. Move around the panel instead of building too much heat in one area.
Conclusion
The most important classic car welding rule is simple: match the welding method to the repair and control heat at every step. Clean the metal, fit each patch carefully, and test your settings before you work on the car.
Keep your workspace safe, your panels aligned, and your welds protected from rust. When you avoid shortcuts, your restoration has a better chance to stay strong, straight, and road-ready for years.


