
In multi-pass welding, a weld pass is one controlled deposit of weld metal laid into a joint. A finished weld may use one pass or several passes, depending on the base metal thickness, groove design, welding process, position, filler size, and the required weld quality. The goal is not simply to add more metal. The goal is to make each pass fuse cleanly with the base metal and the previous layer while staying within the approved procedure, drawing, or code requirement.
Quick Answer
A weld pass is one run of weld metal placed along a joint. In multi-pass welding, the root pass starts the joint, fill passes build thickness, and the cap pass finishes the surface. Each pass must be cleaned, controlled, and inspected before the next layer is added.
Key Takeaways
- A weld pass is a single bead or layer of weld metal placed during one travel of the torch, electrode, or wire.
- Multi-pass welding is common on thicker groove welds, large fillet welds, pipe welds, and code work where one pass cannot fill the joint correctly.
- The usual sequence is root pass, hot pass when used, fill passes, and cap pass.
- Clean and inspect every pass before welding over it, especially with stick, flux-core, and submerged arc processes that leave slag.
- Follow the WPS, drawing, code, or instructor guidance for pass count, amperage, voltage, travel speed, preheat, and interpass temperature.
At a Glance
| Time Required | Seconds to minutes per pass, plus cleaning and inspection time between passes |
| Difficulty | Beginner to intermediate for practice welds; advanced for structural, pipe, pressure, or code-critical welds |
| Tools Needed | Welding machine, correct filler metal, helmet, gloves, jacket, clamps, wire brush, chipping hammer, grinder, temperature crayon or infrared thermometer when required |
| Cost | Low for practice coupons; higher for qualified work because inspection, procedure control, consumables, and testing may be required |
What Is a Weld Pass in Multi-Pass Welding?
A weld pass is one complete run of weld metal placed along a joint. You may also hear welders call it a bead, run, layer, or pass, depending on the shop and the type of weld. In a single-pass weld, one bead completes the required weld size. In a multi-pass weld, several beads are stacked or placed side by side until the groove or fillet reaches the required size and shape.
Welding itself joins materials by heating and melting the base metal, usually with shielding and sometimes with filler metal, to form a joint with similar properties to the materials being joined, as explained by the Canadian Centre for Occupational Health and Safety. In a multi-pass weld, that joining happens in controlled stages rather than in one large deposit.
The first pass in a groove weld is usually the root pass. It starts the weld at the deepest part of the joint. After that, you may add a hot pass, fill passes, and a cap pass. The exact sequence depends on the welding process, joint design, weld position, and the written welding procedure. Understanding amperage ranges can help with practice, but the approved procedure or machine setup should control production welds.
Note: For structural, pressure, vehicle-frame, roll-cage, lifting, trailer, or pipe work, do not guess the number of passes. Follow the drawing, weld symbol, WPS, code, or a qualified supervisor’s instructions.
Weld Pass Sequence: Root, Hot, Fill, and Cap
Most multi-pass groove welds follow a simple pattern. The names may vary by trade, but the job of each layer stays similar.
| Pass Type | Main Job | What to Check |
|---|---|---|
| Root pass | Starts the weld at the root of the joint and establishes the base for all later passes. | Required penetration, fusion, alignment, root gap, and absence of burn-through or lack of fusion. |
| Hot pass | Often used after the root, especially in pipe and groove work, to refine the root area and help remove minor slag or irregularities. | Clean root surface, correct heat, no trapped slag, and interpass temperature within limits. |
| Fill passes | Build the joint thickness until it is nearly flush with the surface. | Sidewall fusion, bead placement, no undercut, no slag inclusion, and no excessive buildup. |
| Cap pass | Finishes the weld face and provides the final visible surface. | Smooth profile, correct width, proper tie-in at the toes, and no overlap or excessive reinforcement. |
Why Multiple Passes Matter for Weld Strength
Multiple passes help when one pass cannot properly fill the joint, reach the needed weld size, or control heat. This is common on thicker material, deep groove welds, large fillet welds, pressure piping, and work where the joint must pass inspection.
Multi-pass welding can improve joint integrity because each pass gives you another chance to control fusion, bead shape, and heat input. That does not mean more passes automatically make a weld stronger. A clean two-pass weld that follows the procedure can be stronger than a messy five-pass weld with slag trapped between layers.
Complete Fusion and Required Penetration
The root pass is critical because every later pass depends on it. If the root has lack of fusion, poor tie-in, or trapped slag, later layers may hide the defect instead of fixing it. When a complete-joint-penetration weld is specified, the root must meet the required penetration. When a partial-penetration or fillet weld is specified, the goal is to meet that design, not to over-weld the joint.
Controlled Heat Input
Heat input affects the weld pool, the heat-affected zone, distortion, residual stress, and the chance of cracking. You control heat mainly through amperage, voltage, travel speed, arc length, bead size, preheat, and cooling time. Mastering welding parameters matters because too little heat can cause lack of fusion, while too much heat can cause burn-through, undercut, excessive reinforcement, or distortion.
Better Control on Thicker Joints
Thicker joints often need several smaller passes instead of one oversized pass. Smaller controlled beads can help you maintain puddle control, fuse the sidewalls, and keep the weld profile within limits. On fillet welds, the correct size also matters. Oversized welds can waste filler metal, add heat, and increase distortion, so check the required size and any limits such as the maximum fillet weld size.
A multi-pass weld is only as good as the layer underneath it. Clean, inspect, and correct each pass before you bury it under the next one.
How Many Weld Passes Do You Need?
The number of weld passes depends on the joint, not on a fixed rule. A thin lap joint may need only one pass. A thick V-groove, pipe joint, or large fillet weld may need several. For practice work, estimate pass count by looking at groove volume, filler diameter, bead size, and how much weld metal each pass can place without losing fusion or puddle control.
For production work, do not calculate pass count by guesswork alone. Use the WPS, weld symbol, qualified procedure, or instructor direction. A WPS may control process, filler metal, current range, voltage range, travel speed, shielding gas, preheat, interpass temperature, cleaning method, and inspection requirements.
| Factor | How It Affects Pass Count |
|---|---|
| Material thickness | Thicker material usually needs more weld metal and more controlled heat input. |
| Groove angle and root opening | A wider groove takes more fill metal, while a narrow groove may be harder to fuse at the sidewalls. |
| Process and filler size | Stick, MIG, TIG, flux-core, and submerged arc all deposit metal at different rates. |
| Weld position | Vertical and overhead welds often need smaller beads than flat-position welds. |
| Inspection requirement | Code work may require stricter bead placement, cleaning, temperature control, and documentation. |
Products Worth Considering

201 STAINLESS STEEL - Made of Premium Type 201 stainless steel with excellent corrosion and heat resistance. Ideal for consistent practice across MIG, TIG, Stick, and wire-feed welding applications.

Crafted with precision, our steel plates are laser-cut, offering unparalleled edge smoothness and dimensional accuracy compared to stamped and sheared parts.

🎲Superior Processing: Our steel plates are all laser-cut, providing edge and overall flatness that is unmatched by other stamped and sheared components.
Essential Elements of a Weld Pass
Every weld pass has three essentials: a prepared joint, a controlled weld pool, and a clean surface before the next layer. If one of these fails, the finished weld can look acceptable on the outside while hiding defects inside.
Joint Preparation
Good joint preparation starts before you strike an arc. Remove oil, paint, heavy rust, mill scale, moisture, and other contamination from the weld area. Set the root opening, land, bevel, or fit-up according to the drawing or WPS. Common bevel angles may fall around 30 to 37.5 degrees per side for some groove preparations, but that is not universal. The correct angle depends on the process, material, access, backing, and code requirement.
Heat Management Techniques
Effective heat management keeps the weld pool hot enough to fuse, but not so hot that it distorts the part or damages the base metal. Cooling intervals between passes may be required, but you should not let the joint cool below any required preheat range. If the WPS sets a maximum interpass temperature, measure it before continuing.
| Heat Management Technique | Impact on Weld Quality |
|---|---|
| Control travel speed | Helps maintain bead size, penetration, and heat input. |
| Monitor interpass temperature | Helps prevent overheating and keeps the weld within procedure limits. |
| Use the correct bead size | Reduces trapped slag, poor fusion, and excessive reinforcement. |
| Sequence passes correctly | Helps balance shrinkage and reduce distortion. |
Cleaning Between Passes
Cleaning between passes is not optional on slag-producing processes. Stick welding, flux-core welding, and submerged arc welding can leave slag that must be removed before the next pass. Use a chipping hammer, wire brush, grinder, or approved cleaning method. For TIG and MIG, you may not have slag, but you still need to remove soot, oxides, spatter, silicon islands, or contamination before welding over the surface. Good cleaning helps prevent porosity issues and slag inclusion.
Preparing for Each Weld Pass
Before each pass, treat the weld as a new start. The previous bead becomes the foundation for the next one, so inspect it before adding more metal. Small defects are easier to repair while they are still visible.
| Step | Action | Tools Needed |
|---|---|---|
| Joint cleaning | Remove oil, rust, paint, moisture, slag, spatter, and loose oxides. | Wire brush, chipping hammer, solvent approved for welding prep, grinder when needed |
| Fit-up check | Confirm root gap, alignment, bevel, backing, and tack weld condition. | Measuring tools, clamps, wedges, fixtures |
| Temperature check | Confirm preheat and interpass temperature when required. | Temperature crayon, contact thermometer, infrared thermometer |
| Pass timing | Weld the next pass only after cleaning, inspection, and temperature checks are complete. | Welding machine, correct filler metal, WPS or setup chart |
Warning: Welding can expose you to harmful fumes, gases, UV radiation, burns, electric shock, and fire hazards. Use proper PPE, keep fumes out of your breathing zone, provide ventilation, remove flammables, and never weld in a confined space without proper controls. OSHA’s welding fume guidance notes that ventilation and respiratory protection may be required when work practices do not keep exposures at safe levels.
Executing a Successful Weld Pass
Executing a successful weld pass is about control. You want a steady arc, consistent travel speed, correct electrode or gun angle, and enough heat to tie into the previous pass and sidewalls without undercutting the base metal.
- Set the machine for the joint: Match amperage, voltage, wire speed, polarity, filler metal, and shielding gas to the process and material.
- Start with a clean root: A dirty or misaligned root makes every later pass harder to control. For butt joints, maintaining the recommended root gap helps the root pass fuse correctly.
- Watch the puddle edges: Make sure the weld pool wets into both sides of the joint. Poor sidewall fusion is one of the main causes of hidden defects.
- Keep bead size reasonable: Oversized beads can trap slag and add too much heat. Too-small beads may leave lack of fusion.
- Stop and inspect: After each pass, check for cracks, undercut, slag, porosity, overlap, and missed edges before welding again.
Pro Tip: If the bead is hard to clean, has sharp valleys, or leaves deep grooves beside it, fix the technique before adding another pass. The next pass will not reliably repair a bad bead underneath.
Common Challenges With Weld Passes
Most multi-pass weld problems start with poor fit-up, poor cleaning, wrong heat input, or rushed inspection. The table below shows common defects and what usually causes them.
| Challenge | Likely Cause | Fix |
|---|---|---|
| Slag inclusion | Slag left between passes, poor bead overlap, or deep valleys beside the bead. | Clean thoroughly, adjust bead placement, and grind out trapped slag before continuing. |
| Porosity | Moisture, contamination, poor shielding, long arc, or dirty base metal. | Clean the joint, check gas flow, dry consumables when required, and shorten the arc. |
| Incomplete fusion | Low heat, fast travel, wrong angle, or bead placed without tying into the sidewall. | Adjust parameters, slow down slightly, and watch the puddle wash into both edges. |
| Undercut | Too much heat, wrong angle, excessive travel speed, or poor edge fill. | Reduce heat if needed, adjust travel speed, and pause enough at the edges. |
| Distortion | Excessive heat input, too many large beads, poor sequencing, or weak fixturing. | Use smaller beads, alternate sequence when allowed, clamp properly, and control interpass temperature. |
If you grind between passes, inspect wheels and discs before use and control sparks around flammables. Good grinder habits matter because grinding is often part of weld preparation and repair. Review angle grinder spark fire risk prevention when your cleanup work creates hot sparks near combustible material.
Products Worth Considering

Included: (1) DeWalt N441218 Angle Grinder Guard Replacement for Angle Grinder DCG414B

Part Number: 28-41-0034 6" T27 Guard Stamping
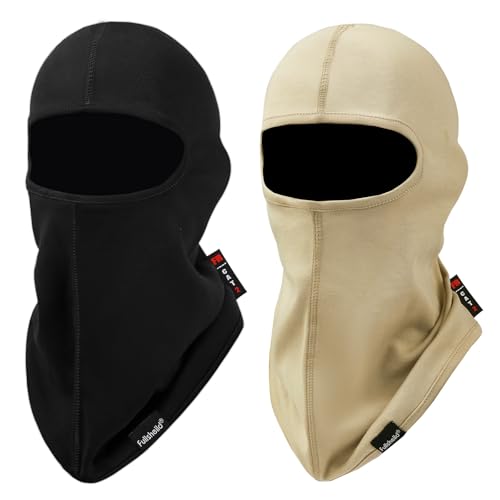
➤Material: 7oz FR balaclava is made of 100% cotton. Soft, breathable, lightweight and moisture-wicking, ensuring all day comfort and durability. FR face mask will remain arc and flame retardant regardless of the washes and wear cycles
Best Practices to Ensure High-Quality Weld Passes
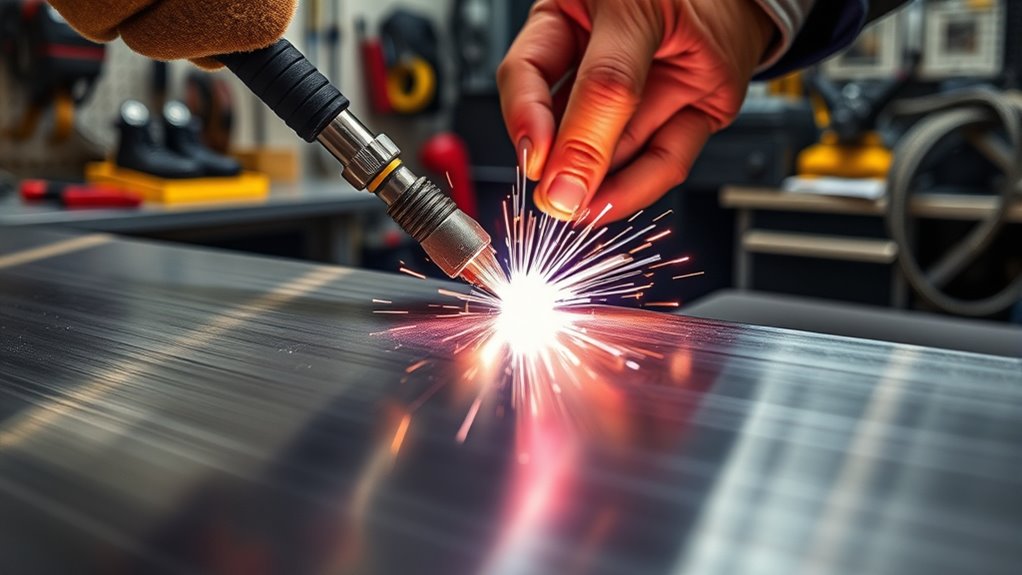
High-quality weld passes come from repeatable habits. Do the same important checks every time, especially when the weld will be inspected or loaded in service.
- Follow the WPS or weld symbol. Do not change process, filler, preheat, or pass sequence on code work unless the procedure allows it.
- Clean before welding and between passes. Remove slag, oxides, paint, oil, moisture, and loose spatter.
- Use the right bead shape. Avoid tall, narrow beads that can trap slag and wide, cold beads that may not fuse at the edges.
- Control heat input. Balance amperage, voltage, travel speed, and interpass temperature.
- Watch shielding gas on TIG and MIG. Poor shielding can create porosity and oxidation. Learn how proper gas flow affects TIG weld quality.
- Repair defects before covering them. Grind or gouge out unacceptable defects, clean the area, and re-weld according to the procedure.
Process-Specific Notes for Weld Passes
Different welding processes handle passes differently. Use these notes as general guidance, then follow the procedure for the actual job.
| Process | Pass Considerations |
|---|---|
| SMAW / Stick | Remove slag completely between passes. Watch arc length, rod angle, and travel speed to avoid slag inclusion and undercut. |
| FCAW / Flux-core | Clean slag and spatter between passes. Use the correct polarity, stickout, and gun angle for the wire type. |
| GMAW / MIG | Watch for lack of fusion if travel is too fast or voltage and wire speed are poorly matched. Clean silicon islands when needed. |
| GTAW / TIG | Keep filler wire clean, maintain shielding, and avoid touching tungsten to the weld pool. TIG is often used for precise root passes. |
| SAW / Submerged Arc | Remove slag and unused flux as required. This process can deposit a lot of metal, so heat input and procedure control are important. |
How to Inspect Weld Passes for Defects
Inspecting weld passes is easier before the next layer covers them. Start with visual inspection. Look at the whole bead, not just the center. The toes, starts, stops, tie-ins, and crater areas are common problem spots.
- Check bead shape: Look for excessive crown, deep valleys, overlap, or uneven width.
- Check the toes: Look for undercut, poor tie-in, and lack of fill at the edges. If you need help with this defect, review how to prevent undercut in welding.
- Check for surface defects: Look for porosity, cracks, arc strikes, slag, and trapped spatter.
- Check cleanliness: Remove slag and oxides until the next pass can fuse into clean metal.
- Use NDT when required: Visual inspection may not find internal defects. Code or critical welds may require magnetic particle, dye penetrant, ultrasonic, or radiographic testing by qualified personnel.
The OSHA welding standards page points to regulations for welding, cutting, and brazing in general industry, construction, and maritime work. Inspection acceptance, however, usually comes from the applicable weld code, drawing, specification, or project procedure.
How Weld Passes Affect Structural Integrity
Each weld pass affects structural integrity because it changes the shape, fusion, heat history, and stress pattern of the joint. A good root pass gives the weld a sound foundation. Good fill passes build the required weld size without trapping defects. A good cap pass protects the surface profile and gives inspectors a clear view of the finished weld.
Poor passes do the opposite. Lack of fusion can leave weak internal boundaries. Slag inclusion can interrupt the weld metal. Porosity can reduce sound metal area. Excessive heat can increase distortion and may contribute to cracking in sensitive materials. This is why multi-pass welding rewards patience: each layer must be good enough to support the next one.
Frequently Asked Questions
What is a multiple pass weld?
A multiple pass weld is a weld made with two or more passes. Each pass adds weld metal to the joint until the required size, profile, and fusion are reached. Multi-pass welding is common on thicker groove welds, pipe welds, and larger fillet welds.
What is a weld pass?
A weld pass is one run of weld metal placed along a joint. In a single-pass weld, that one run completes the weld. In a multi-pass weld, several passes are layered or placed side by side to complete the joint.
What is the first pass of a multi-pass weld commonly called?
The first pass of a multi-pass groove weld is commonly called the root pass. It is placed at the root of the joint and supports the remaining passes. When the weld requires full penetration, the root pass is especially important.
How do you calculate weld passes?
For practice work, estimate weld passes by comparing the joint volume with the bead size you can safely deposit. For production or code work, use the WPS, weld symbol, or qualified procedure. Material thickness, groove angle, filler size, process, position, and inspection requirements all affect pass count.
Do you have to clean between weld passes?
Yes. Clean between passes before welding over the previous bead. Stick, flux-core, and submerged arc welds usually need slag removal. MIG and TIG welds may need spatter, soot, oxide, or silicon-island cleanup. Never cover a visible defect without repairing it first.
What is the cap pass in welding?
The cap pass is the final visible pass on a multi-pass weld. It should tie into both sides smoothly, meet the required profile, and avoid overlap, undercut, cracks, or excessive reinforcement.
Conclusion
In multi-pass welding, each weld pass is one controlled step toward a sound finished joint. The root pass starts the weld, the fill passes build the required size, and the cap pass finishes the surface. Strength comes from correct preparation, clean metal, proper heat control, full fusion where required, and careful inspection after every layer. Treat each pass as important, because a defect hidden between layers can weaken the entire weld.
Sources
- CCOHS: Welding Overview of Types and Hazards — supports welding basics, common processes, and safety hazards.
- OSHA: Welding, Cutting, and Brazing — supports safety and regulatory context for welding work.
- OSHA Fact Sheet: Controlling Hazardous Fume and Gases during Welding — supports fume, gas, ventilation, confined-space, and respiratory protection guidance.
- OSHA: Welding, Cutting, and Brazing Standards — supports standards context for welding, cutting, and brazing.
- OSHA: Welding, Cutting, and Brazing Hazards and Solutions — supports workplace hazard control and safety planning.




