How to Butt Weld Auto Body Panels for a Flush Finish
What’s in This Article
- Why Butt Welding Works Well for Auto Body Repairs
- Prepare Your Welding Workspace and Tools
- What You’ll Need Before You Begin
- Step-by-Step Guide to Cutting and Fitting Patch Panels
- Tack Welding: Keep Panels Aligned Before Final Welding
- Effective Butt Welding Techniques for a Smooth Finish
- Safety Tips for Butt Welding Auto Body Panels
- Finalizing Welds: Grinding and Smoothing Techniques
- Common Mistakes to Avoid
- Frequently Asked Questions
Butt welding auto body panels can look simple, but thin sheet metal punishes small mistakes fast. Too much heat, a poor gap, or weak prep can leave warping, pinholes, and a rough seam. This guide shows you how to prep, fit, tack, weld, grind, and smooth patch panels for a cleaner flush finish.
Quick Answer
To butt weld auto body panels, cut the patch panel to fit, leave a small and even gap, then tack weld around the seam. Use short stitch welds and let the metal cool often so you reduce warping. After welding, grind the bead carefully, planish low spots, sand the area, and seal the bare metal before primer and paint.
Key Takeaways
- Keep the patch panel fit tight and even before you strike an arc.
- Use small tack welds first so the panels stay aligned.
- Control heat with short welds and cooling breaks to reduce warping.
- Grind slowly so you don’t thin or overheat the sheet metal.
- Seal and prime the repaired area to help reduce future rust.
Estimated total time: plan on several hours for a small patch repair, depending on panel size, rust removal, fitment, welding skill, and finish work.
Why Butt Welding Works Well for Auto Body Repairs
Butt welding works well in auto body repairs because it joins two panel edges on the same plane. This helps you create a seamless joint with fewer moisture traps than many overlapping seams.
Butt welding creates a flush seam that helps reduce moisture traps and gives thin sheet metal a cleaner repair surface.
This technique also helps you keep the repair area close to the original panel shape. That matters when you want a smooth surface for filler, primer, and paint.
A clean butt weld can also reduce the need for heavy filler. You still may need a thin skim coat, but the metal work should do most of the job.
Butt welding also helps with precise alignment. When you fit the panel well, you can keep the vehicle’s body lines and panel curves closer to the original shape.
Good heat control matters as much as fitment. If you rush the weld, thin metal can warp, shrink, or burn through.
This skill helps you restore your vehicle’s structure and appearance with more control. Understanding maximum fillet weld size can also help you avoid poor weld sizing during other repair tasks.
Prepare Your Welding Workspace and Tools
Start with a clean, stable, and well-lit workspace. Remove clutter, dust, oil, and anything that can catch fire.
Keep your MIG welder, grinder, clamps, hammer, dolly, and safety gear close enough to reach. A tidy setup helps you work slower, safer, and with better control.
Good lighting helps you see the panel gap, tack welds, and heat marks. Proper equipment setup also helps you avoid poor fitment and uneven weld beads.
Wear the right protective clothing before you start. Welding can expose you to sparks, hot metal, bright arc light, and fumes.
Workspace Organization Essentials
A well-organized workspace helps you weld with fewer distractions. It also helps reduce common safety risks.
Set up in a well-ventilated area and keep flammable items away from your welding zone. Move paper, rags, fuel, paint, solvents, and loose dust before you weld.
Keep your welder, clamps, grinders, and hand tools in set places. Use a sturdy table or stand for cutting and fitting patch panels.
Keep cleaning supplies nearby, such as degreaser, rust remover, and clean shop towels. Clean metal helps reduce weld contamination and improves your final result.
Store welding consumables, including wire and shielding gas, where they stay dry and protected. Damaged or dirty consumables can make welding harder.
Tool Selection Tips
Choose tools that help you cut, fit, clamp, weld, and finish the repair with control. Thin auto body sheet metal needs care because it heats fast.
A MIG welder can work well for thin sheet metal when you set it up correctly. Use the correct wire, gas, and settings for the panel thickness.
Use a grinder with a thin cutting disc for careful trimming. A hammer and dolly help you shape and smooth the metal after tacking or welding.
Use clamps or panel holders to keep patch panels stable. Check the fit and alignment before each set of tack welds.
If you use TIG welding, prepare the right tungsten electrodes and filler wire for the base metal. TIG can give strong control, but it takes more skill and clean metal prep.
Put safety first. Use a welding helmet, gloves, eye protection, hearing protection, and flame-resistant clothing.
What You’ll Need Before You Begin
Gather your tools before you cut into the panel. Stopping halfway to search for tools can lead to rushed work and poor fitment.
- MIG welder or TIG welder set for thin sheet metal
- Auto body patch panel or sheet metal of matching thickness
- Welding wire or filler rod that matches the base metal
- Shielding gas, if your welding process needs it
- Angle grinder with a thin cutting disc and sanding discs
- Clamps, magnets, or panel holders
- Scriber, ruler, marker, and straight edge
- Hammer and dolly set
- Rust remover, degreaser, and clean towels
- Welding helmet, gloves, jacket, safety glasses, and hearing protection
- Fire extinguisher rated for workshop use
Warning: Disconnect or protect nearby electrical parts, fuel lines, trim, and interior materials before welding on a vehicle.
Products Worth Considering

Multipurpose Fit: Repairs at least 98% of the plastics on the market. Suitable for repairing: bumper, dashboard, lamp holder, plastic ring, radiator, spoiler, handles, headlights, plastic wings, car and motorcycle plastic device, etc

Highly Durable Design: The shell of stud welder kit is made of high-quality ABS body, has good stability under high temperature conditions, withstand temperature of 93-118℃, and the movement is pure copper electrode. This welder stud kit is wear-resistant, strong and sturdy.

Professional Dent Removal: VEVOR Stud Welder Dent Puller offers a fast and efficient solution for removing dents from car body, all while providing precise dent pulling and controlled force for a professional-grade dent repair every time.
Step-by-Step Guide to Cutting and Fitting Patch Panels
A clean weld starts with a clean fit. Measure twice, cut slowly, and test-fit the patch before you tack it in place.
Use a scriber for accurate marking. Good lines help your new patch match the opening without wide gaps or tight spots.
Careful fitment also supports proper welding techniques. A poor gap makes even a good welder struggle.
Products Worth Considering

Reinforced mesh provides supportive backing to fill holes

AUTO SHEET METAL KIT: Suitable for repairing metal components or panels on cars, trucks, and other automotive vehicles. The aluminized finish gives the steel vastly improved anti corrosion and rust properties, extending the lifetime of your sheet metalworking repairs. Excellent properties make this 20 gauge aluminized sheet metal ideal for welding, forming, and once in place for painting.
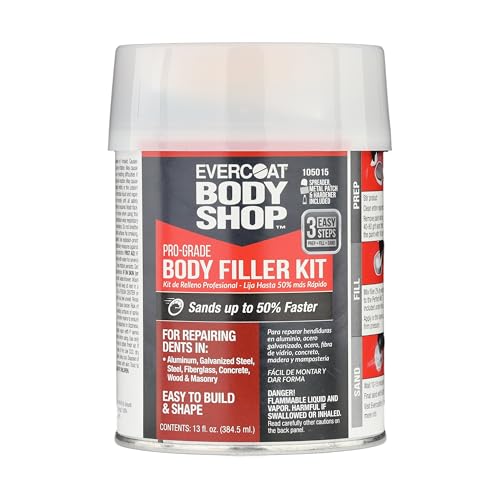
Pro-Grade Performance: Evercoat Body Shop Pro-Grade Body Filler offers a professional finish with fast drying and lightweight formula, perfect for a smooth, easy application on various surfaces like aluminum, steel, fiberglass, and wood.
Proper Tool Selection
Pick tools that help you control the edge shape. A jiggler or flange tool can help in some panel repairs, but a true butt weld places the panel edges flush without overlap.
Cut the new patch panel with straight, clean edges. A snug fit helps you use less filler metal and lowers the risk of burn-through.
Tack the new panel in place before final welding. Then use a grinder with a thin cutting disc to fine-tune tight spots.
Keep a small, even gap between the panels. A gap of about 1/16 inch often gives enough room for weld penetration, but panel thickness and welder settings can change what works best.
Accurate Measurements Required
Measure the damaged section before you cut. Mark the repair area so you remove weak, rusted, or torn metal while keeping as much sound metal as possible.
Use a scriber to mark precise cutting lines on the old panel. Clean edges help the butt weld sit flat.
Cut the patch panel slightly large at first. Fit it over the repair area, mark the final trim lines, and make small cuts until the edges align.
Maintain a consistent gap of about 1/16 inch between the patch and existing metal when that gap suits your setup. Clamp the patch securely before tack welding.
- Clean the repair area until you expose sound bare metal.
- Mark the damaged area with a scriber or marker.
- Cut the old metal slowly and keep the edge as straight as you can.
- Trim the patch panel in small passes until it fits the opening.
- Clamp the patch so the edges sit flush with the original panel.
- Check the gap, body line, and surface height before you tack weld.
Tack Welding: Keep Panels Aligned Before Final Welding
Tack welding helps you lock the patch in place before final welding. Make small tack welds around the seam instead of welding one long bead.
Start with tack welds spaced about 1 inch apart. Check the panel after each few tacks so you can catch movement early.
Use your welder settings for thin sheet metal. A machine like the Millermatic 211 PRO can handle this work when you set wire speed, voltage, and technique correctly.
Make sure the patch panel fits snugly against the existing metal. Use a straight edge and your hand to check high or low areas before you continue.
Limit heat buildup by moving around the panel. Let each area cool before you add more welds near it.
Clean the metal thoroughly before starting, as explained in these flux core welding tips for beginners. Clean steel helps reduce porosity, popping, and weak welds.
Pro tip: Skip around the seam as you tack so one area does not absorb too much heat at once.
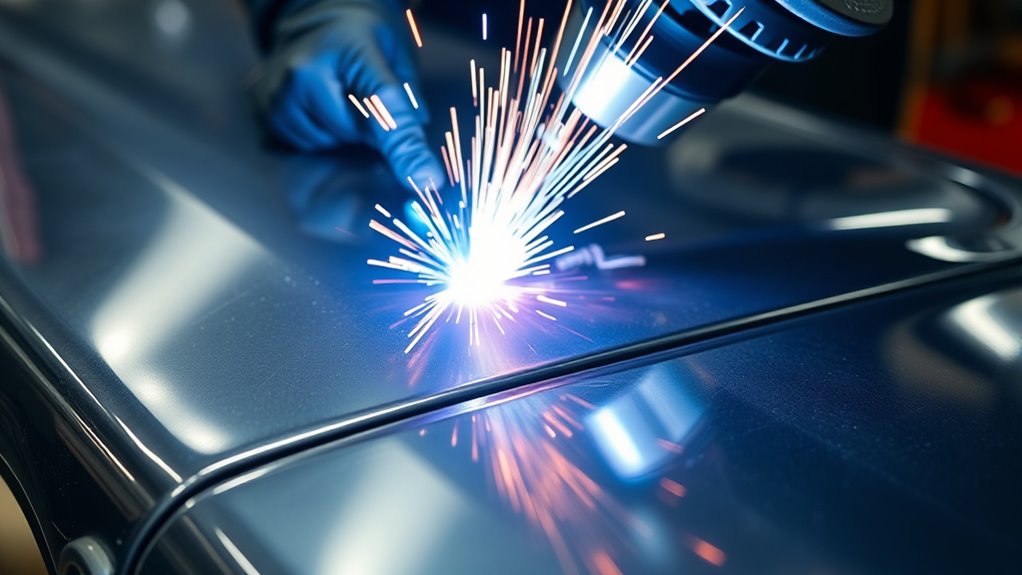
Effective Butt Welding Techniques for a Smooth Finish
A smooth finish depends on fitment, heat control, and patience. The weld should join the edges without leaving a tall bead or warped panel.
Maintain a small gap that suits the sheet metal thickness and your welding process. This helps the butt welds penetrate without forcing too much filler into the seam.
Start with tack welding at even intervals. Then fill between the tacks with short stitch welds rather than one long pass.
Control your heat input to reduce blow-through and warping. Excess heat can shrink the metal and pull the panel out of shape.
Techniques like stitch welding help you manage heat on thin panels. Let the metal cool often and avoid chasing a red-hot seam.
After welding, finish with grinding. Use light pressure and work slowly so you flatten the bead without thinning the panel.
Safety Tips for Butt Welding Auto Body Panels
A smooth weld matters, but your safety matters more. Welding on auto body panels can expose you to sparks, hot metal, arc light, fumes, and fire risks.
Always wear proper personal protective equipment (PPE). Use a welding helmet, gloves, safety glasses, hearing protection, and flame-resistant clothing.
Set up strong ventilation before you weld. Remove paint, undercoating, seam sealer, oil, and grime from the weld area because heated coatings can create harmful fumes.
Inspect the area for flammable materials before you start. Remove or shield carpets, insulation, fuel lines, wiring, and trim near the repair.
Keep a fire extinguisher nearby and make sure you know how to use it. Keep watching the area after welding because hidden sparks can smolder.
Secure your workpiece before welding. A stable panel reduces movement and helps you make safer, cleaner welds.
Including appropriate PPE in your safety gear can reduce burn and injury risks. Don’t weld near fuel vapors or closed containers.
Finalizing Welds: Grinding and Smoothing Techniques
Finalize your welds with careful grinding and smoothing. Use a disc grinder to remove excess weld material without overheating the panel.
After grinding, use a hammer and dolly to lift low spots and calm high spots. This step helps you create a more even surface before filler.
Start sanding with a 50-grit disc for initial smoothing, then move to 120-grit paper for a finer finish. Sand the weld bead flush with the surrounding metal before primer and paint.
Keep the grinder moving and use light pressure. A steady grinding angle of 30 to 45 degrees can help remove material without digging into the panel.
Here’s a quick reference table to guide your grinding process:
| Step | Tool | Grit |
|---|---|---|
| Initial Grind | Disc Grinder | 50 |
| Smooth Finish | Sandpaper | 120 |
| Low Spots | Hammer/Dolly | N/A |
| Final Touch | Plastic Filler | N/A |
Use plastic filler only after the metal sits as smooth as you can make it. Keep filler thin, then seal the repair with primer so bare metal does not stay exposed.
Common Mistakes to Avoid
Most poor butt weld repairs come from rushed prep or too much heat. Slow down during fitment and welding so the panel stays flat.
- Don’t weld over paint, rust, oil, seam sealer, or undercoating.
- Don’t force a patch into place if the gap changes from tight to wide.
- Don’t run one long bead on thin auto body sheet metal.
- Don’t grind hard in one spot because the panel can thin or overheat.
- Don’t leave bare metal unsealed after welding and sanding.
Note: If the panel contains structural damage, hidden rust, or safety-critical mounting points, ask a qualified body repair professional to inspect it.
Frequently Asked Questions
What Type of Welding Machine Is Best for Auto Body Panels?
A MIG welder often works best for auto body panels because it is easier to control on thin steel. Use the correct wire, shielding gas, and heat setting so you reduce burn-through and distortion.
How Can I Prevent Rust From Forming After Welding?
Clean the weld area, remove grinding dust, and seal the bare metal as soon as the repair is ready. Use a suitable primer, seam sealer where needed, and paint to help protect the panel from moisture.
What Is the Ideal Welding Wire Size for Auto Body Work?
Many auto body MIG welding jobs use wire around 0.023 to 0.030 inch, depending on panel thickness and machine setup. Thicker wire can add more heat, so test your settings on scrap metal first.
Can I Butt Weld Aluminum Panels the Same Way?
You can butt weld aluminum panels, but you need different settings, cleaner prep, and the right filler material. Aluminum moves heat fast, so it can distort quickly if you use the same method as steel.
How Do I Know if My Welds Are Strong Enough?
Inspect the weld for cracks, pinholes, lack of fusion, and uneven bead shape. For structural or safety-critical repairs, let a qualified professional check the weld before you finish the panel.
Should I Use Body Filler Over a Butt Weld?
You can use a thin layer of body filler after the weld is ground and the metal is shaped. Don’t use filler to hide weak welds, heavy warping, or rust that still needs repair.
Safety Disclaimer: This article is for informational purposes only and does not replace hands-on training or professional repair advice. Welding can cause burns, fire, eye injury, fumes, and vehicle damage. Consult a qualified welding or auto body professional before you repair structural panels or safety-critical parts.
Conclusion
A clean butt weld starts with fitment, not the arc. Take time to cut the patch well, tack it carefully, and control heat with short welds.
After welding, grind slowly, shape the metal, and seal the repair before primer and paint. When you respect each step, you give the panel a better chance of staying flush, strong, and ready for a clean finish.


