To tack weld before running a full bead, start by cleaning your workpieces and aligning them securely, using clamps as needed. Place tack welds at one to two-inch intervals, focusing on corners and joints for stability. Limit each tack to one to two seconds to control heat and prevent warping. After inspecting your tack welds for consistency, shift to the full bead by starting slightly ahead of your last tack. There’s more to guarantee a strong weld.
What Is Tack Welding and Why Is It Important?
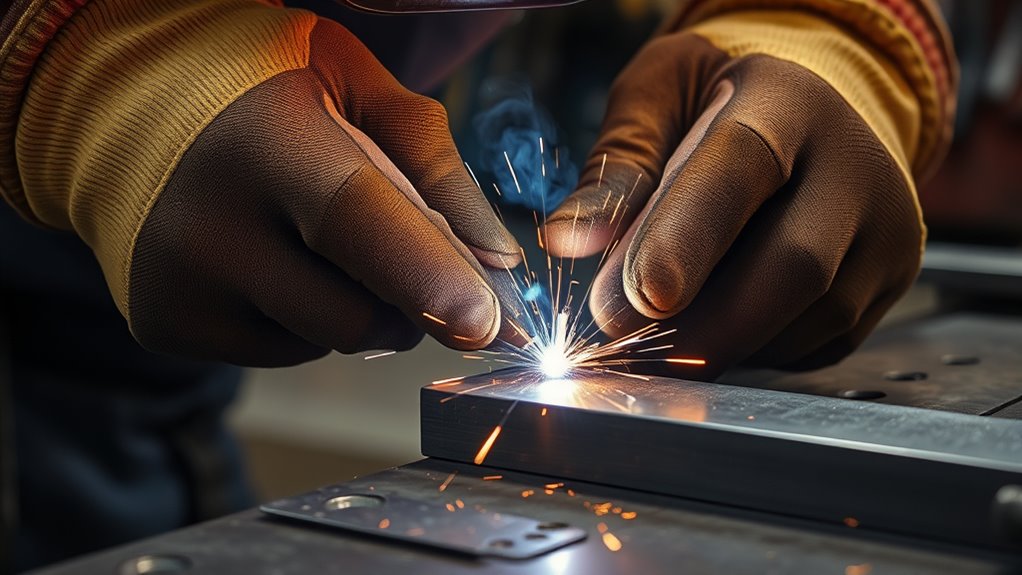
Tack welding is an essential step in the welding process, serving as a temporary method to secure components in place. By creating short welds at intervals, you guarantee proper alignment and maintain joint gaps, which is critical for the assembly. Tack welds allow for easy adjustments and realignment, making them indispensable for achieving an accurate fit before the final weld.
Properly executed tack welds are important for controlling movement and distortion during the full welding process. This control notably contributes to the structural integrity of the overall assembly. Additionally, adhering to maximum fillet weld size guidelines ensures that the final weld meets structural requirements and minimizes the risk of defects.
Proper tack welds are crucial for minimizing movement and distortion, ensuring the structural integrity of the entire assembly.
However, it’s important to remember that tack welds must be cleaned and their ends ground smooth before final welding. This prevents defects and guarantees a strong, safe final weld. Inadequate techniques can lead to invisible cracks, undermining the strength of your work.
As a result, mastering tack welding is key to achieving reliable and durable welds.
Preparing Your Materials for Tack Welding
To prepare your materials for tack welding, start by cleaning the edges of both workpieces thoroughly to eliminate any contaminants. Next, clamp the thinner material tightly to the thicker one, ensuring proper alignment and a consistent joint gap. This step is essential for achieving a strong bond and preventing misalignment during the welding process. Additionally, remember that proper cleaning is crucial for ensuring paint adhesion and preventing issues during welding.
Clean Material Edges
Clean edges are essential for achieving strong tack welds. If you’re trying to run a successful welding project, verify both pieces are free from contaminants like rust, oil, and dirt, as these can weaken your weld joint.
Use a wire brush or grinder to clean the surfaces, focusing on areas where the weld will be applied for best adhesion. For stainless steel, opt for a stainless steel brush to avoid cross-contamination from other metals.
After cleaning, visually inspect the edges to confirm they’re smooth and free from imperfections. Properly cleaned edges not only maintain consistent joint gaps but also uphold the integrity of your final weld, preventing defects that could compromise your work.
Secure Proper Alignment
Achieving proper alignment is essential for successful tack welding, as even minor misalignments can lead to weak joints and increased distortion.
Start by ensuring both materials are clean and free of contaminants. Use appropriate clamp types to tightly secure the thicker material to the thinner one, eliminating gaps.
Employ alignment tools like levels or squares to double-check the positioning of your components before applying tack welds. Space your tack welds approximately one to two inches apart, which helps maintain control over the joint and prevents distortion.
After tacking, visually inspect the alignment and adjust as necessary. This meticulous process sets the foundation for a robust, reliable weld that meets your project’s requirements.
How to Select Effective Tack Weld Locations?
Selecting effective tack weld locations is vital for guaranteeing strong, stable joints during the final welding process. Start by placing tack welds at intervals of one to two inches along the joint. This strategy helps maintain proper alignment and minimizes distortion.
Focus on corners and joints where movement is likely; these areas need secure tack welds for stability.
Prioritize securing corners and joints, as these areas are critical for maintaining stability during the welding process.
Employ staggered tack weld strategies to promote even heat distribution, particularly on larger components. This approach reduces the risk of warpage, which can compromise your final weld.
Confirm that your tack welds maintain a consistent joint gap, as this is essential for achieving a robust connection. Additionally, consider the thickness and material properties of your components; thicker materials may require more tack welds to guarantee stability. Remember that proper preparation of metal is crucial for strong welds.
Best Techniques for Tack Welding
When preparing to tack weld, ensuring your materials are free from contaminants is essential for achieving a strong bond. Start by cleaning the edges of your common materials thoroughly.
Utilize effective tools, like clamps, to secure thicker materials to thinner ones, preventing gaps and ensuring consistent joint spacing. When applying your tack welds, use short bursts of one to two seconds, spaced one to two inches apart, to maintain alignment without overheating.
Pay close attention to your arc length; a shorter arc enhances penetration and reduces the risk of burn-through. After applying the tack welds, inspect them and grind down the ends for a smooth shift. This process helps control heat input, a crucial factor when working with thin metal to avoid issues like warping or excessive heat buildup.
This preparation not only sets the stage for a successful full bead weld but also enhances the overall integrity of your project. Mastering these tack weld techniques will empower you to achieve reliable, high-quality results in your welding endeavors.
Products Worth Considering

QUALITY MATERIAL: This product is made of high quality 304 stainless steel, with excellent anti-corrosion and high temperature resistance, even in high temperature and humid environment can be used durably and prolong the service life.

Heavy-Duty 304 Stainless Steel:Built for durability with corrosion-resistant stainless steel, ideal for high-temperature exhaust fabrication and industrial welding

Long Last Stainless Steel Construction: Crafted from Sturdy stainless steel, this 3-inch (76.1mm) exhaust tacking band clamp-on ensures long-lasting durability and resistance to corrosion, making it perfect for welding fabrication applications.
Managing Component Gaps
To manage component gaps effectively during tack welding, space your tack welds one to two inches apart for even pressure distribution. As you progress, monitor the joint alignment and adjust your technique to fill larger gaps by halving the distance between tacks. Maintaining consistent pressure throughout the process is essential to keep the joint aligned and minimize any remaining gaps. Additionally, using flame-resistant clothing helps protect against potential burns from spatter during the welding process.
Tack Weld Spacing Techniques
Properly spacing your tack welds is vital for managing component gaps effectively. Aim for one to two inches between tack welds to provide adequate support while allowing for adjustments.
Use heat distribution techniques by jumping between tacked areas; this helps maintain even heat and minimizes distortion. If you encounter uneven gaps, consider halving the distance between tack welds to enhance coverage and control.
Consistent pressure during application is important to prevent gaps from widening in the final welding operation. Monitor your spacing closely, adjusting your technique based on the materials’ thickness, to achieve the best alignment and joint quality.
These gap management strategies will guarantee a stronger, more reliable weld for your project.
Monitoring Joint Alignment
Maintaining accurate joint alignment is key to achieving a strong weld. Before you tack weld, verify all components are properly aligned and securely clamped.
Monitor the joint gap closely; consistency is vital, as variations can lead to weak welds. Use alignment tools and conduct gap measurements to confirm uniformity throughout the assembly.
Adjust tack weld spacing to one to two inches apart, effectively bridging gaps while maintaining alignment. Jump between gaps while tacking to distribute welds evenly, which helps control overall alignment.
After each tack, regularly check alignment, making necessary adjustments before proceeding with the full bead. This approach supports effective joint stress analysis and maintains structural integrity, leading to a high-quality final weld.
Controlling Heat Input During Tack Welding
Adjust your travel speed to maintain consistency; moving too slowly can lead to increased heat and unwanted warping. Use short tack welds, limiting each to one to two seconds to minimize heat buildup and reduce the risk of hardening in the heat-affected zone.
Adjust your travel speed for consistency; slow movements can cause excess heat and warping. Use short tack welds to minimize heat buildup.
Pay attention to arc control; a long arc can create excessive heating, while a short arc may not penetrate adequately. Finally, employ cooling techniques by performing intermittent tack welding—space your welds one to two inches apart and jump around to allow for cooling between each tack. This approach effectively manages heat input, ensuring a solid foundation for your full bead. Additionally, consider using self-shielded flux core wire to further enhance your welding efficiency and control.
Top Mistakes to Avoid When Tack Welding
When tack welding, avoiding inconsistent joint gaps is essential for ensuring strong, reliable welds. Neglecting proper surface cleaning can lead to contamination, compromising the joint’s integrity. Additionally, understanding welding process selection can greatly enhance the quality of your tacks and overall welds.
Inconsistent Joint Gaps
Use effective gap measurement techniques to guarantee uniformity while tacking. Regularly perform joint integrity assessments to identify potential misalignments.
Employ alignment troubleshooting methods to adjust components as needed, using clamps to secure pieces tightly and minimize movement. Avoid excessive heat input; too much heat can warp materials and create inconsistent gaps.
Consider a series of smaller tack welds spaced one to two inches apart to better control joint gaps and maintain alignment. These practices will enhance the strength of your final welds.
Poor Cleaning Practices
While it might seem minor, poor cleaning practices can severely undermine the quality of your tack welds. Before you start, guarantee thorough surface preparation; failing to clean the edges of both pieces can result in weak joints.
Contamination sources like rust, oil, and dirt can introduce defects such as porosity and inclusions, jeopardizing weld integrity. Always use appropriate cleaning tools; non-abrasive cloths may leave residues that hinder effective bonding.
Consistent cleaning methods—like grinding or using solvents—are essential. Inadequate cleaning of tack welds prior to final welding can hide defects that compromise structural strength.
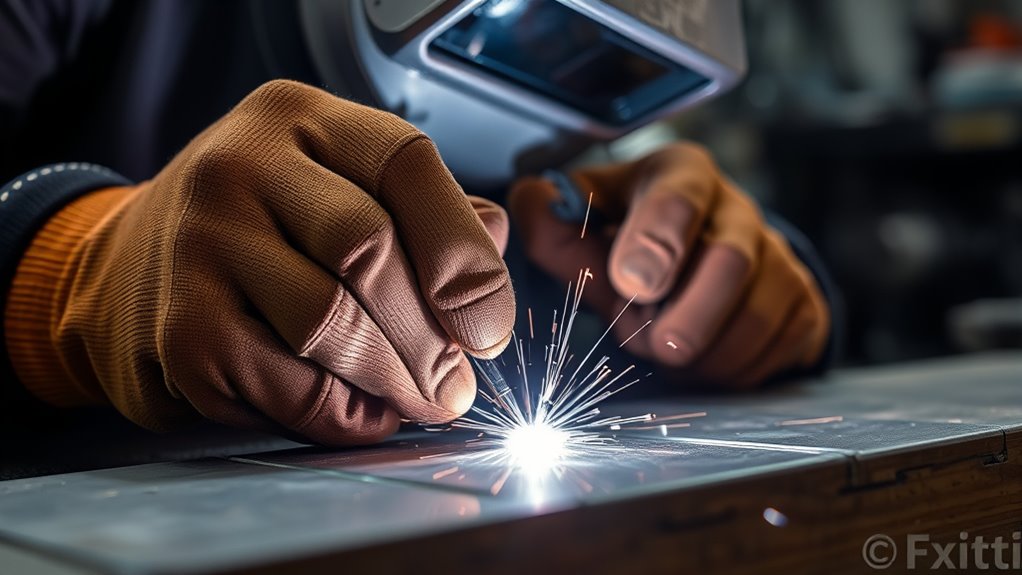
How to Check Your Tack Welds?
How can you guarantee your tack welds are up to standard? Start with a thorough tack weld inspection. Perform a visual defect analysis to check for consistency in size and appearance. Look for cracks, excessive spatter, or any irregularities that could compromise quality.
Next, conduct mechanical strength testing by gently bending the welds to confirm they hold components in alignment without failure. For added precision, grind the ends of the tack welds with a clean, sharp tool to remove any defects and facilitate smooth blending with your final bead.
Don’t forget to examine the heat-affected zone for adequate penetration; it shouldn’t be overly hardened or brittle. Additionally, ensure that you have removed the zinc coating from the weld area to minimize the risk of porosity. Finally, verify that your tack welds meet the required quality standards by conducting a final inspection according to a qualified welding procedure.
This meticulous approach guarantees your tack welds are reliable before you proceed with full bead welding.
How to Transition From Tack Welds to Full Beads?
Shifting from tack welds to full beads requires careful preparation and technique to guarantee a strong, consistent joint. First, verify all tack welds are cleaned and ground to eliminate defects, which promotes smooth blending.
Shifting from tack welds to full beads demands meticulous preparation to ensure strong, seamless joints.
Monitor your heat input during tack welding to avoid hard, brittle microstructures that could compromise your final bead. When starting the full bead, restart slightly ahead of the last tack weld. This bead shift strategy helps maintain continuity and prevents defects.
Adjust your welding speed and technique according to the number and size of tack welds to verify uniform penetration and minimize warpage. Lastly, use visual feedback from the weld pool to fine-tune your arc length and amperage settings. Furthermore, maintaining consistent heat input levels is essential to ensure the integrity of the final weld.
Tips for Achieving a Consistent Weld Appearance
Achieving a consistent weld appearance hinges on meticulous preparation and execution. Start by confirming the edges are clean; contaminants can severely impact bead quality and overall aesthetics.
When applying tack weld techniques, maintain consistent spacing of one to two inches between welds. This promotes uniformity and minimizes distortion during the final welding process.
To enhance the final bead’s appearance, feather the ends of your tack welds by grinding them down. This creates smoother shifts, improving the visual appeal.
Additionally, monitor your arc length to guarantee ideal penetration without risking burn-through or excessive spatter.
Lastly, adjust your amperage settings based on material thickness. This helps you achieve a consistent bead appearance while preventing defects like cold laps or uneven surfaces. Consider preheating your material to 400-600°F to reduce the risk of hard, brittle zones that can affect the weld quality.
Frequently Asked Questions
How to Tack Weld for Beginners?
To tack weld effectively, choose appropriate equipment, follow safety precautions, and apply basic tack welding techniques. Guarantee clean edges, use short bursts, and monitor joint gaps for alignment, creating a solid foundation for your final weld.
What Are Common Mistakes in Tack Welding?
Tack welding’s like dance; if you miss a step, you stumble. Common mistakes include poor equipment selection, inadequate safety precautions, and flawed techniques. Stay aligned, clean surfaces, and monitor heat for stronger, safer welds.
What Is the Rule of 33 in TIG Welding?
In TIG welding, the Rule of 33 states your arc length should be one-third the tungsten diameter. This guarantees ideal heat input, enhancing weld bead preparation and preventing damage to your workpiece during heat input considerations.
What Is the Golden Rule in Welding?
The Golden Rule in welding stresses proper arc length, ensuring ideal heat input. By mastering welding techniques, adhering to safety practices, and focusing on material preparation, you’ll achieve strong, consistent welds with minimal defects.
Conclusion
In summary, mastering tack welding is like laying the foundation for a sturdy building; it guarantees your final product stands strong and true. By following the techniques outlined, avoiding common pitfalls, and shifting seamlessly to full welds, you’ll achieve a reliable and aesthetically pleasing result. Remember, each tack weld is a stepping stone to your final masterpiece, so take the time to do it right and watch your skills flourish.


