What’s in This Article
- Choose the Right Bead Roller for Auto Panels
- Pick the Best Dies for the Job
- Mark Your Bead Layout Before Rolling
- Practice on Scrap Metal First
- Dial In Speed and Tension
- Roll Straight Beads Without Warping
- Finish Bead Ends for a Clean Look
- Clean and Lubricate Your Bead Roller
- Common Bead Rolling Mistakes to Avoid
- Frequently Asked Questions
- Conclusion
A bead roller can make an auto body panel stronger, cleaner, and more professional, but it can also warp metal fast if you rush the setup. The best results come from matching the tool, dies, speed, and pressure before you touch the final panel. This guide shows you how to choose the right bead roller, mark your layout, practice safely, and roll cleaner beads with less waste.
Quick Answer
Use a bead roller by choosing a rigid machine with enough throat depth, fitting the right dies, and marking the bead path before you start. Practice on scrap metal of the same gauge, then roll the final panel at low speed with light, steady pressure. Clean the bead ends and lubricate the tool after each session.
Key Takeaways
- Choose a bead roller with enough throat depth, stiffness, and torque for your panel size.
- Match the dies to the bead shape, edge detail, or flange you need.
- Mark every bead path before rolling so you can keep spacing and alignment consistent.
- Practice on matching scrap metal before you roll the final auto body panel.
- Use low speed, light tension, and steady feed pressure to reduce warping.
Choose the Right Bead Roller for Auto Panels
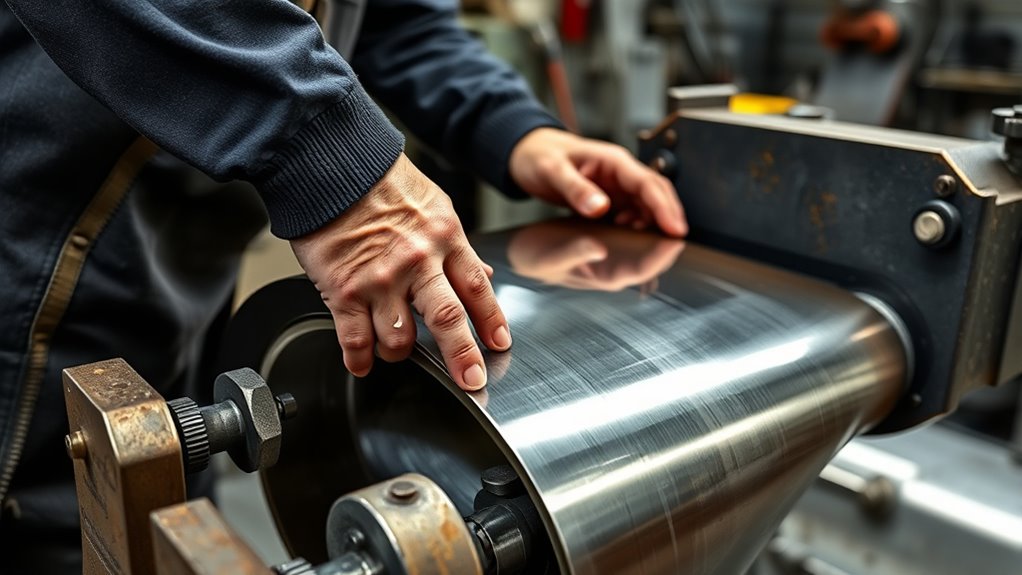
Choosing the right bead roller starts with matching the machine to auto body work. You need a rigid, heavy-duty unit for thicker sheet metal because weak frames flex under pressure.
If you’re new to the tool, a motorized bead roller gives you hands-free control. You can guide the panel with both hands instead of fighting a hand crank.
Check throat depth and machine width before you buy. Your panel must fit freely, or you’ll lose control and waste material. Adjustable bead roller dies help you form different bead profiles and sizes, so one machine can support more panel designs.
A bead roller works best when your panel design also supports sound welding and fit-up. Understanding amperage importance can help your bead work complement strong welded seams.
When you match capacity, control, and reach, you work with the metal instead of against it. That’s where cleaner beads and better panel fit begin.
Products Worth Considering
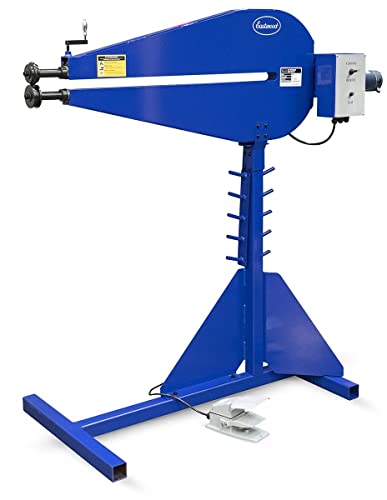
BEAD ROLLER: This Eastwood bead roller has a 1/6hp 120v electric motor which makes it much easier to work large or long pieces without the help of friends. With a typical manual roller you need to crank the handle and manipulate the work piece at the same time, but not with our power roller. The reversible, infinitely variable, foot pedal control lets you control the speed and direction of the rollers, even while both hands are on the work.

For use with the 20662A Eastwood Motorized Bead Roller

Compatibility: The Large Bead Roller Table fits standard 1/2" thick plate-style bead rollers, providing a secure base for metalworking projects of all sizes—small components to large panels. Ideal for fabricators, small workshops, and hobbyists.
Pick the Best Dies for the Job
The right dies control both the shape and the function of your bead. Choose the die set before you mark the panel so your layout fits the bead width.
- Use flat dies when you want a cleaner surface with light shaping.
- Use round dies when you need more rigidity in a large flat panel.
- Use flanging dies when you need stepped edges for lap joints.
Check your bead roller’s die set instructions before you install anything. The machine’s setup and safe operation depend on the exact dies you use.
Test several dies on scrap metal of the same gauge as your final panel. Those samples show you how each die behaves, so you can avoid weak beads or distorted edges.
When you understand how each die forms and supports the metal, you keep control of the work. Selecting the right flux-cored welding wire can also improve the durability of nearby welded seams.
Products Worth Considering
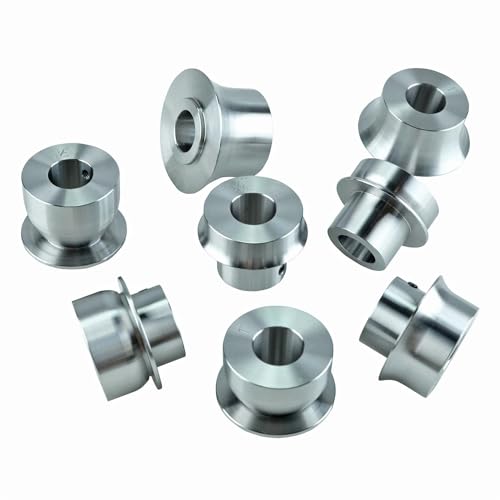
Complete Die Set Included: Includes 5/16", 1/2", 1", and 1 1/2" Radius Dies, 4 pairs total for versatile metalworking applications

Fits most bead rollers with 22mm shafts

This kit includes an additional 10 dies to use with any bead roller with a 7/8 inch (22mm) shaft.
Mark Your Bead Layout Before Rolling
Sketch your bead paths on the panel with a marker so you can see the layout during rolling. Use a straightedge or ruler for straight runs, and use templates for smooth curves.
Mark reference points and check spacing before you start. Accurate layout reduces alignment errors and helps prevent uneven beads. Maintaining a consistent standoff distance also helps when you cut or prep related panel edges.
Sketch Bead Paths
Before you roll any beads, mark the layout directly on the panel with a marker. This helps you check alignment and picture the finished pattern.
Use a ruler or straightedge for straight runs. Sketch curves with templates so the design flows cleanly.
Mark reference points to hold spacing, especially on cargo panels where function matters. Clearly note each path’s start and end so you don’t lose orientation during a pass.
| Path | Tool | Purpose |
|---|---|---|
| Straight bead | Ruler | Clean alignment |
| Curved bead | Template | Smooth flow |
| Reference marks | Marker | Consistent spacing |
This simple plan gives you control, saves material, and keeps your work precise.
Trace Guide Lines
Grab a Sharpie and trace your bead layout directly onto the metal. Clear guide lines help you lock in the bead path and feed the panel with control.
Sketch simple bead designs first, then mark straight runs and curves. Keep the lines evenly spaced so you can hold a consistent bead depth and shape across the panel.
Before you roll, compare each layout with the installed dies. Adjust spacing or angle if the die profile needs more clearance.
Practice on Scrap Metal First
Start with scrap metal so you can practice bead rolling without risking your final panel. Mark simple lines or curves to guide your feed.
Set the machine to low speed and make a few test passes. Then adjust pressure and speed until you form beads with even depth and shape.
Warning: Too much pressure can stretch thin sheet metal and cause warping that takes extra time to repair.
Control heat and distortion during related cutting or welding work, too. Keep heat input limitations in mind when you plan the final panel assembly.
Scrap Metal Setup
Use scrap metal pieces that match the thickness and type of your auto body material. Then trace your bead lines with a Sharpie so you can feed the panel accurately.
This setup gives you a real-world feel before you touch the project panel. Set the bead roller to about 15% speed, then practice forward and backward passes to learn control.
- Place a flat steel offcut on the bench.
- Mark clear Sharpie lines along the feed path.
- Run the test strip through the roller wheels.
- Check the finished sample for warp and uneven depth.
After each run, inspect the piece for distortion or uneven beads. Adjust your pressure and hand position until the motion feels steady and precise.
Trace Simple Practice Lines
With your scrap strip ready, trace simple practice lines with a Sharpie before running the bead roller. A clear bead path helps you feed the material with control.
Mark straight lines first, then add curves to learn how the dies follow shape changes. Keep the sheet flat, guide it steadily, and let your hands work with the machine.
Start with the roller at a manageable pace, around 15%, so you can stay calm and precise. Hold steady pressure as you repeat each line and watch how the bead depth changes.
Record what you changed, what worked, and what didn’t. Those notes give you a practical reference when you move to real panels.
Test Speed And Pressure
Once you’ve traced a few lines, test your bead roller’s speed and pressure on scrap metal. Don’t start on a real panel until the bead looks clean.
Start at about 15% speed so you can control the dies and feel the feed. Then test speed and pressure with several passes, changing one variable at a time.
You’ll see how depth, crown, and edge crispness shift under load. Keep pressure low at first because too much force can stretch the sheet and warp the form.
- Run a flat steel offcut under the rollers.
- Form a shallow bead and check the shape.
- Increase depth slightly and watch for stretch.
- Write notes beside each test run.
Keep those notes near the machine. They help you repeat a good setup later without guessing.
Dial In Speed and Tension
Speed and tension control how clean and consistent your beads look. Start at low speed, around 15%, so you can guide the metal with confidence.
Start slow, around 15%, so you can control the cut and guide the metal with confidence.
Use variable speed settings to match material thickness and bead design. Make small changes until the machine runs smoothly.
Set tension carefully and count each turn on the adjustment. This helps you repeat the same depth on every pass.
Pro tip: Change only one setting at a time so you know which adjustment improved the bead.
Keep steady pressure as you feed the panel. Let the rollers do the work instead of forcing the sheet.
Before touching the real panel, run test pieces from scrap to verify speed, tension, and feed feel. Maintaining a consistent standoff during related cutting work can also improve the final panel edge.
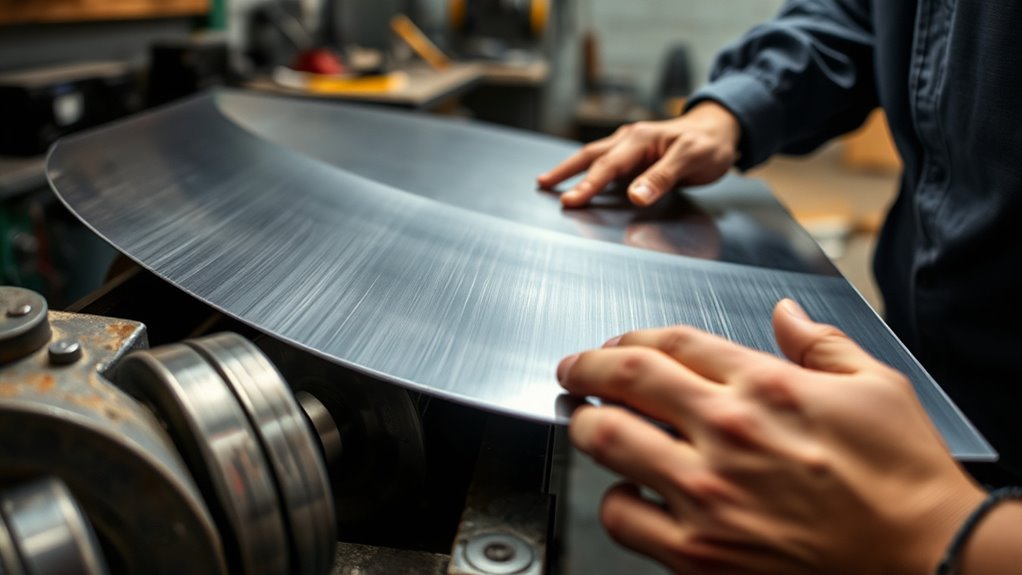
Roll Straight Beads Without Warping
After you set speed and tension, keep the bead straight by controlling alignment and panel movement. Set your bead roller square to the line, then use guide stops so the sheet can’t drift.
Clamp the panel at several points to reduce flex and hold a stable path through the rollers. Run a few passes on scrap first to confirm pressure, speed, and turn count.
- Align a chalk line straight across the bare steel.
- Hold the bead roller frame square to the panel edge.
- Feed the sheet with steady, relaxed control.
- Check the bead for side-to-side wobble.
Count each turn as you work so every pass builds the same depth and shape. If the panel starts to bow, stop and reset your alignment.
When you keep the sheet steady, you stay in command of the metal. Proper cleaning of aluminum before related welding work can also improve panel quality.
Finish Bead Ends for a Clean Look
For a clean, professional finish, close the bead ends properly as you roll. Clean ends help reduce cracks, burrs, and sharp stress points.
Use a half-round pipe or end former to shape the edge and keep the seam smooth. Keep steady tension on the panel as you feed it through the rollers.
If the end starts to pucker, restretch it right away so the panel stays flat. After rolling, dress the ends with light sanding or filing to remove burrs and refine the profile.
You improve more than the look when you finish bead ends well. A clean end cut reduces stress risers and gives the panel a stronger, more deliberate edge. Proper gear also helps keep your work area safer and more efficient.
Clean and Lubricate Your Bead Roller
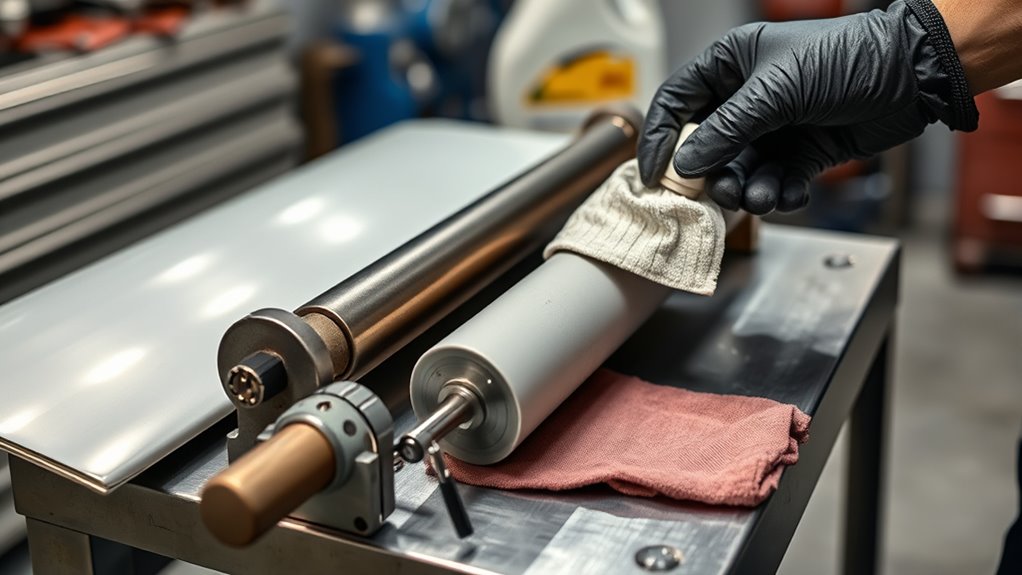
After you finish the bead ends, clean the tool so the next pass comes out smooth. Small chips and dirt can mark the metal or make the rollers feel rough.
Wipe away metal shards and debris between the rollers after every session. Use a manufacturer-recommended cleaner on the surfaces, then dry them fully to help prevent corrosion.
If the rollers feel sticky or rough, apply light grease to restore smooth movement and protect the bearings. Inspect every moving part on a set schedule, then re-lube dry points before you start a new panel.
- Brush chips from the roller throat.
- Spray approved cleaner on the metal faces.
- Add grease to slow or stiff rollers.
- Spin the handles and check for smooth motion.
A clean, well-lubricated bead roller cuts rework and gives you sharper beads with less effort. A clean machine also supports better flux core welding habits around nearby fabrication work.
Common Bead Rolling Mistakes to Avoid
Most bead rolling problems start with poor setup, not poor skill. If you slow down and check the basics, you can avoid most panel damage.
- Rolling without layout marks makes it harder to keep beads straight.
- Using too much pressure can stretch the sheet and create oil-canning.
- Skipping scrap tests can waste the final panel.
- Changing speed and tension together makes problems harder to diagnose.
- Leaving burrs on bead ends can create sharp edges and weak spots.
Fix mistakes early instead of forcing the bead to the finish. Small resets save more time than major repair work later.
Frequently Asked Questions
How Do I Bead Curved Auto Panels Accurately?
You’ll bead curved panels accurately by marking the path, supporting the sheet, and feeding slowly through the dies. Adjust roller pressure in small steps and practice the curve on scrap before you roll the final panel.
Can a Bead Roller Create Decorative Patterns?
Yes, a bead roller can create decorative patterns with the right dies and careful spacing. Test each pattern on scrap first so you can check depth, alignment, and distortion before working on the final panel.
What Metal Thickness Can a Bead Roller Handle?
Many bead rollers can handle 18- to 16-gauge steel, but the real limit depends on the machine, dies, and frame stiffness. Thinner aluminum usually forms more easily, while thicker sheet needs more support and slower feed.
How Do I Repair Mistakes After Rolling a Bead?
Flatten high spots, gently planish low areas, and re-roll with lighter pressure. Mark the bead path again before the second pass so you can sneak up on the correct profile.
Is a Manual or Electric Bead Roller Better?
An electric bead roller usually works better for speed and consistency because both hands can guide the panel. A manual bead roller can still work well for small jobs, tight budgets, or light-duty panels.
Conclusion
Clean bead rolling starts with setup, not force. Choose the right machine, fit the correct dies, mark your layout, and test on scrap before you touch the final panel.
Keep speed low, tension light, and feed pressure steady as you work. Finish each bead end cleanly, then wipe and lubricate the machine after use.
When you work methodically, the bead roller becomes a precise shaping tool instead of a source of warped panels. Your next panel will come out cleaner because you planned the pass before you rolled it.


