MIG Welder Maintenance Checklist
What’s in This Article
- Complete MIG Welder Maintenance Checklist
- Do Daily MIG Welder Checks
- Keep the Welder Clean and Covered
- Inspect Cables, Clamp, and Gas Hoses
- Clean the Liner and Drive Rolls
- Check Wire Feed and Tension
- Replace Worn Consumables
- Purge the Gas Line and Store the Torch
- Follow a Simple Maintenance Schedule
- Frequently Asked Questions
A MIG welder can make clean welds one day and feed wire badly the next if small problems build up. Dust, worn tips, loose clamps, and gas leaks can all hurt your weld quality fast. This guide shows you what to check daily, weekly, and monthly so your welder stays safe and ready.
Quick Answer
Maintain your MIG welder by checking cables, the ground clamp, hoses, fittings, wire feed parts, and gas flow before you weld. Clean the liner, drive rolls, contact tip, and nozzle often so the wire feeds smoothly. Cover the welder when it’s idle, replace worn consumables early, and follow a simple maintenance schedule.
Key Takeaways
- Check cables, clamps, gas hoses, and fittings before each welding session.
- Clean the liner, drive rolls, contact tip, and nozzle to prevent wire feed problems.
- Set wire tension correctly so the wire feeds without slipping or flattening.
- Shut off the gas bottle and relieve line pressure after welding.
- Keep spare tips, nozzles, and liners ready so worn parts do not stop your work.
Complete MIG Welder Maintenance Checklist
A solid MIG welder maintenance checklist starts with the basics. Clean the liner after each wire spool change to help prevent feeding problems. Inspect the ground lead and clamp for clean, tight contact, then check hoses and fittings for leaks.
You should treat this as essential MIG welding preventive maintenance, not optional cleanup. Check the drive rolls for debris and corrosion. Then adjust tension so the wire feeds smoothly without slipping or flattening.
Keep the machine clean by dusting it often and using low-pressure compressed air where your manual allows it. This helps remove internal debris that can trap heat and shorten component life. Regularly assessing shielding gas problems can also improve your welding results.
This welding machine maintenance routine protects performance, reduces defects, and keeps you ready to work without waste.
When you follow a disciplined maintenance checklist, you keep control of the process. You also extend equipment life and support reliable welding on your own terms.
Products Worth Considering
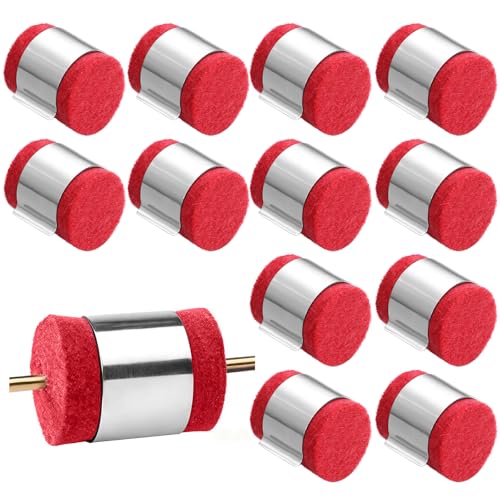
Steady Material: crafted from felt and metal, our welding wire cleaner pads promise steadiness; Specifically designed for rigorous environments like welding workshops, these pads withstand heavy usage and maintain their shape and efficiency over time; This product cleans wires and reduces scorching by 50%, ensuring smooth feeding of poorly cast, spiral, rusted, or excessively long wire feed bushings

Packaging: Arrives in a sturdy Box for secure delivery
Package List :1pcs Drive Motor(12V or 24V DC 10W Mig Welder Wire Feed Motor Mig Wire Motor Mig Wire Feeder)
Do Daily MIG Welder Checks
Before you start welding, perform a quick visual check of the MIG welder. Look for damage on the machine body, cables, connectors, and gas system.
Inspect the ground lead and clamp for tight, clean contact. Confirm the hoses, fittings, and tank are not leaking or loose.
Then check the wire feed path, drive rolls, gun, and liner for debris, corrosion, or misalignment. Also confirm that the gas flow rate matches your setup to help prevent porosity during welding.
Pre-Use Visual Check
Start each shift with a fast visual inspection of the MIG welder. This helps you catch problems before they affect safety or weld quality.
Check the power cord and plugs for wear, burns, or cuts. Inspect gas hoses and fittings for tightness, and use soapy water if you suspect leaks.
Verify that the ground lead and clamp are clean, undamaged, and firmly attached to the workpiece. Look at the MIG gun liner for blockage or wear that could disrupt wire feed.
| Check | What to confirm |
|---|---|
| Power supply | No damage, secure connections |
| Gas hoses | Tight fittings, no leaks |
| Drive rolls | Clean, proper tension |
This quick routine keeps your MIG welder ready and supports consistent results.
Cable and Clamp Inspection
After the visual check, inspect the ground lead and clamp every day. Look for wear, damage, and loose connections at both the machine and the clamp.
Check the cable for cuts or burn marks, especially near the handle where abuse often starts. Tighten every connection so current flows cleanly and conductivity stays strong.
Clean the ground clamp if rust, spatter, or dirt builds up. Then verify that it grips the workpiece firmly.
Poor contact can cause unstable arcs and uneven welds, so do not let it slip. Perform a quick continuity test on the ground lead if you suspect a break.
When you keep this path sound, you protect weld quality and keep better control at the torch.
Clean Feed Path
Keep the MIG feed path clean every day so wire moves smoothly and the arc stays stable.
Inspect the wire liner for clogs or debris. A clean feed path protects wire feed consistency and improves operating efficiency.
Check drive rolls for wear and set tension correctly. This helps prevent slippage, flattened wire, and erratic delivery.
Clean the contact tip and remove spatter to preserve conductivity and reduce welding defects. Brush dust from the gun, cable entry, and nearby surfaces so contamination cannot enter the system.
Verify gas flow settings before you strike an arc. Improper shielding gas can raise spatter and weaken the weld.
These maintenance tips help you work with control, reduce rework, and keep your setup ready for dependable output.
Keep the Welder Clean and Covered
When your MIG welder is not in use, cover it to block dust, grime, and metallic particles. These contaminants can build up on the wire spool, feed mechanism, and circuitry.
Add this step to your welding machine maintenance checklist. A fitted cover works best, but a clean drop cloth also helps reduce debris on exposed components.
Before you walk away, switch off power to prevent accidental startup. Also confirm that the area around the machine stays clean.
Dust the welder with a dry, lint-free cloth or low-pressure air to remove buildup before it traps heat or bridges contacts. This simple routine helps extend the life of the unit, supports stable wire feeding, and lowers the risk of shorts, overheating, and sudden breakdowns. Maintaining proper settings also supports better performance and reduces weld defects.
A protected welder performs more consistently, so you can work with less interruption and more control.
Products Worth Considering

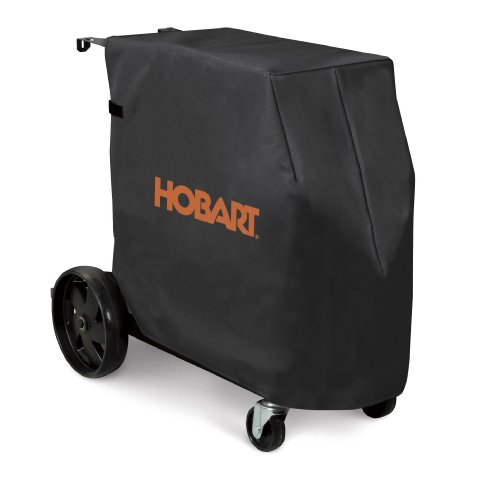
Welding Machine Cover Sizes- 21.3"x11.5"x13".Our welding machine cover, for welder machine models TIG/MIG140、190、210MVP and welding machine of the same size as other brands on the market.Please check your welder dimension before purchase
Country of Origin:United States
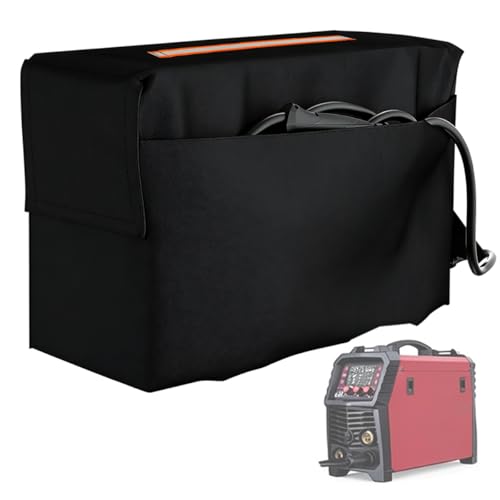
Precise Size & Compatible Models This welder cover measures 20.28" L x 8.27" W x 14.37" H (51.5x21x36.5cm). Designed to fit standard-sized MIG and TIG welding machines, including models like MIG200, MIG250, MIG205PRO, MIG205MP, TIG200PACDC and other welders with similar dimensions. Ensures full coverage without excess material.
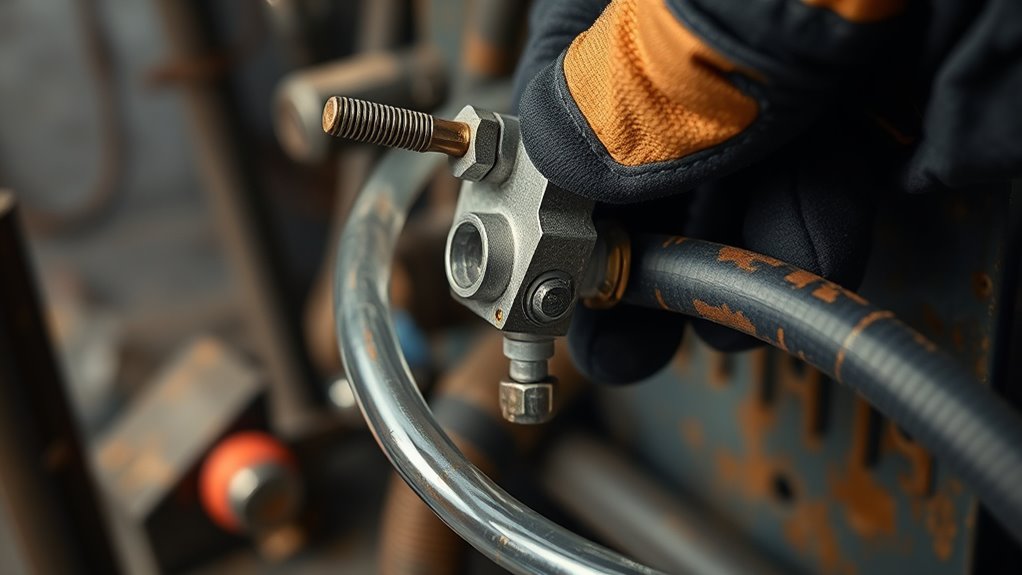
Inspect Cables, Clamp, and Gas Hoses
Inspect the MIG gun cable and power cord for cuts, burn marks, or wear. Pay close attention near the handle, where damage often starts.
Keep the ground clamp clean and tight on the workpiece. A stable electrical connection helps produce consistent weld quality.
Check the gas hoses with soapy water if you suspect leaks. Watch for bubbles, then tighten or replace loose or damaged fittings right away. Also make sure all electrical connections stay secure and functional.
Cable and Clamp Checks
A quick cable check can save you from erratic welds and wasted gas. During routine maintenance, inspect the cable, clamp, and connections at both the machine and work lead.
Look for cuts, burn marks, cracks, and heat damage. Tighten any loose connections so current flows cleanly and weld quality stays consistent.
Clean the clamp regularly to remove spatter, rust, and dirt. A dirty clamp will not grip or ground the workpiece well.
Examine the ground lead for wear or overheating, since damaged copper raises resistance and weakens the arc. You are not maintaining equipment for its own sake. You are protecting your control, your efficiency, and your ability to weld with confidence.
Gas Hose Leak Inspection
After checking the cable and clamp, move on to the gas hose system. Look for damage before it turns into a leak.
Inspect the gas hoses for cracks, abrasions, and soft spots, because even minor wear can affect safety. Tighten every connection at the tank, regulator, and hose ends to hold steady gas flow.
Brush soapy water on fittings and along the hose if you suspect a leak. Bubbles show escaping gas.
Warning: Replace a damaged gas hose right away, because leaks can create unsafe shop conditions.
Keep the shielding gas tank valve closed when you finish welding. This simple act protects hoses and fittings and supports disciplined maintenance routines.
If you find persistent leaks or visible wear, replace the hose immediately. Do not accept gas loss as normal. Fix it fast and keep your workspace safe, efficient, and under your control.
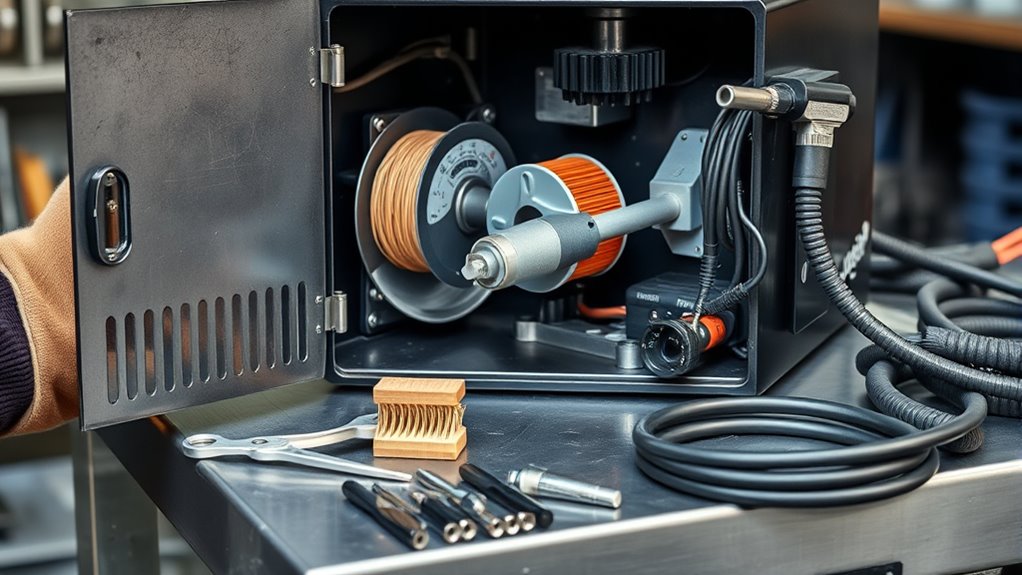
Clean the Liner and Drive Rolls
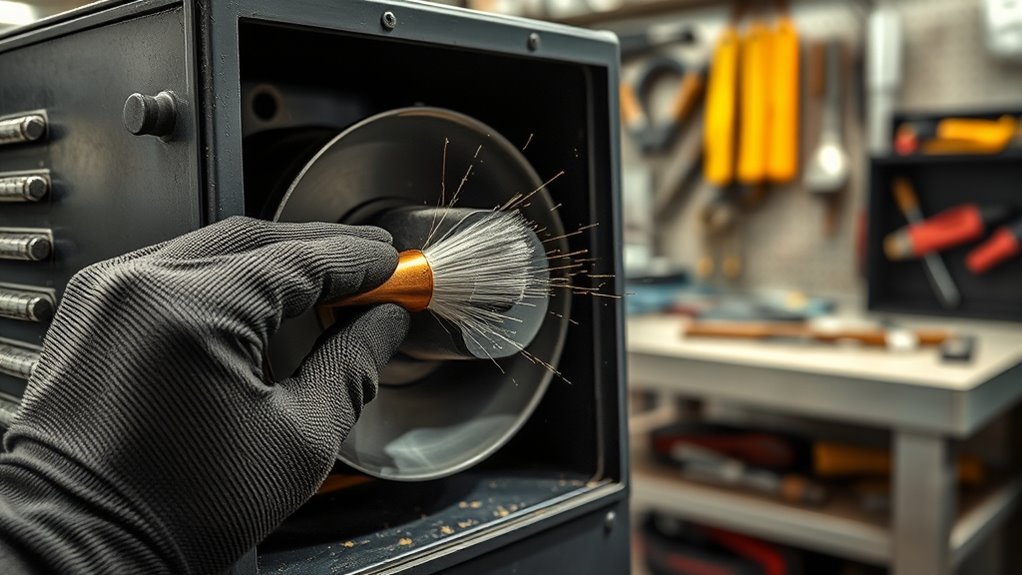
Keep the liner and drive rolls clean to maintain smooth wire feeding and reliable weld performance. During cleaning, remove the wire spool and blow compressed air through the liner to clear dust, metal fines, and buildup that can block the wire feed.
Do this every time you change spools. That simple maintenance step protects performance and cuts down on feeding faults.
Then inspect the drive rolls for corrosion, debris, and packed shavings. Any contamination can slip the wire or scar it, so wipe the rolls clean and reinstall them with the correct groove matched to your wire type.
That alignment helps the drive system hold proper contact and keeps feeding accurate. Regular maintenance of the drive rolls is essential for steady welding performance.
When you treat the liner and drive rolls as critical wear parts, you extend your welder’s service life. You also preserve output consistency and keep your shop free from avoidable downtime.
Check Wire Feed and Tension
Check the wire feed mechanism often to make sure it runs smoothly and does not jam. Inconsistent feeding can quickly lower weld quality.
When you check wire feed on welding machines, verify that the drive roll grips the wire without slipping or crushing it. Set drive roll tension to the manufacturer’s specification so the system works with minimal wear.
Choose the correct groove for the wire diameter. The wrong fit changes feed pressure and can deform the wire.
Inspect the liner for blockage or damage, because even small restrictions disrupt delivery. Then confirm the feed speed matches the material thickness and type, since speed affects penetration and bead shape.
Maintaining the correct wire feed tension is crucial for steady welding performance. Build this inspection into your maintenance schedule, and record any adjustment you make.
Consistent attention keeps your machine responsive, protects weld consistency, and gives you more control over every bead.
Replace Worn Consumables
Replace worn consumables before they start hurting arc stability or feed consistency. In welding equipment maintenance, inspect contact tips and nozzles often.
Replace a contact tip when the bore wears, the wire fits loosely, or the arc becomes unstable. Do not wait until the tip causes poor starts or heavy spatter.
Check the wire liner for wear or clogging, because a clean liner keeps wire feeding smooth and helps prevent weld defects. Use a wire brush or reamer to clear spatter from parts before each job. Make sure a fresh liner is installed when wire flow does not improve after cleaning.
Monitor drive rolls for grooves, slipping, or damage. Change them when they cannot hold proper tension and alignment.
Keep spare tips, nozzles, and liners on hand so you can act fast and stay productive without waiting on parts.
This routine supports safer operation, protects your equipment, and gives you steady, clean welds with less downtime.
Purge the Gas Line and Store the Torch
Once you finish using the welder, shut off the gas bottle to prevent leaks and reduce wear on hoses and regulators.
Then purge the gas line by squeezing the MIG gun trigger briefly. This relieves trapped pressure and clears residual gas from the system.
If wire feeds during purging, snip off the excess to prevent tangles and keep the next start smooth.
Briefly squeeze the MIG trigger to purge trapped gas; snip any fed wire to prevent tangles.
Next, relieve tension on the drive roll so the wire is not pushed forward under load. This helps protect the feed path.
Inspect the MIG torch for slack, then coil it loosely or hang it so the cable does not kink. Store in a clean location that stays dry, dust-free, and out of traffic.
This simple routine keeps your gear ready, preserves parts, and lets you work with control instead of waste. Also ensure effective ventilation to reduce fume exposure during welding activities.
Follow a Simple Maintenance Schedule
A simple maintenance schedule keeps your MIG welder reliable. It also makes small problems easier to catch before they cause downtime.
Build a routine that supports steady work, not repair stress. Start with preventive maintenance:
- Daily: Inspect the MIG unit for wear, loose parts, leaks, or damage before you weld.
- Weekly: Check power cables, grounding connections, and wire feed mechanisms so the machine runs consistently.
- Monthly: Clean internal components and inspect electrical systems for faults, heat damage, or buildup. Regular checks support steady performance and advanced safety mechanisms that protect your equipment.
Document each service in your maintenance schedule. Note dates, findings, and corrections so you can spot trends and recurring issues fast.
If usage rises or performance changes, adjust the schedule right away. A disciplined approach protects internal components, reduces unexpected failures, and keeps your MIG setup ready for precise work.
You stay in control, extend machine life, and keep your shop moving.
Pro tip: Keep a small logbook near your welder so you can record faults, cleaning dates, and part changes.
Frequently Asked Questions
How do I know if my MIG welder is overheating?
Your MIG welder may be overheating if a temperature light turns on, the power cuts out, or the machine stops during its duty cycle. Let the welder cool, check ventilation, and reduce workload if the problem repeats.
What causes inconsistent arc starts in MIG welding?
Inconsistent arc starts often come from poor ground contact, dirty metal, worn contact tips, bad wire feed, or weak gas coverage. Start with the ground clamp and contact tip because those parts are quick to check.
How often should I calibrate my MIG welder?
Check calibration monthly if you rely on exact settings, or after impact, repair, or a major weld quality change. Follow your machine manual and verify output against known settings when results seem off.
Can humidity affect MIG welding performance?
Yes, humidity can affect MIG welding performance by adding moisture to wire, surfaces, and the work area. You may see porosity, unstable arcs, and poor bead shape when moisture reaches the weld zone.
Which safety gear is essential for MIG welding?
You need a welding helmet, protective gloves, flame-resistant clothing, safety glasses, and proper footwear. Match your gear to the job, heat level, and shop conditions before you start welding.
Conclusion
Good MIG welder maintenance keeps your machine steady, safe, and ready for clean welds. Check it daily, protect it from dust, inspect cables and hoses, clean the liner, and replace worn consumables before they fail.
A simple routine also keeps wire feeding smooth and gas flow reliable. Start with the daily checks in this guide, then build weekly and monthly service into your shop schedule. With steady care, your welder can stay dependable every time you need it.


