A butt weld in auto body repair joins two metal panels edge to edge, so you get a tight, seamless repair line. You use it when you want less filler, less moisture trapping, and better rust resistance than a lap weld. To do it well, you need clean metal, accurate fitment, and controlled tack welds to keep the panels aligned. Done right, it keeps the finish cleaner and the joint stronger, and there’s more to know after that.
What Is a Butt Weld in Auto Body Repair
A butt weld in auto body repair joins two metal panels edge-to-edge, so you need precise fitment and accurate alignment to avoid gaps and achieve a strong, clean seam.
You prepare both edges by cleaning off paint, rust, and contamination, then hold the panels flush so the joint stays true. This method gives you butt weld advantages: less trapped moisture, reduced corrosion risk, and a smoother surface for paint prep.
You also need enough penetration to fuse thin sheet metal without burn-through, because weak fusion can fail under stress. Common welding techniques include TIG and MIG, and each lets you control heat and puddle size differently. Use the method that matches the panel thickness and your skill level.
When you set up the joint correctly, you create a repair that looks factory-clean and holds strong. Additionally, ensuring proper fillet weld sizing is crucial to maintaining the structural integrity of the repair.
Why Pros Prefer Butt Welding for Panels
Pros prefer butt welding because it creates a seamless joint that doesn’t trap moisture between overlapping panels, which helps reduce rust and corrosion over time.
You get real butt welding advantages: a cleaner repair line, less filler work, and a surface that preps faster for paint.
Because you cut and fit the panels precisely, you keep the repair to a single ply, which helps preserve structural integrity and gives you a more controlled result.
You also avoid extra sealing steps that can slow you down and hide poor workmanship.
With professional techniques, you can place a tight, even weld that looks good and holds strong under stress.
That matters when you want a repair that performs without compromise.
In practice, butt welding lets you work with precision, reduce rework, and deliver a finish that reflects skill, discipline, and freedom from shortcuts. Additionally, employing proper welding techniques ensures the joint remains strong and resistant to failures over time.
Butt Weld vs Lap Weld: What’s the Difference
You use a butt weld when you join panels edge-to-edge, so you get a smooth seam and less chance of rust.
A lap weld overlaps the metal, which makes fit-up easier, but it can trap moisture and needs sealing to reduce corrosion.
If you want the cleanest, strongest repair, you’ll usually choose a butt weld. Additionally, the choice of welding method can significantly impact the overall longevity and durability of the repair.
Products Worth Considering
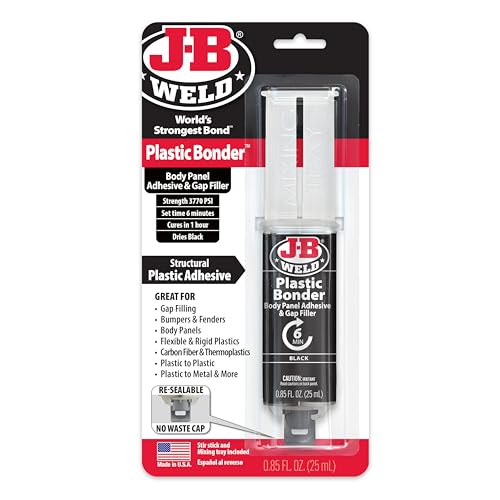
Plasticbonder: Is A Quick-Set, 2 Part, Urethane Adhesive System That Provides Strong, Lasting Repairs And Works On Thermoset, Carbon Fiber Composites, Thermoplastics, Coated Metals, Concrete & More.

【BASIC PARAMETERS】- With Input voltage of 110V, input power of 800VA, max current of 1600A, you will find the body dent puller is easy and comfortable to use

Reliable and Robust Welding Every Time: Designed specifically for the automotive repair industry, our stud welder ensures dependable welds on materials up to 1.2mm maximum single-side welding thickness, providing maximum strength without compromising the integrity of your vehicle's body.
Butt Weld Basics
Butt welds join two metal panels edge-to-edge, creating a seamless repair that’s less prone to rust and corrosion than a lap weld. You need precise cutting, tight fit-up, and no gaps if you want a strong joint.
That accuracy is one of the main butt weld advantages: you get a single-ply panel that’s easier to shape, sand, and paint for a clean finish.
The butt weld disadvantages are clear too: it takes more skill, control, and practice to master, especially on thin auto body steel.
When you set the edges correctly and weld with discipline, you reduce exposed metal and help free the panel from hidden corrosion points.
For professional results, you must respect the technique and execute it cleanly.
Lap Weld Differences
When you’re comparing a butt weld to a lap weld, the main difference is how the panels meet: butt welding joins metal edge-to-edge for a single-ply repair, while lap welding overlaps the panels and can create a moisture-trapping channel that increases corrosion risk.
You get a cleaner finish with a butt weld because it needs tight fitment, less filler, and less sealing. That makes sanding and paint prep easier, and it lowers rust potential.
Lap weld advantages include easier alignment and a more forgiving setup, which can help if your cut isn’t perfect.
But lap weld disadvantages include a visible ridge, extra moisture control, and a higher chance of hidden corrosion.
If you want durable, liberation-minded bodywork, choose the method that keeps metal honest and dry.
When to Use Butt Welding on Quarter Panels
Quarter panels are a prime candidate for butt welding because the method creates a seamless joint that helps reduce rust and corrosion in a high-risk area of the vehicle.
You should use it when you need precise quarter panel alignment and corrosion prevention without adding overlap that can trap moisture.
Use butt welding when you need precise quarter panel alignment and corrosion protection without trapping moisture.
On older vehicles, this approach helps you preserve the original body line and keep a single-ply surface that matches factory appearance.
It’s also the right choice when you want a cleaner repair with less filler, which makes finishing and paint work easier.
You’ll get the best results when the replacement section fits tightly and the weld runs along the correct seam.
If the panel’s shape matters to structure or style, butt welding gives you more control and a stronger, more liberated repair path. Additionally, removing zinc coating before welding can greatly enhance the integrity of the joint and reduce the risk of contamination.
Products Worth Considering

Value Pack: The package includes 24 packs of butt welding clamps, enough quantity to meet your daily needs and replacements. Each butt welding clamps is individually wrapped in a small bag, convenient to carry and use.
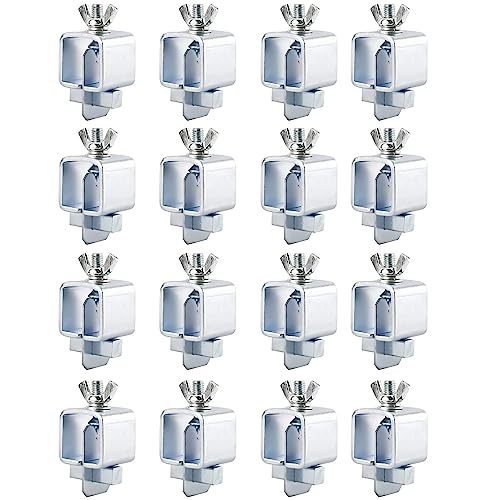
Butt Welding Clamps includes 16 welding corner square welder clamps; Used to make precision butt welds and edge-to-edge welds for patch repairs in floors, wings, door skins, fabricating, and re-skinning projects

Crafted with precision, our steel plates are laser-cut, offering unparalleled edge smoothness and dimensional accuracy compared to stamped and sheared parts.
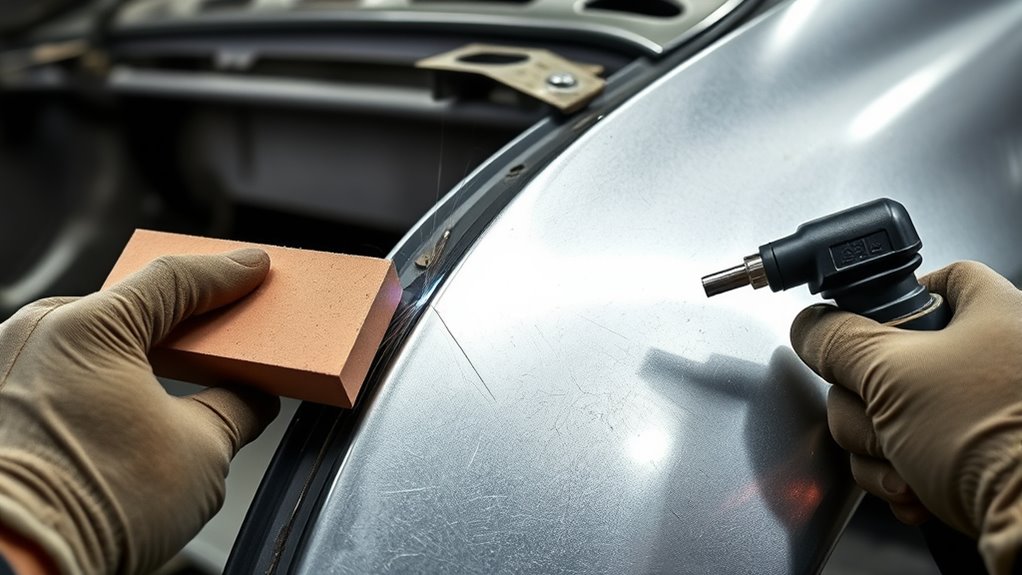
How to Prep Metal for a Butt Weld
Start by cleaning both metal surfaces until they’re free of rust, paint, and any contamination that could weaken the weld. Good metal preparation gives you a clean fusion path and helps your welding techniques perform as intended.
- Grind or sand both edges to bare, bright metal.
- Check the fit-up and keep a uniform 1/16 inch gap.
- Clamp the panels firmly so they don’t shift under heat.
- Preheat thicker steel if needed to cut warping and improve penetration.
You want the joint aligned before you strike an arc, because a crooked seam fights you the whole way. Accurate prep reduces burn-through, improves control, and lets the weld pool bridge the gap evenly. For thicker sections, a little preheat can make the joint more cooperative and more stable.
Additionally, ensuring proper heat input is essential to achieve a strong and durable weld.
Once the surfaces are clean and aligned, you’re ready to move into tacking and final welding with far less distortion.
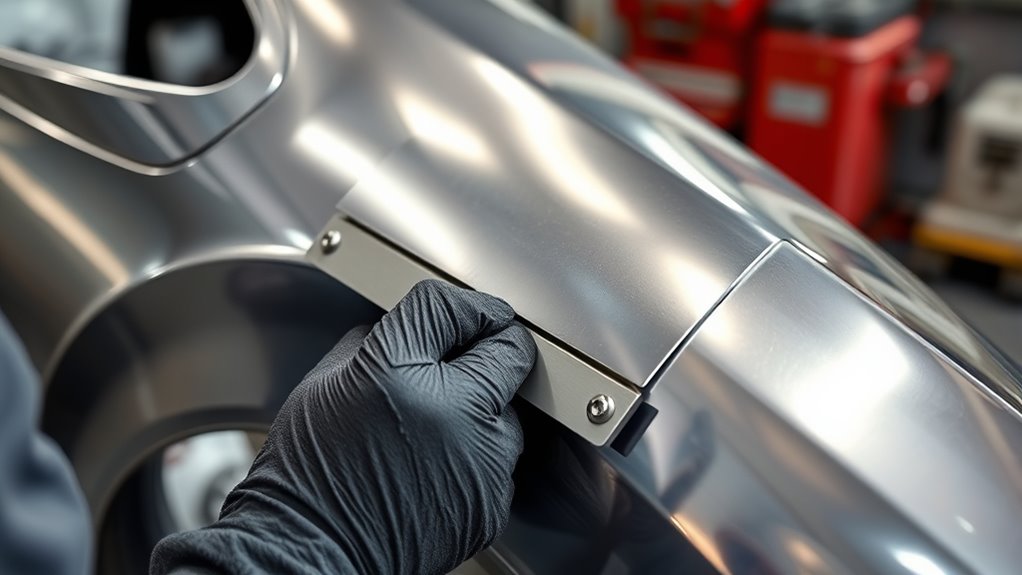
How to Clamp and Tack a Butt Weld
Clamp the panels with a butt weld clamp, such as an Eastwood Butt Weld Clamp, so you can hold a uniform gap and keep the joint stable while you work. Clean both edges first; contamination weakens adhesion and ruins clamp alignment. Check fit before you strike an arc, because butt weld techniques depend on even spacing and straight panels. Proper surface preparation is essential to ensure strong welds and avoid issues like porosity.
| Step | Action | Goal |
|---|---|---|
| 1 | Position clamps | Hold a consistent gap |
| 2 | Verify alignment | Prevent weak joints |
| 3 | Tack weld spots | Lock the seam |
Use small tacks every few inches along the seam. This gives you control and lets the metal stay free from shifting. Watch for distortion as heat builds; you may need to hammer or adjust the panel after tacking. Stay precise, stay independent, and let the joint stay true before you move on to full welding.
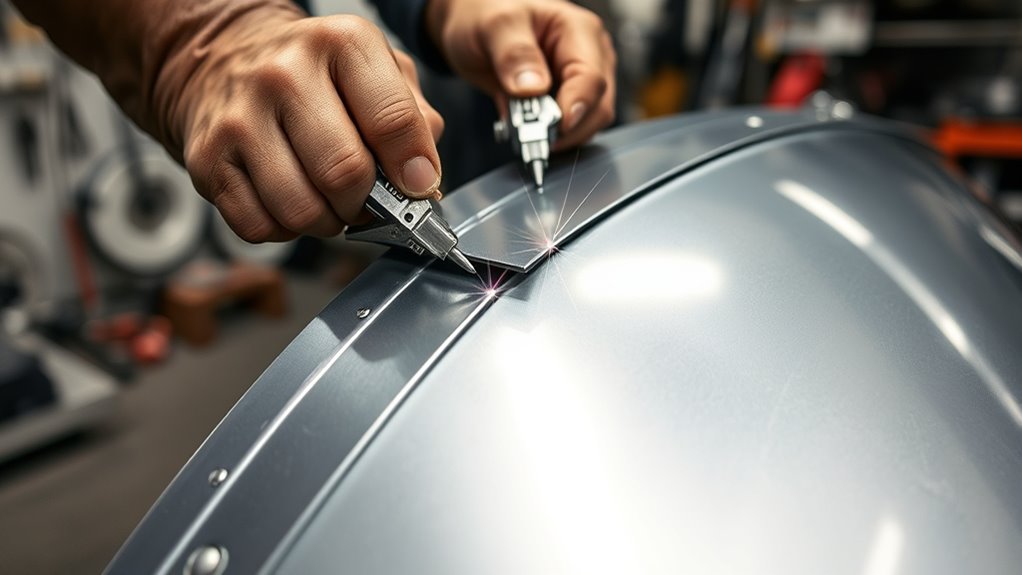
How to Weld a Butt Joint Without Burn-Through
Fit and clamp the panels with a consistent gap, ideally about 1/16 inch, so you get stable penetration without excess heat.
Control heat input by using quick electrode movement with TIG or stitch welding with MIG to keep the weld pool small and prevent burn-through.
Tack the joint first, then build the seam in short passes while watching for a uniform bead and proper penetration. Maintaining proper stick-out length is crucial for optimal arc stability and preventing burn-through.
Fit And Clamp Properly
Clean both panels thoroughly before you bring them together, because rust, paint, and other contaminants can weaken adhesion and increase the chance of burn-through.
Then check fit alignment so the edges meet evenly and the gap stays uniform.
- Use clamp techniques that hold the joint steady without distorting the metal.
- Aim for about 1/16 inch between panels for consistent heat spread.
- Place tack welds every few inches to lock the panels in position.
- Verify the joint stays flush before you continue welding.
Good prep gives you control and keeps the metal free to move only where you want it to.
A tight, even setup reduces warping, supports clean penetration, and lets you build a stronger butt weld with less risk.
Control Heat Input
Once the panels are aligned and tacked, your next job is to control heat input so you don’t burn through the joint.
Thin sheet metal gives up fast, so keep your arc tight and your travel quick. In TIG, a fast electrode movement helps spread heat distribution and lets you build penetration without blowing out the seam.
In MIG, stitch welding reduces total heat and keeps the panel from getting soaked. If the metal is cold, a light preheat can soften thermal shock and cut distortion, giving you more control.
Watch the bead closely: you want steady penetration and a small lower bead, not a wide, dropped edge. That’s how you weld with discipline, protect the panel, and keep your repair clean.
Tack And Stitch Weld
Tack the butt joint first with small welds spaced along the seam so the panels stay aligned and don’t warp as you work. Use tack welding techniques to lock the fit, then move to stitch welding for controlled heat.
- Keep travel speed steady.
- Pause between short welds.
- Use a backer bar on thin sheet.
- Inspect bead consistency on both sides.
This approach limits burn-through and gives you better control in a butt joint.
Stitch welding benefits include lower heat buildup, cleaner penetration, and less distortion, so you can work with precision instead of forcing the metal. If the weld starts to stack up or discolor fast, stop and reset your settings.
You’re not stuck relying on brute heat; you can guide the weld, protect the panel, and finish with stronger, flatter seams.
Common Butt Weld Problems and How to Fix Them
Even a well-placed butt weld can show problems if your heat, travel speed, or technique is off. Watch the weld bead: too much buildup often means weak heat control or poor welding techniques. You want a visible bead on both sides, with the lower bead smaller and even.
A good butt weld shows even beads on both sides; excess buildup signals poor heat control.
If you see penetration issues, slow down only enough to keep fusion, then hold consistent travel speed to protect joint strength.
On thin sheet metal, burn-through happens fast. In TIG work, use quick electrode movement and shorter pauses to spread heat without punching holes.
If the panel pulls or waves, you’re dealing with metal distortion; plan to hammer the welds back into shape after the joint cools.
Use inspection techniques to catch undercutting, concave shapes, or uneven edges before they spread trouble. These checks keep your repair honest and let you correct defects before the bodywork moves on to finishing. Proper amperage settings can also help prevent many of these issues during the welding process.
How to Finish and Inspect a Butt Weld
Inspect the butt weld on both sides and look for a consistent bead, with the lower bead smaller than the upper to confirm solid penetration and strength. Use inspection techniques that reveal weld quality fast, so you can move forward with confidence and control.
- Grind the bead with a grinder or flap disc.
- Aim for a smooth, even surface.
- Check for undercutting or excessive concavity.
- Tap warped areas with hammer and dolly.
Finish the joint carefully, removing only enough metal to level the surface. Don’t chase perfection with filler; let the weld stay honest.
If heat distortion pulled the panel out of shape, correct it now with hammer-and-dolly work before you proceed.
Then clean the welded area thoroughly, removing dust, residue, and any contamination. A clean surface gives you a reliable base for the next stage and helps you judge the repair without distraction. Additionally, always prioritize safety gear to protect yourself during the inspection and finishing process.
How to Prevent Rust After Butt Welding
After butt welding, you should clean both sides of the joint thoroughly with a wire brush or grinder to remove slag, scale, and contaminants. Then apply a rust-inhibiting primer or coating right away to seal the seam and block moisture. Don’t ignore the backside of the weld; treat it with rustproofing spray so hidden areas stay protected. Additionally, remember that proper preparation is crucial for ensuring the longevity and integrity of your welds.
Clean Backside Protection
Once you finish the butt weld, clean the backside of the joint thoroughly to remove any weld spatter, oil, dirt, and oxidation that could trap moisture and start rust.
Use disciplined cleaning techniques so every exposed surface is bare and ready for treatment. Then protect the metal with coatings that fight corrosion and keep your repair strong.
- Wipe the area with a solvent-free cleaner.
- Brush off slag and loose residue.
- Apply a rust-inhibiting protective coating like POR-15 or Chassis Saver.
- Inspect the joint later and renew protection if moisture shows up.
If the panel cavity allows, add a wax-based rust prevention product inside the panel for another barrier.
Clean metal, sound protection, and routine checks give you lasting freedom from hidden corrosion.
Seal And Prime
A fresh butt weld needs to be sealed fast to keep rust from starting. After cooling, do weld cleaning to strip off slag, dust, oil, and oxide. Any residue traps moisture and weakens the repair.
Next, apply a high-quality primer right away; primer application locks out air and water and gives your topcoat a solid base. In critical spots, brush on rust-inhibiting sealer over the seam and any pinholes.
Inspect both sides of the joint, then touch up exposed metal so no bare edge stays open. Let the primer and sealer cure fully before you spray color.
That wait matters: it boosts adhesion, strengthens the barrier, and helps you keep the panel durable, protected, and free from hidden corrosion.
Frequently Asked Questions
What Is the Difference Between Seamless and Buttweld?
Seamless welding techniques join edges flush, while butt welds explained means you join two pieces edge-to-edge with no overlap. You’ll get a cleaner, stronger panel with less rust risk, but fitment must be precise.
Conclusion
A butt weld gives you a clean, factory-style panel repair, but only if you fit, prep, and weld it correctly. You’ve also got to finish it well to keep rust out of the seam. One thing to note: welding defects cause about 90% of fabrication failures, so small mistakes matter. If you take your time, control heat, and inspect the joint carefully, you’ll end up with a stronger, smoother repair that lasts.


